Robot vacuum cleaner Kitfort KT-577 is a modern device equipped with a lidar sensor. Recall that a lidar is a device that, based on a system of laser beams, calculates the distance to objects by reflecting light rays by objects. Thanks to the presence of such a sensor, the robot vacuum cleaner can navigate in space with high accuracy.
Thus, we expect to see increased efficiency and high cleaning speed during testing. Such devices do not tend to waste time: instead, they quickly and accurately build a map of the room, after which they clean the apartment, passing through each zone once.
Characteristics
| Manufacturer | kitfort |
|---|---|
| Model | KT-577 |
| Type | robot vacuum cleaner |
| Country of Origin | China |
| Warranty | 1 year |
| Service life * | 2 years |
| Cleaning type | dry and wet |
| Automatic cleaning | Yes |
| Automatic return to base | Yes |
| Dust container volume | 0.6 l |
| Water container volume | 0.36 l |
| Noise level | no more than 65 dB |
| Max Power | 32 W |
| Battery life | 60-120 minutes, wet cleaning 100-180 minutes |
| Battery Charging Time | 5-6 hours |
| Battery | lithium-ion, 3200 mAh, 14.8 V |
| Remote control | yes, IR |
| The weight | 3.7 kg |
| Dimensions | diameter 330 mm, height 76 mm |
| Network cable length | 1.5 m |
| Retail offers |
* Contrary to common misconception, this is not the period after which the device will definitely break. However, after this period, the manufacturer ceases to bear any responsibility for its performance and has the right to refuse to repair it, even for a fee.
Equipment
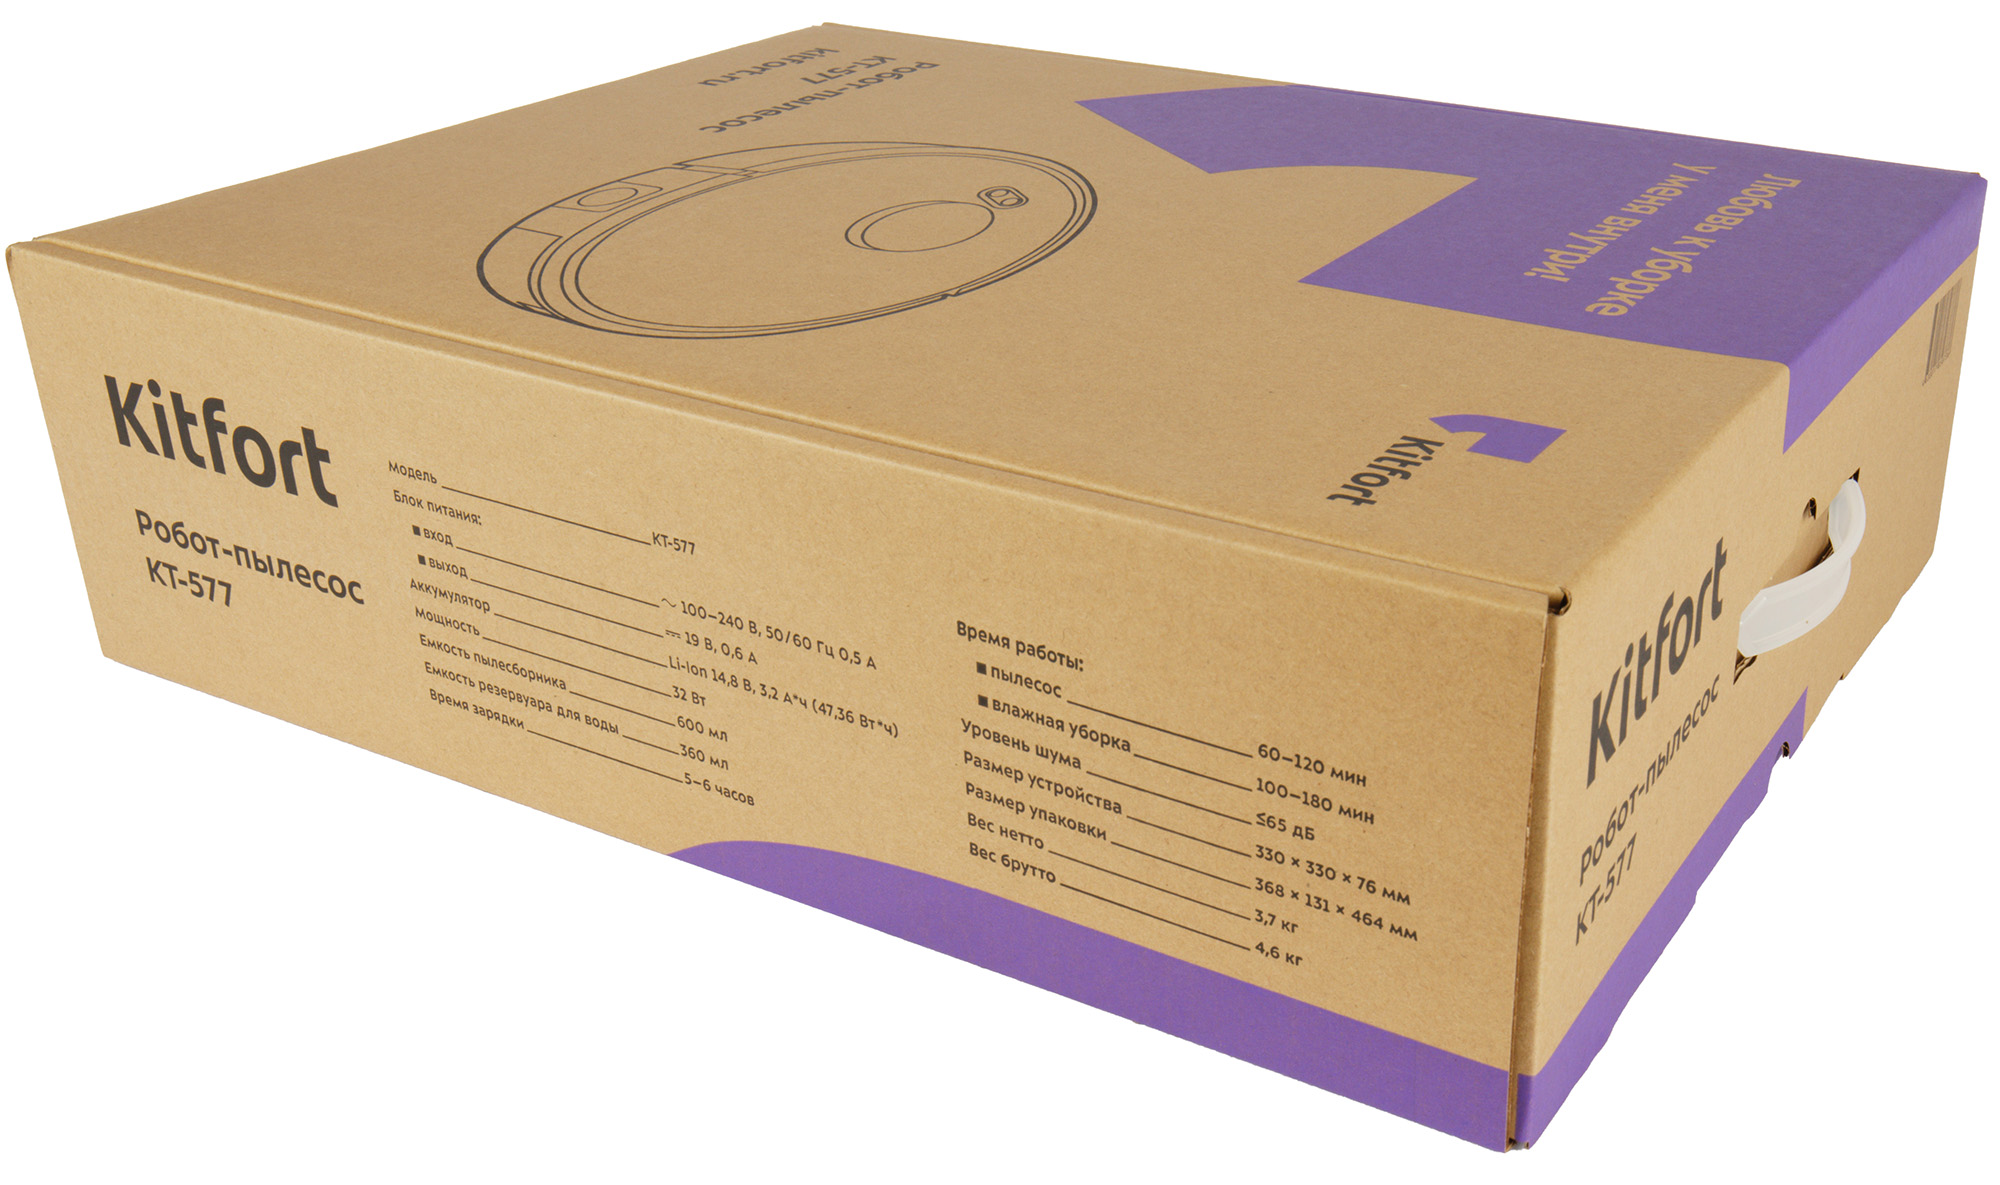
The robot vacuum came to our test lab packed in two boxes. The outer one, made of brown “technical” cardboard, is designed to protect the device during transportation, and contains minimal information about the contents.
The inner box, although made of brown cardboard, is “front”: it has a plastic carrying handle, a vector image of the robot is applied on the box itself, and its main technical characteristics and advantages are also marked.
The contents of the box were protected from shock with shockproof tabs and plastic bags.
Opening the box, inside we found:
- the robot vacuum cleaner
- charging station with mains adapter
- brush for cleaning and caring for the robot
- containers for dry and wet cleaning and a latch lid for the container
- cleaning pads (cloths) made of microfiber
- spare HEPA filter
- two sets of side brushes
- remote control
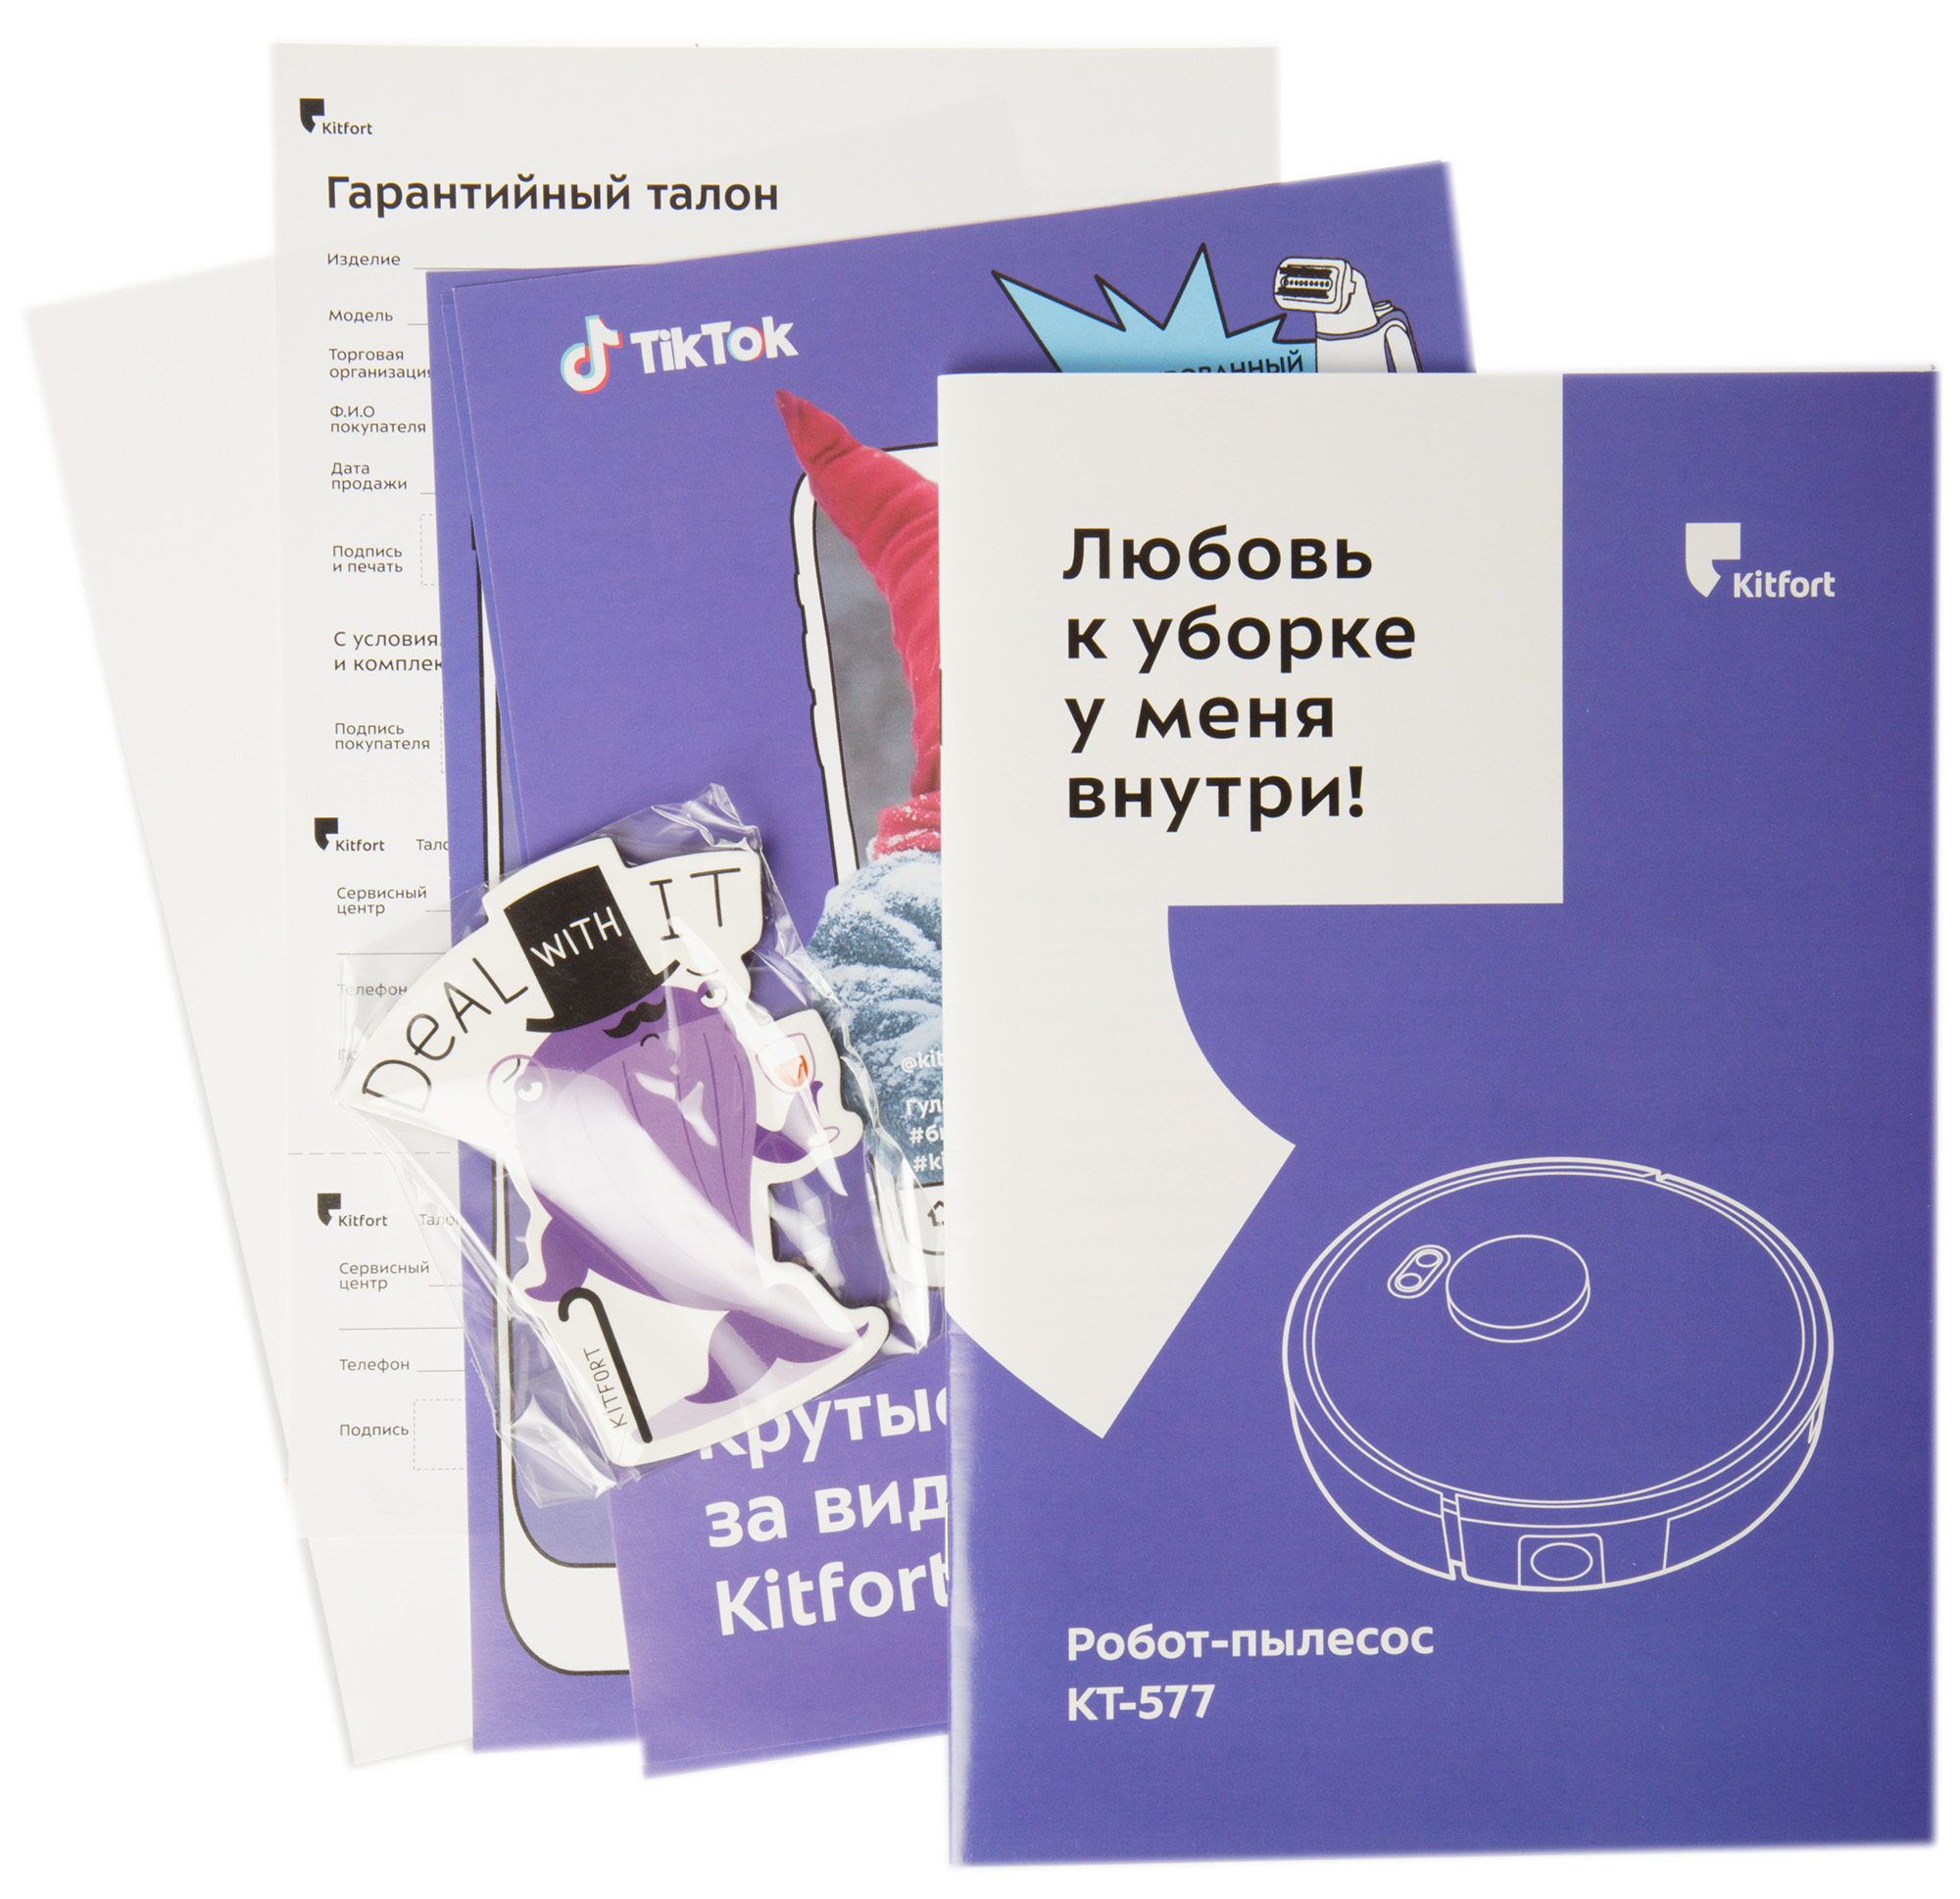
- user manual with warranty card
- collectible magnet and promotional materials
At first sight
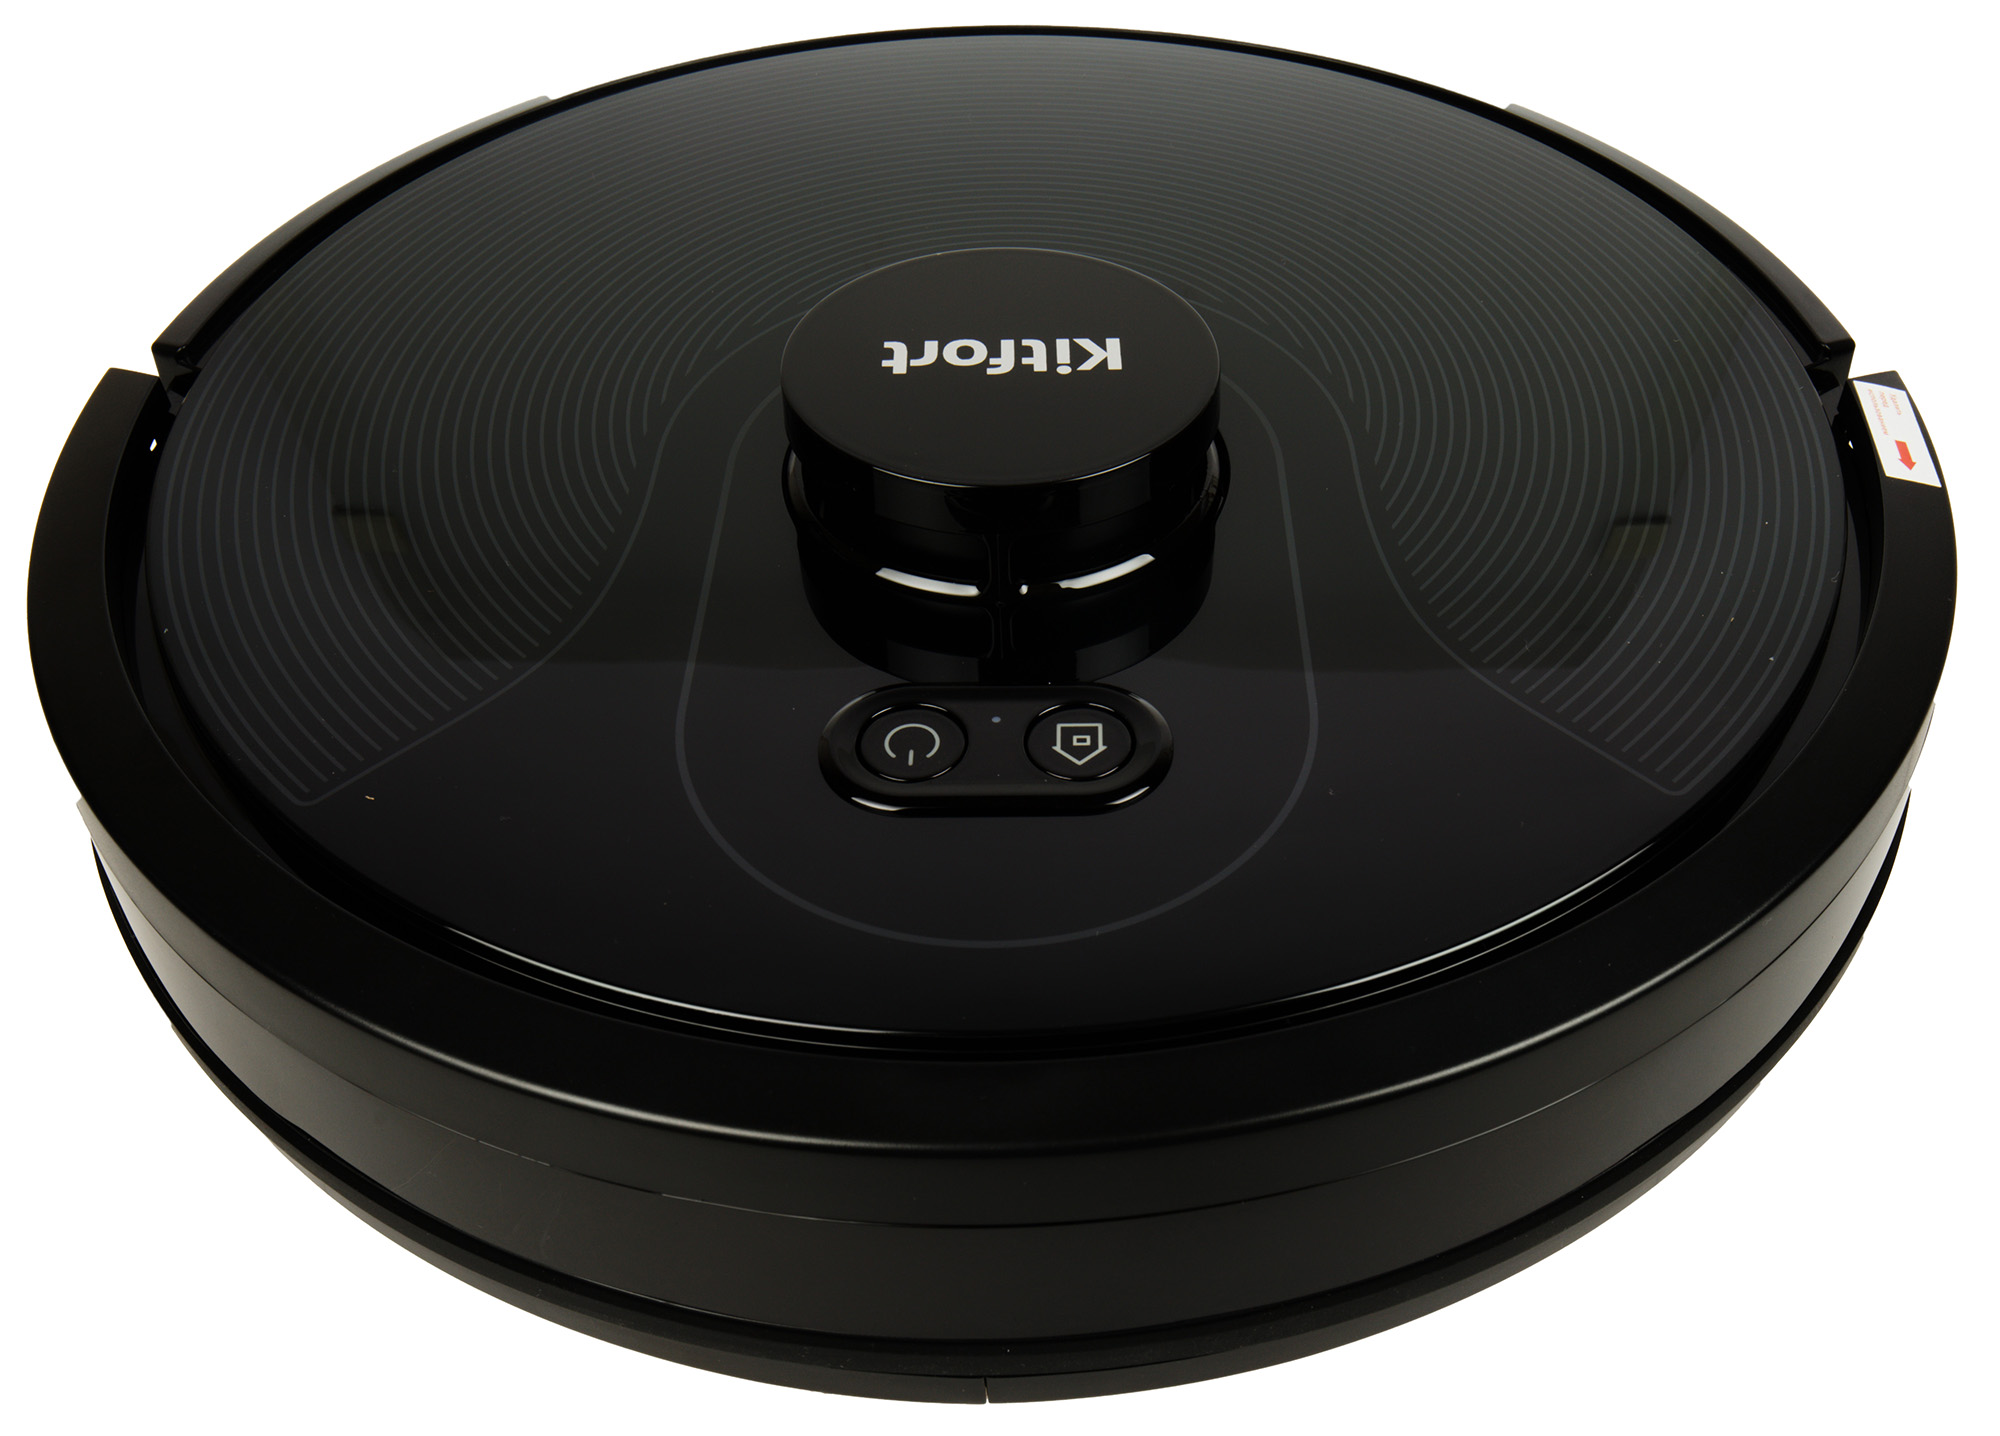
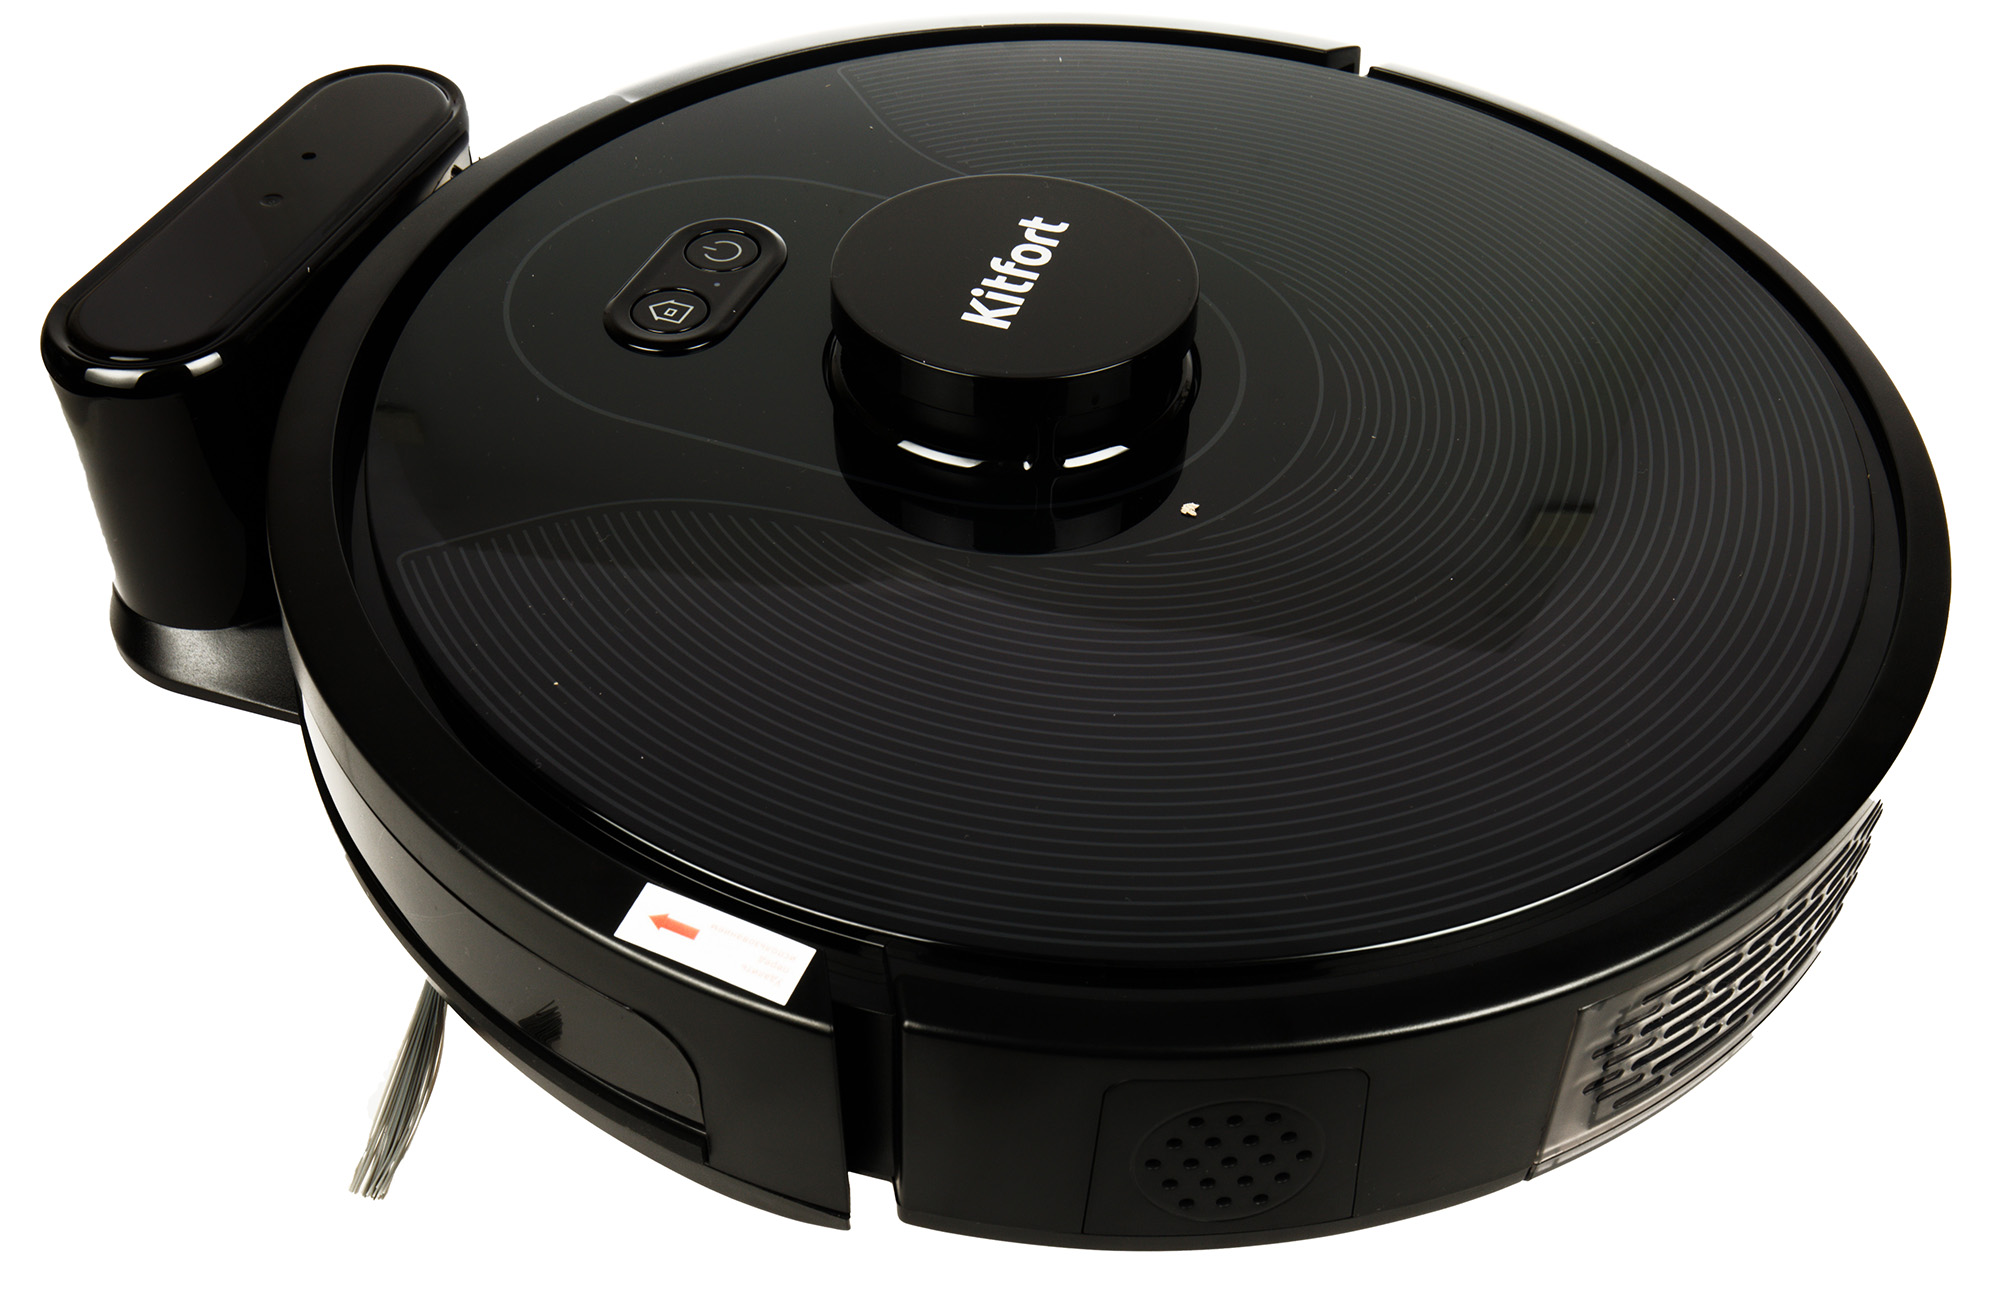
Visually, our robot vacuum cleaner looks solid and heavy: more than three and a half kilograms of weight, massive and durable (at least in appearance) plastic, glossy surface – all this creates the impression that we are facing a serious and professional device.
Let’s now take a closer look at the device.
The top of the device is glossy. Above we see a miniature control panel consisting of two buttons with LED backlight.
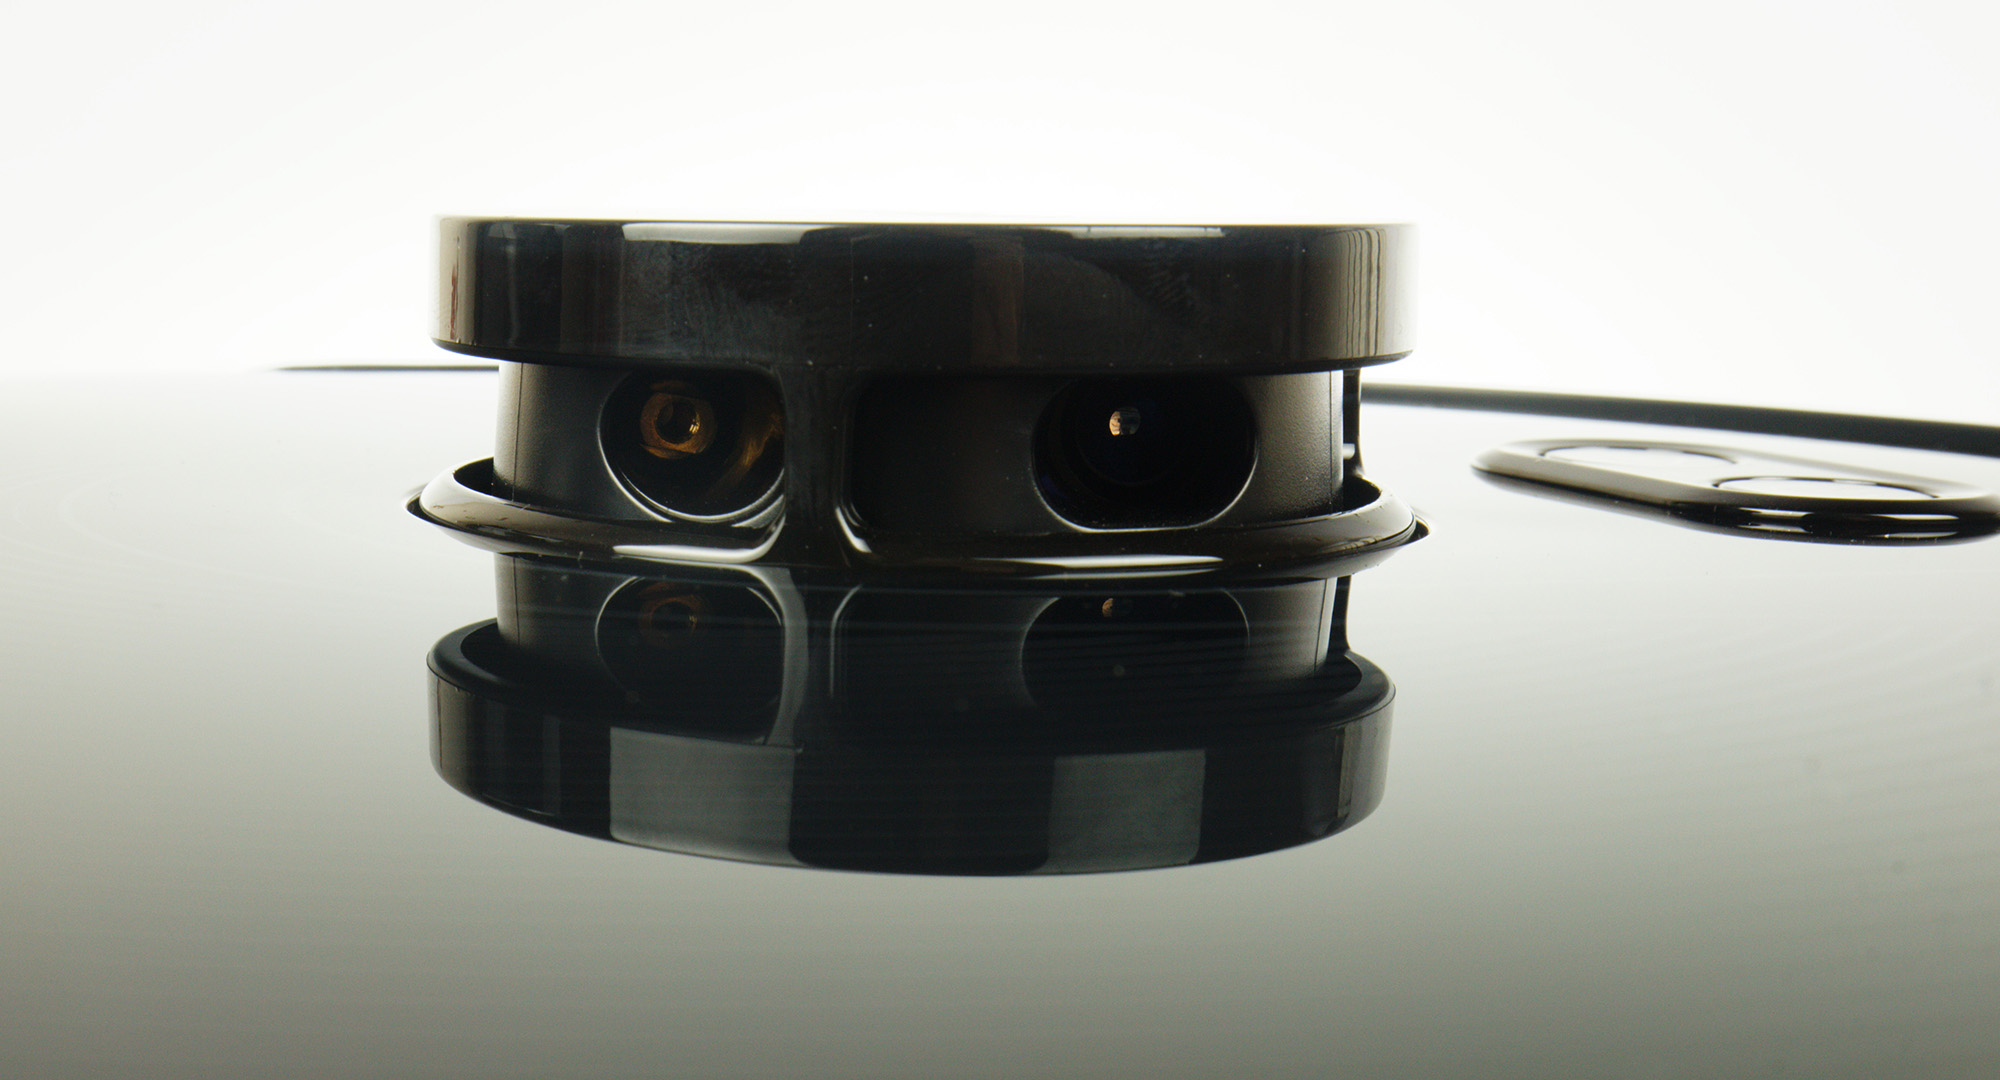
In the center rises the lidar turret, on which the Kitfort logo is applied.
The whole structure looks solid, reliable and convincing.
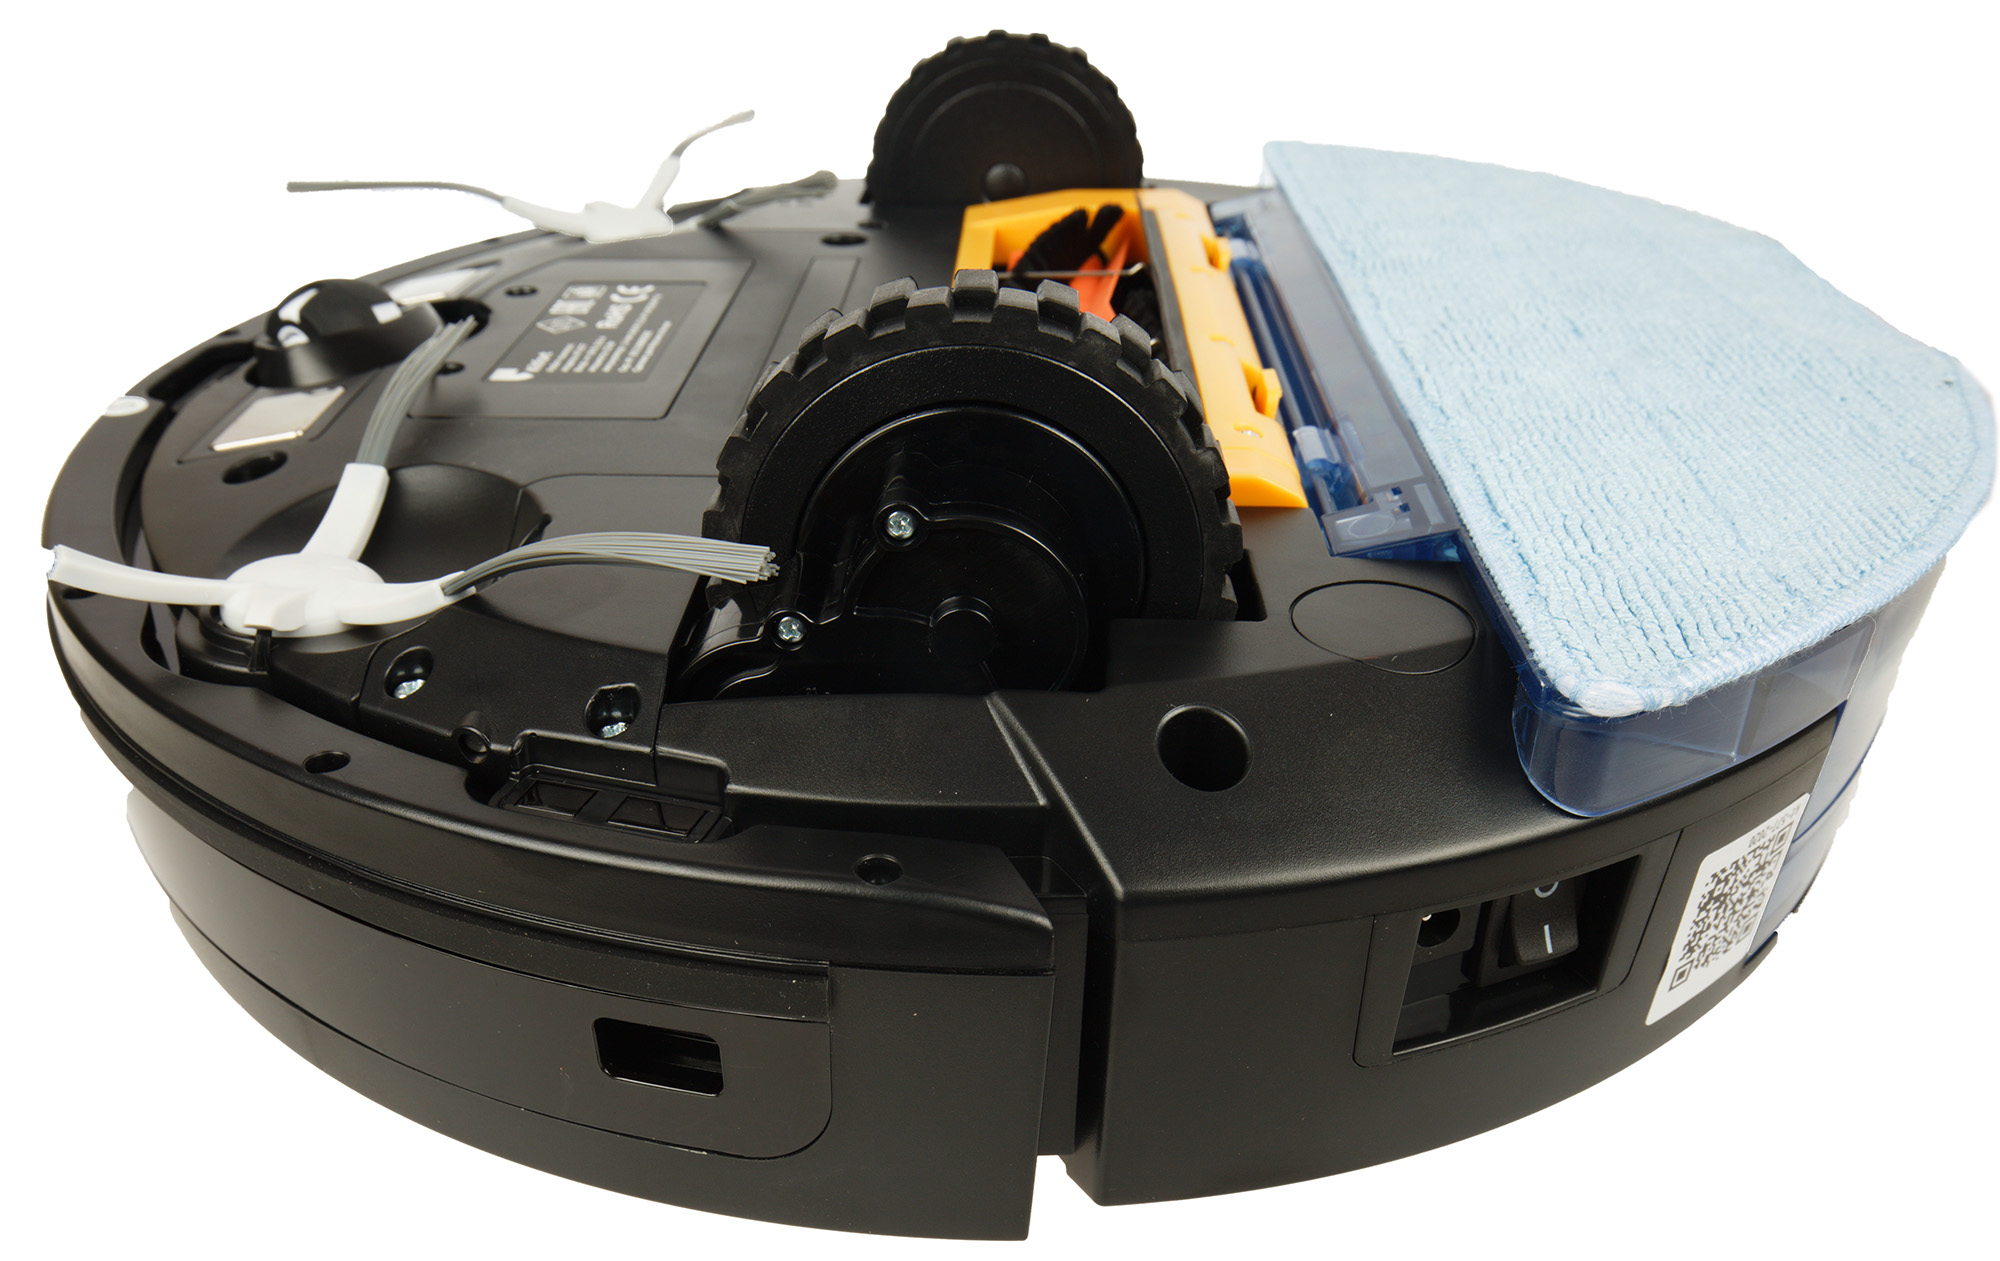
As usual, the body rests on three wheels: two driving and one guide. The drive wheels are equipped with rubber treads with pronounced lugs, the purpose of which is to prevent slipping on a smooth floor and improve flotation on carpeted floors.
On the opposite side is a speaker with which the robot communicates with the user.
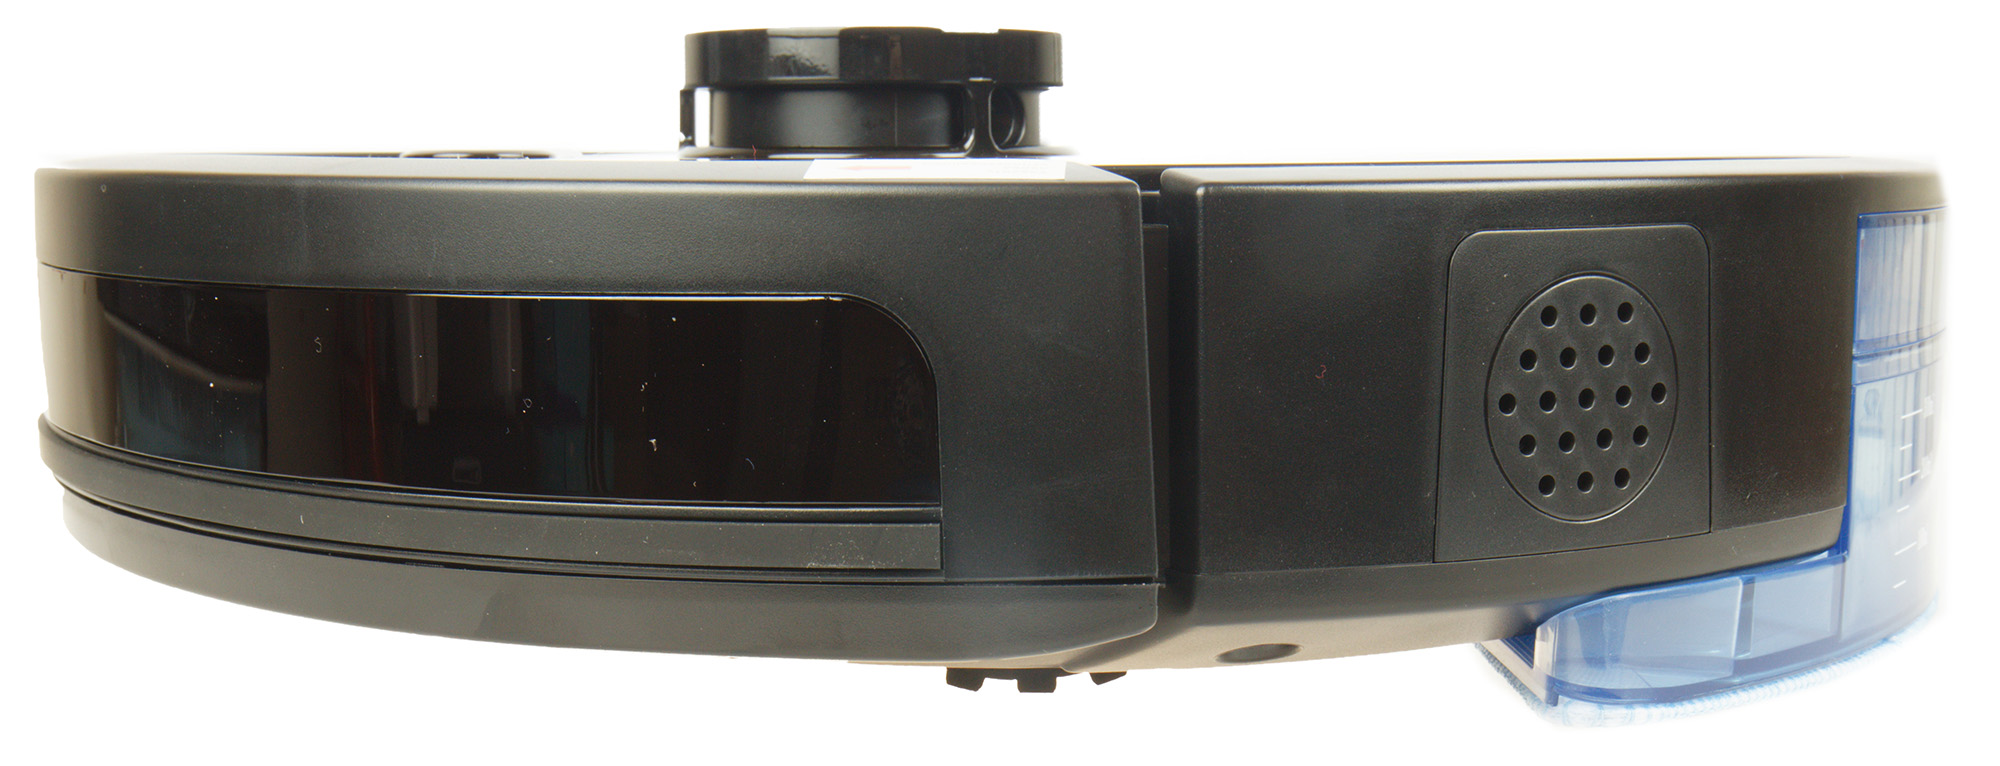
The spring-loaded suspension has about 33-34mm of travel, which is slightly above average.
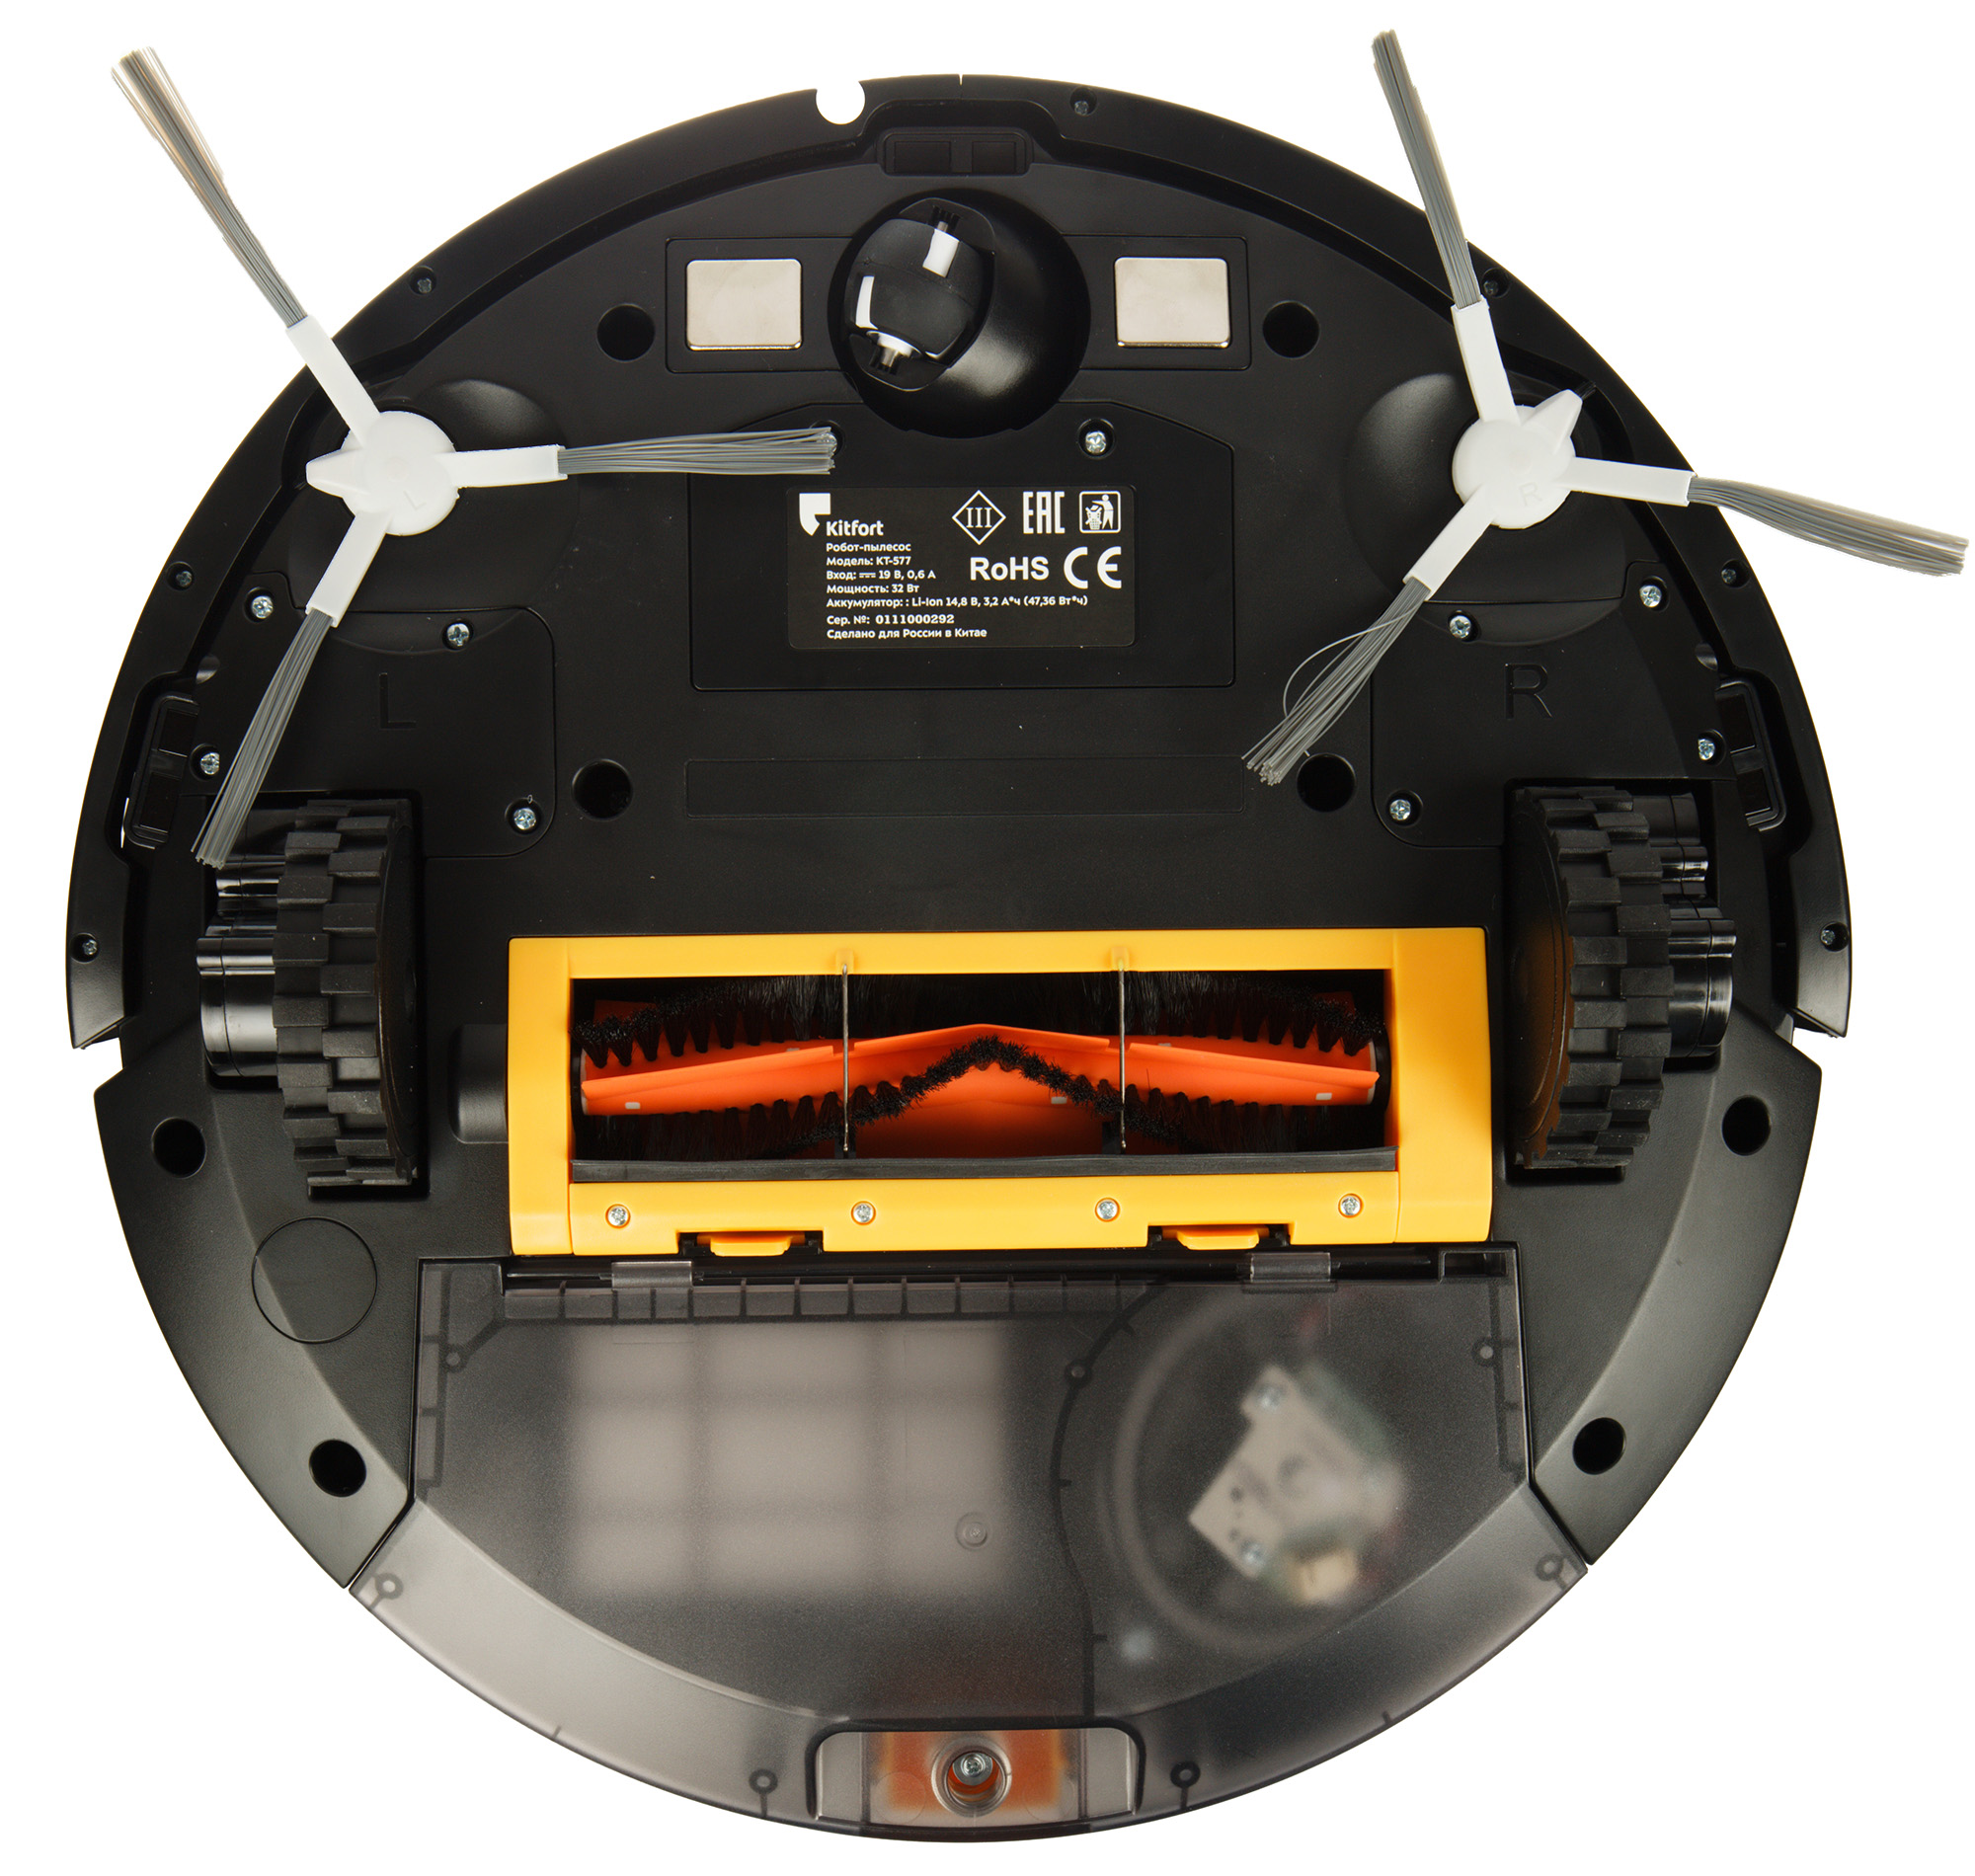
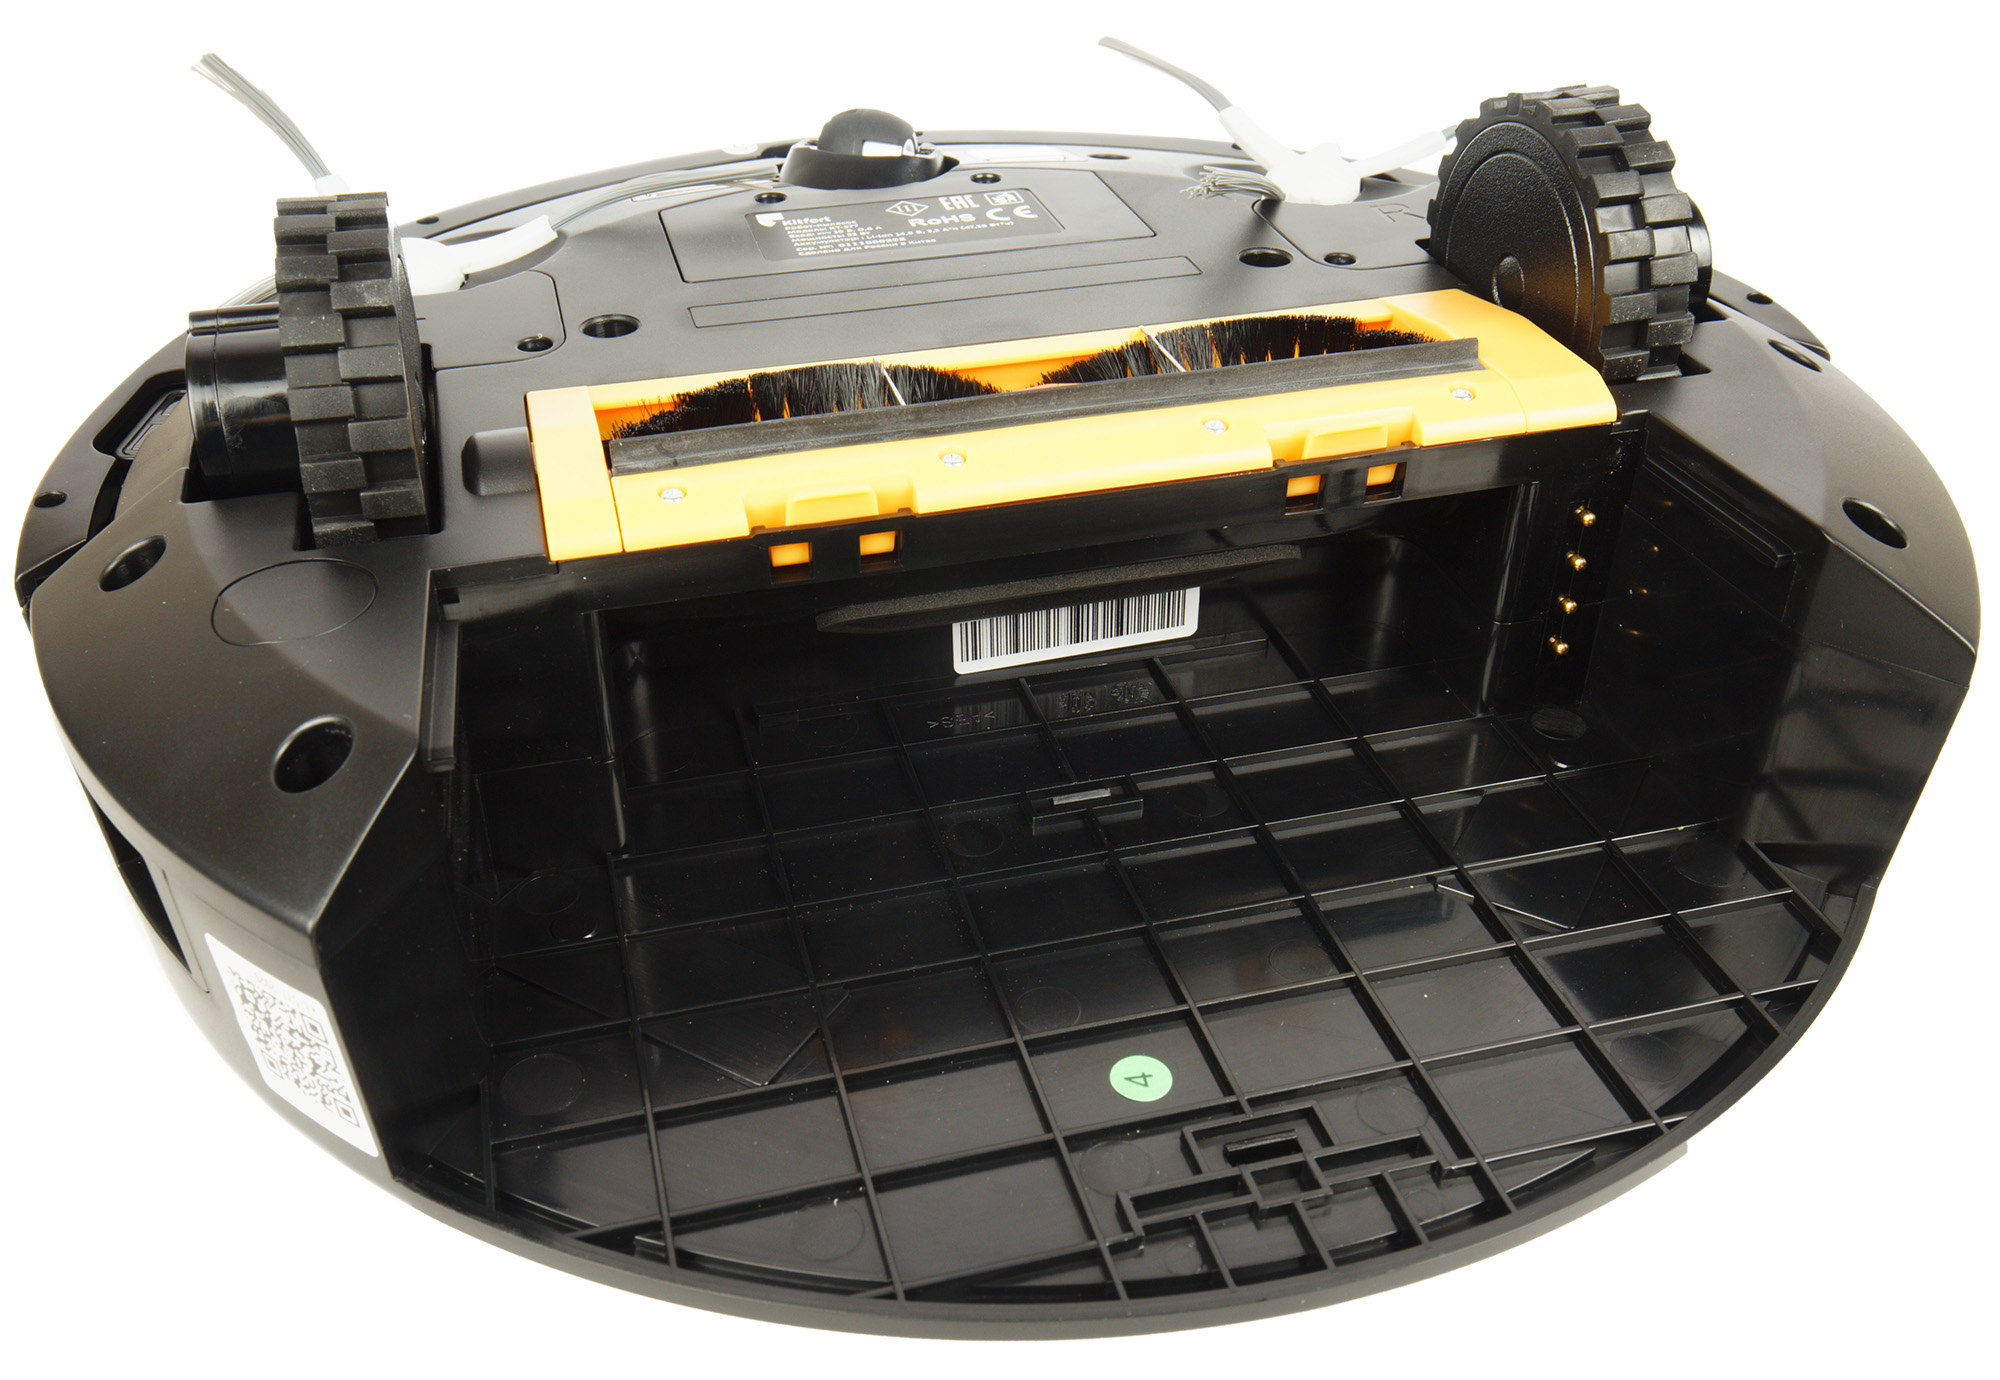
The guide wheel is plastic. It is enclosed in a plastic sphere, which allows free rotation through 360°. On either side of the wheel are charging contacts on the base. Also in the front of the case you can see the slots for attaching the side brushes, and in the center and on the sides there are windows for optical (infrared) surface sensors.
The side brushes of our robot vacuum cleaner are divided into left and right. Appropriate markings are applied on the brushes and the body of the device. Brushes are installed by light pressing.
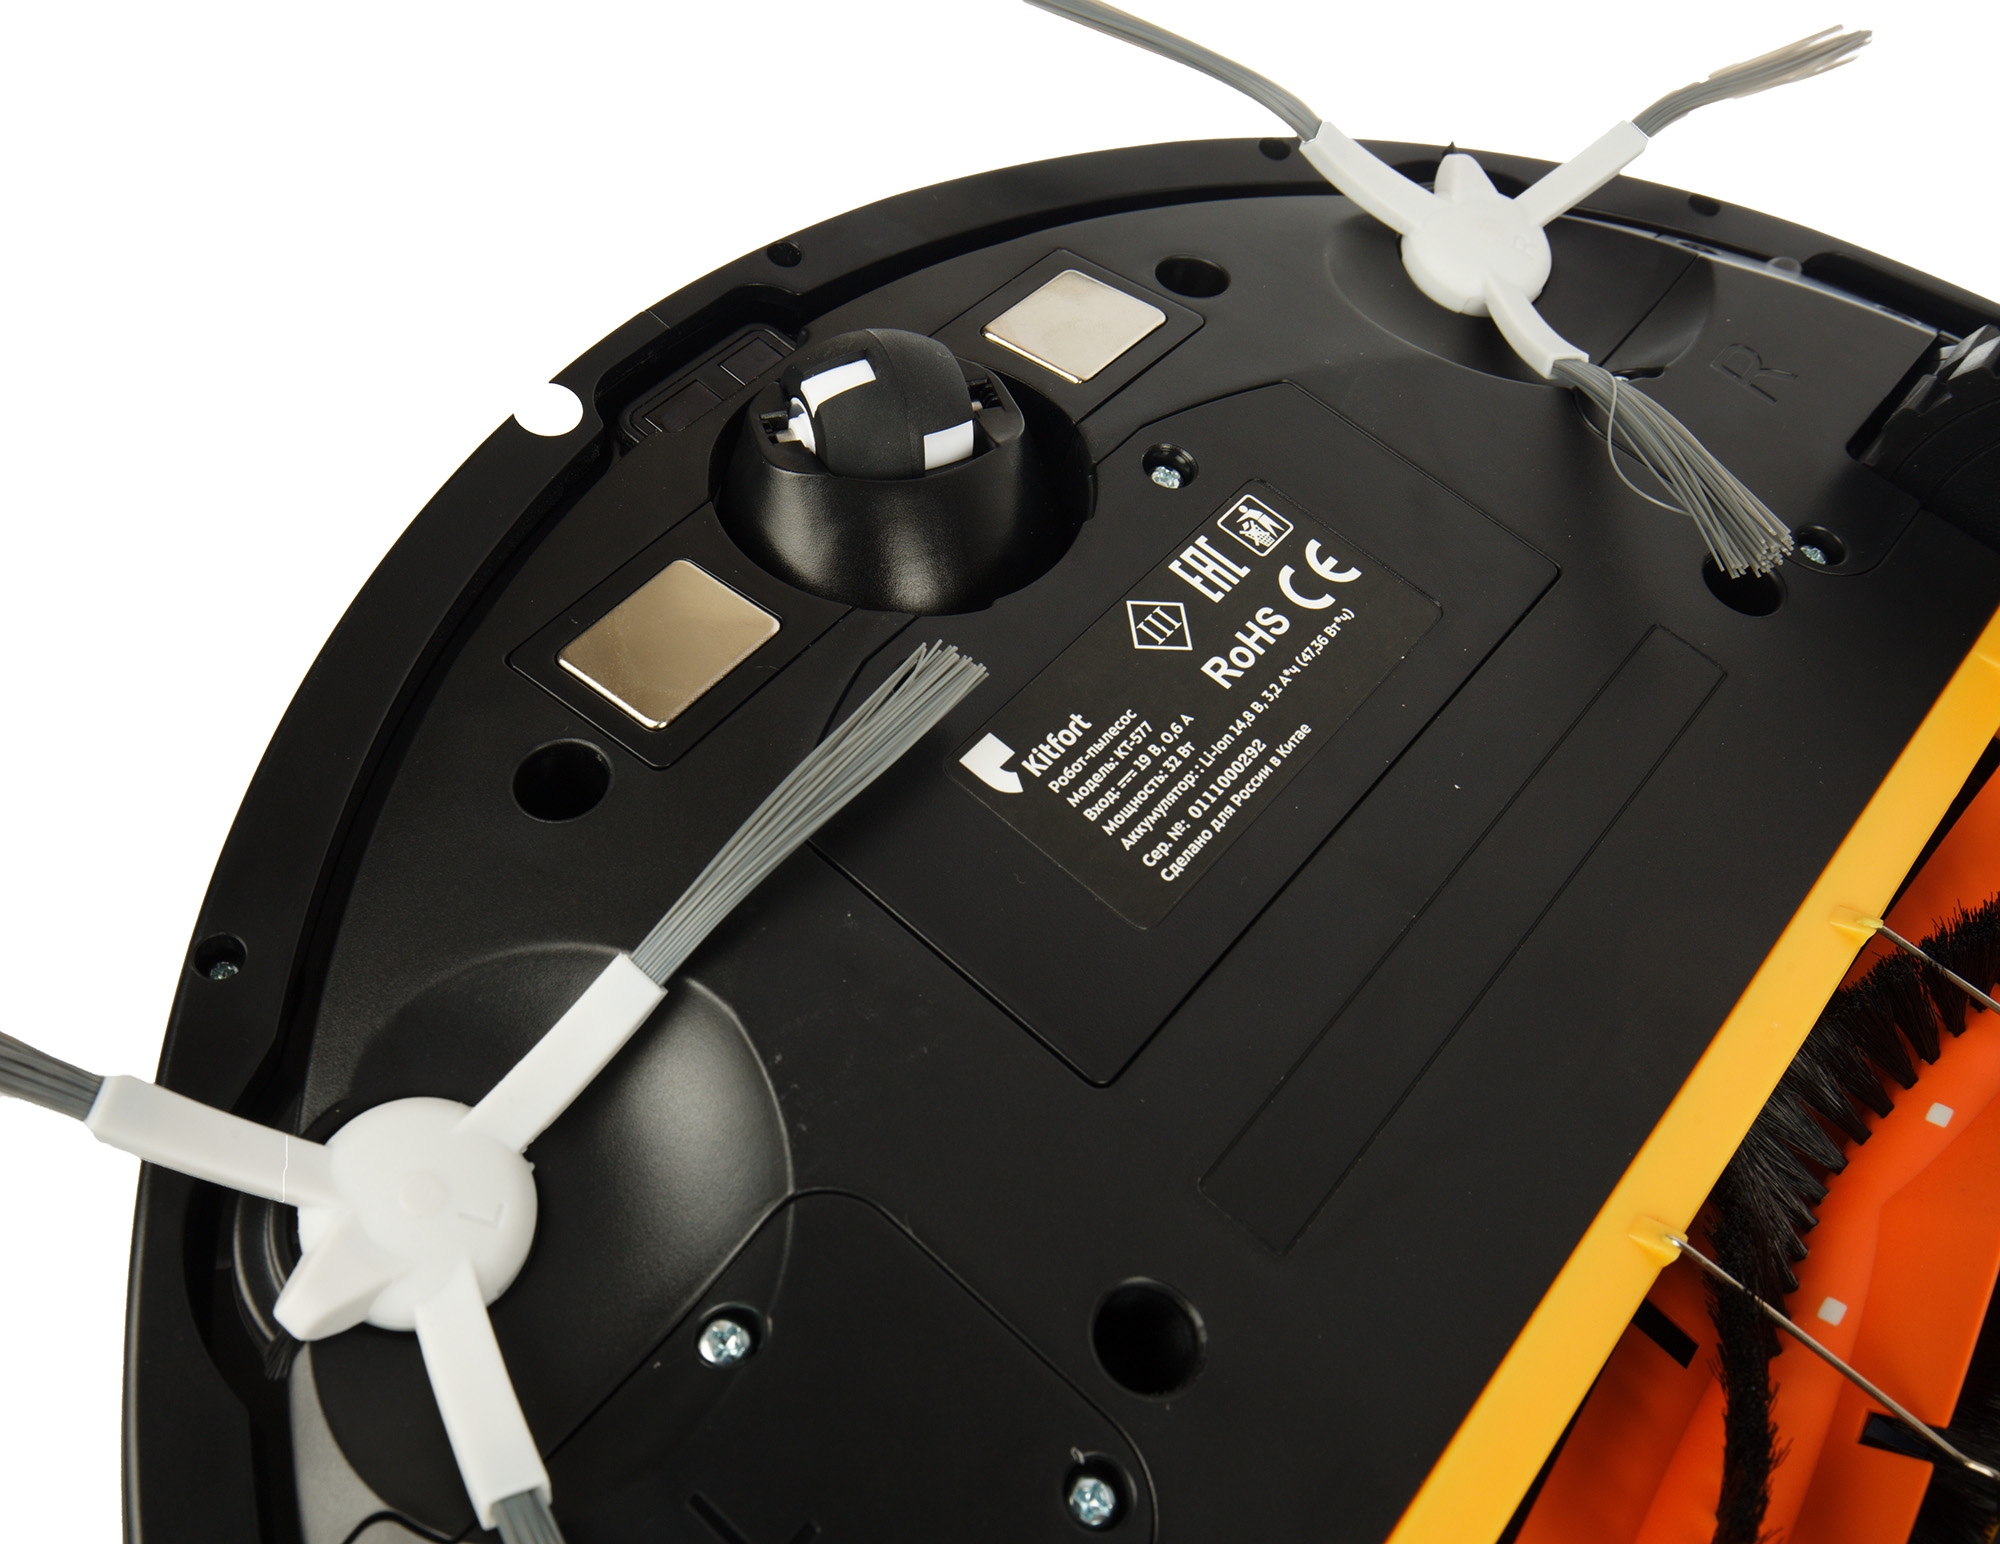
In the center of the bottom panel is the main electric brush with V-shaped rubber lamellae, alternating with rows of synthetic bristles. It is fixed with an ordinary plastic frame with two latches.

To protect the brush from winding wires, two transverse wires are provided near the grate.
The left axis of the brush rests on a round bearing, the right one is inserted into the quadrangular hole of the drive. Thus, there is only one way (correct) to install the brush in the vacuum cleaner.
Next to the charging contacts on the base is a battery cover that closes with two screws. The power supply is an assembly of four 18650 batteries. The nominal capacity of the battery is 3200 mAh.
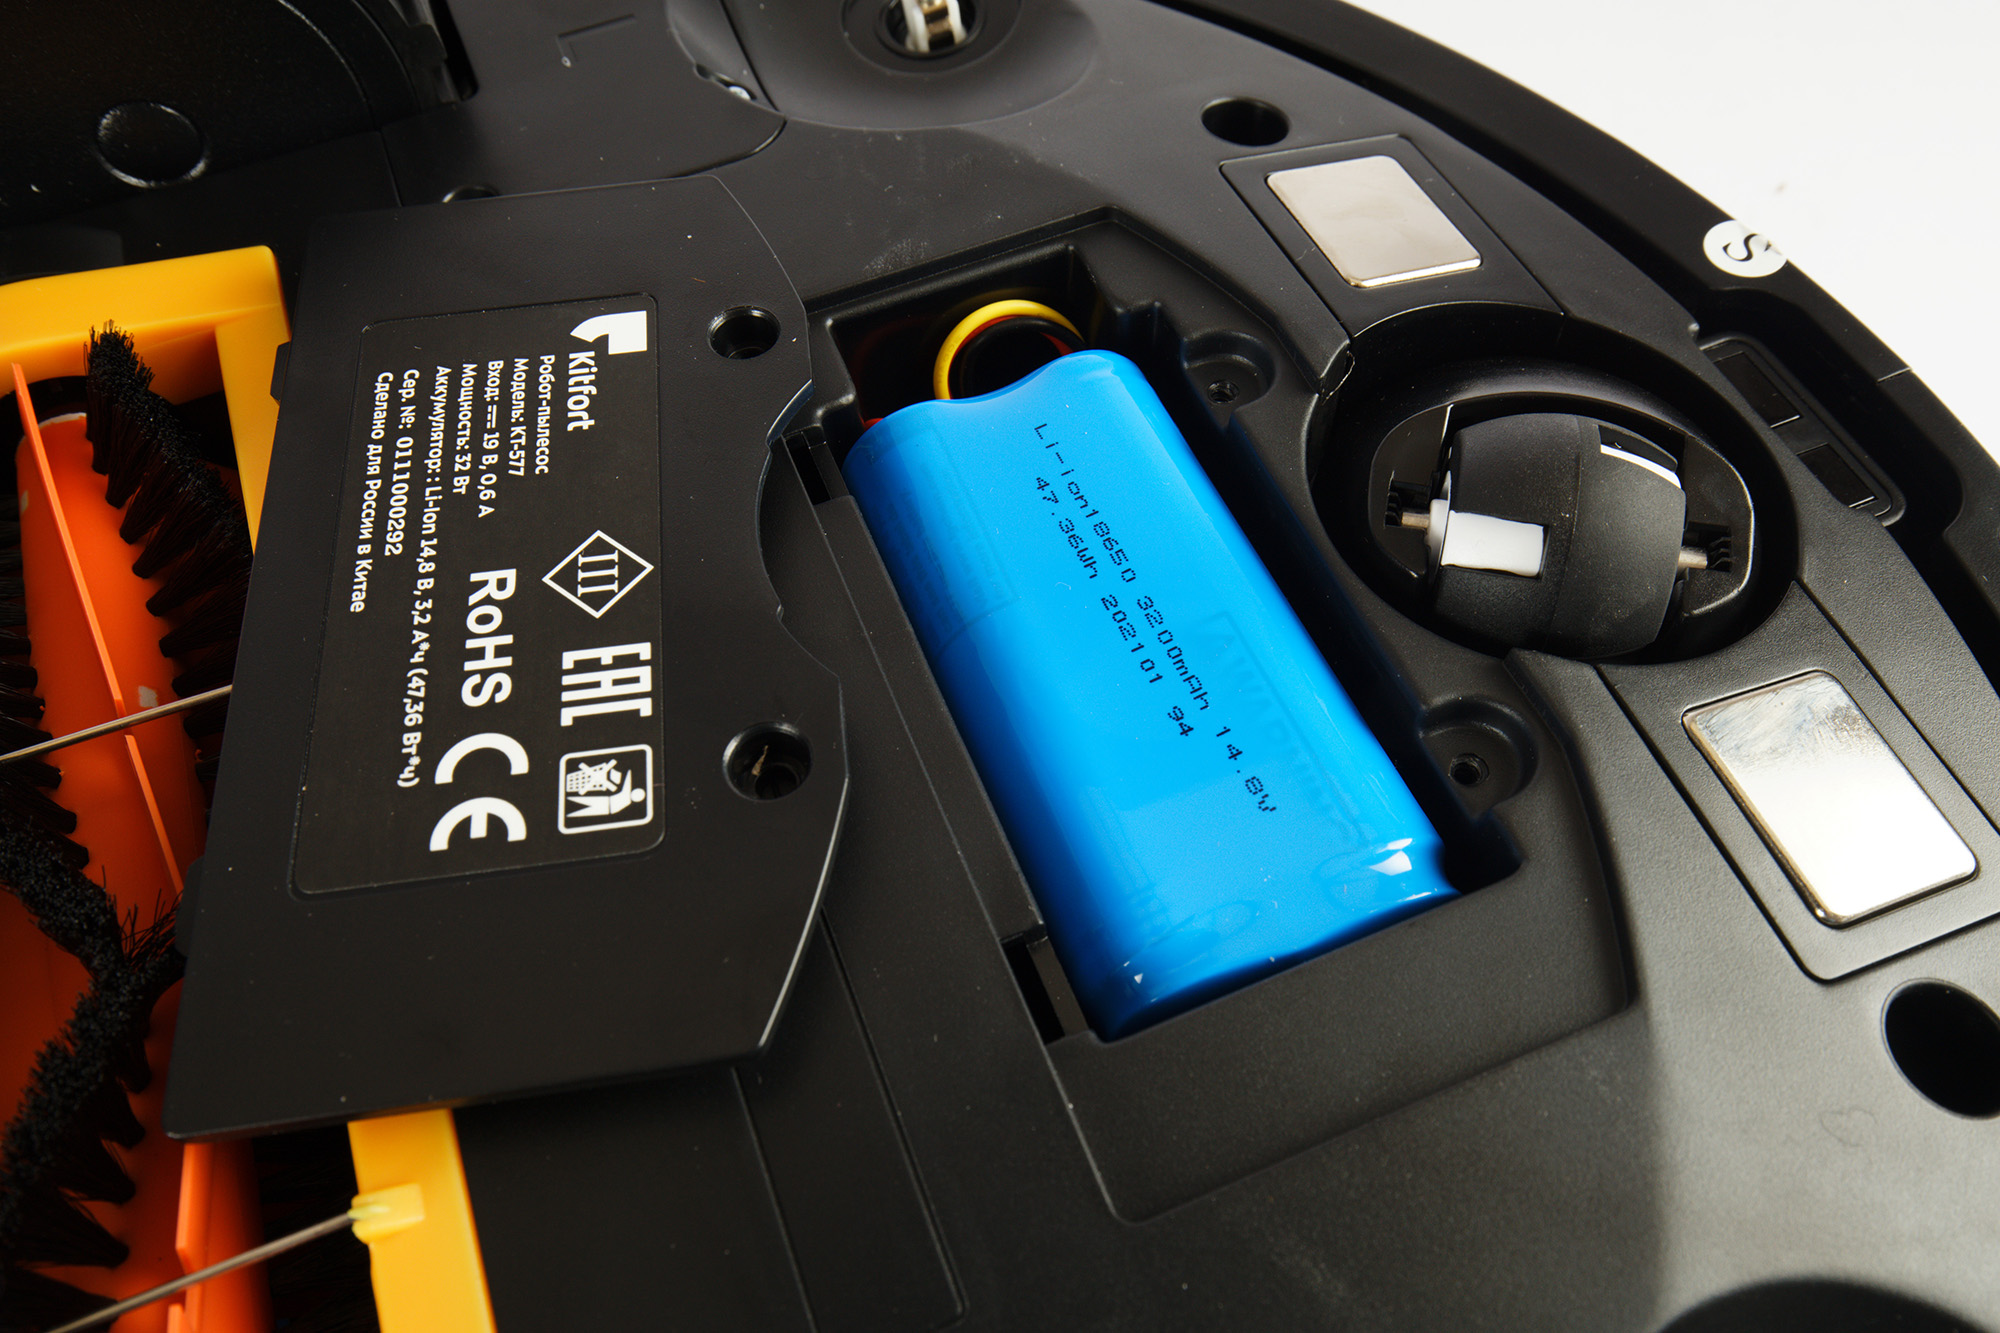
We always note the use of one of the standard form factors to power the vacuum cleaner: even if the manufacturer stops producing ready-made assemblies for this model after some time due to its obsolescence, you can always fix the exhausted battery yourself.
At the back of the case there is a place to install a dust collector or a water container.
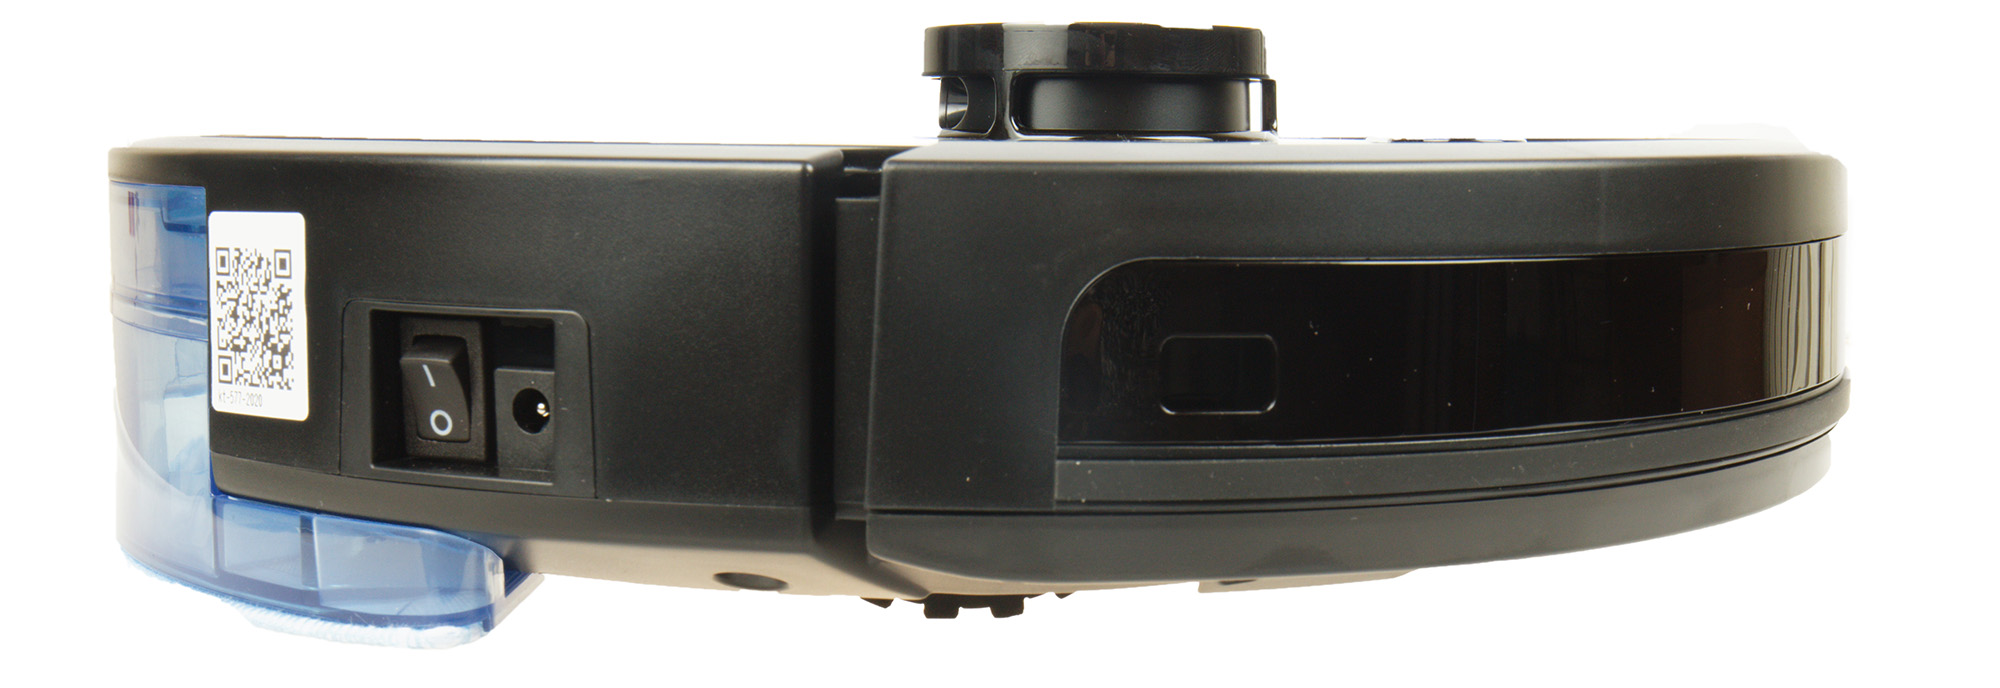
The front half of the side of the device is occupied by a movable spring-loaded bumper with a stroke of 4-5 mm. Pressing it triggers mechanical proximity sensors. IR sensors are placed behind the tinted bumper glass, allowing the vacuum cleaner to detect obstacles, find the base and receive signals from the remote control. An additional IR sensor is located on the right: its task is to monitor what is happening on the side of the vacuum cleaner and prevent the device from “rubbing” against the wall. On the same side, there is a key for turning on the device and a connector for recharging the robot, bypassing the “base”.
The dry cleaning module is installed in its place with a slight click and is fixed with a latch-button.
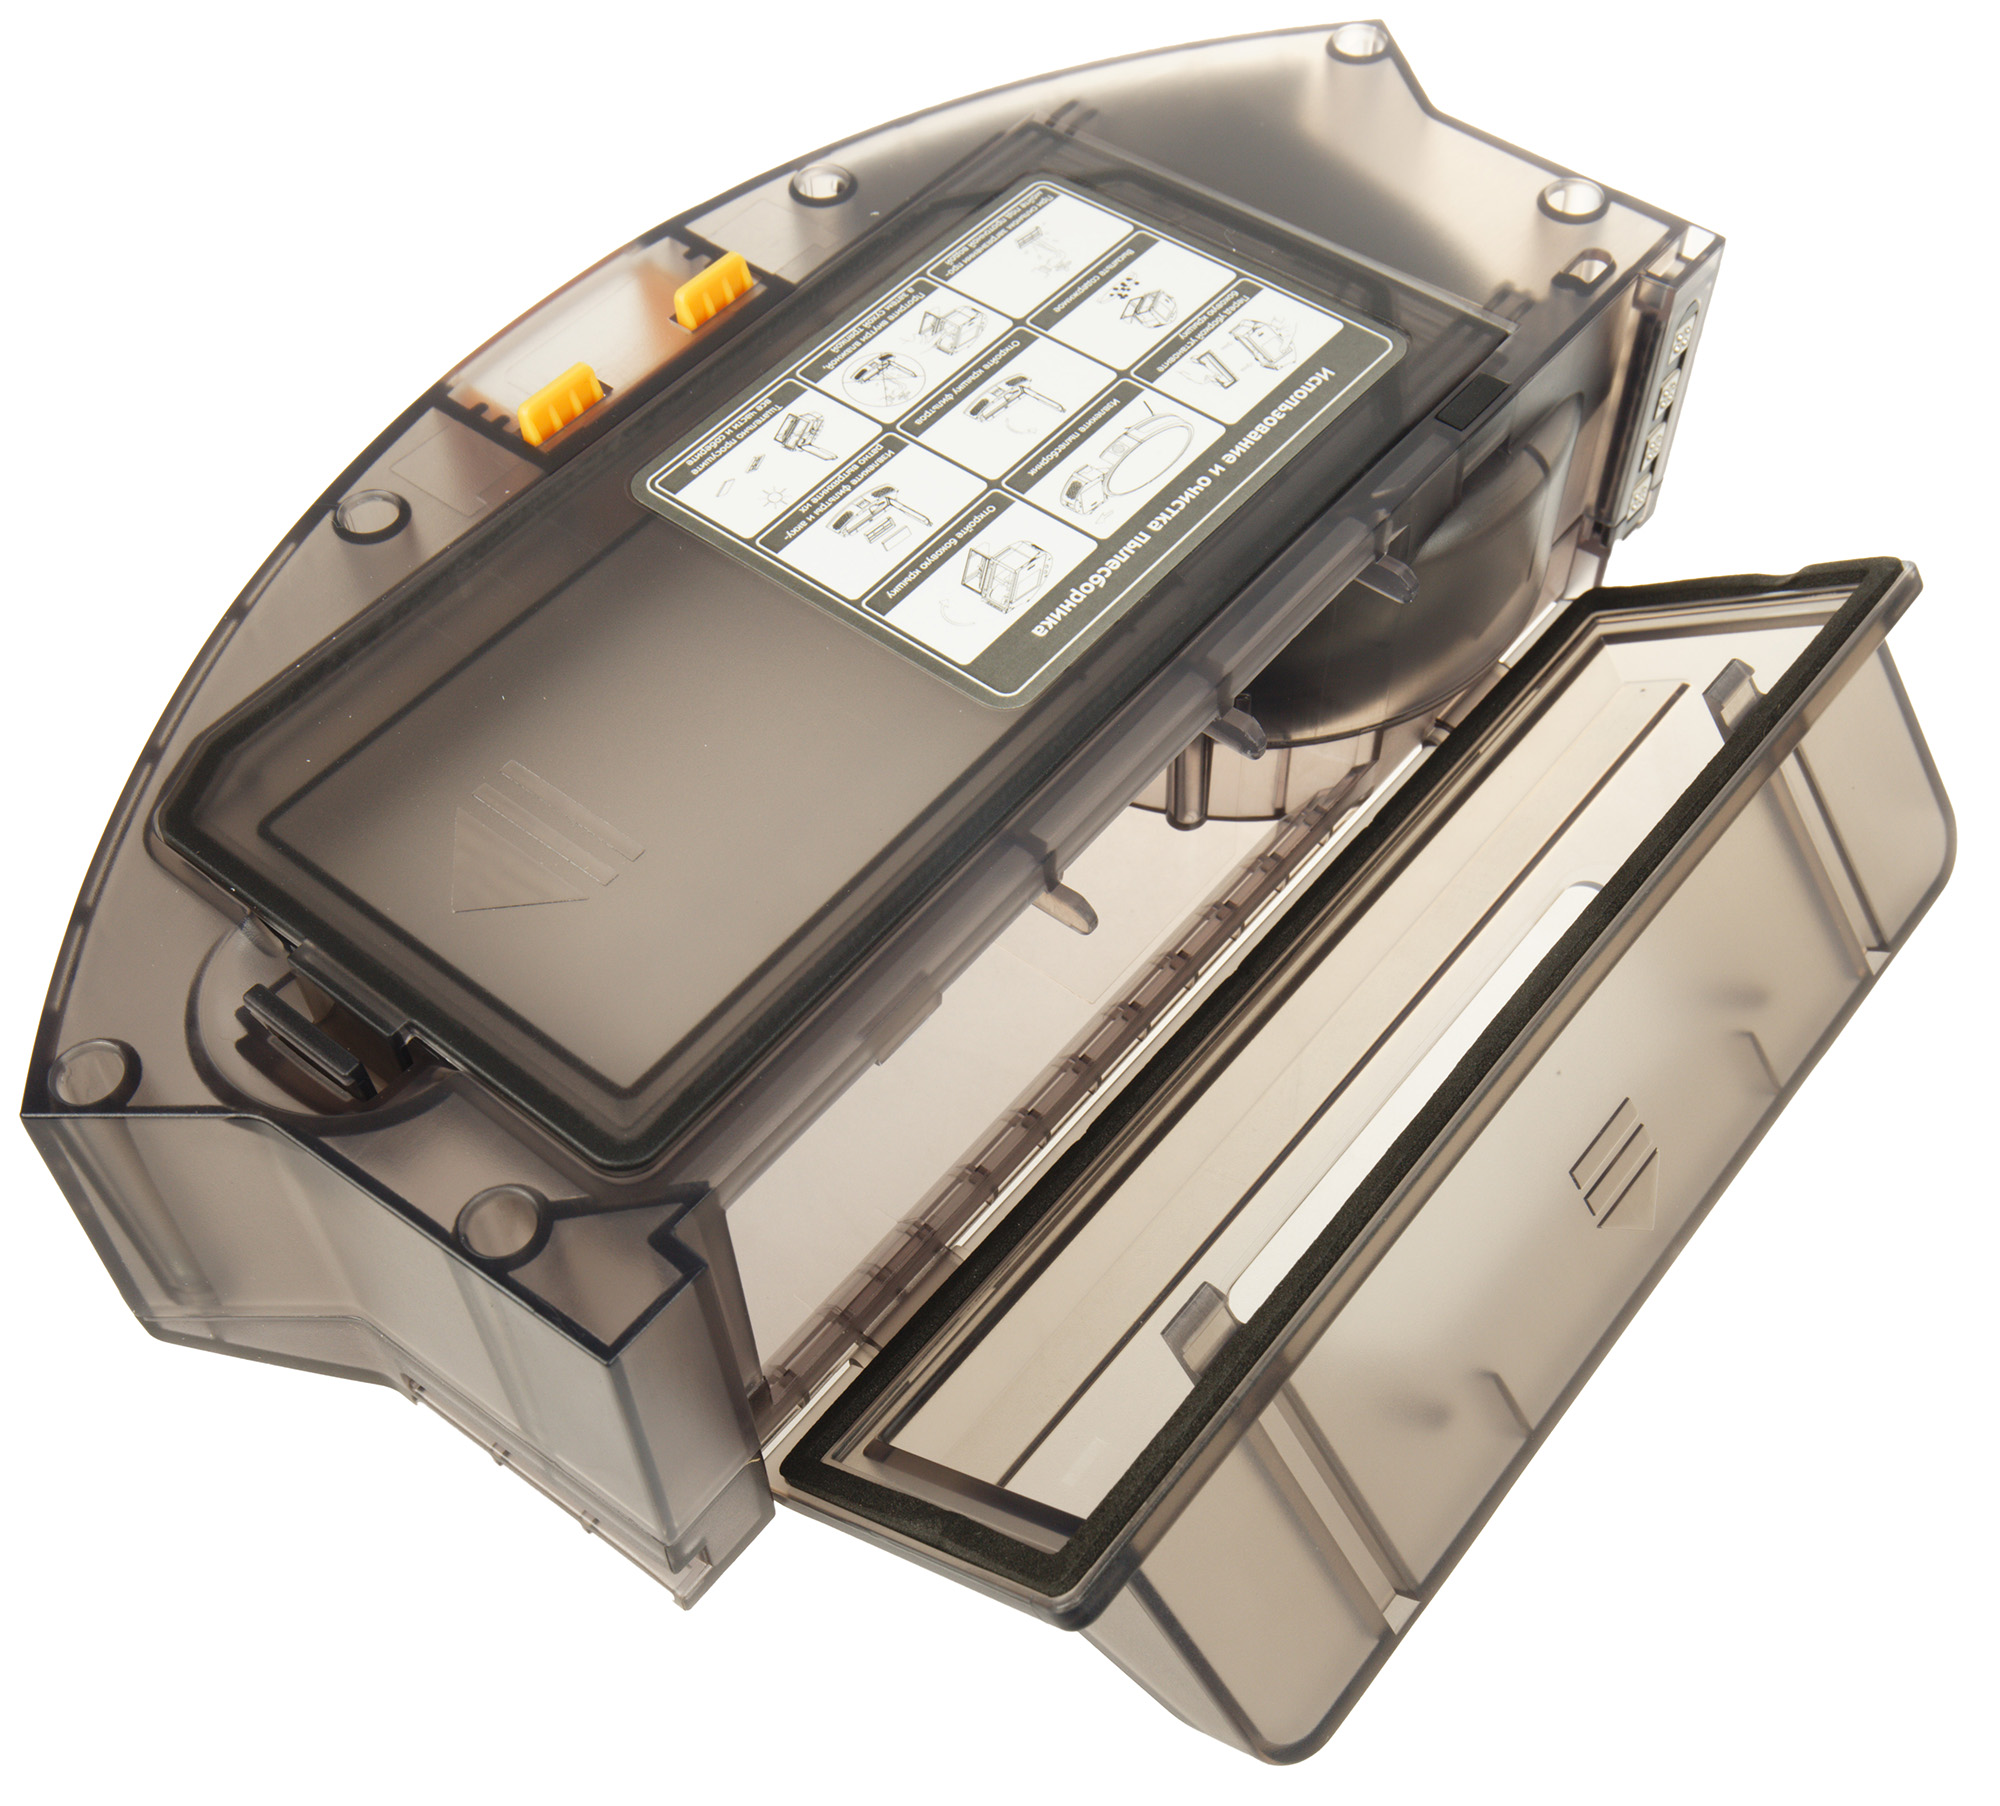
It has a hinged (removable) cover, under which there is a removable pre-filter made of synthetic material and a HEPA filter. Special attention is drawn to the metal mesh filter, behind which the radial fan is hidden. The power supply to the fan is carried out using several contacts.
The hinged cover is fixed on a latch. On the container, you can find a hint sticker with the rules for cleaning the dust container, so you don’t have to look at the instructions once again.
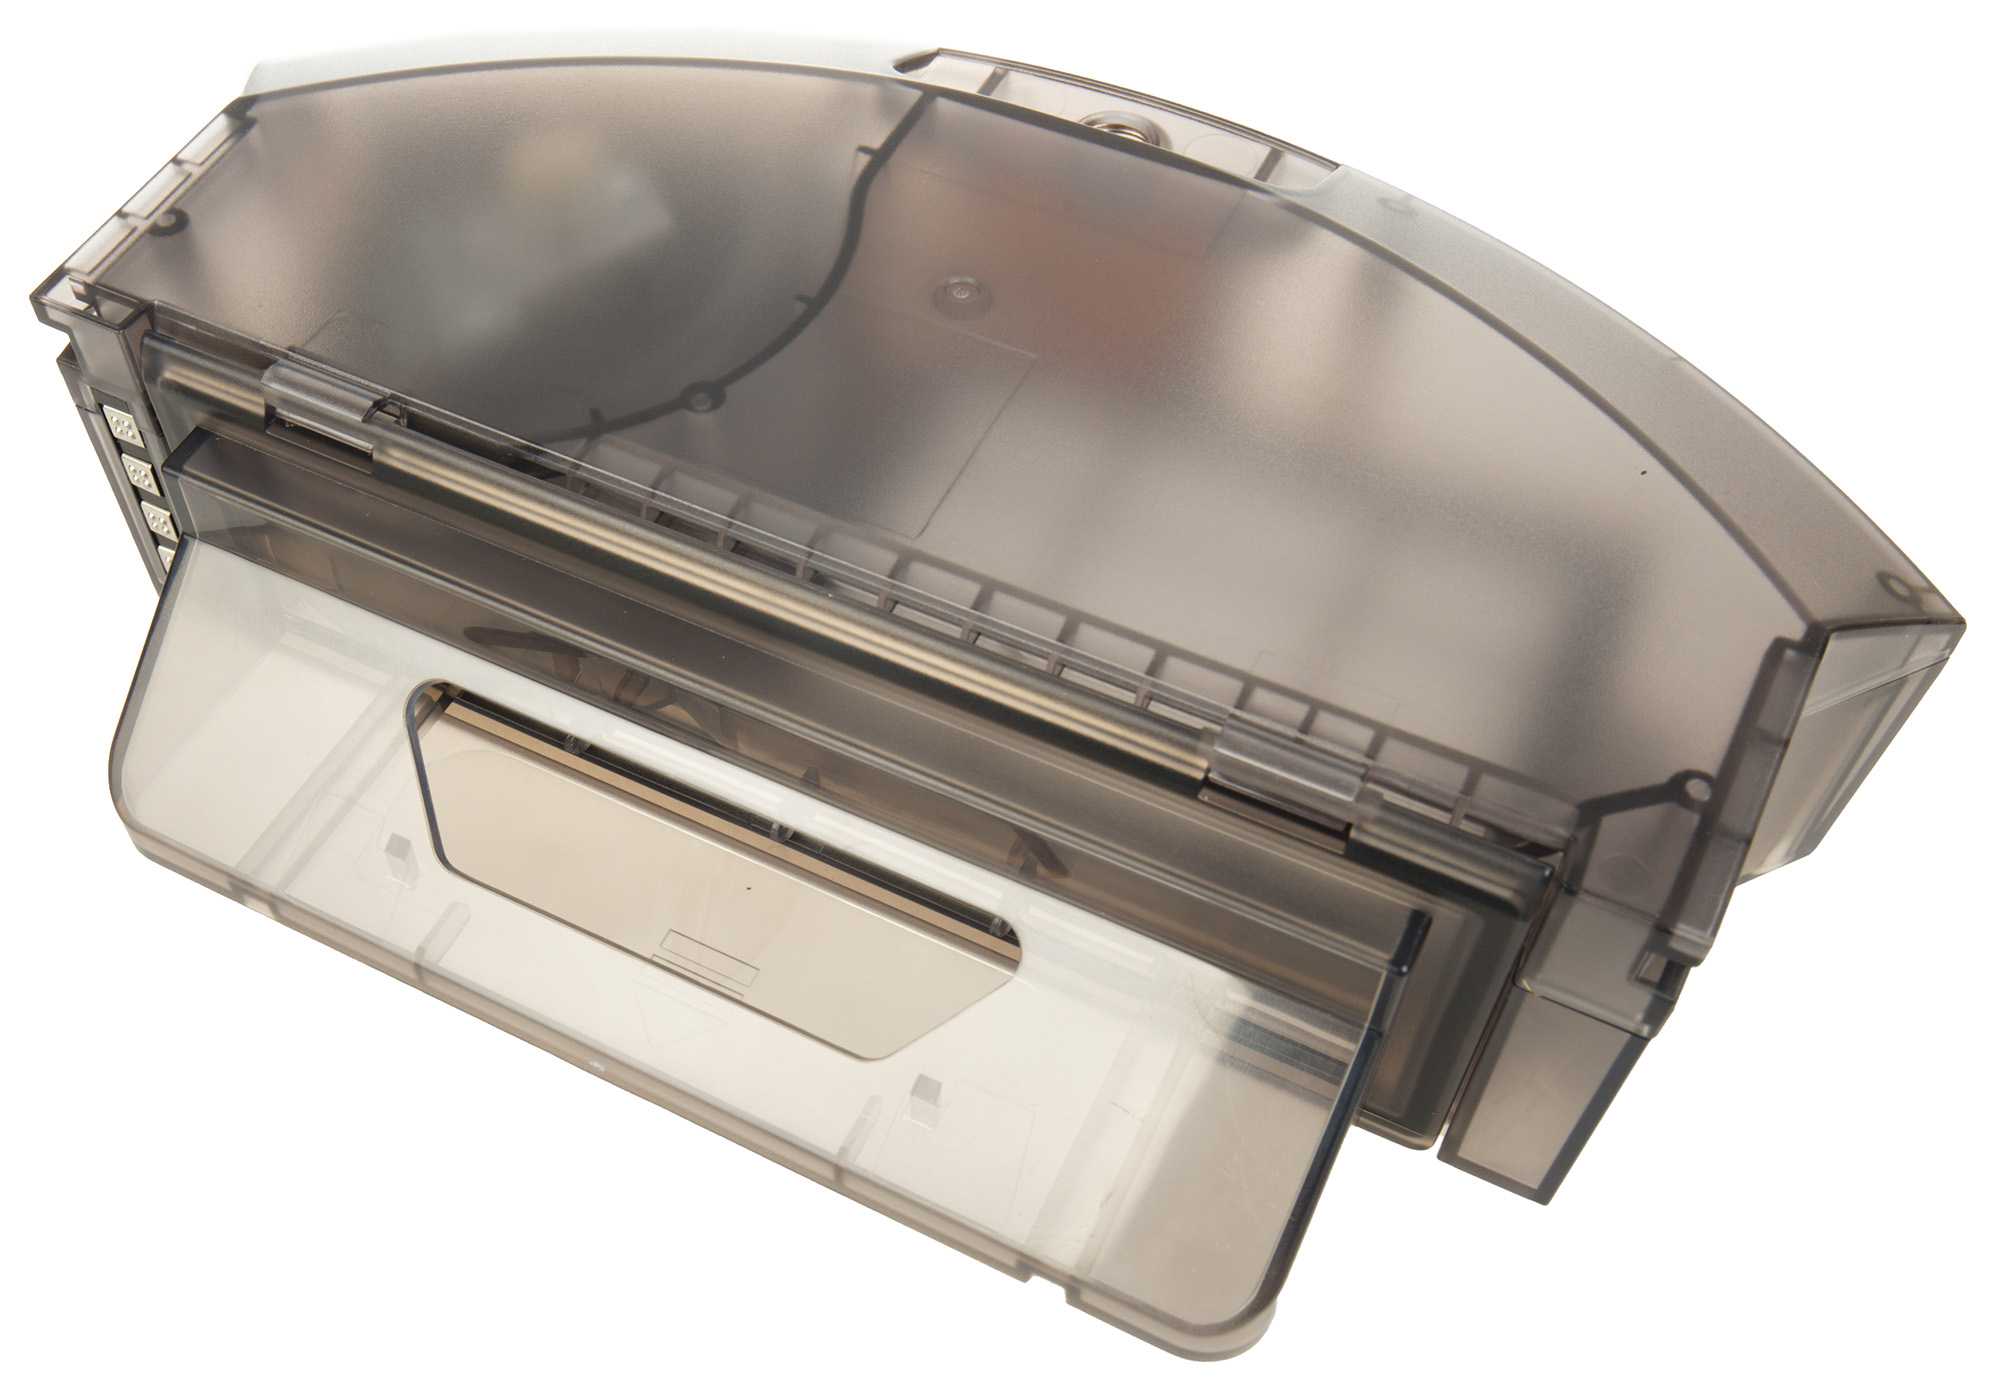
The wet cleaning module is installed in the same slot and is also fixed with a latch button.

The filling hole is on the side and closed with a rubber stopper.
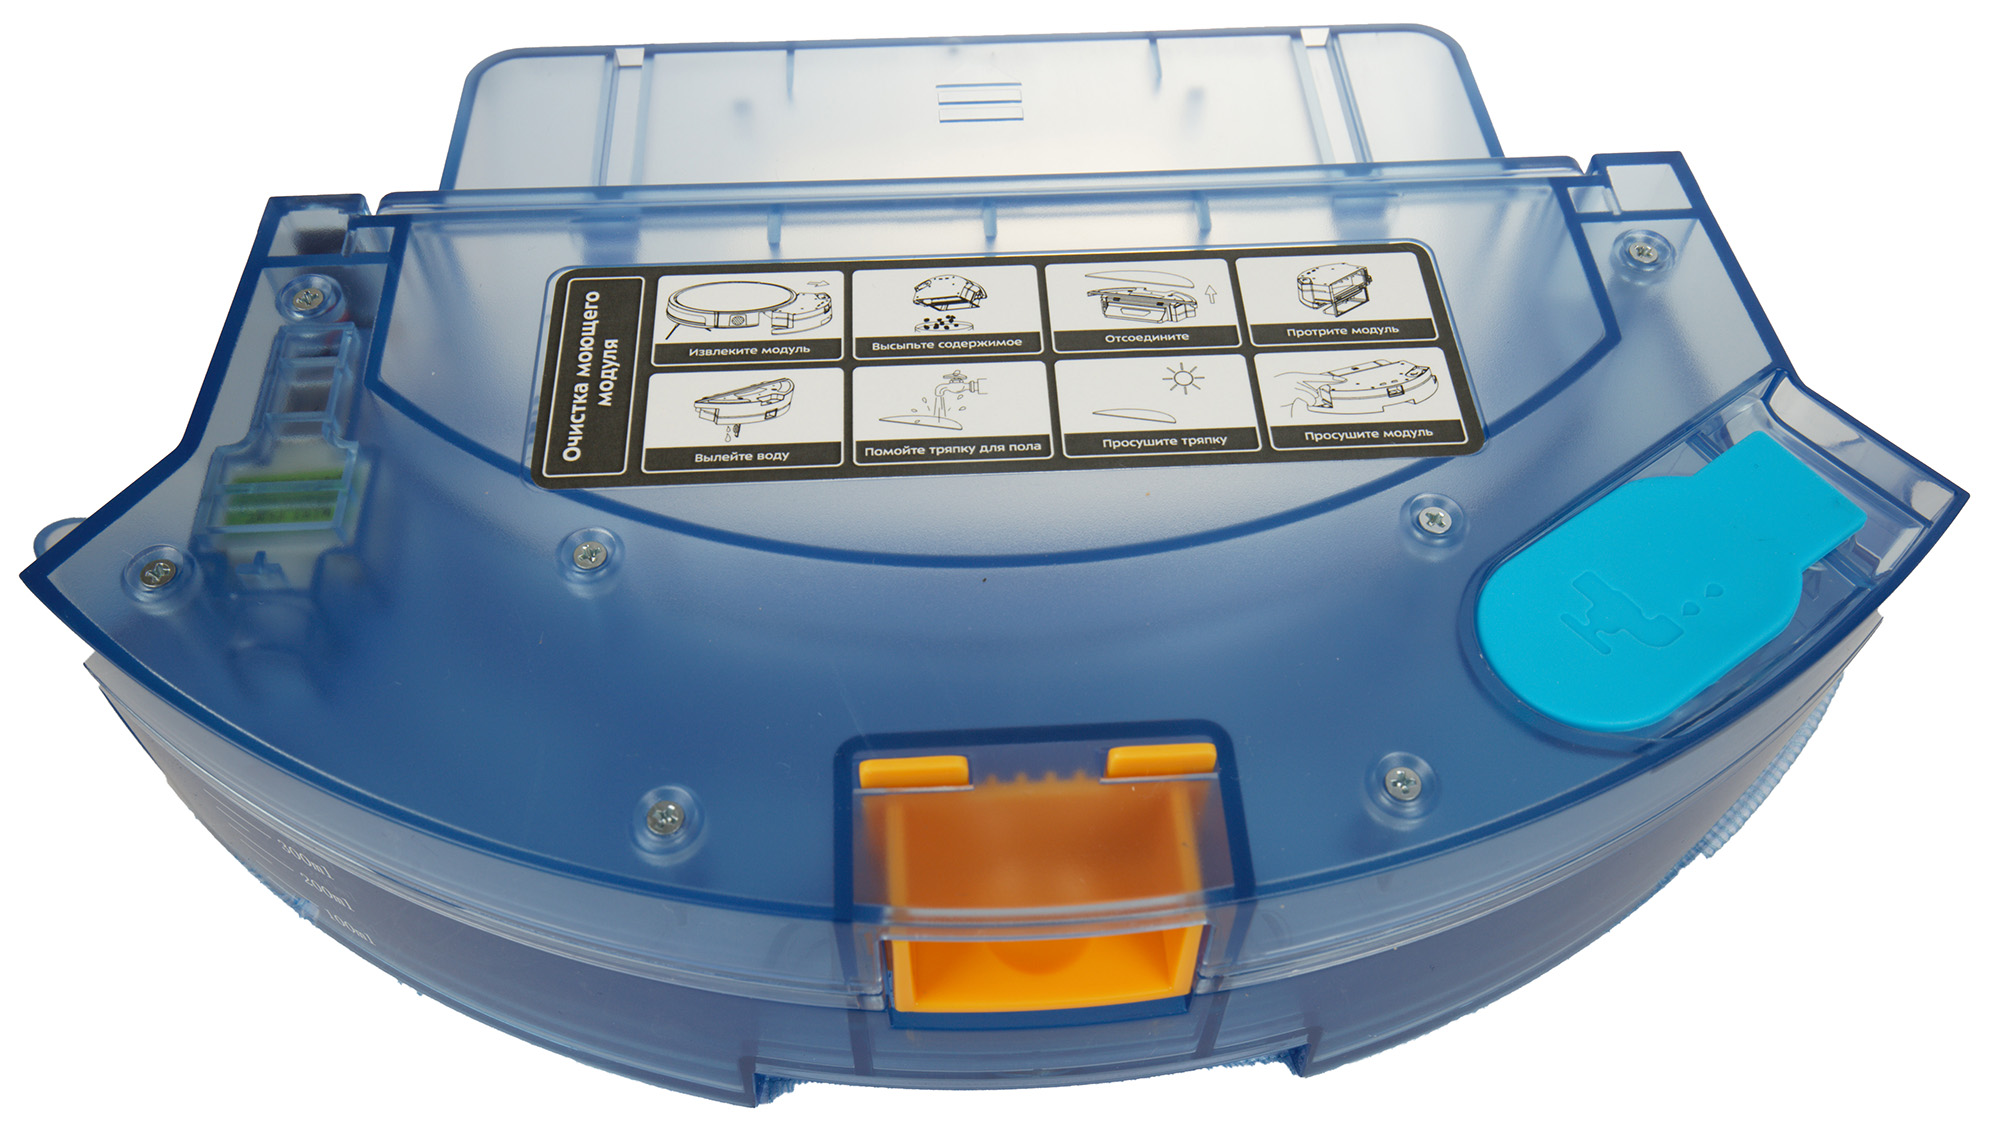
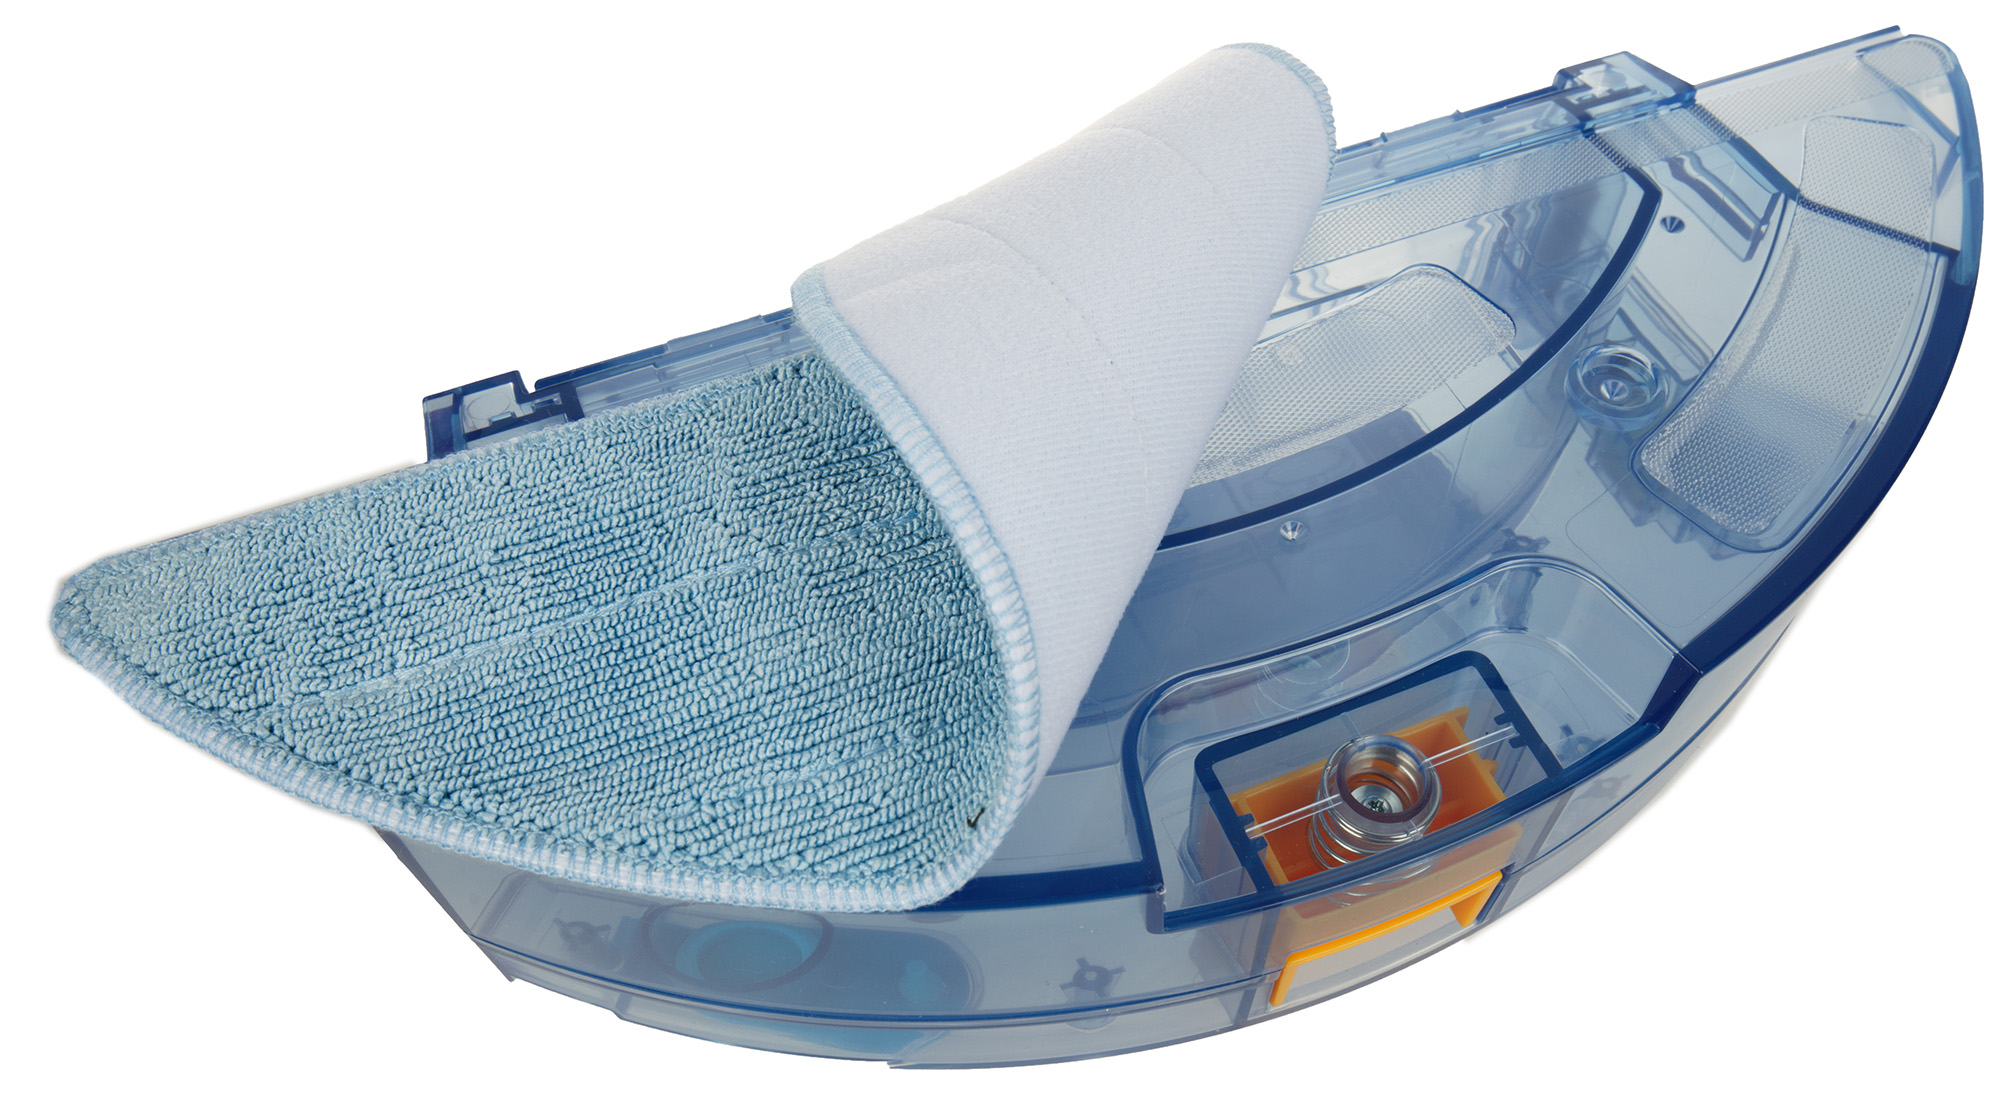
The microfiber cloth is fixed on the module with the help of four fairly large Velcro Velcro. On the side of the module, we see the graduation corresponding to 100, 200 and 300 ml. Above is a sticker containing information about the care of the module.
Water, moistening the cloth, comes from the tank through five miniature holes. It should be noted that the Velcro fasteners are not perfectly glued to the module body: in some places they are not glued well enough, and we are afraid that this may become a problem in the future (the Velcro will peel off).
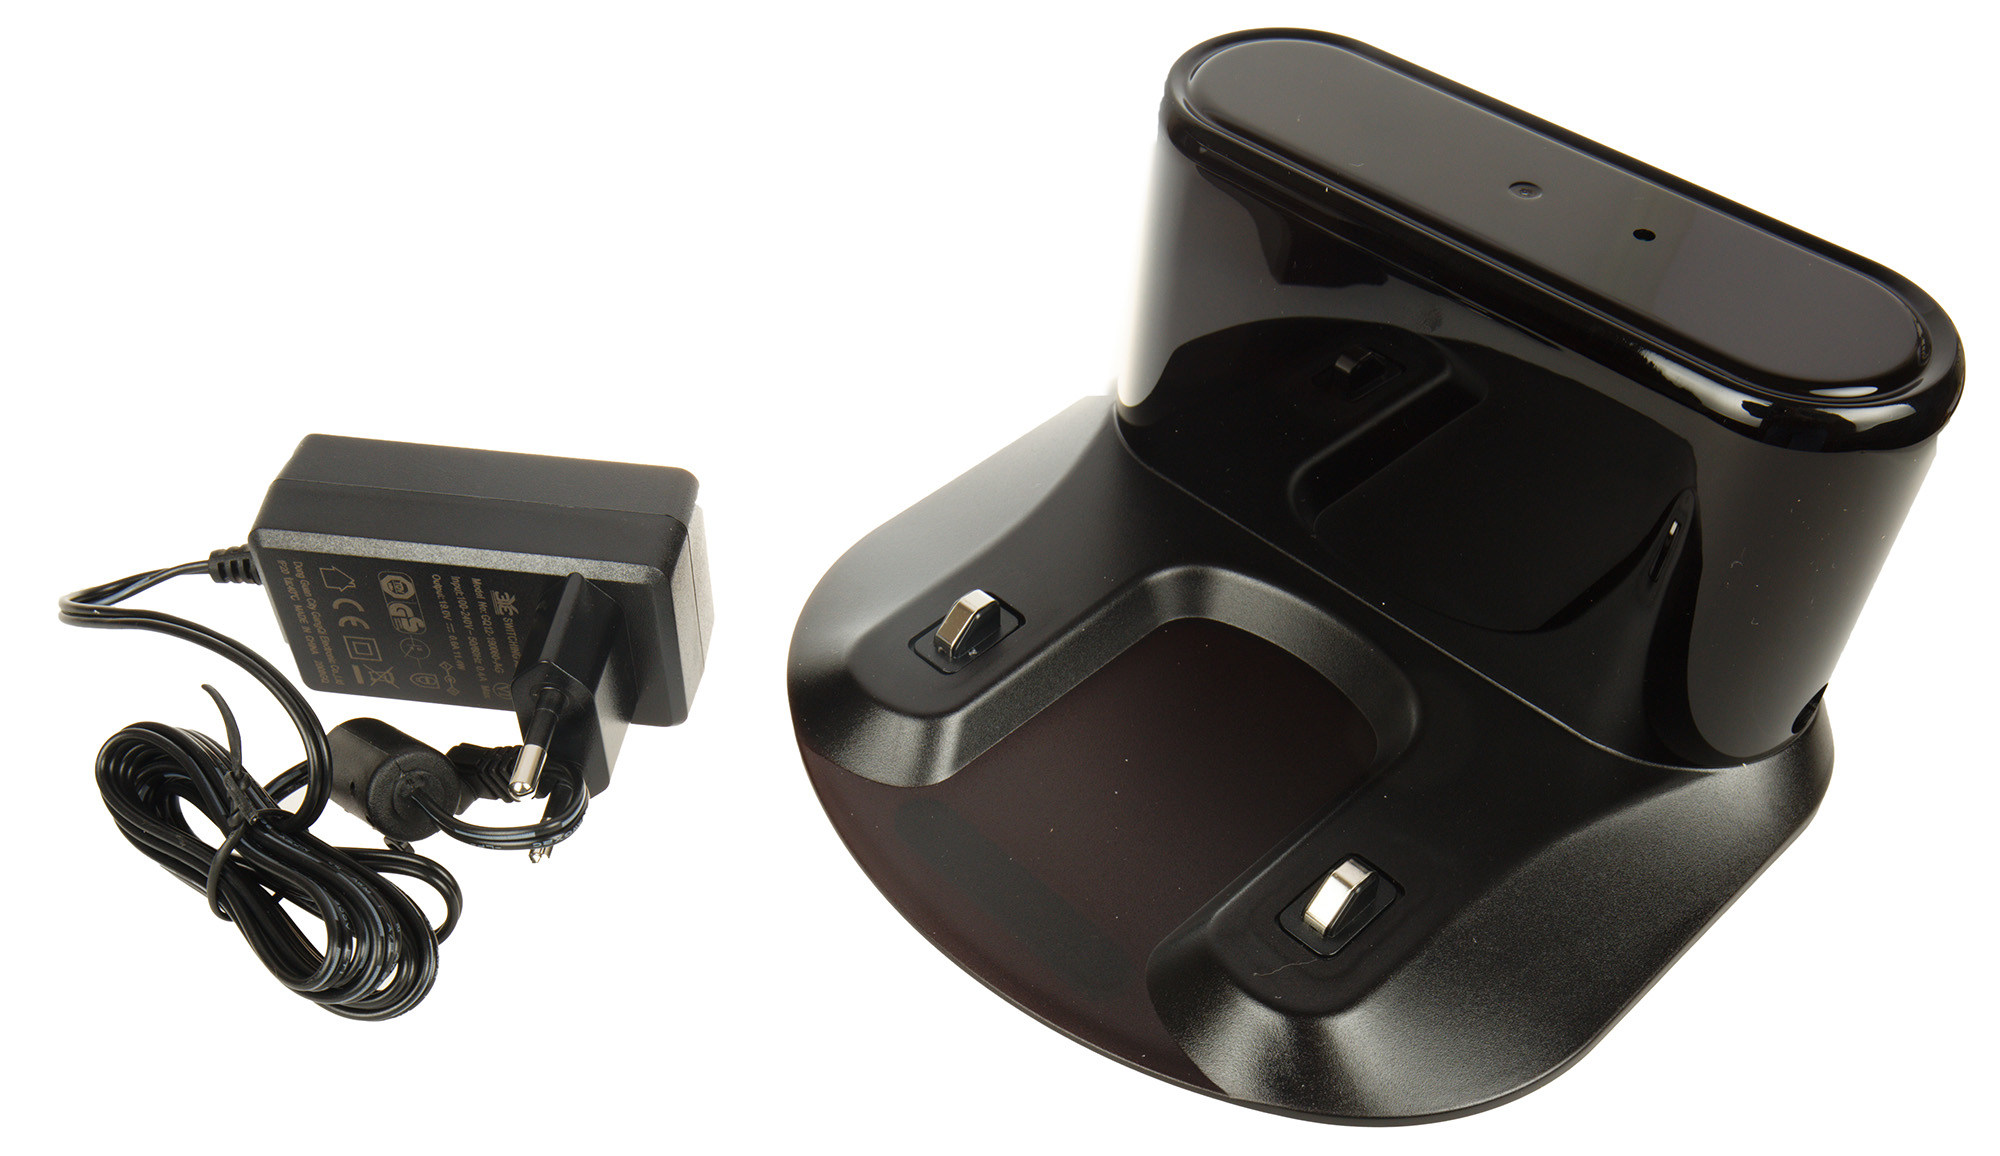
The charging unit turned out to be quite standard. The length of the cord was 1.5 meters.
You can charge the robot either using the base or by connecting it to the charging block directly. The base is made of IR-transparent plastic, under which there are sensors that provide positioning of the robot when returning to charge. The base has an LED that indicates the progress of the battery charge. The contacts are spring-loaded and have a stroke of about 3 mm. There are anti-slip stickers on the bottom of the base.
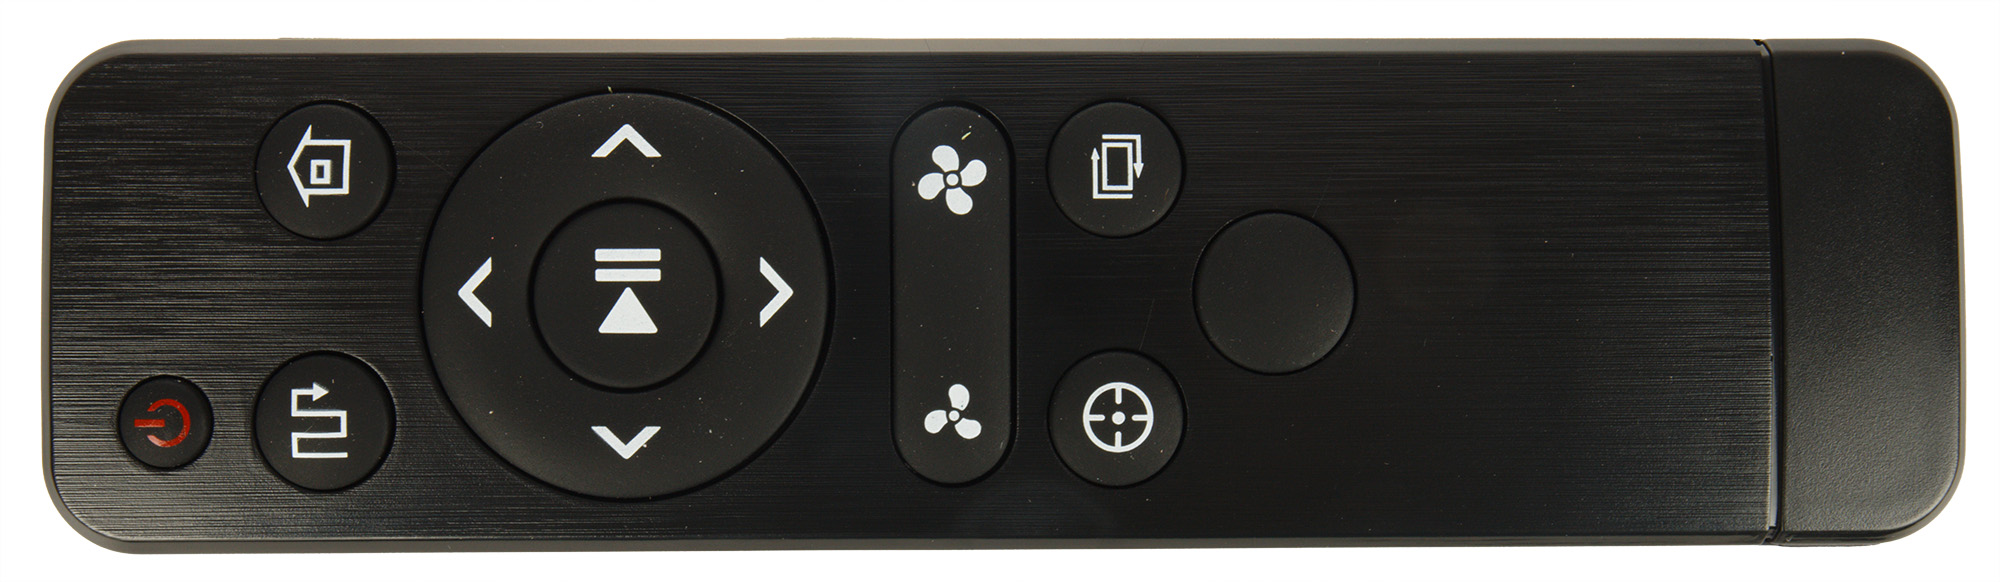
The infrared remote control is made of black plastic. It has 13 buttons, is powered by two AAA batteries and looks quite standard (we have repeatedly seen similar remote controls in Xiaomi products, so both in size and in the location of the buttons, the remote corresponds to the now popular “standard”).
In the box with the vacuum cleaner, you can also find a spare cloth, a spare HEPA filter and a special plastic brush with a knife to clean all the elements of the device. The appearance and design of the brush-knife is more than standard: it can be used to effectively deal with threads and hair that tend to wind around the brushes of the device.
Summing up the visual inspection: we have before us a completely standard, well-assembled and stylish-looking device, which, in our opinion, looks in full accordance with its price. We estimate the quality of materials as high, the design is strict and concise. Based on the results of the inspection, we did not find any claims to the device (if you do not remember about the Velcro on the wet cleaning module).
Instruction
The user manual for the vacuum cleaner is a heavy brochure printed on high-quality matte paper. In total, the brochure contains 34 pages, which describe everything you need to know when working with a vacuum cleaner.
The content of the manual is standard: technical specifications, equipment, assembly and use, selection of the operating mode and management of the device care, work with a mobile application, etc.
All the necessary actions and manipulations that will be encountered during the use of the device are illustrated in black and white images, making it easy and simple to understand the rules for operating and caring for the vacuum cleaner.
It will take a little time to study the instructions, and the reading promises to be easy and relaxed.
Control
Using the buttons located on the device body, you can perform basic tasks:
- on the left is the button to return to the charging station
- on the right – on / off button, start cleaning
- in the center is the Wi-Fi connection indicator
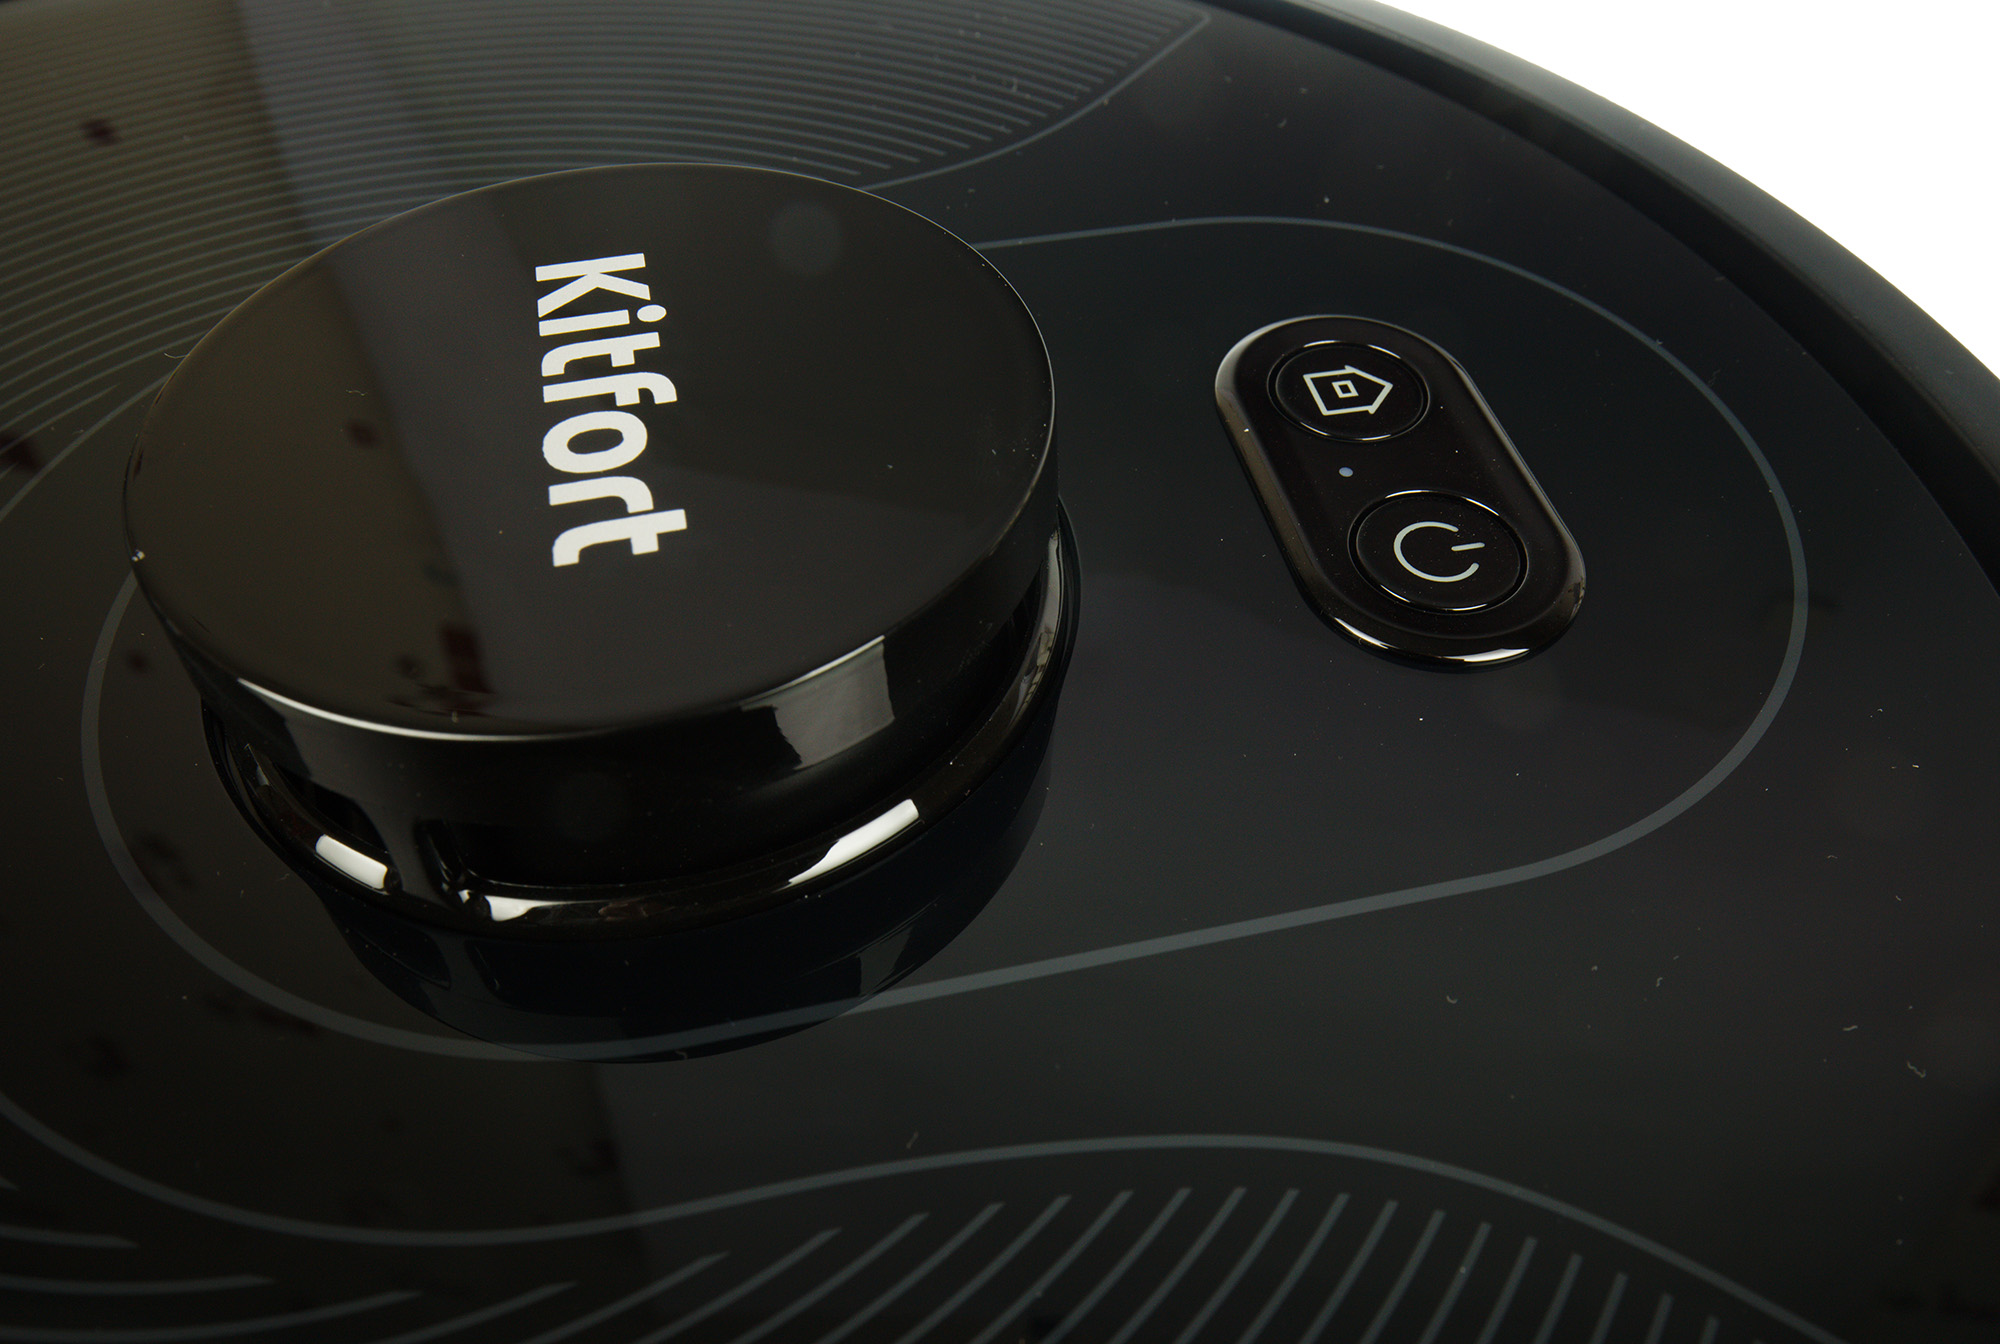
With the help of these buttons, we can perform not so many actions: send the vacuum cleaner to the base for recharging, start or pause standard cleaning, and also “make friends” of the vacuum cleaner with the local WiFi network.
Remote control
Our robot vacuum cleaner can be controlled by remote control.
The functionality of the remote control allows you to switch to manual control mode (using the navigation buttons), start or pause automatic cleaning, select the suction power (normal or reduced), and also start the local cleaning mode (SPOT) for cleaning in a spiral area approximately corresponding to 1 square meter.
In general, the remote somewhat expands the user’s capabilities, however, in order to access all the features, you will have to use the mobile application.
Smartphone control
In order to control the vacuum cleaner from your smartphone, you will need to install a special WeBack application. When controlled from a mobile application, the user will open a number of advanced features and settings. We list the main ones:
- Reset card
- Monitoring the cleaning process and tracking the cleaning history
- Editing cleaning maps (setting virtual walls and areas prohibited for cleaning on maps)
- Installation on the map of zones for cleaning, selection of rooms for cleaning
- Direction of the robot to any zone on the map for local cleaning
- Suction force setting
- Wet cleaning setting
- Setting how to resume cleaning after recharging (in case the charge ran out before cleaning was completed)
- Control of sound and voice signals of the robot (including the choice of a voice package – Russian or English)
- Remote control of the robot
- Choice of units of measurement (default is square meters)
- Ability to share robot access with another WeBack account
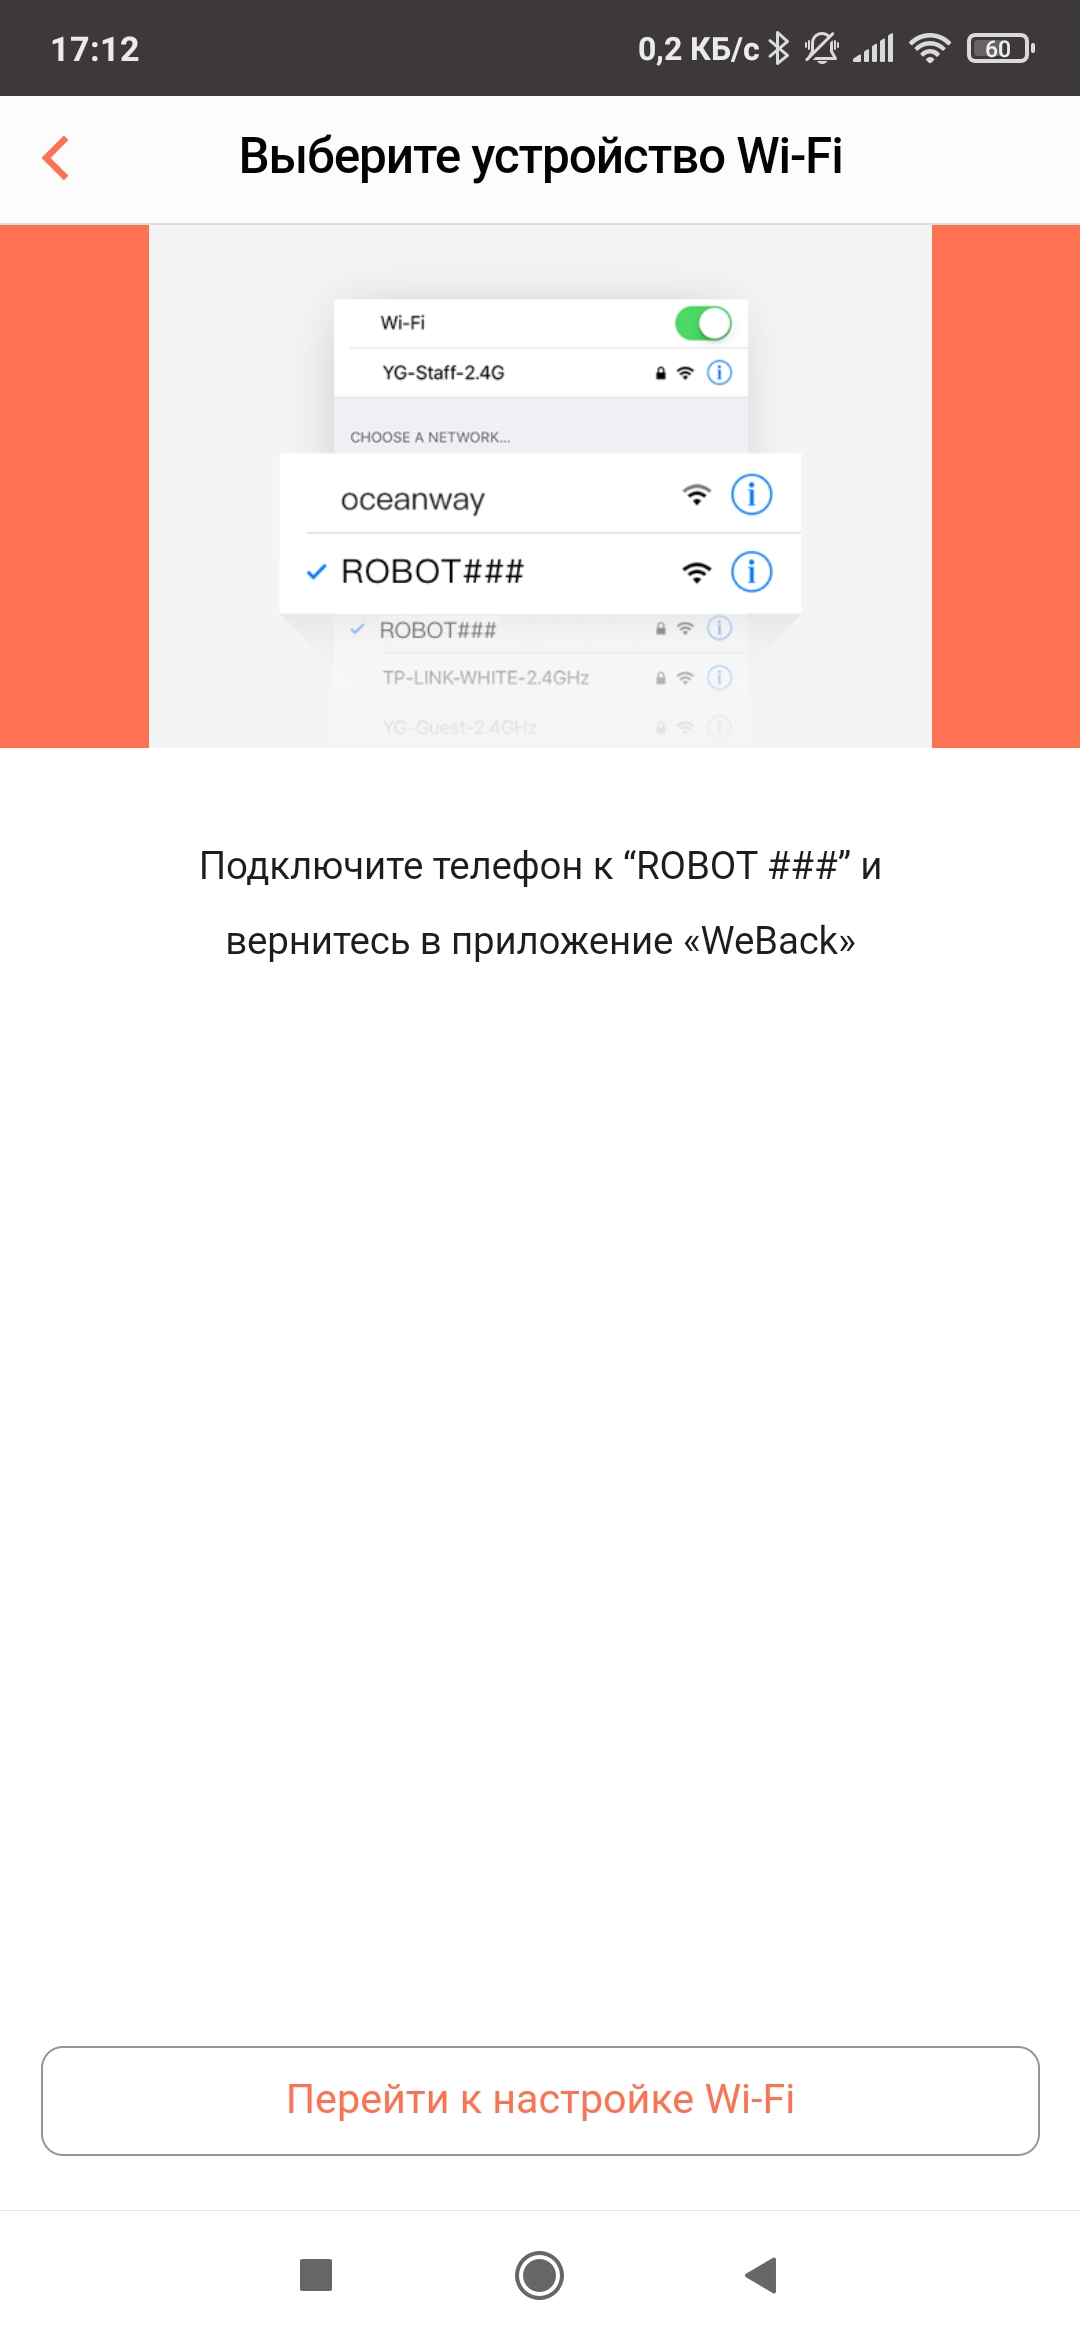
Setting up the application is quite traditional. First you need to create an account.

Then – reset the settings and add a new device and transfer the Wi-Fi network data to the robots (only 2.4 GHz networks are supported).
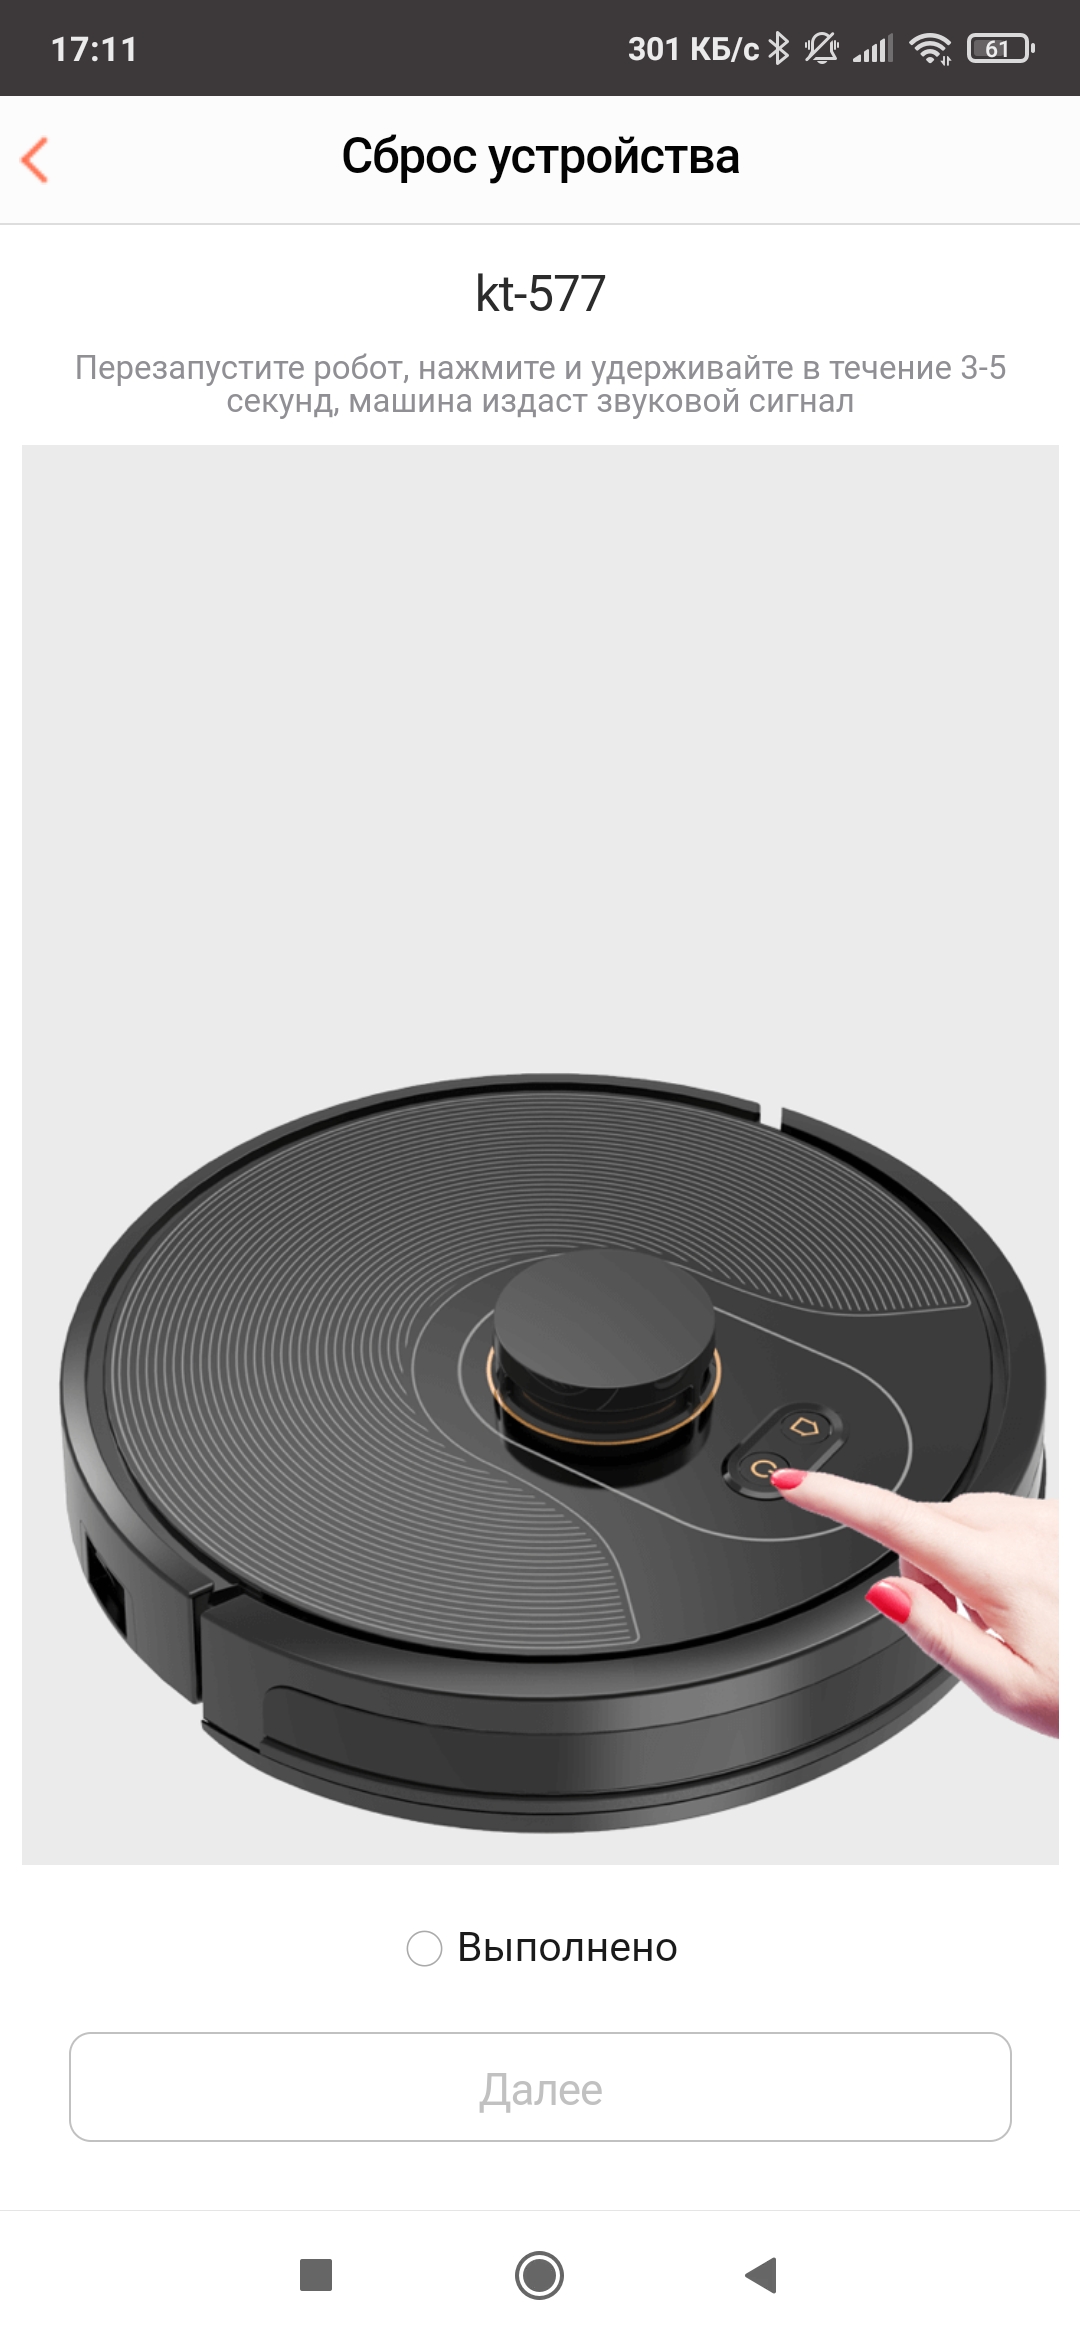
After that, the application will find the vacuum cleaner (if something goes wrong, you can add the device manually by selecting it from the list of models). In case of any problems, you can always refer to the “help” section.
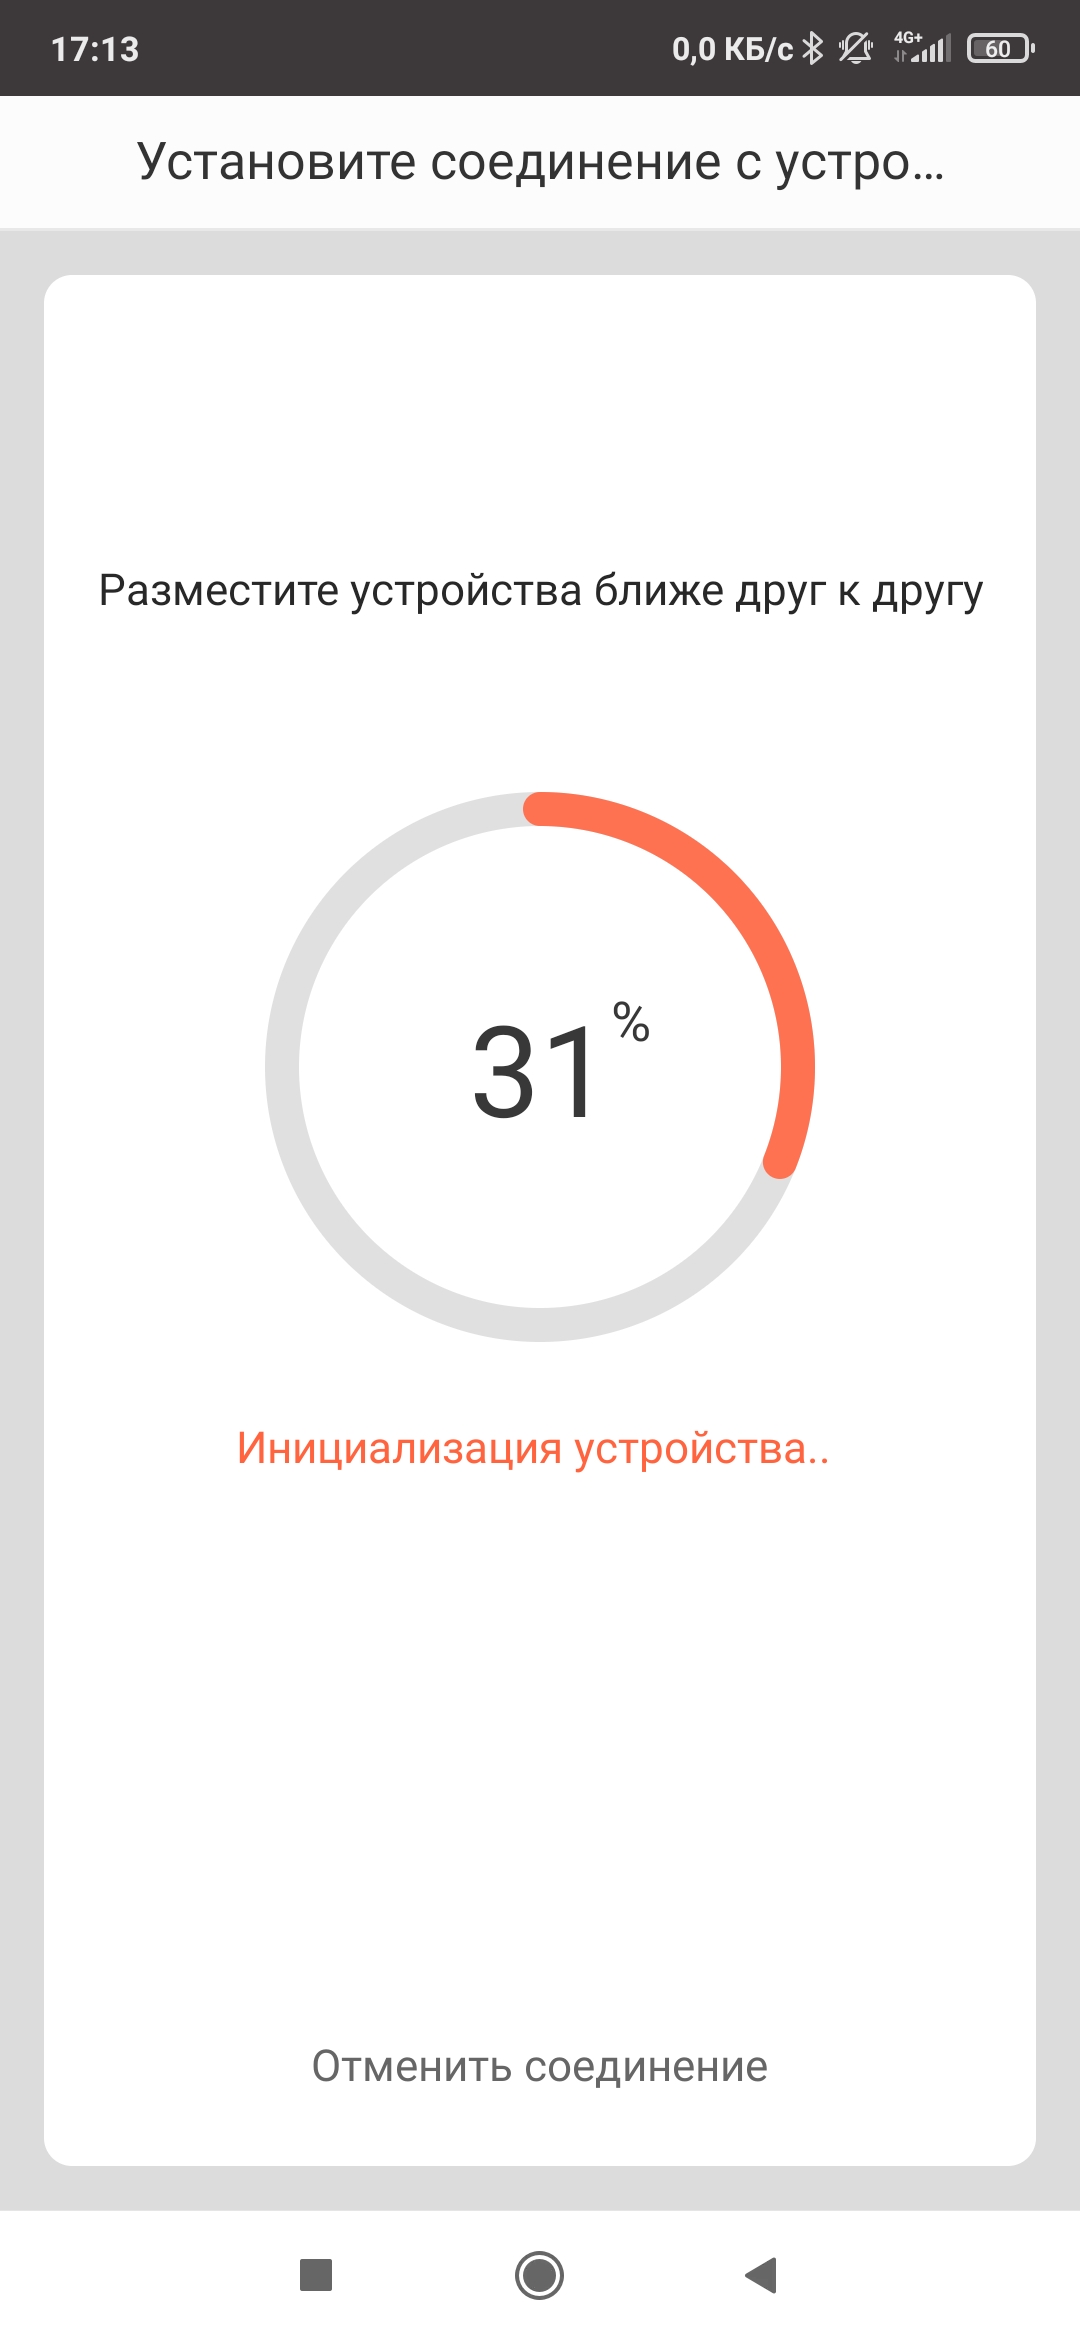
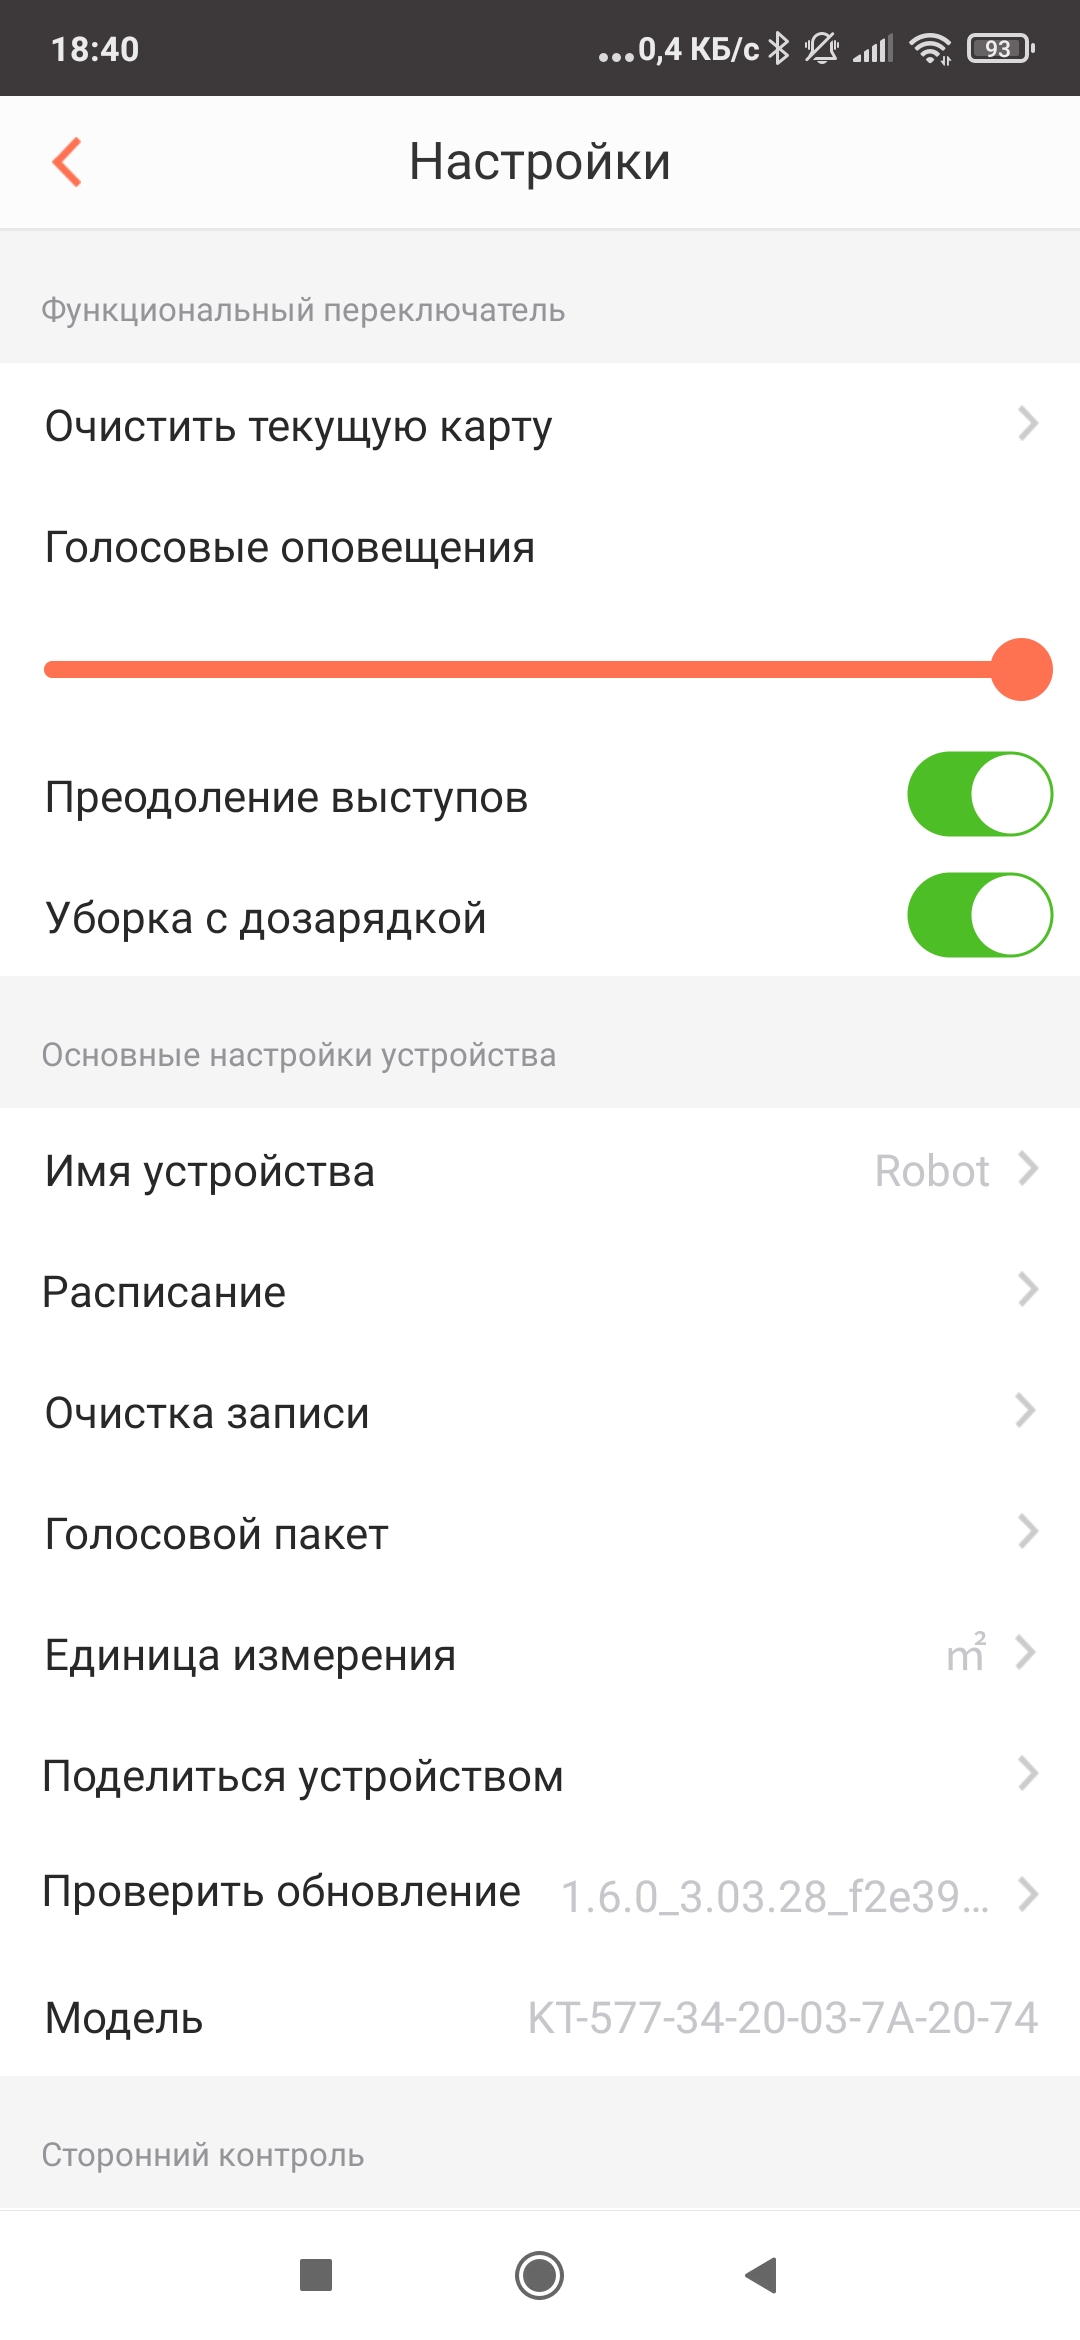
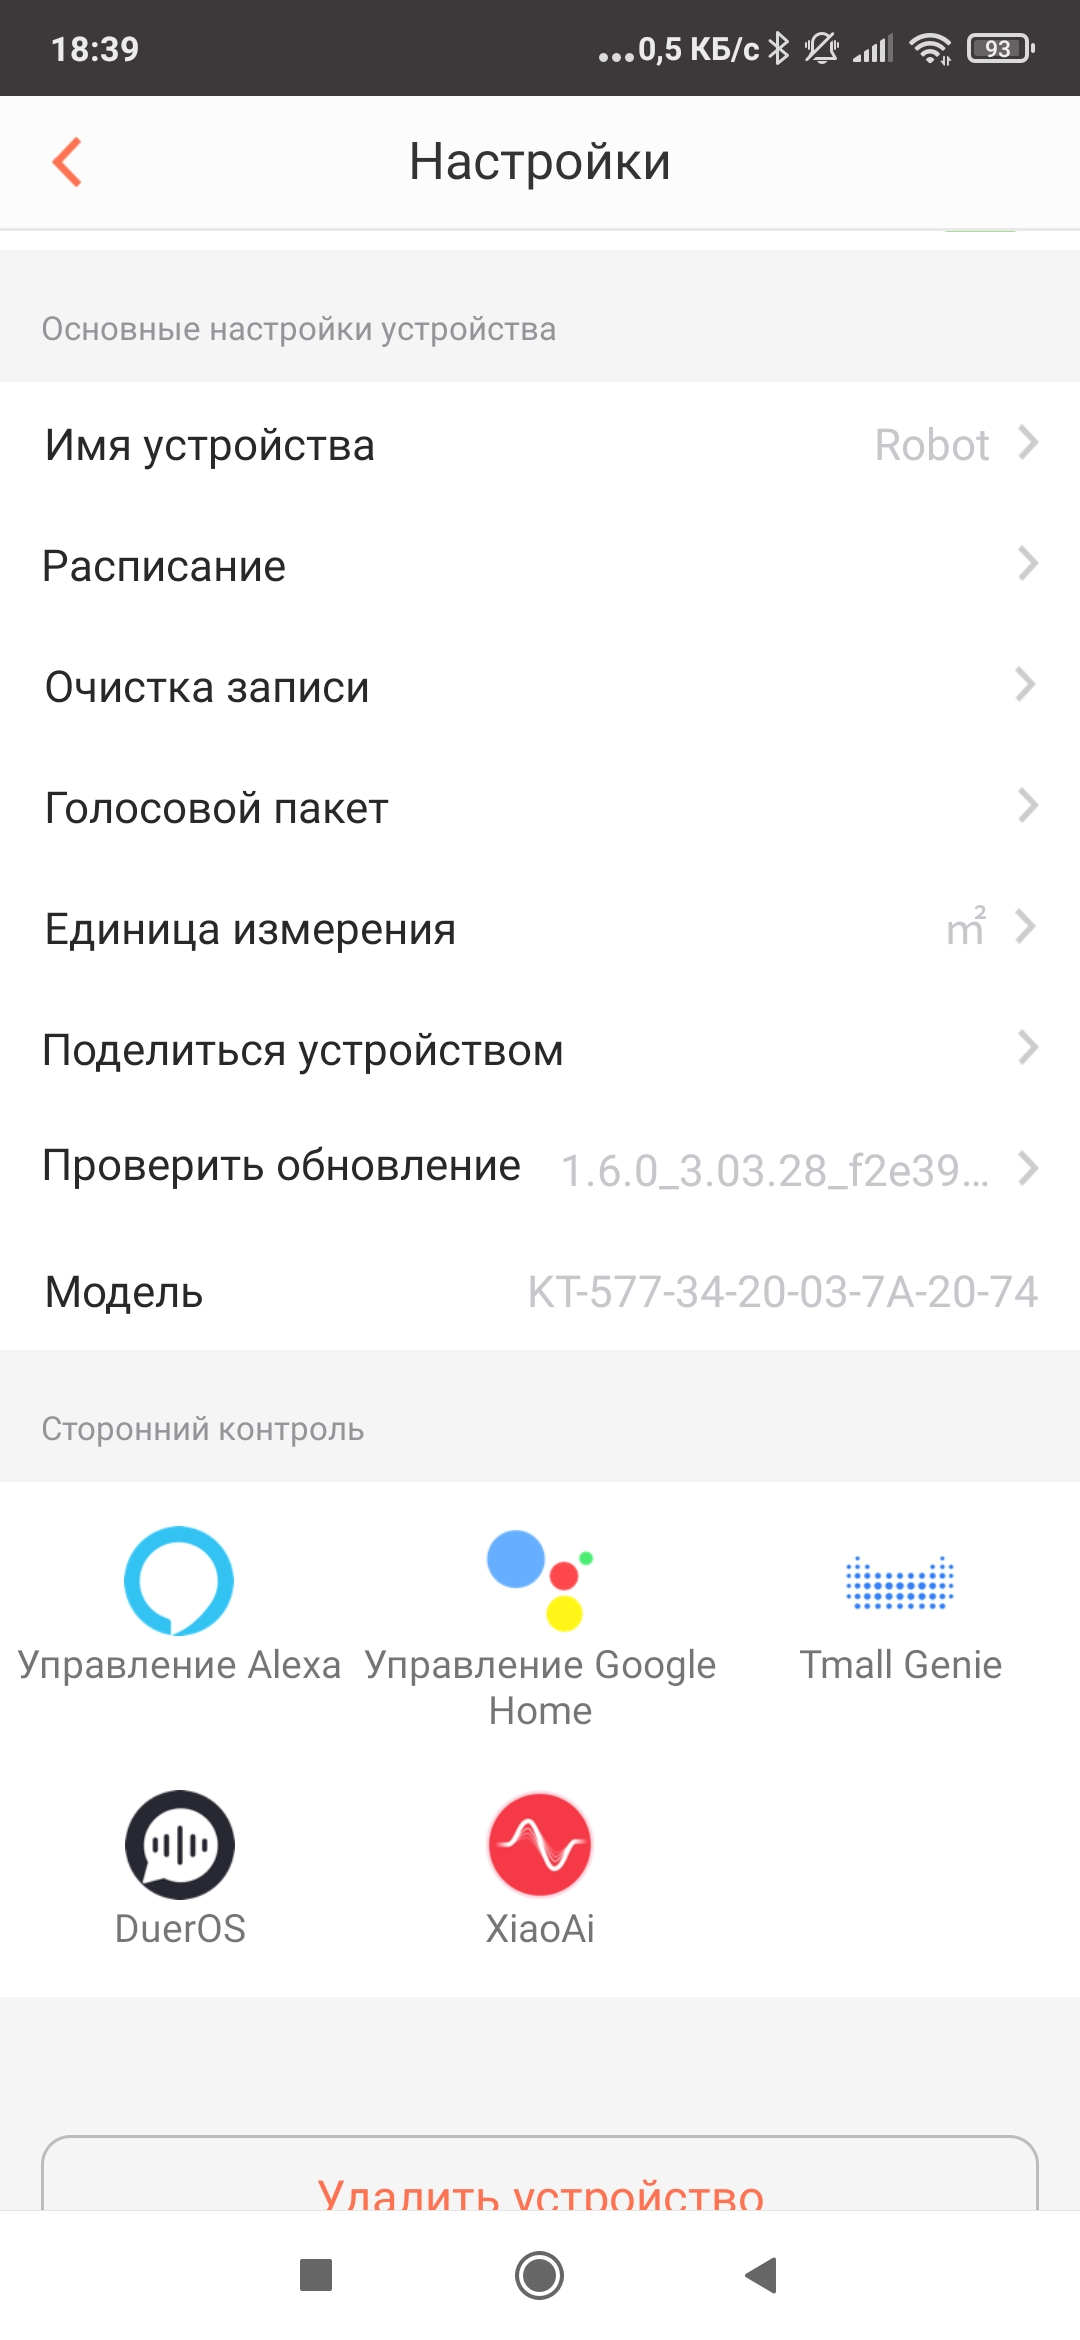
After a successful connection, a settings tab will appear, allowing you to get information about the vacuum cleaner, update the firmware, grant other users access to the device, etc.
Here you can also configure the control of the robot using third-party services (their list is rather small). Alexa and Google Home are supported, but Alice and Marusya, alas, are not. There is also a tab for creating advanced cleaning schedules.
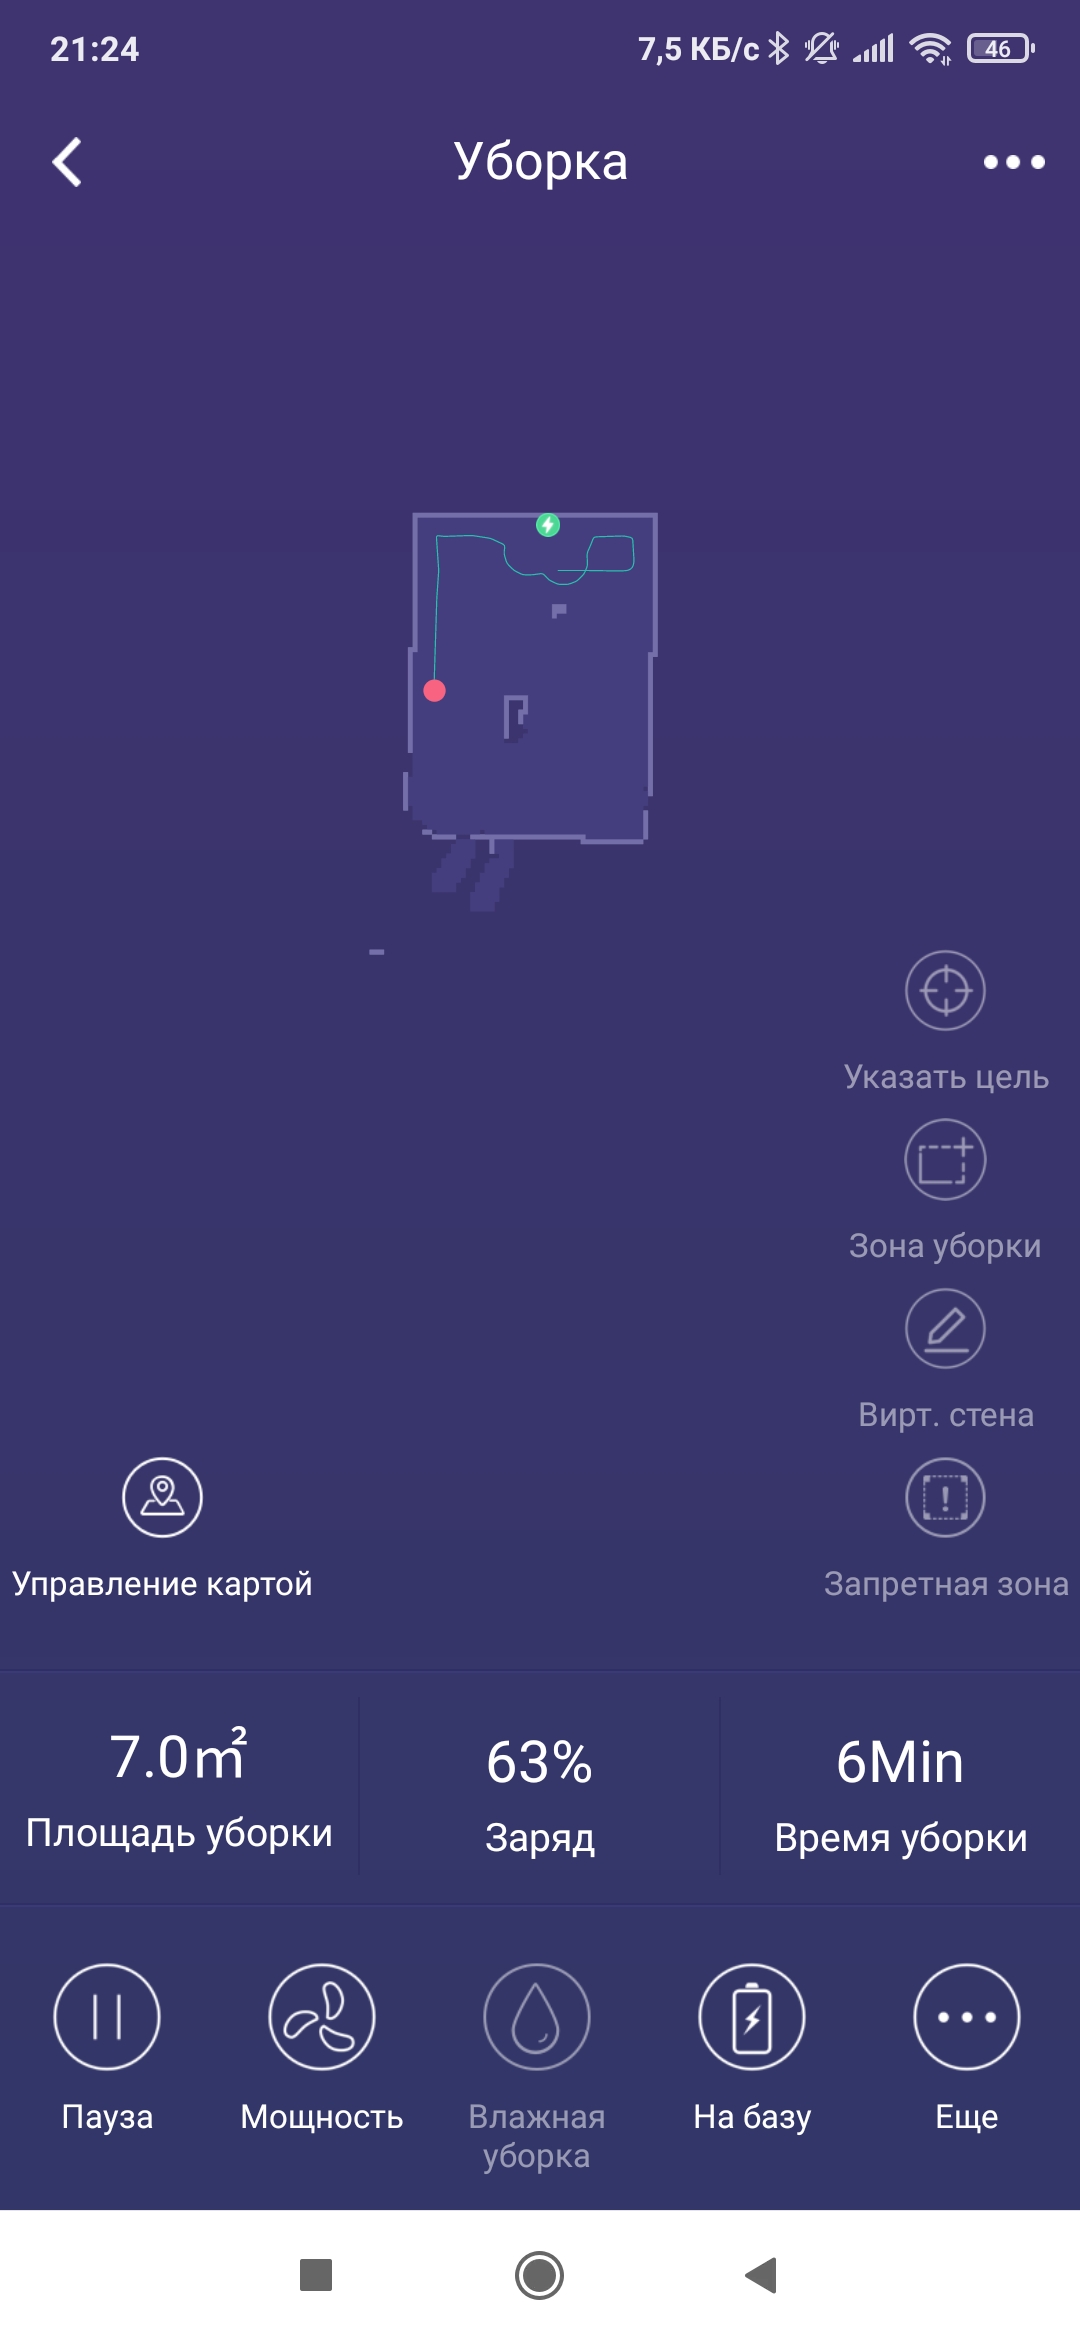
As for building a map, then our robot is in perfect order.
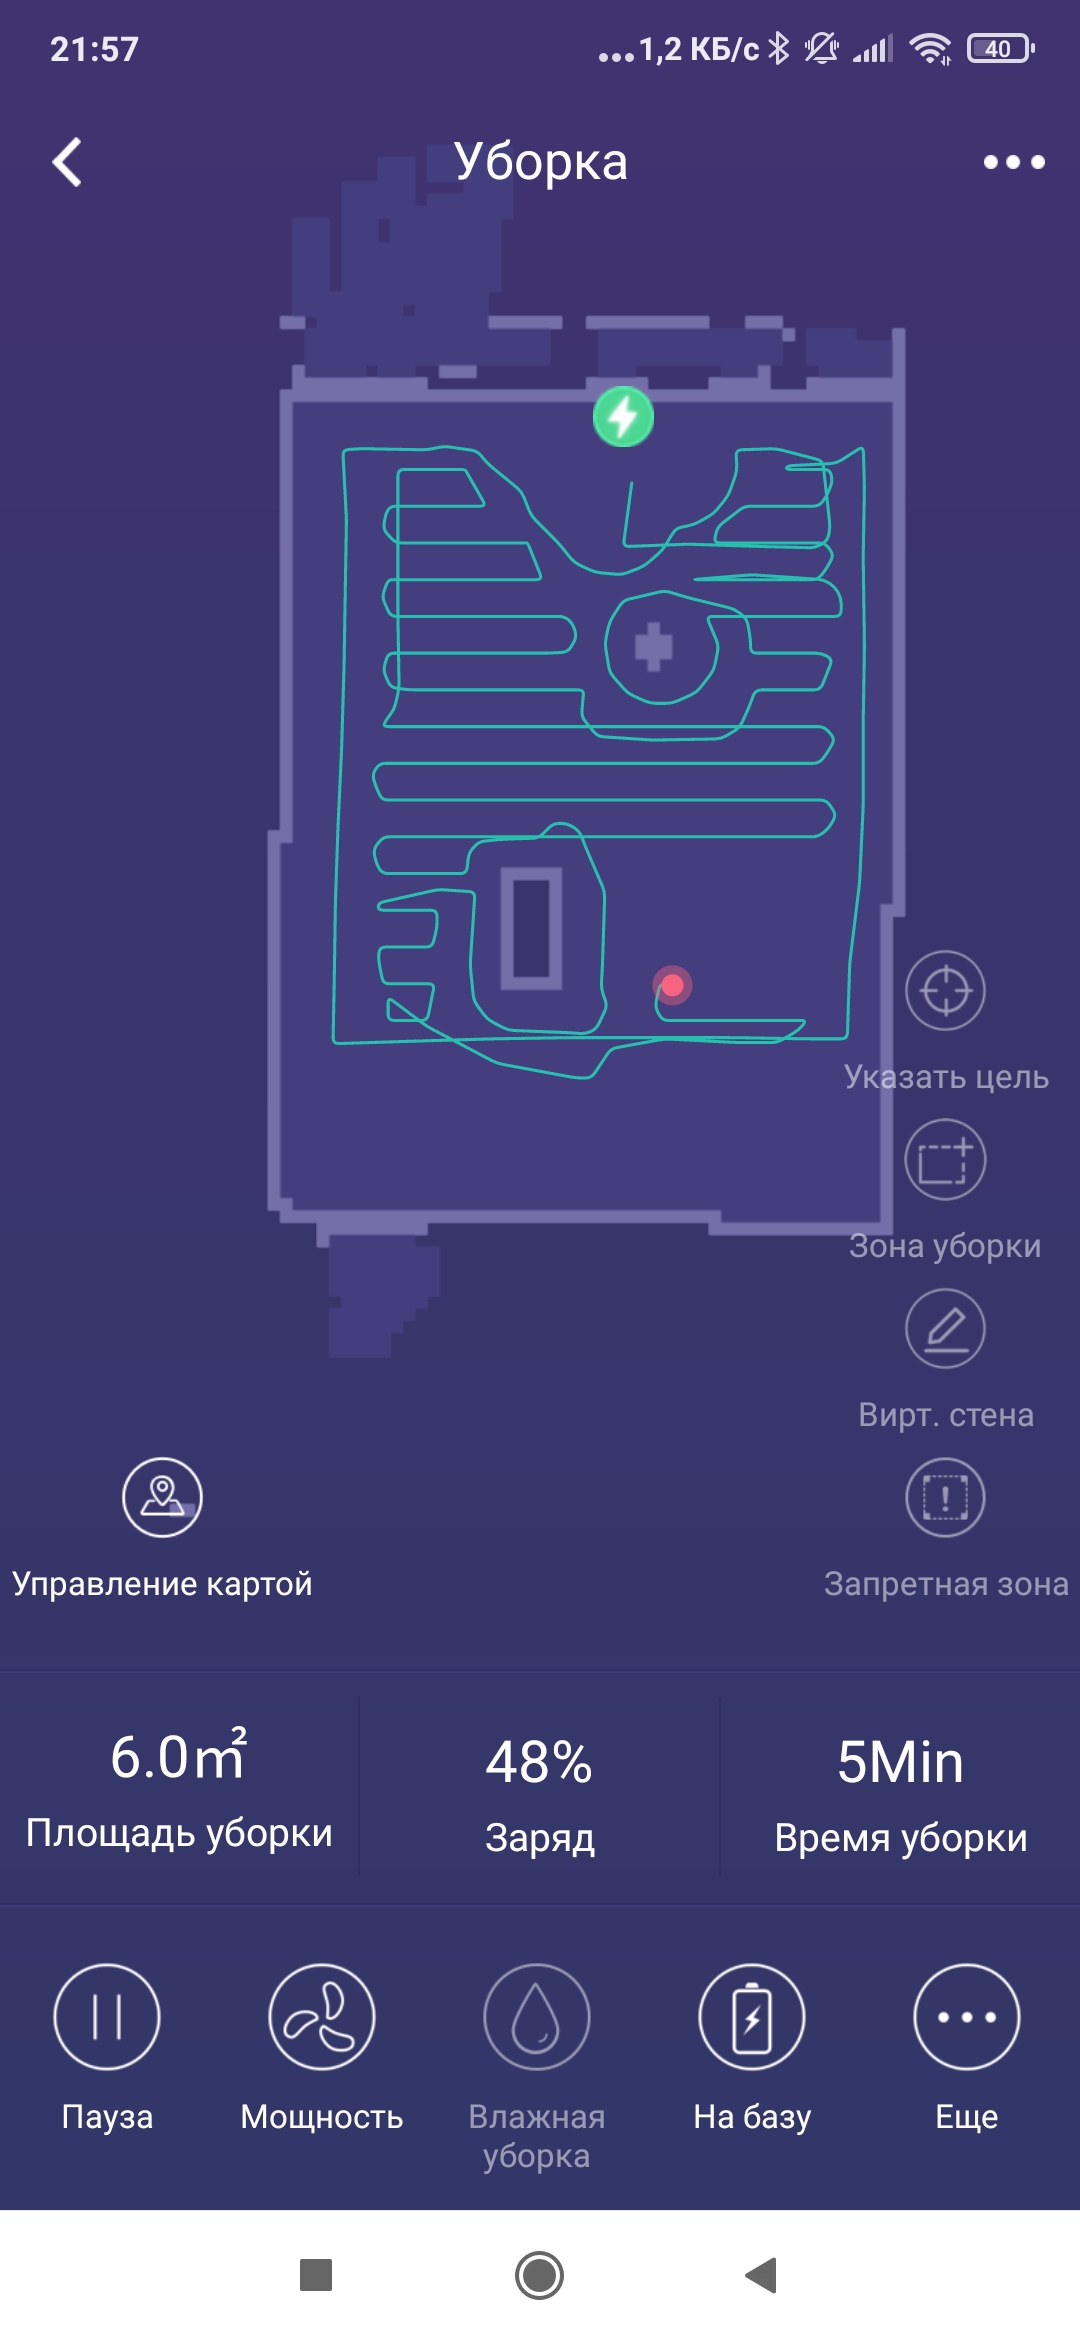
At the beginning of cleaning, the device looks around, determines its position relative to the base and proceeds to building a map – it allocates a zone for cleaning of a suitable size and passes it with a snake.
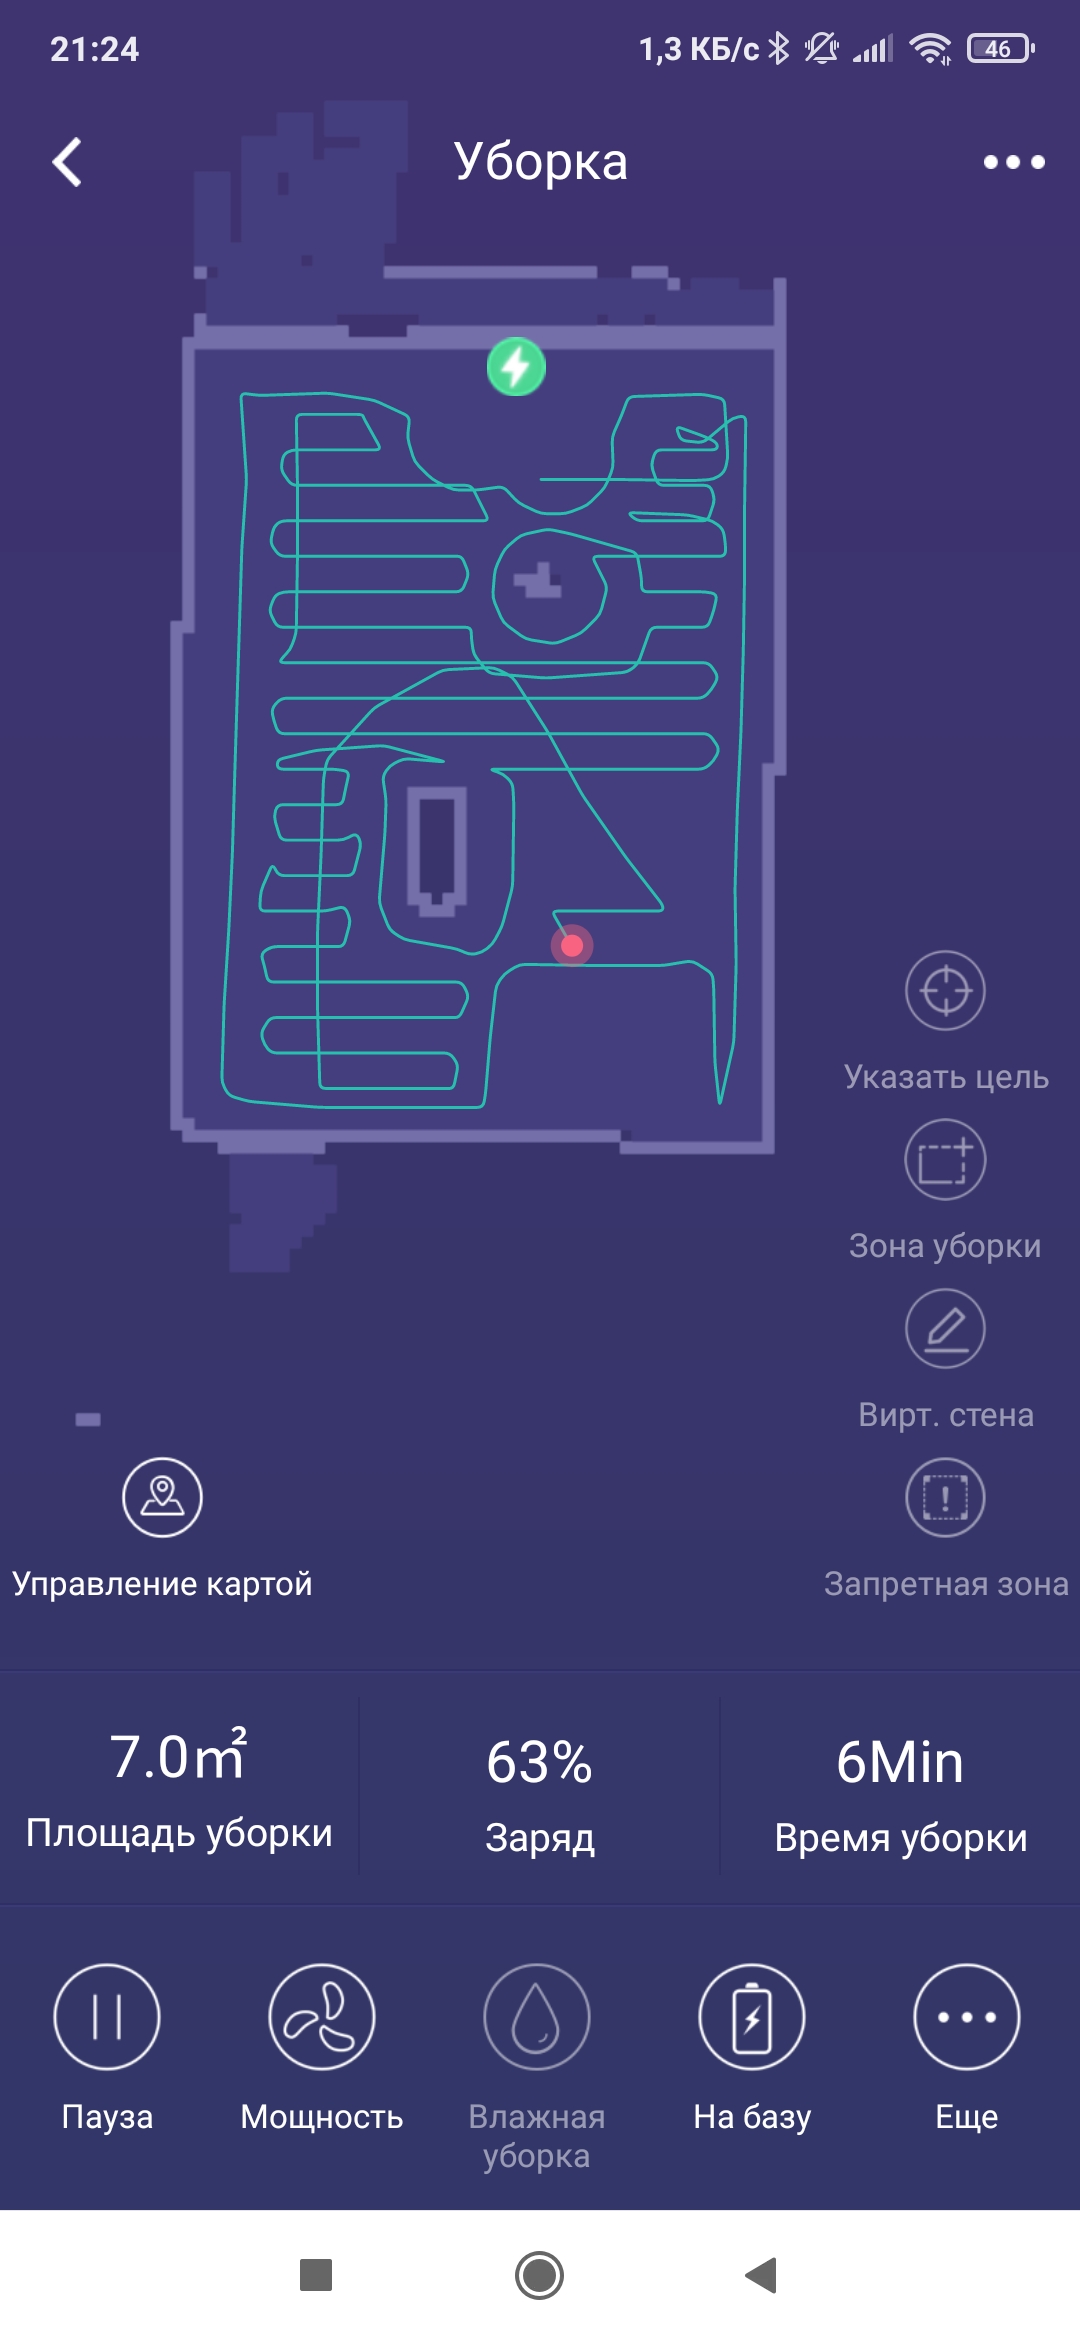
Then – it goes into the uncleaned area and snakes through the next section.
Here’s how the robot cleaned our test room with as few obstacles as possible.
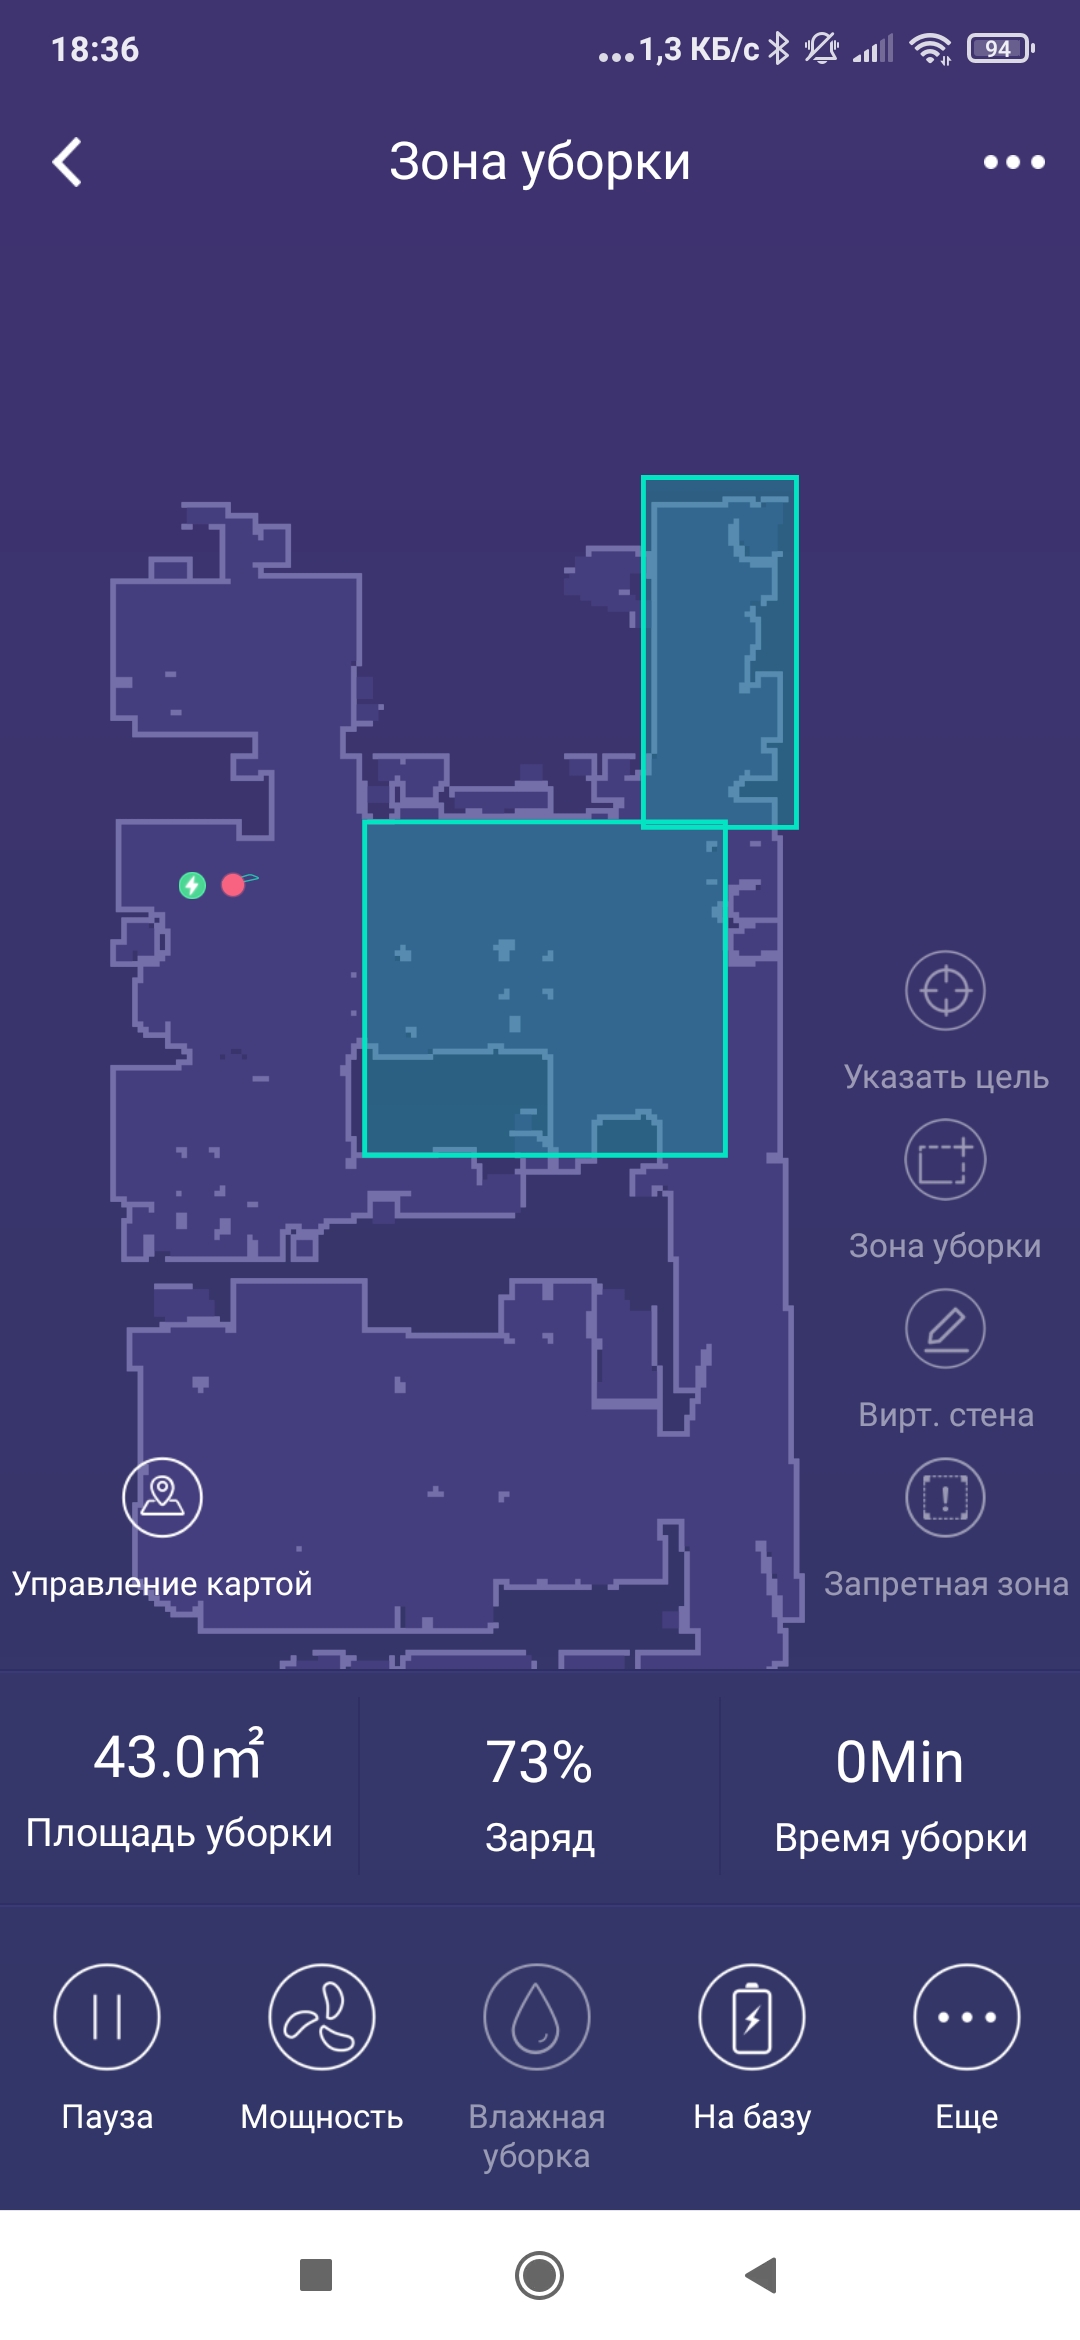
While the robot is charging, the user can draw directly on top of the map – place virtual walls, or independently designate areas that require cleaning.
What can we say from the results of studying the application? In general, we liked it: all the functions turned out to be working, and the user gets a fairly extensive set of tools with which you can configure all kinds of cleaning options.
The number of complaints turned out to be minimal and mainly concerned typos and problems with localization. Sometimes it is simply impossible to guess what the application wants from us. “The machine works and cannot work” – how is this to be understood?

Exploitation
Before using for the first time, you need to remove the shipping pads and protective films, install the side brushes and make sure that the dust container with filter is installed in the robot. The container must be pre-assembled by installing a hinged lid with a window for dust on it.
The charging station must be placed near the wall. There should be no obstacles nearby (1 meter on the sides and 2 meters in front of the station). When the base is connected to the power supply, the green indicator on the base will light up.
To start charging, just place the robot vacuum cleaner on the station, or send it there using the button on the top panel, on the remote control or through the application. While charging, the indicator on the robot cleaner will flash. When charging is completed, the indicator will be on constantly. It is recommended to charge the Robot Cleaner for at least 6 hours before first use.
Our robot was 55% charged when taken out of the box. Charging to 100% took 2 hours and 30 minutes. Thus, we can say that the robot will restore 100% of the charge in a little more than 5 hours – exactly as stated in the instructions.
During storage, you need to recharge the battery approximately once every 2 months. And if before harvesting for long-term storage, the manufacturer recommends charging the battery up to 50-60%.
As usual, before starting, it is strongly recommended to remove clothes, sheets of paper, cords from curtains and blinds, electrical wires, charger wires, fragile or unstable objects, and spilled liquids from the floor.
All actions (the beginning and end of cleaning, charging, etc.) are accompanied by voice messages (for Russian-speaking users, a male voice). Messages can be turned off in the app.
When washing the floors, the robot leaves behind a uniformly wet – without streaks, drops and smudges – a trail that dries fairly quickly. Do not leave the vacuum cleaner charging with the wet cleaning module in order to avoid waterlogging and damage to the floor covering.
We estimate the navigation system as very high quality. During testing, the robot never got lost and did not make a mistake in determining its own location. Some difficulties are possible only if there are reflective surfaces in the room, but this applies to all vacuum cleaners equipped with a laser sensor (we did not encounter such problems during testing).
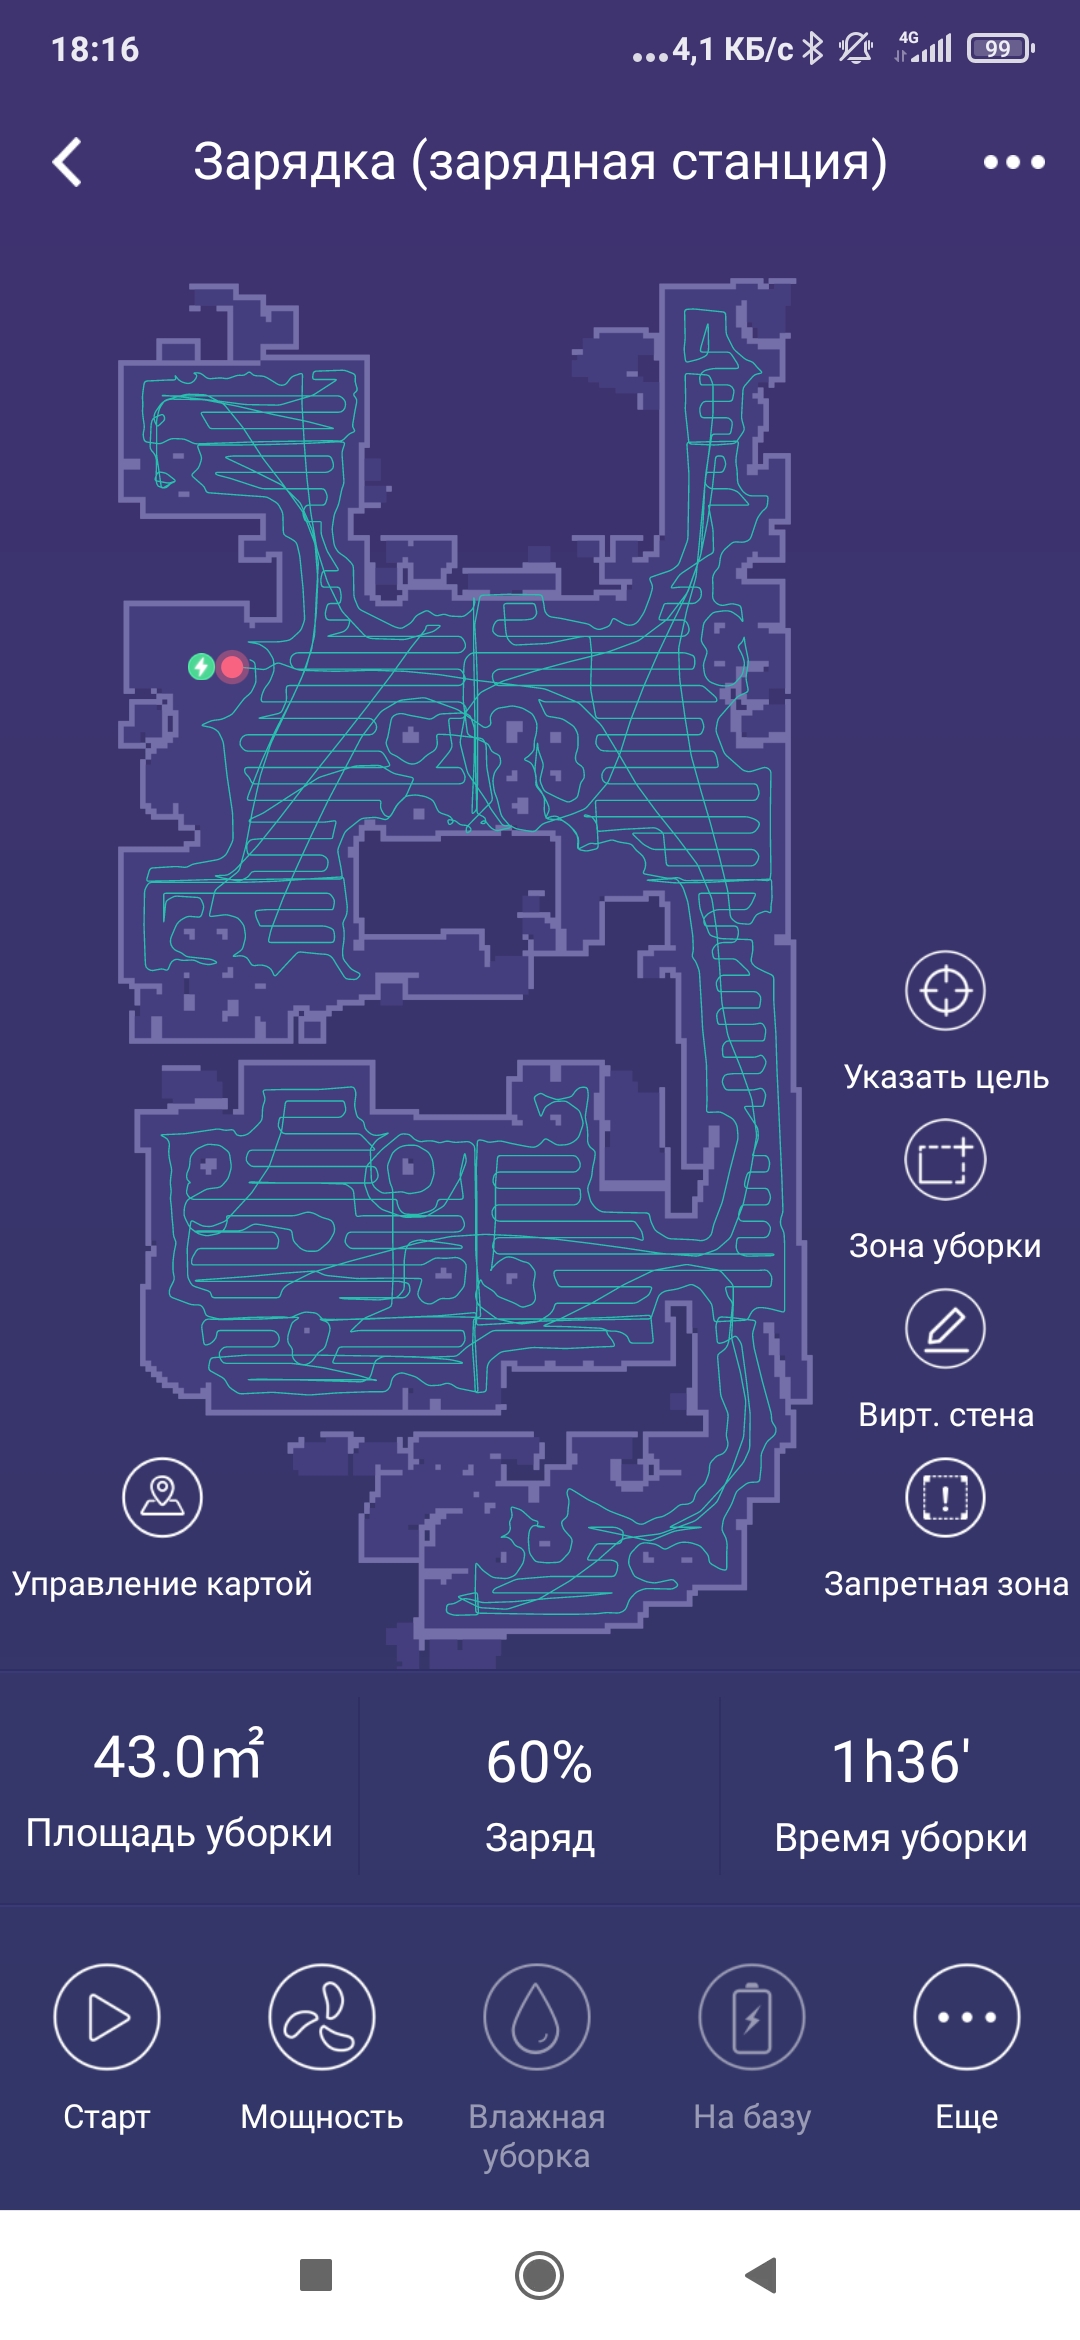
This is how the robot coped with building a map in a three-room apartment: as we can see, it confidently went around all the rooms without missing a single corner that it could reach.
Note that the real height of the robot is slightly higher than the declared 76 mm: the manufacturer forgot to calculate the height of the lidar tower. So if height is important to you, feel free to add about 2 cm to be sure that the robot will crawl under low furniture.
Care
The plastic parts of the appliance can be cleaned with a damp cloth or cloth.
The dust container of the device is recommended to be cleaned after each cleaning or when it is 50% full. In case of light pollution, it is enough to shake out the garbage. If it is strong, it is allowed to wash the filters under running water, while the fine filter must be washed carefully, without the application of mechanical forces.
The washing module can be washed with water and detergent. After such cleaning, it must be thoroughly dried. The cloth may be washed in soapy water followed by a thorough rinse.
It is recommended to wipe the surface sensors with a dry cloth. Central wheel – remove with a screwdriver and clean if necessary.
Threads, wool and hair wound around the turbo brush can be cut with a special cutter that comes with the device.
Wheel axles can be lubricated with cotton soaked in machine oil.
Our measurements
We present the results of testing the device according to our methodology, which is described in detail in a separate article .
The video below was filmed from one point with full coverage of the harvested area, while processing part of the video sequence was accelerated by sixteen times. During the entire cleaning, the vacuum cleaner was turned on in automatic mode.
Note that the robot does not build a map, but moves in random directions.
In the first 10 minutes, our robot went to the center of the room, looked around, and then went around the entire test area, confidently determining the cleaning route for itself. Not a single zone was passed twice, not a single corner was missed. The exception is, perhaps, the area near the base.
The robot was able to clean the test site faster than in the allotted 10 minutes. The actual cleaning time (excluding the time to return to the base) was 7 minutes and 30 seconds. The volume of collected garbage amounted to 89.8%.
We also note that by the end of the first ten minutes, the garbage container was almost full: not only the container itself was filled with rice, but also the air duct leading to it.
Over the next ten minutes, the vacuum cleaner continued cleaning without much incident. The cleaning algorithm turned out to be about the same, and the cleaning time was 7 minutes and 8 seconds.
The amount of garbage removed increased by 5.2%.
The third cycle did not give us any surprises. In 7 minutes and 33 seconds, the robot improved the result by another 1%, after which, as usual, it went to recharge.
The fourth stage of testing – 30-minute cleaning in automatic mode was not carried out for obvious reasons: we can say that the main part of the test area was cleaned already in the first 8 minutes, after which the increase in the percentage of garbage collected fell sharply – the robot picked up individual grains of rice and improved the result around the base.
By the way, it was around the base that the bulk of the unharvested grains eventually turned out to be concentrated.
As a result, the robot removed 96% of the test area, which we consider a very good result for such a device. Especially considering how quickly the device coped with the cleaning.
| Interval | Total cleaning time, min. | % (total) |
|---|---|---|
| First 10 min. | ten | 89.8 |
| Second 10 min. | 20 | 95 |
| Third 10 min. | thirty | 96 |
The device, connected to the charger after the end of work in automatic mode, is charged for approximately 5.5 hours. At this time, the charger consumes approximately 1.4W, while in standby mode, its power consumption is less than 0.1W.
The weight of the vacuum cleaner without installed modules was, according to our measurements, 3700 g. The dust collector unit weighs 375 g.
The noise level in the standard mode in the immediate vicinity of the vacuum cleaner did not exceed 65 dBA.
findings
We liked the Kitfort KT-577 robot vacuum cleaner. Like other devices equipped with a lidar sensor, it is perfectly oriented in space, which affects both the speed of cleaning and its quality: the robot does not waste extra time, confidently passes the entire room and does not leave uncleaned areas.
With our test room, he coped in just 7.5 minutes, and in a three-room apartment he was able to clean up in about 1 hour and 40 minutes, for which he spent a little less than 50% of the charge.
The price of the device turned out to be generally in line with our expectations. Among the advantages, we also note the possibility of wet cleaning, and among the shortcomings, the insufficiently high-quality localization of the mobile application. Here the developers have something to work on.
But the quality of cleaning we were more than satisfied. There were no complaints or complaints.
Pros :
- adequate price
- possibility of wet cleaning
- map building
- mobile app
Cons :
- application localization contains errors


