Frankly, starting to prepare this review, we would not like to start talking again about the advantages and disadvantages of home bread machines. We are sure that the vast majority of culinary lovers have already encountered these devices in one way or another and generally understand what kind of animal it is and what to expect from it. The pros and cons of bread makers are well known: they are able to make bread of acceptable quality without much effort on the part of the cook. Bake something truly outstanding, of course, is unlikely to come out. However, a bread machine will provide a fresh loaf of bread for breakfast.

The hero of our review is a fairly standard Redmond RBM-1908 bread maker, which allows you to bake up to 750 g of bread, as well as prepare jams, yogurts and other non-bread dishes.
Characteristics
| Manufacturer | Redmond |
|---|---|
| Model | RBM-1908 |
| Type | bread maker |
| Country of Origin | China |
| Warranty | 1 year |
| Power | 450 W |
| Housing material | plastic |
| Case color | black, silver |
| Form coating | non-stick |
| Number of mixing paddles | one |
| Baking weight | 500/750 g |
| Baking form | loaf |
| Number of cooking programs | nineteen |
| Keep warm function | 60 minutes |
| Delay start timer | 15 h |
| Peculiarities | process control window, non-volatile settings memory for 10 minutes |
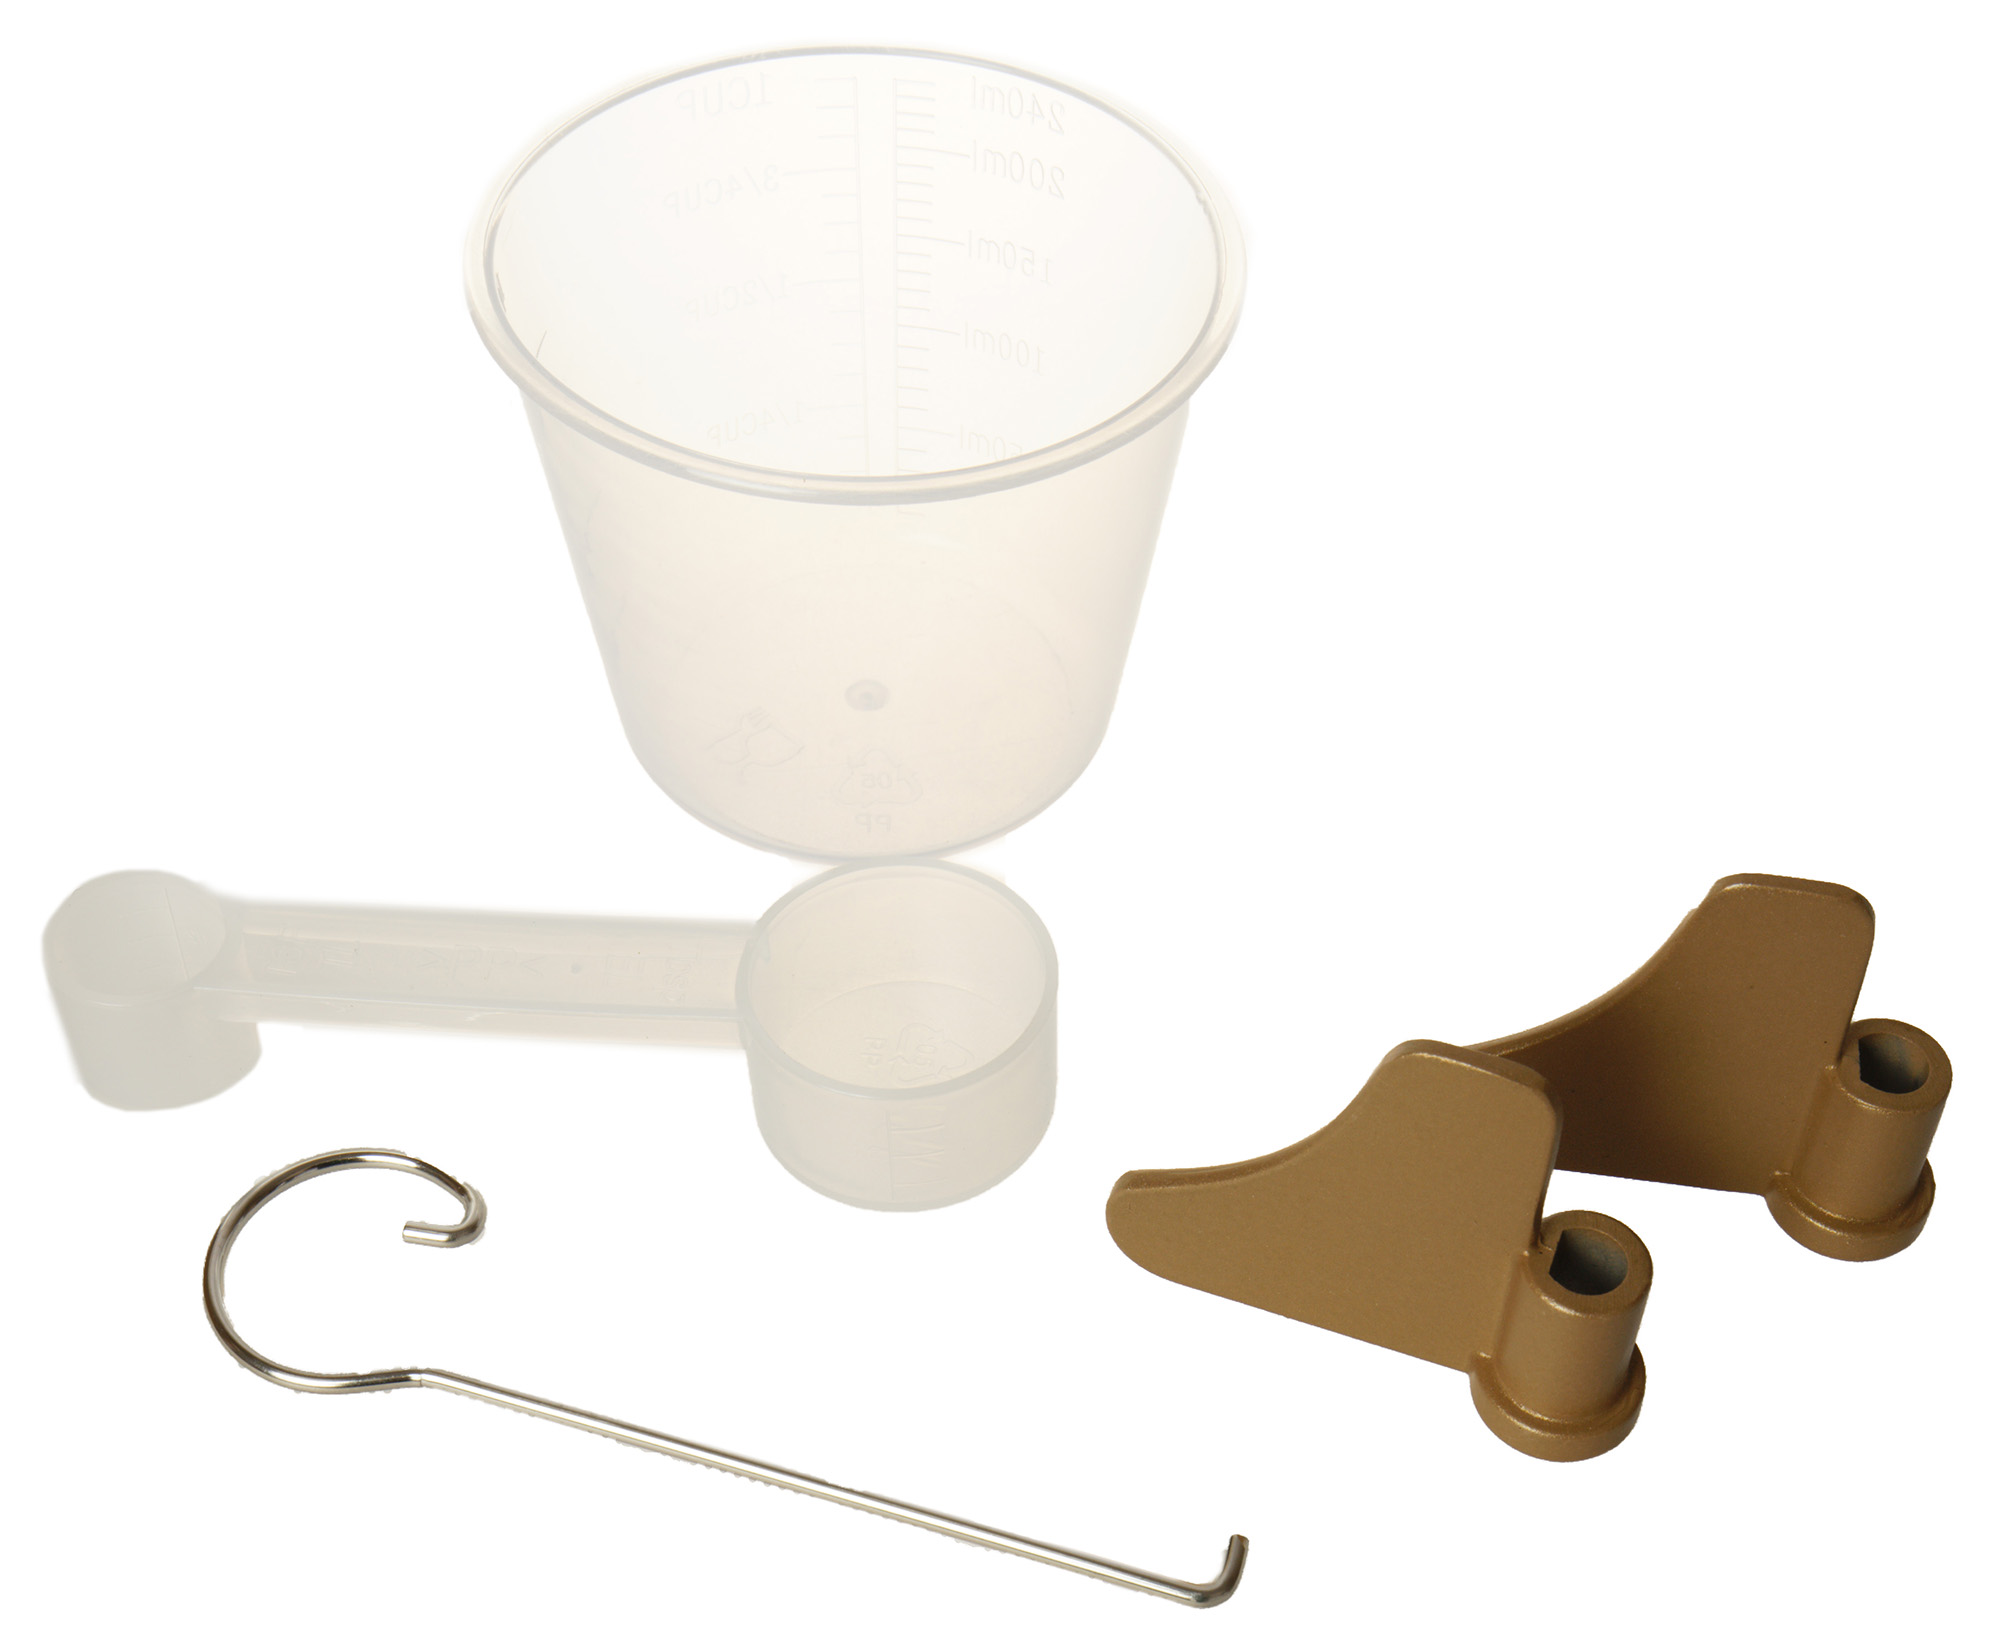
| Accessories | measuring spoon, measuring cup, bread hook, spare blade |
| The weight | 3.3 kg |
| Dimensions (W×H×D) | 268×228×280mm |
| Network cable length | 1.2 m |
| Retail offers |
* Contrary to common misconception, this is not the period after which the device will definitely break. However, after this period, the manufacturer ceases to bear any responsibility for its performance and has the right to refuse to repair it, even for a fee.
Equipment
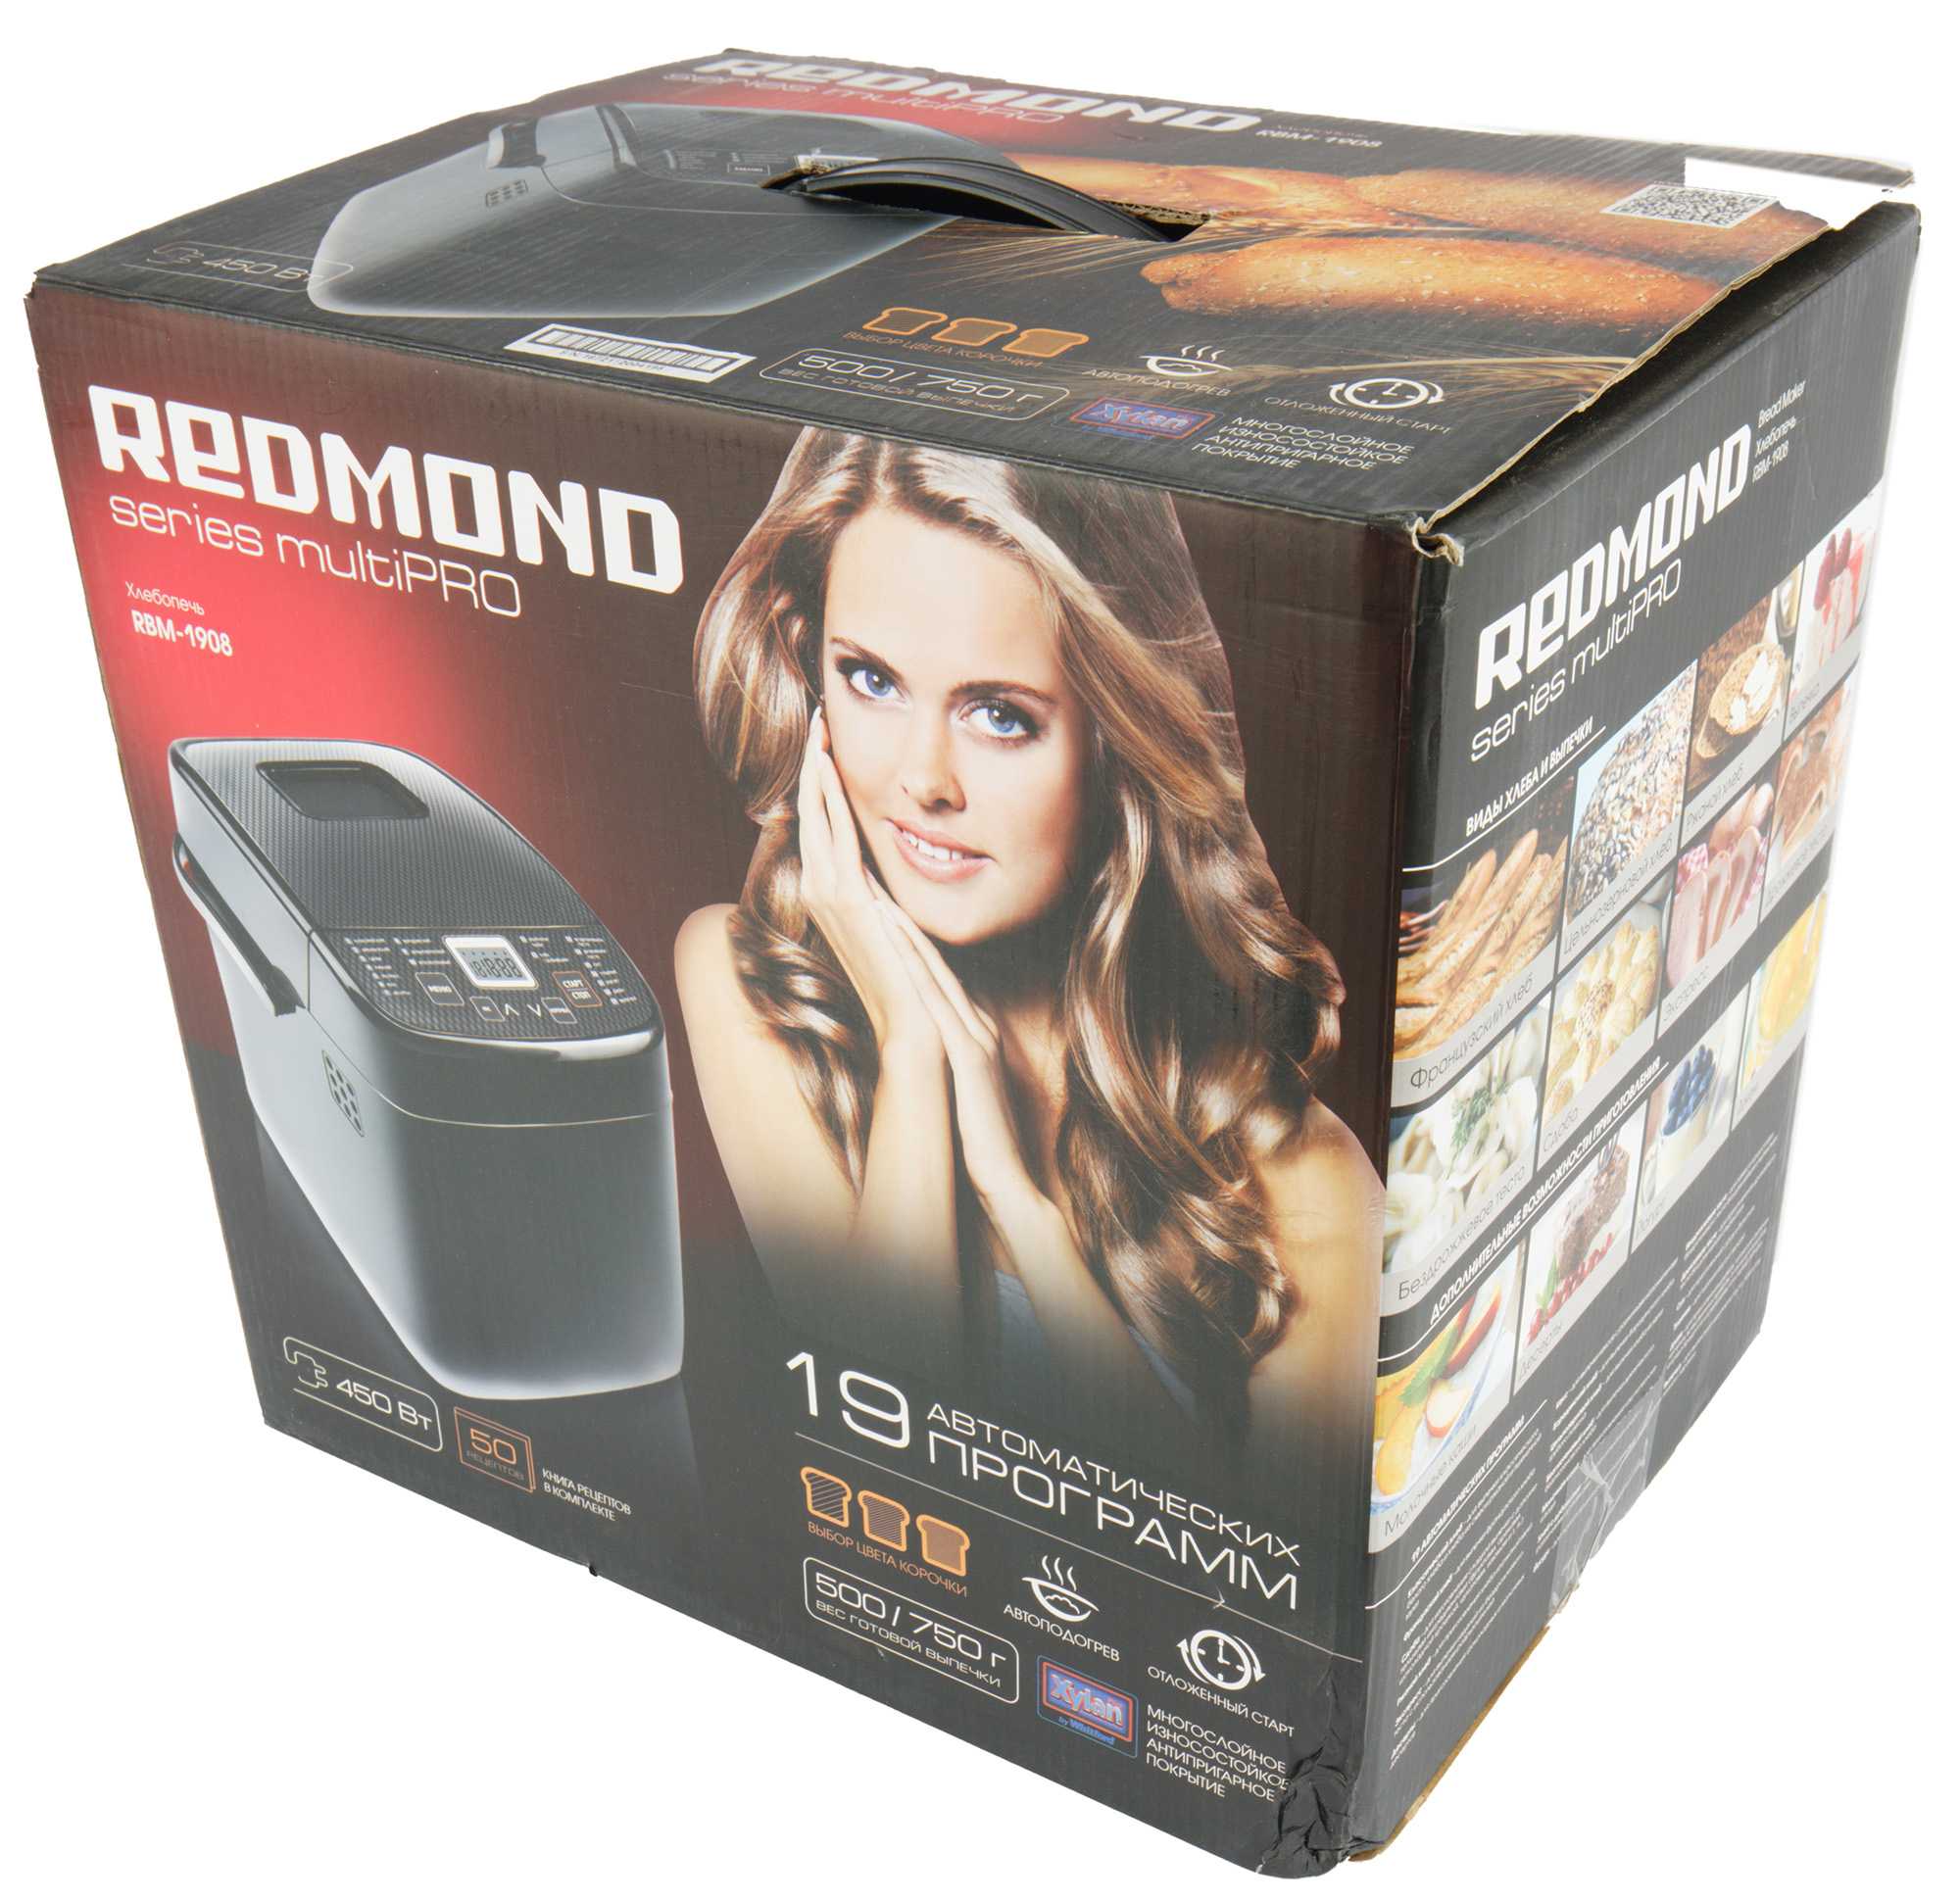
The bread maker arrived for testing in a cardboard box designed in the Redmond corporate style: black and red background, full-color colorful pictures and a large company logo on the side surfaces. In addition, on the box we see technical specifications and a description of the main functions of the device. On the side face are examples (photos) of ready-made dishes. A plastic handle is provided for carrying.
After examining the box, you can learn about almost all the functions of the device. First of all, this is, of course, a brief description of the programs. It also contains technical information: for example, the maximum power (450 W) and the main features of the device (the presence of a delayed start, non-stick coating on the bowl, the choice of the color of the bread crust) are indicated.
Opening the box, inside we found:
- bread maker
- baking dish
- two mixing paddles
- beaker
- measuring spoon
- bread blade hook
- instructions
All items were packed in a protective film, and the bread machine itself was reliably protected in the box with foam inserts.
Thanks to the presence of a measuring cup and a measuring spoon, you can start making bread right away, without having to worry about finding the right measuring utensils. True, for full-fledged work, we will also need kitchen scales: it is better to get them in advance.
At first sight
The design of the body of the device turned out to be quite standard: at first glance it is clear that we have a completely ordinary bread machine. We assess the build quality as decent: the device does not look cheap, but it also does not impress as a device from the highest price segment (which, however, it is not – the retail price of the bread machine turned out to be quite normal).
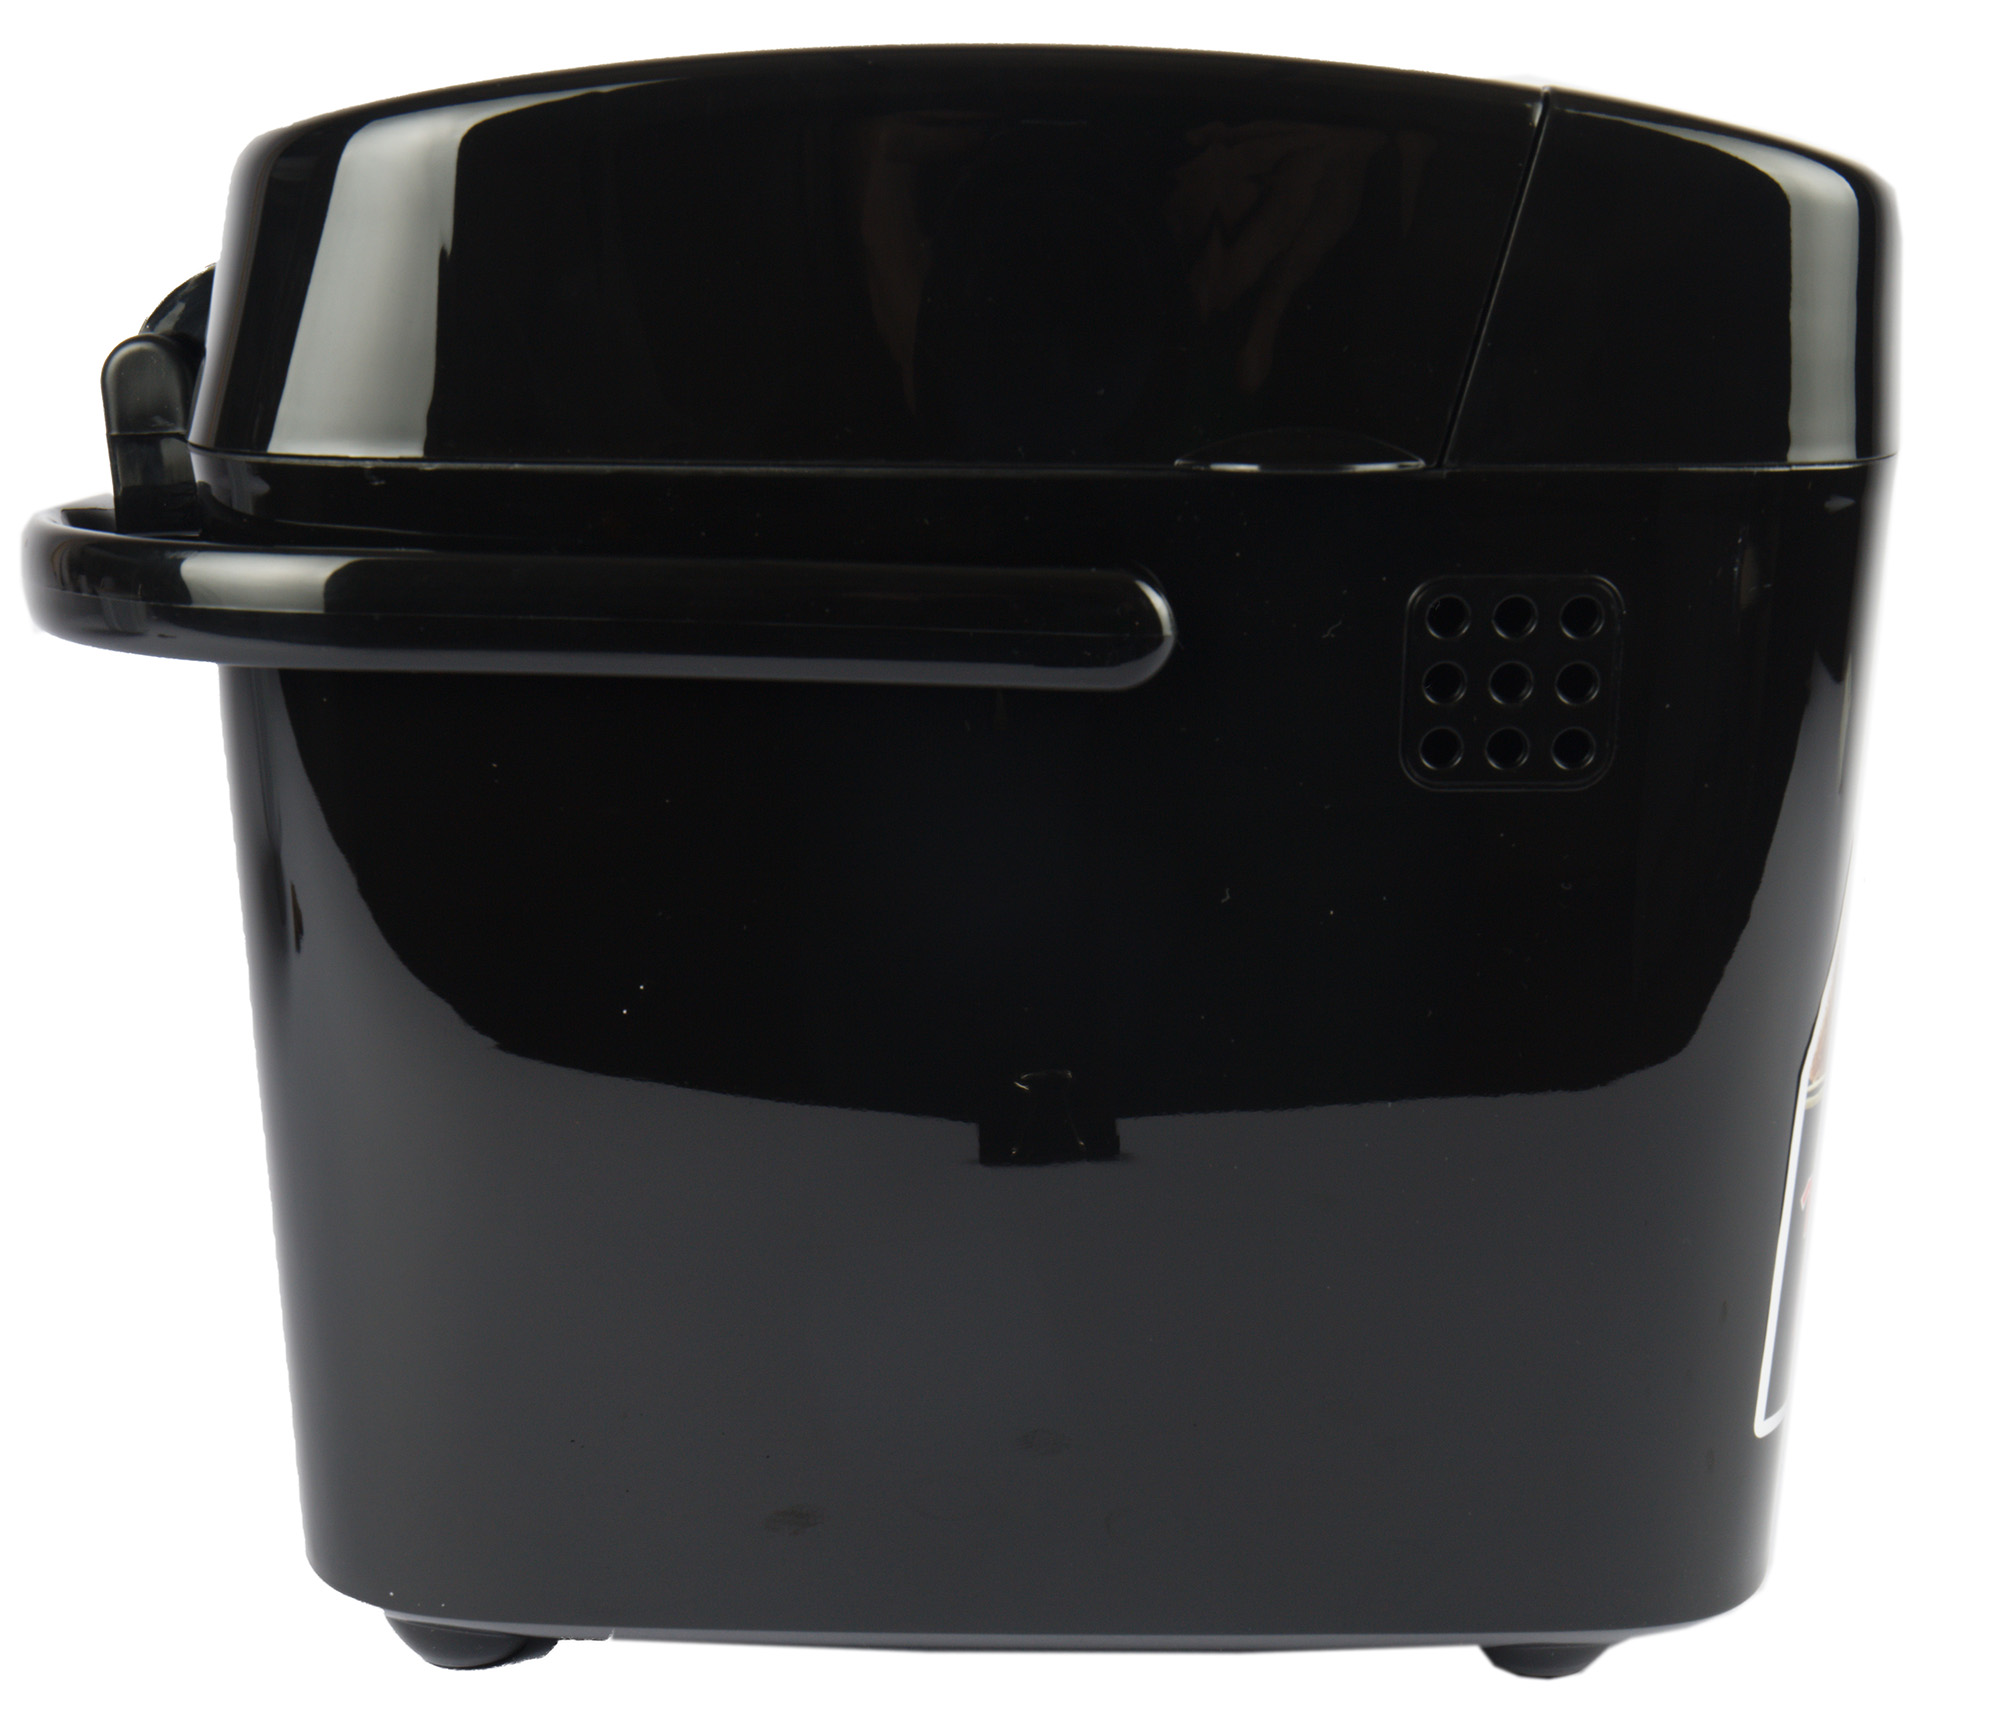
The case is made of black glossy heat-resistant plastic.
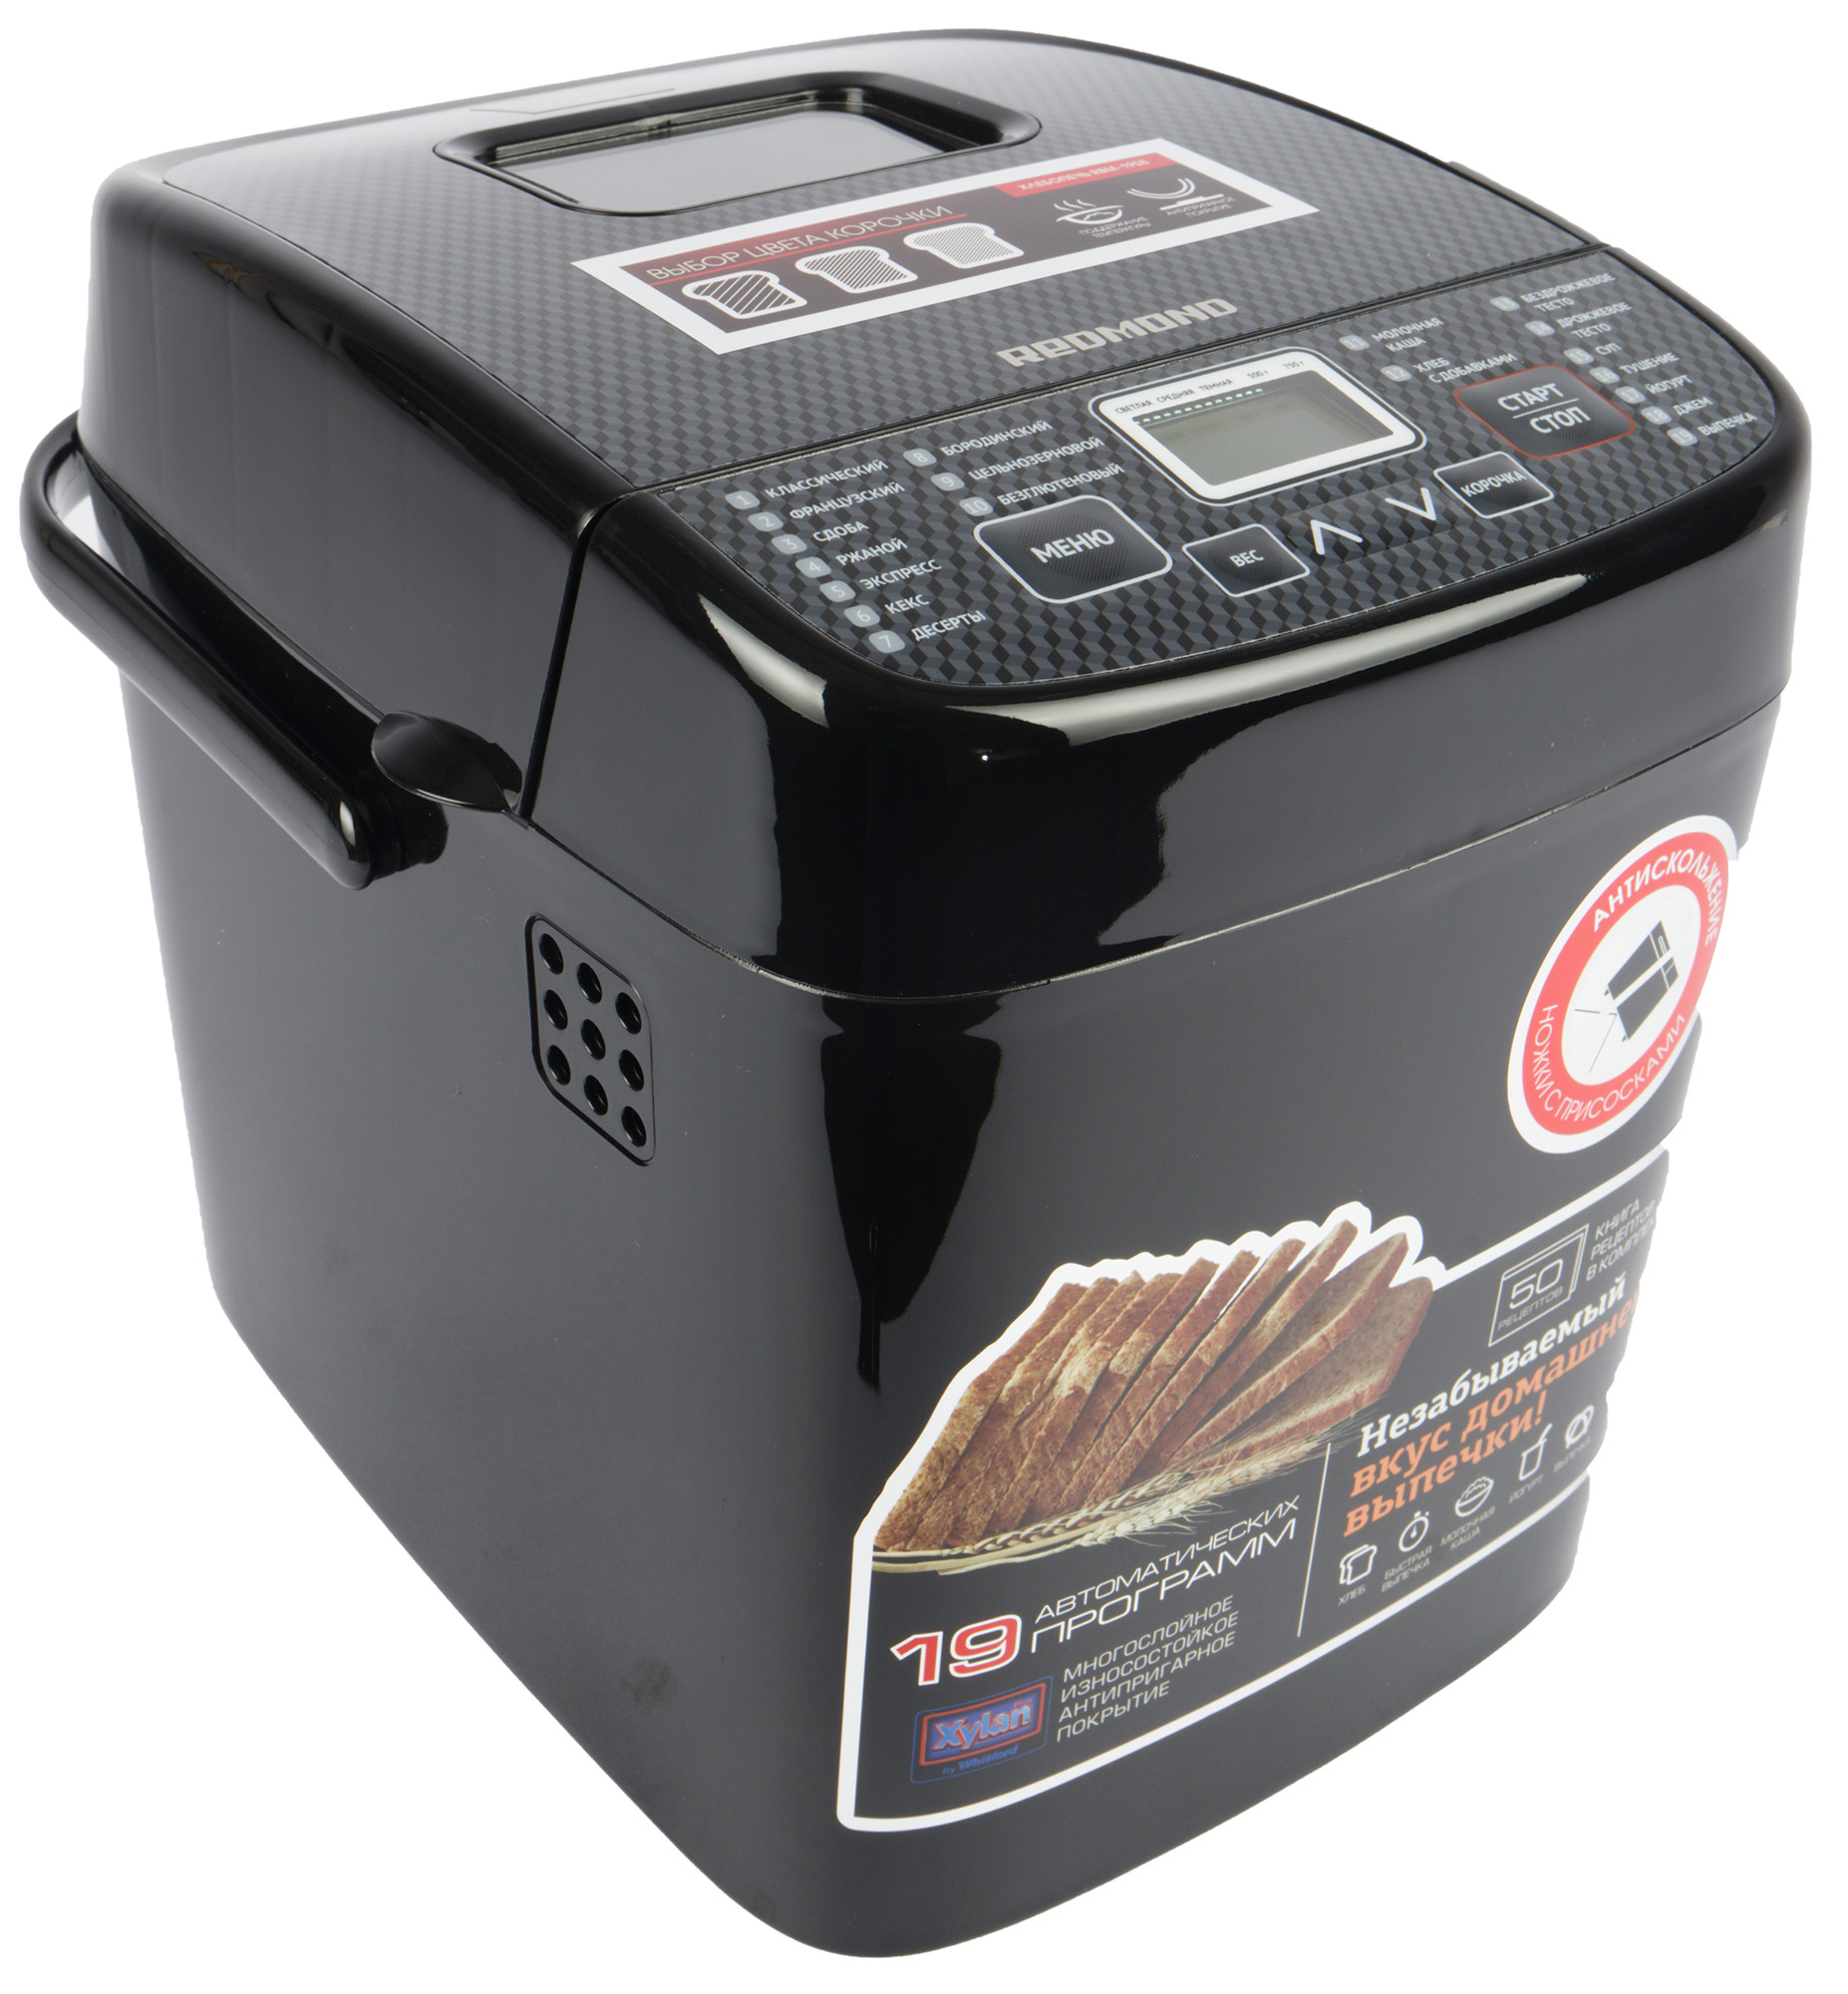
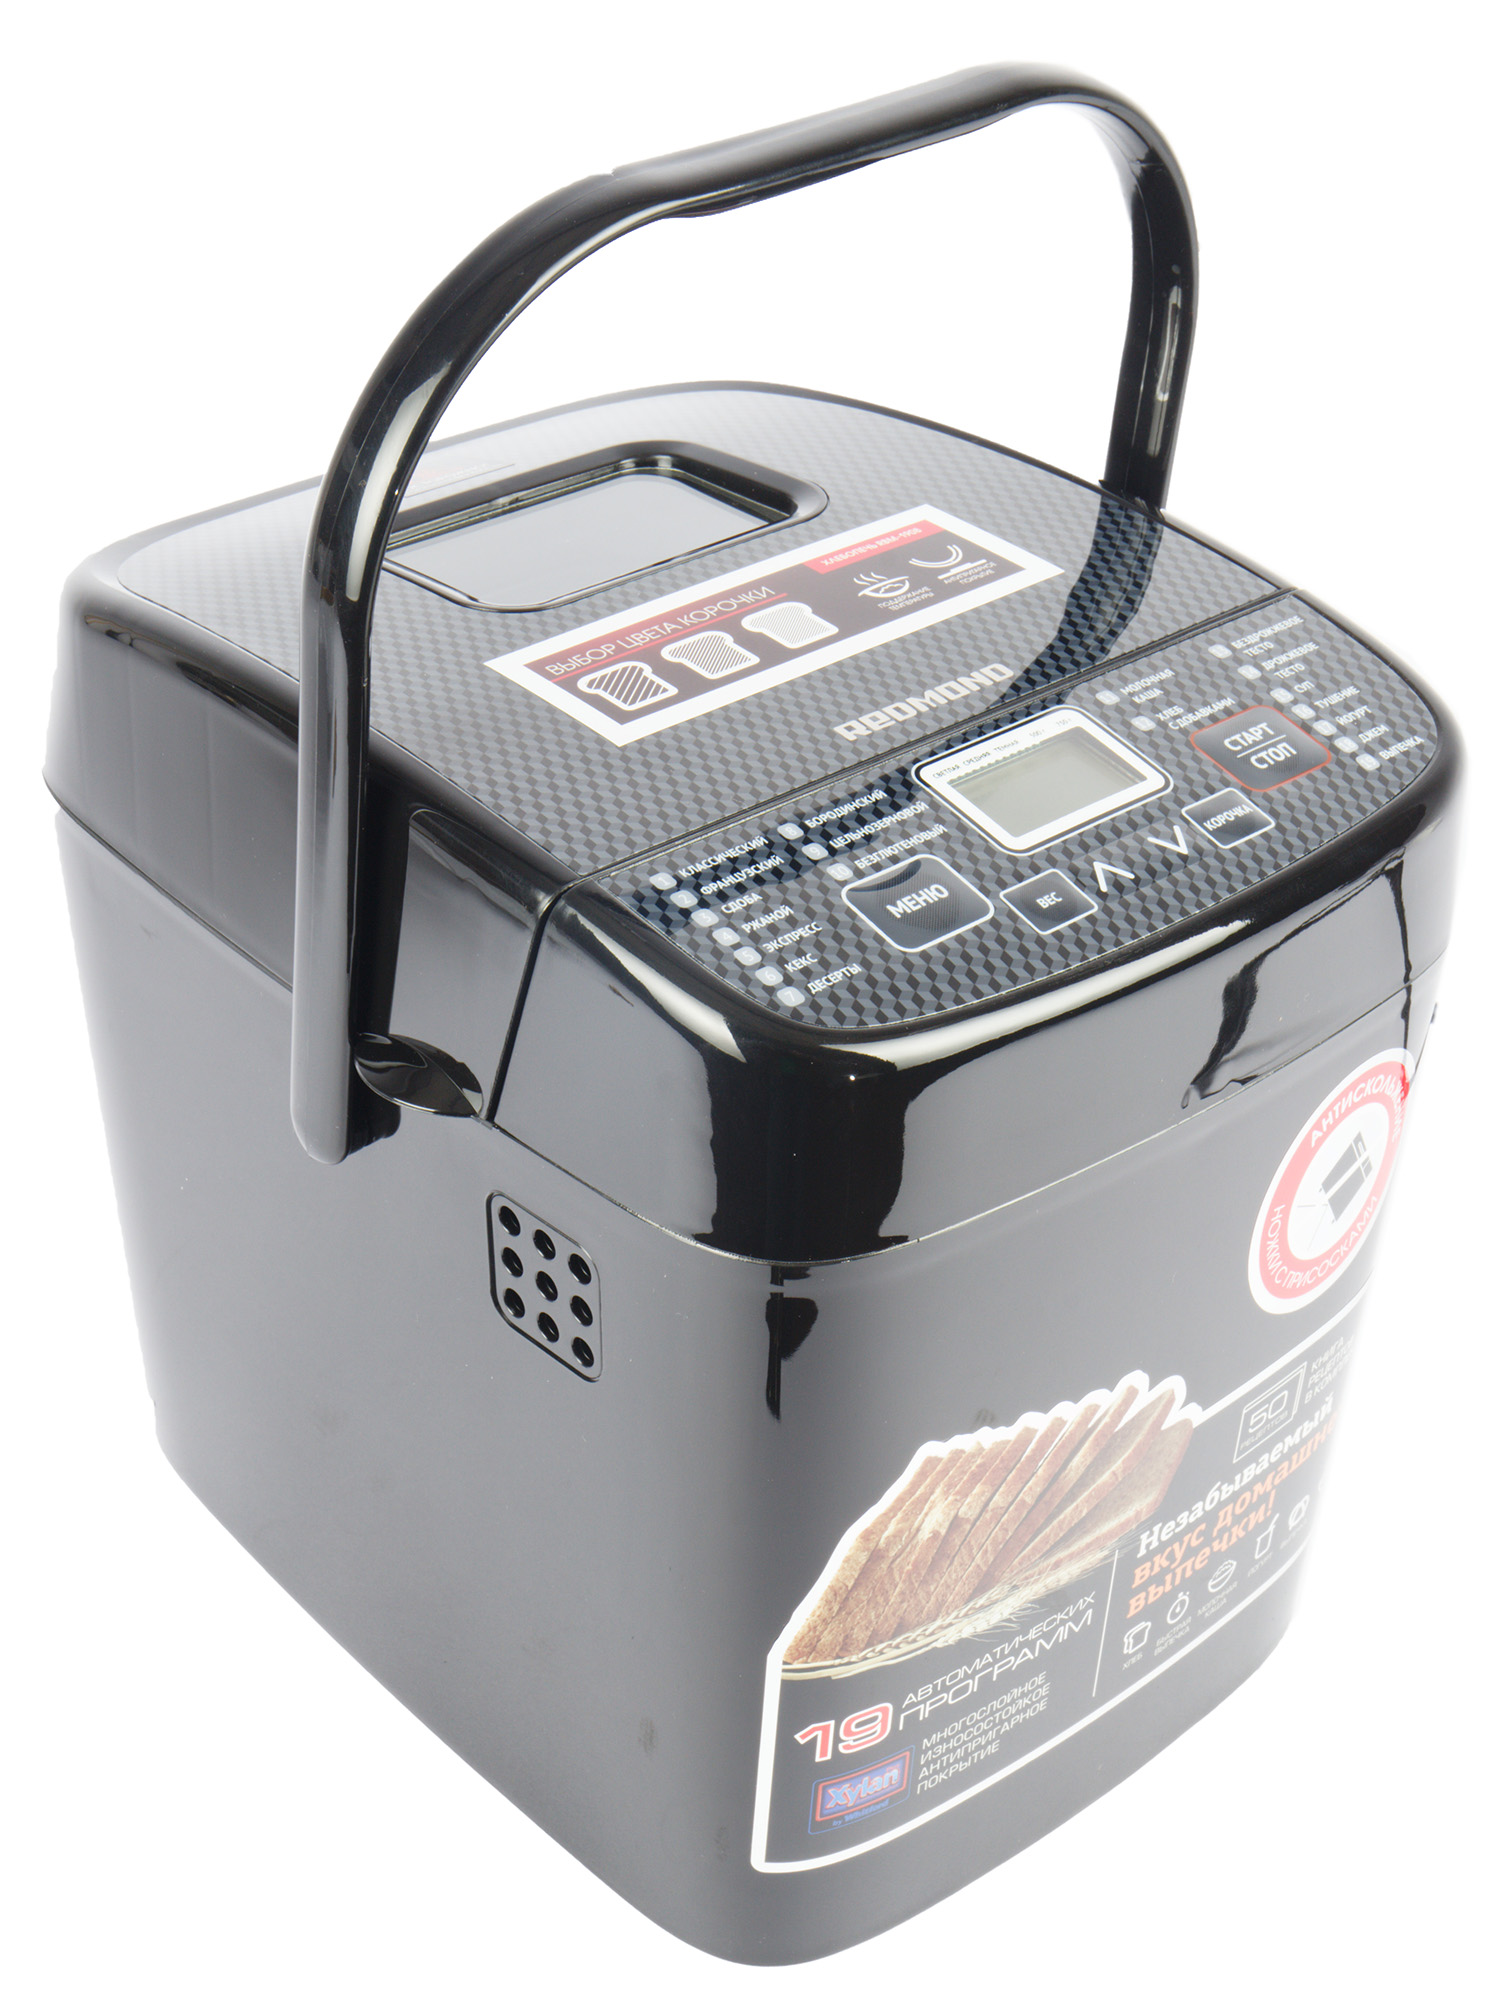
On the side of the appliance there is an air vent and a folding plastic handle, with which it is convenient to carry the bread machine.
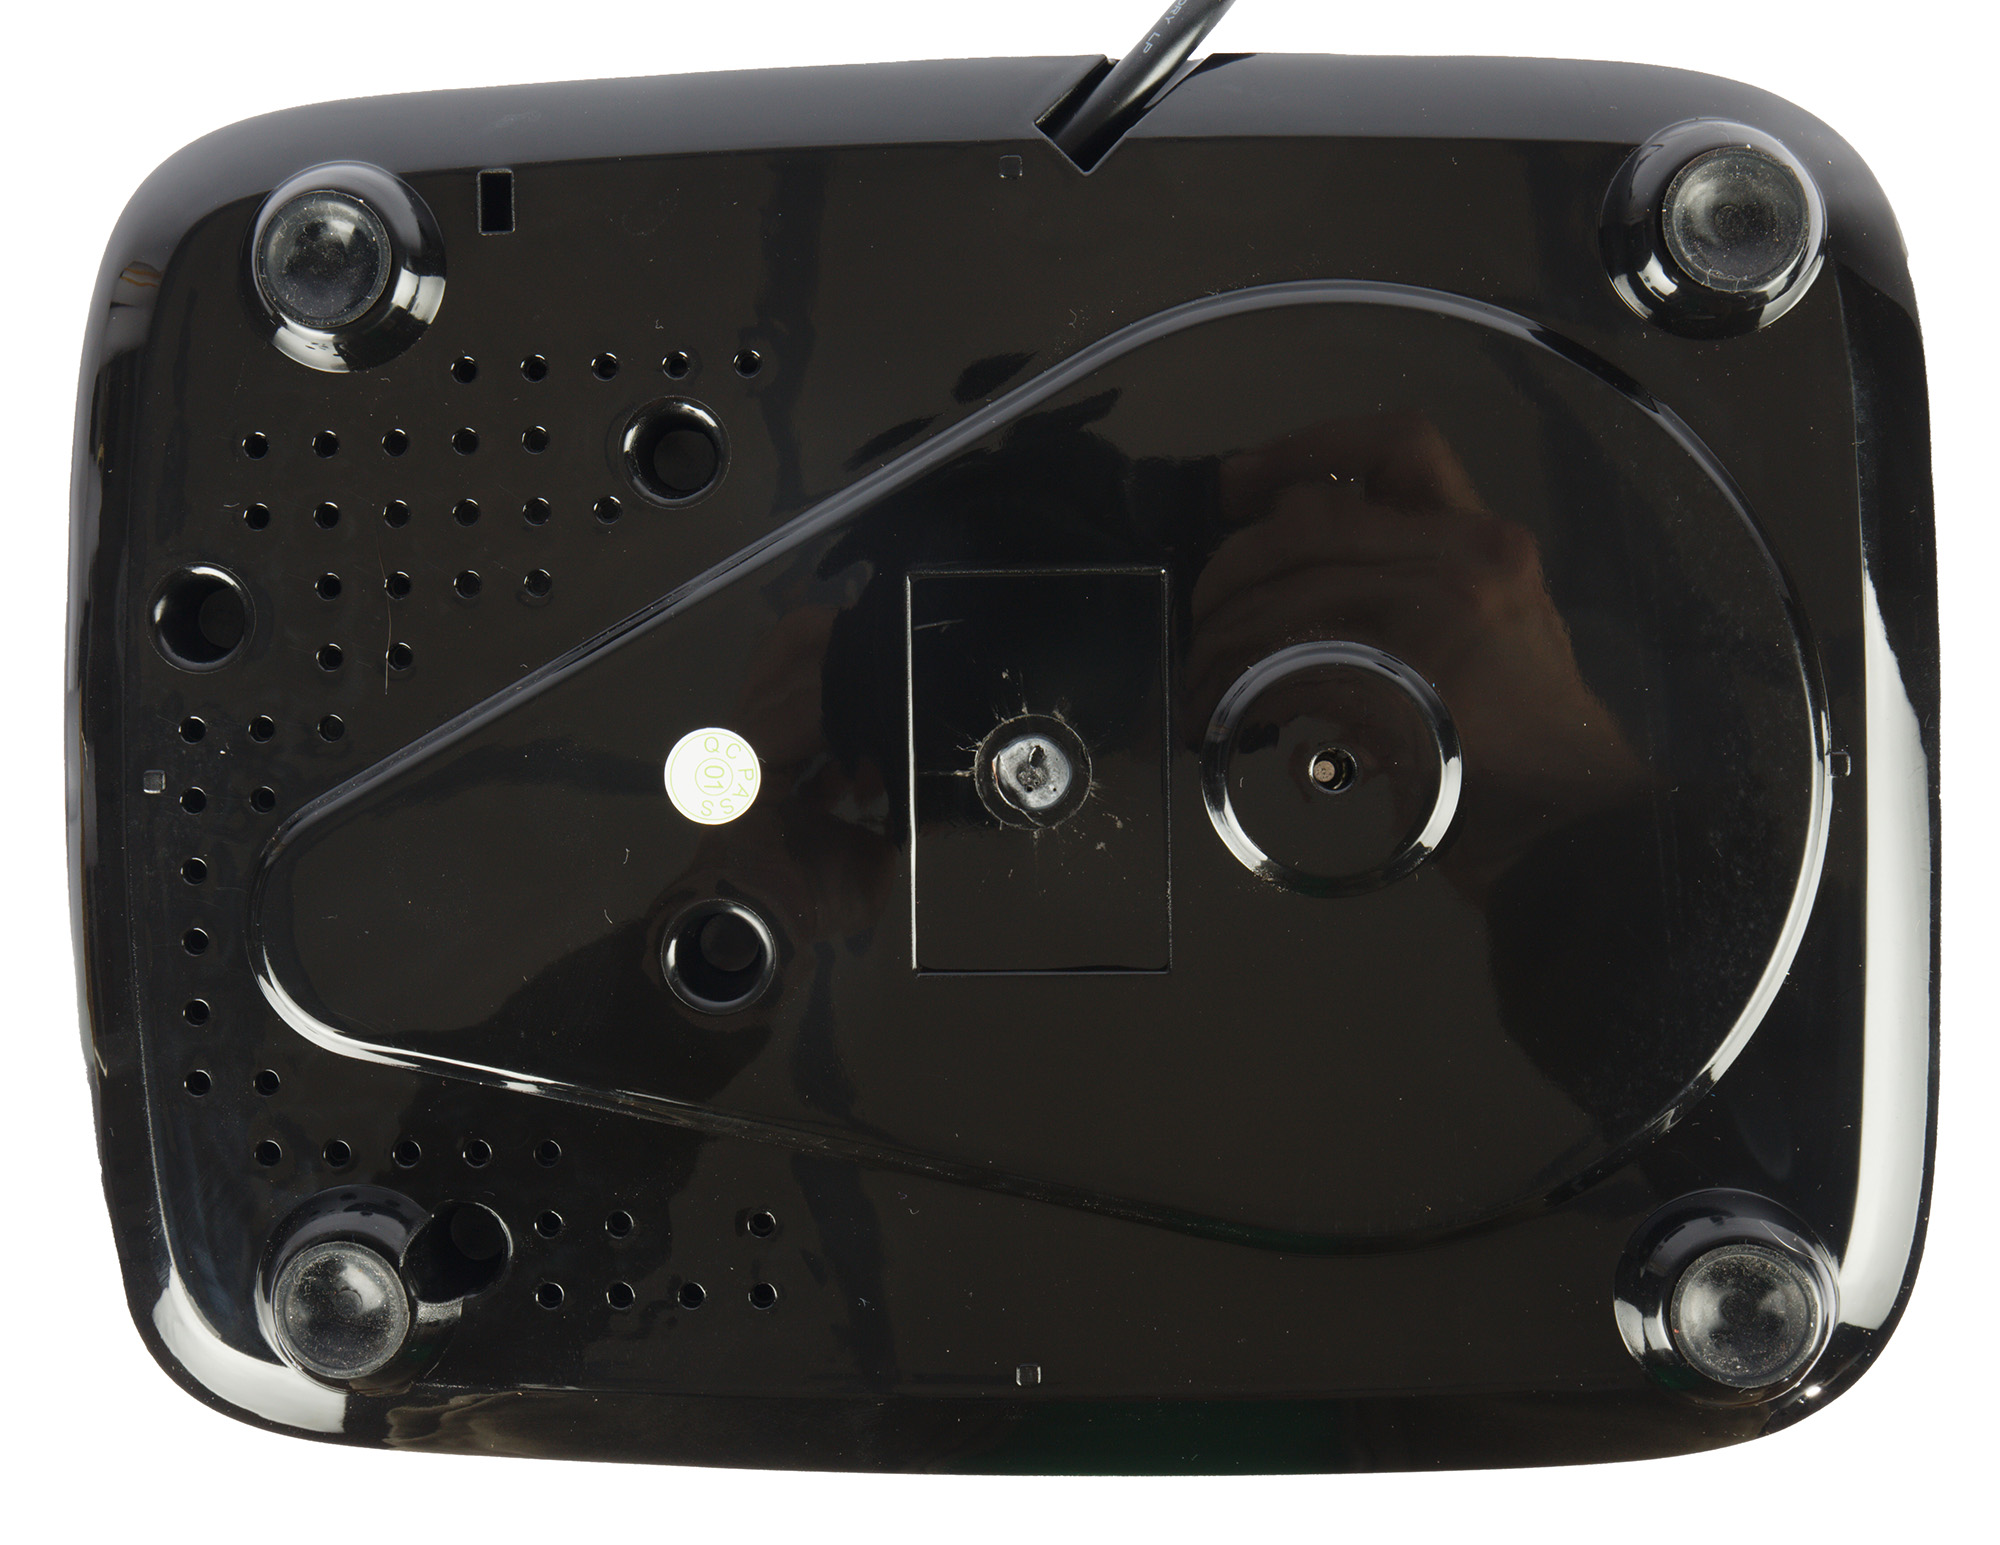
From below, attention is drawn to the legs-suction cups and ventilation holes. This is where the power cord is located. There is no compartment for winding excess cord.
There are also ventilation holes on the side of the device.
The top lid has no locks and is lifted by a simple tilt, no locking or automatically opening mechanisms are provided. The lid has a window to monitor the cooking process, because it is not always possible to open the lid during baking. The walls of the case are quite thick, providing good thermal insulation.
For the user, of course, the main interest is the cover, on which the control panel is located, consisting of six mechanical membrane buttons and an inexpensive black and white liquid crystal display. On the roof there are inscriptions deciphering the purpose of the buttons, and all 19 built-in programs are listed. Thus, the user is relieved of the need to keep the instructions at hand and check the program number with its name. Everything is simple and clear. The only thing missing is the illumination of the buttons and the display.
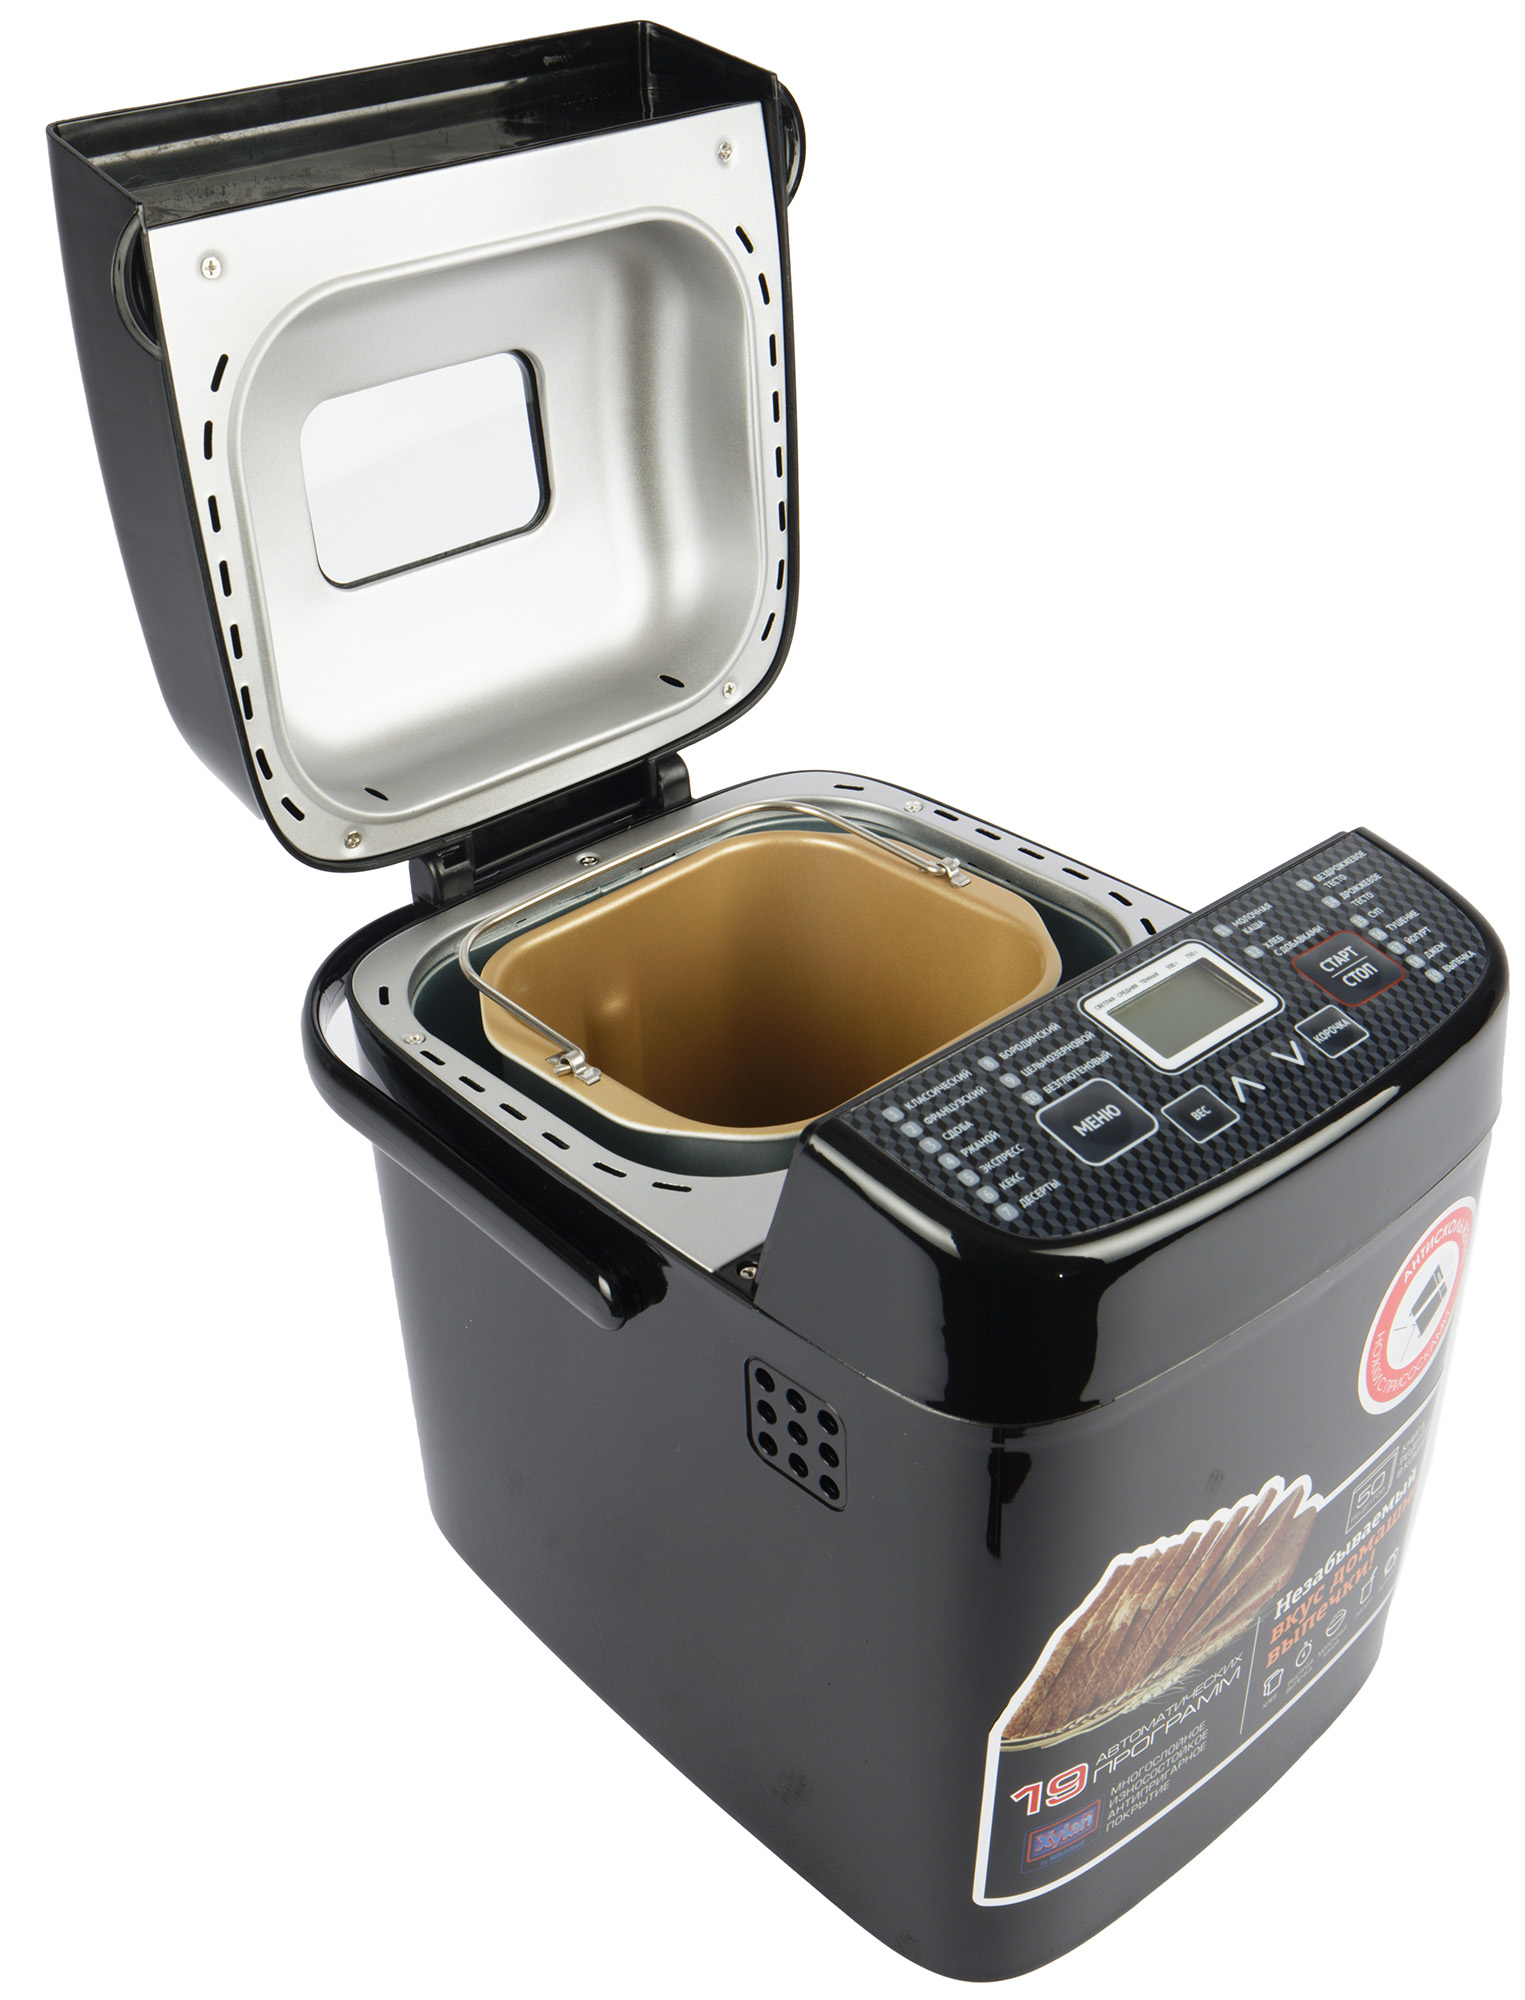
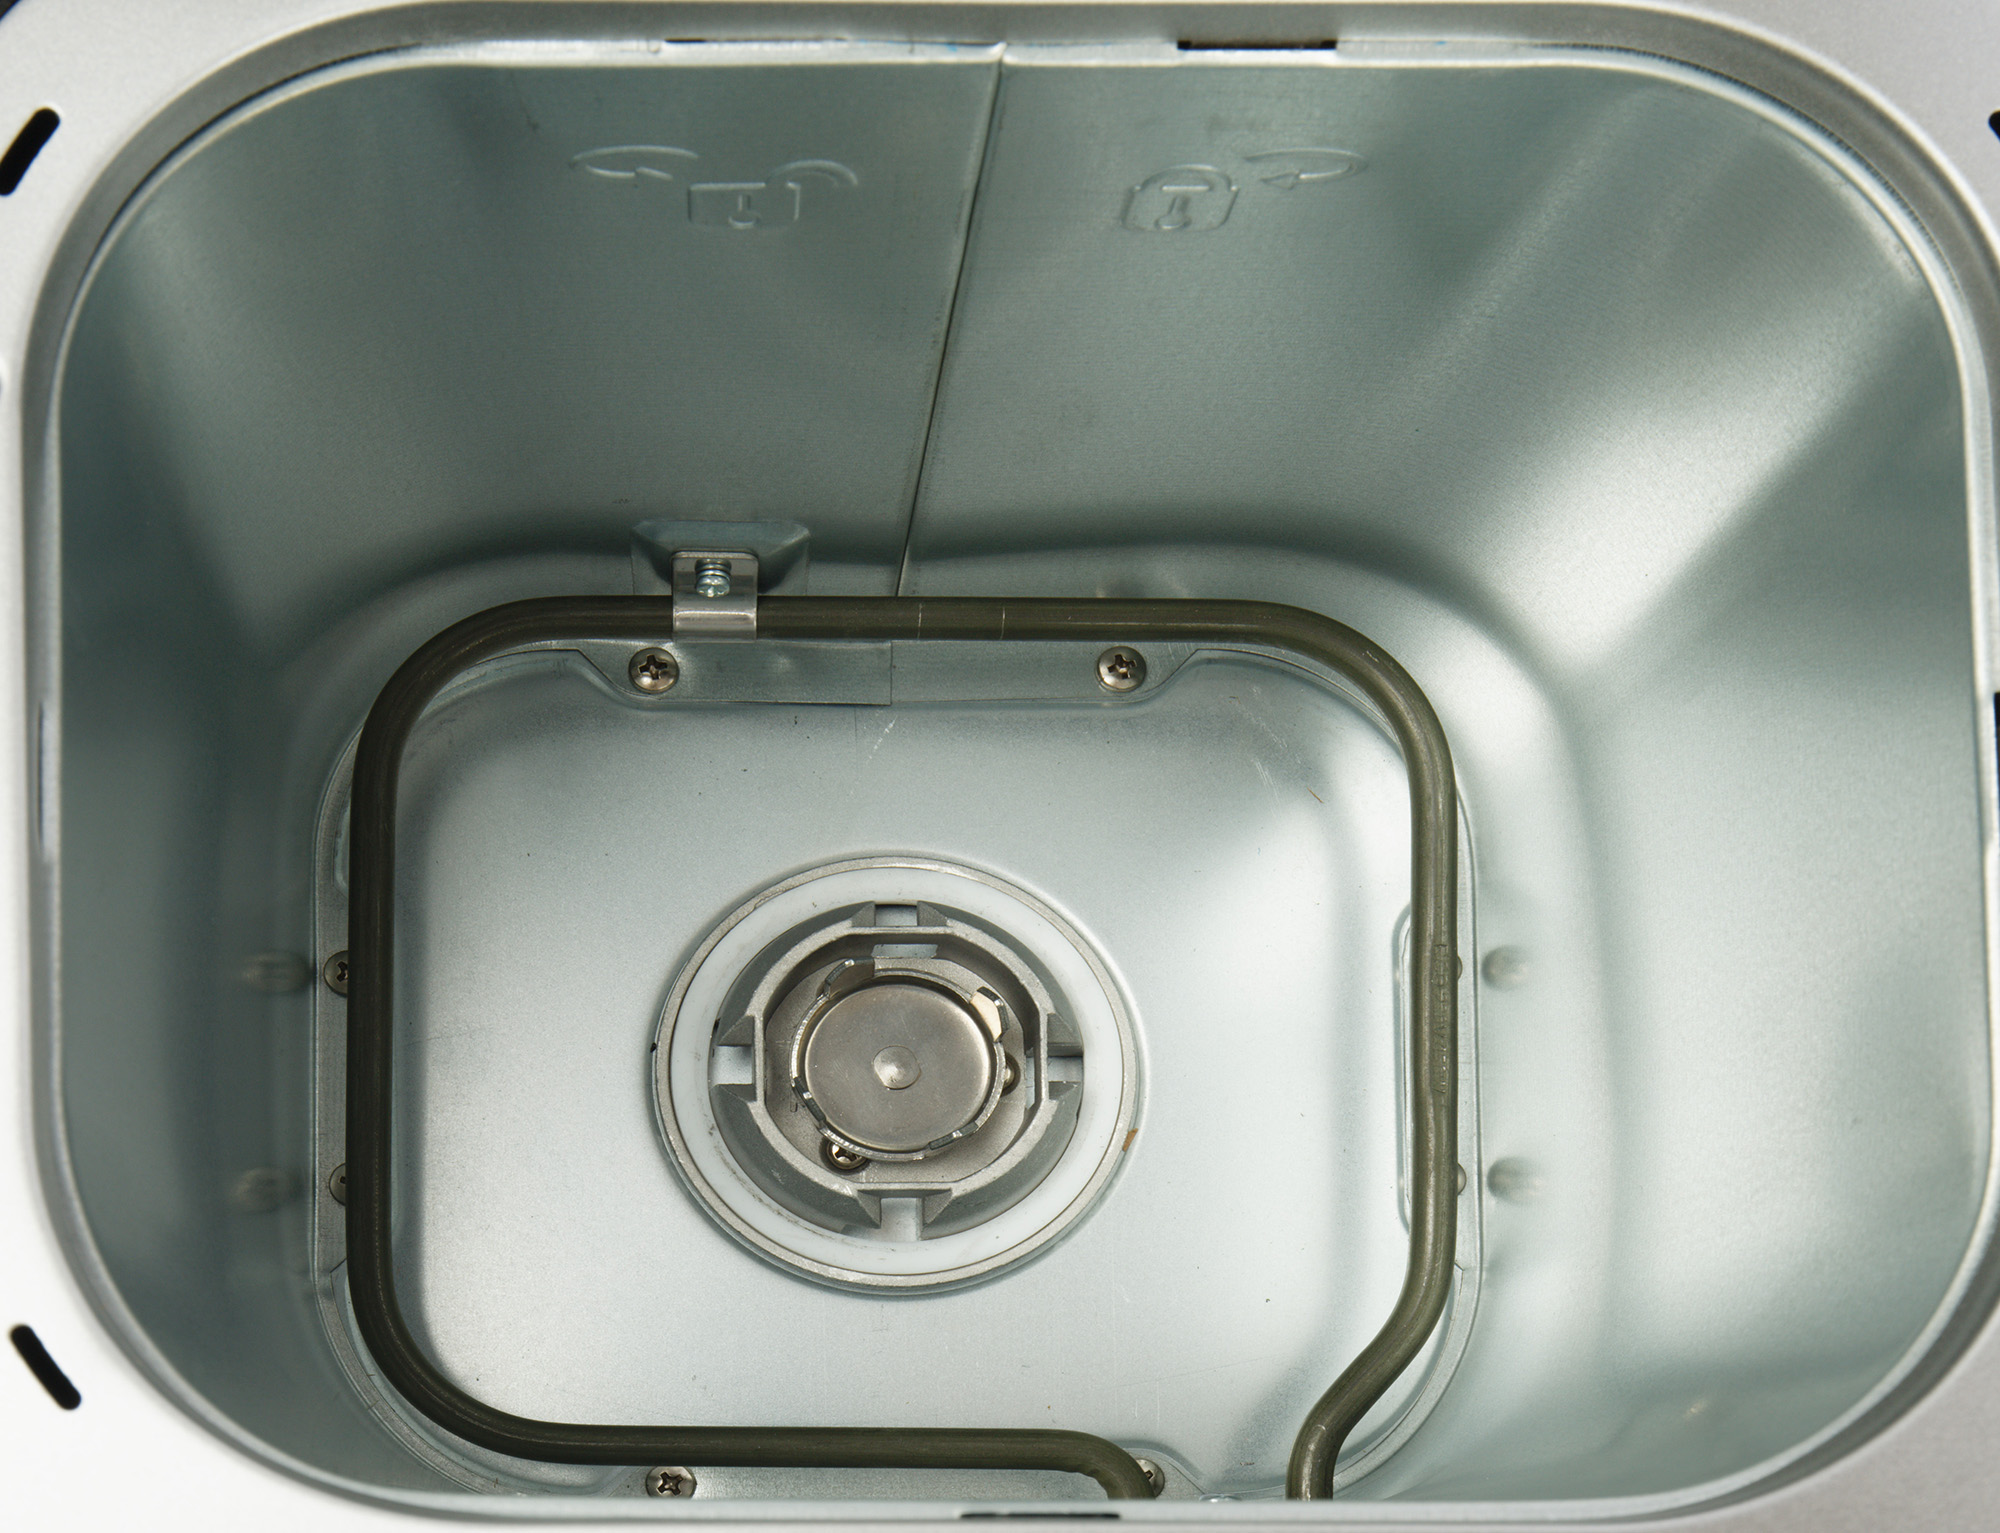
The working chamber of the bread machine looks standard: a metal case, along the perimeter of which there is a heating element and a bayonet for installing the bowl. The heater is located at a certain height from the bottom, so you can easily clean the bottom of the working chamber. The metal bayonet also looks standard: the bowl is installed by turning a few degrees, about which there are corresponding hints right on the inside of the working chamber.
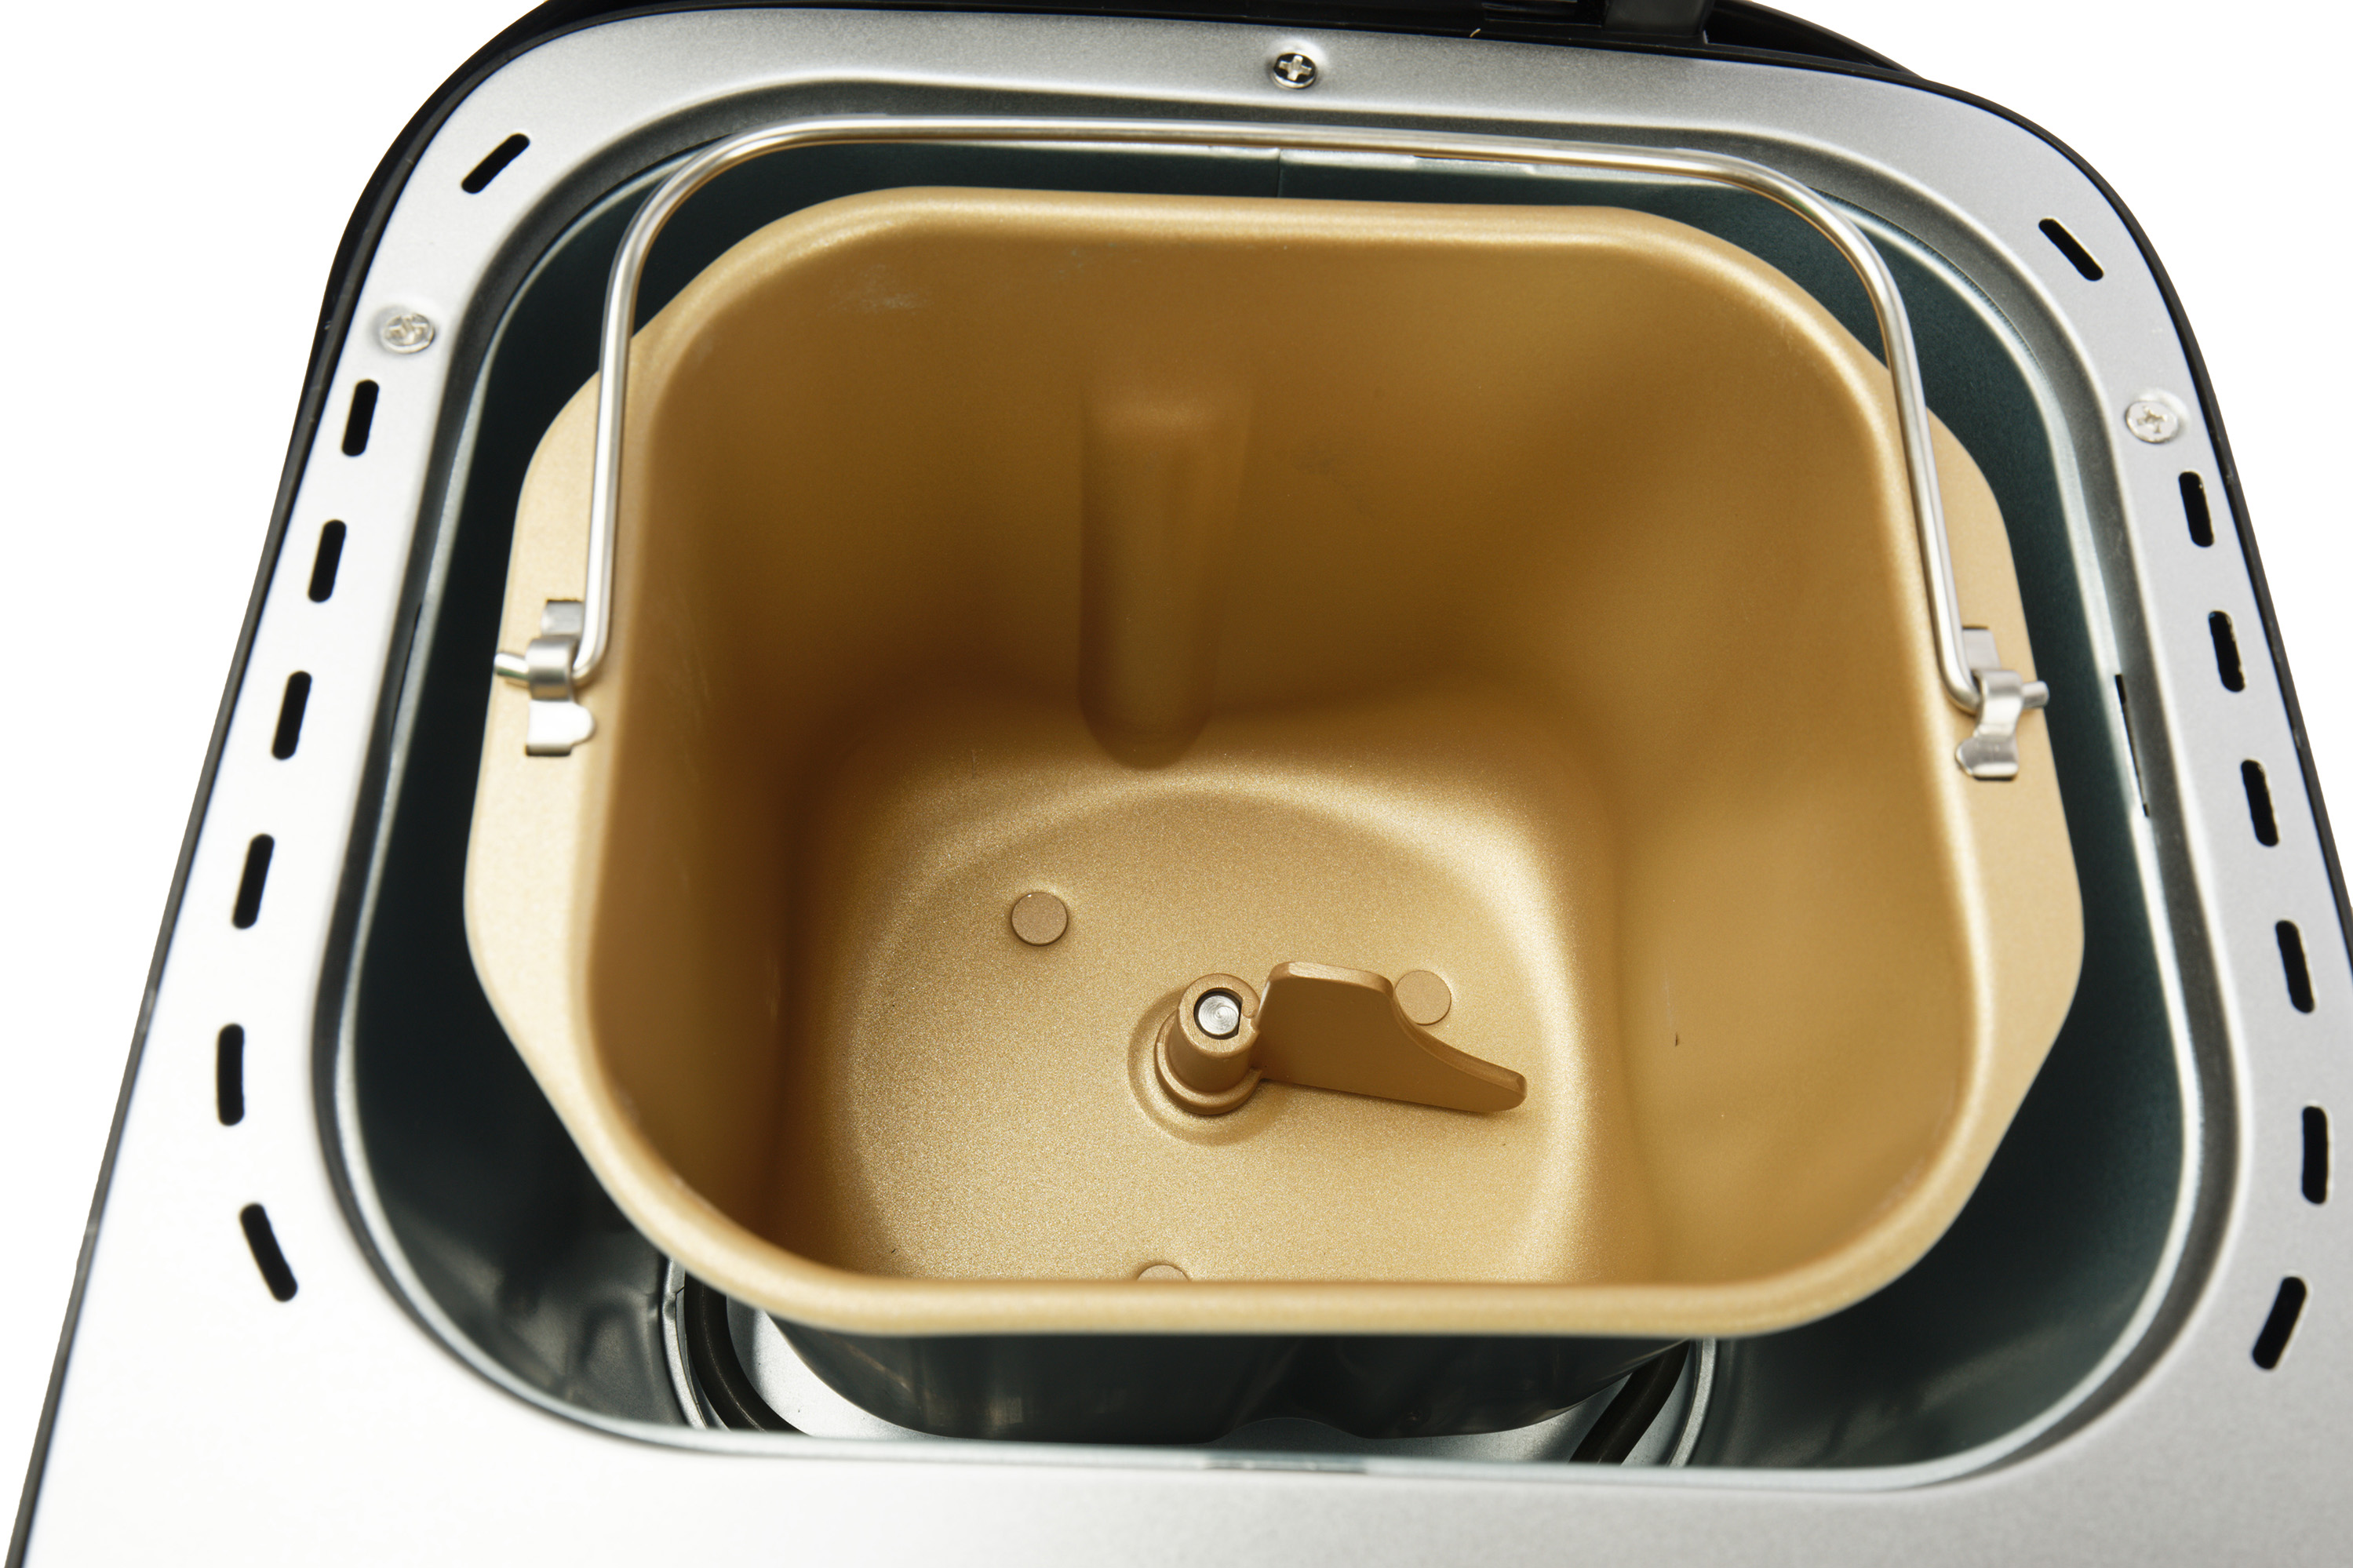
The form is made of metal with a non-stick coating and has a complex shape with elements that provide rigidity to the structure.
From above there is a folding handle-wire made of stainless steel, from below there is an element that provides fastening to the body and rotation of the blade.
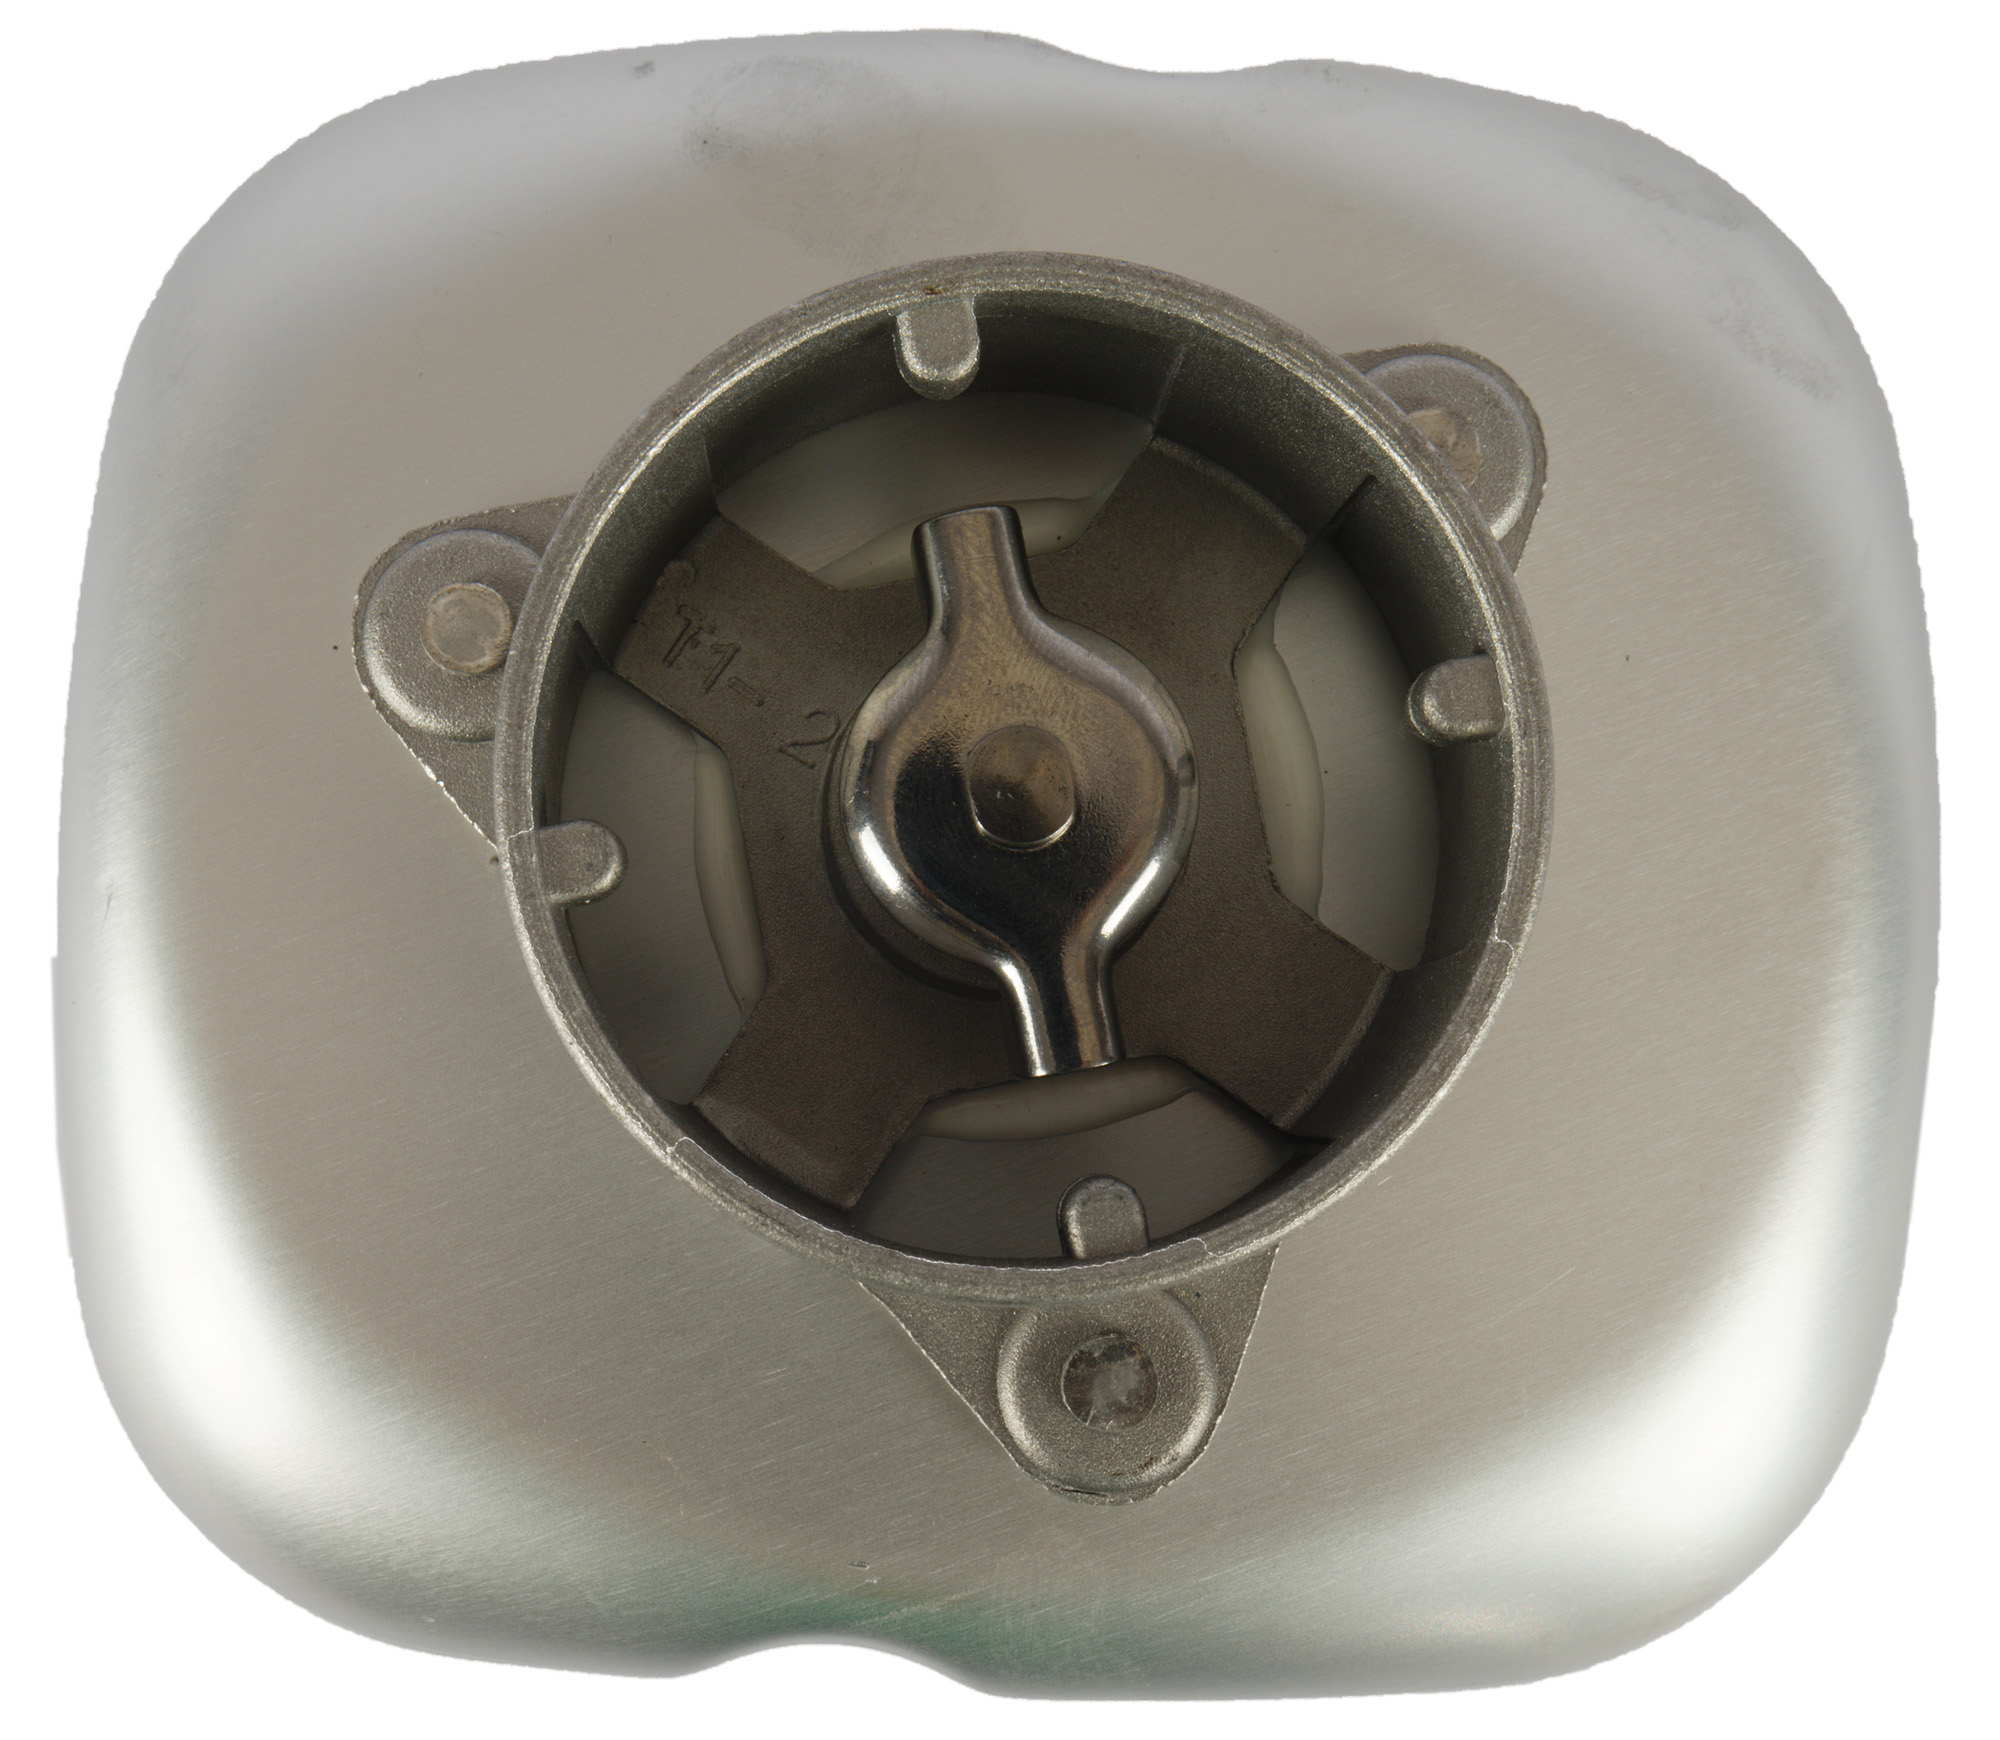
The shape is neat, no notches on the edges, the metal is of sufficient thickness.
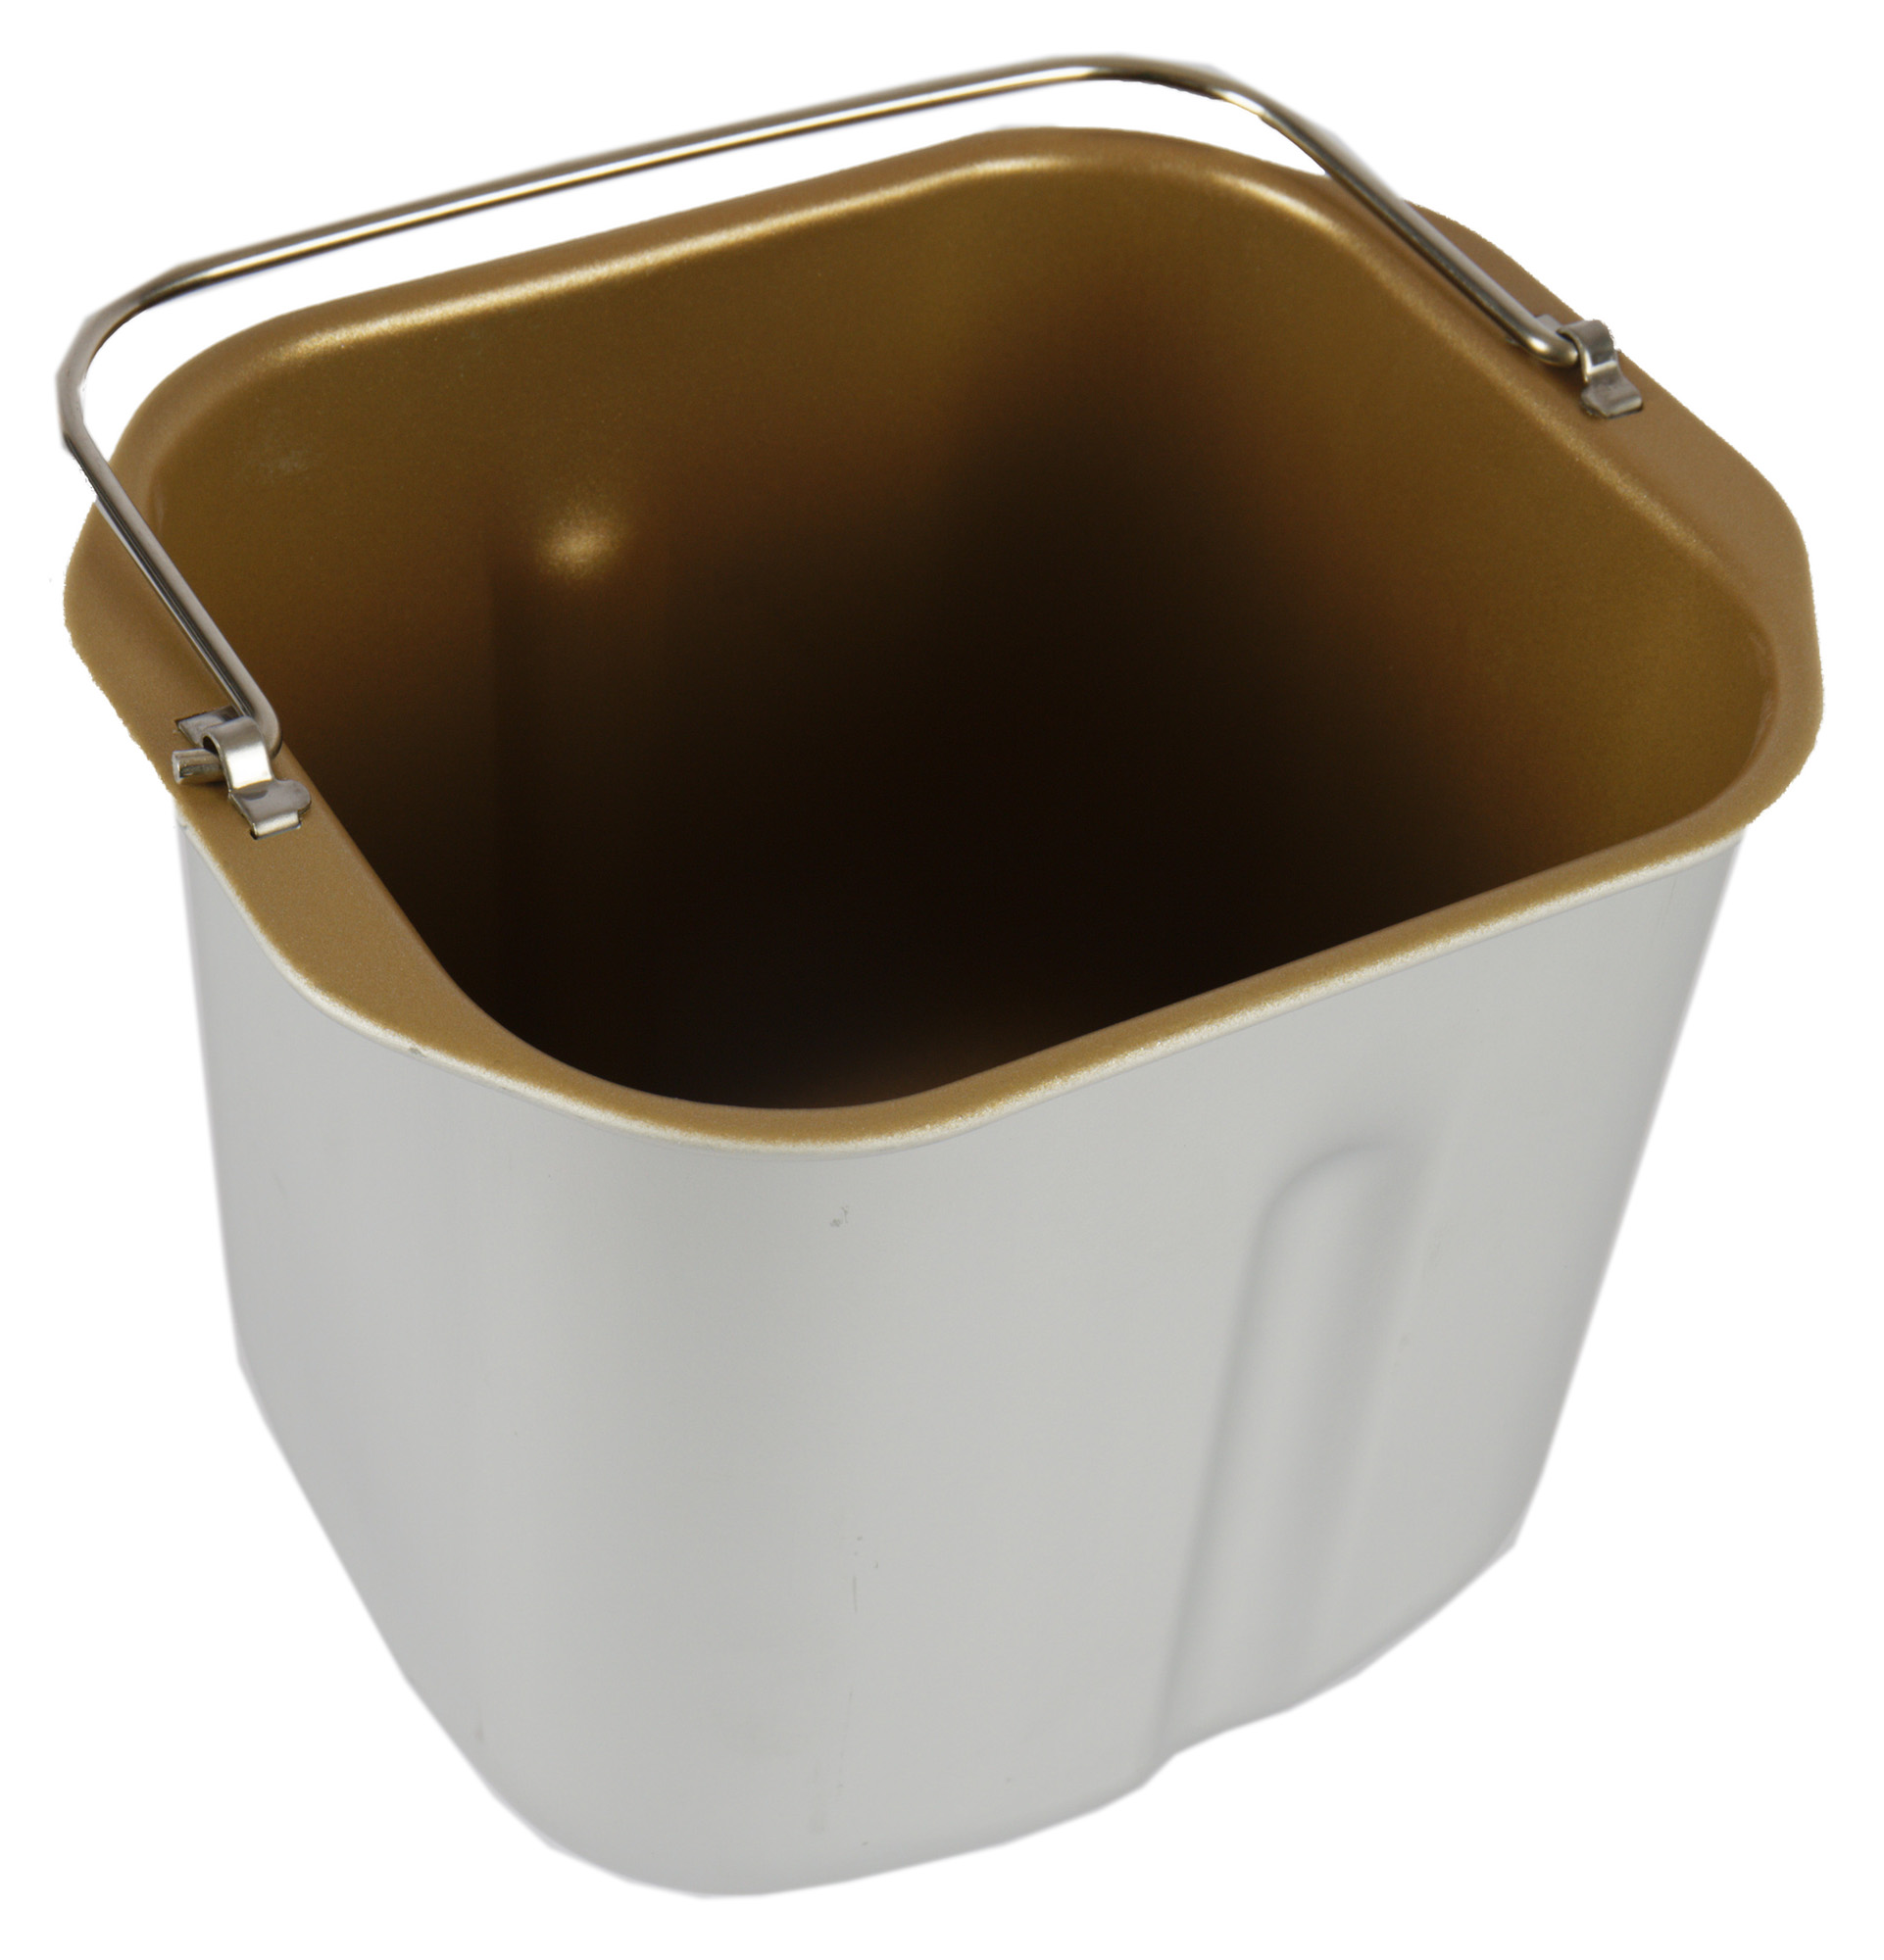
A spatula is put on the pin inside the mold to mix the dough. It, like the bowl, has a non-stick coating.
Included with the device are accessories – a measuring spoon, a measuring cup and a hook for removing the spatula from the dough. With the same hook, you can get a hot form from the bread machine by the handle.
Instruction
The instructions that came with the bread maker, as well as the packaging, turned out to be made according to a single standard adopted in Redmond. This is a small 31-page brochure printed on high quality glossy paper. The share of the Russian language is 15 pages, where you can find all the necessary information about working with the device – from the rules of use and description of the program features, and ending with cooking tips.
Of the additional useful information, it should be noted the presence of a small FAQ, which describes the solution to the most common problems such as “What to do if the bread does not rise well?”, As well as a summary table of cooking programs indicating the operating time, the range for changing the cooking time, the possibility of delaying the start, the inclusion of the auto-heating function and the ability to select the color of the crust.
Since baking bread can be quite difficult for an unprepared user, all the nuances regarding the use of the bread machine are explained in detail in the instructions. The user will be told not only the sequence in which to load the ingredients, but also introduce them to different types of flour, the behavior of additional ingredients (eggs, dairy products, cinnamon, etc.), and even explain how to properly cut and store bread.
According to the information provided on the official website, a recipe book should also be included with the device. We did not find one in the box with our bread machine (maybe we got an incomplete set?). One way or another, recipes for baking and cooking other dishes can be found on the official website (which we used during testing).
Control
The bread machine is controlled by six mechanical membrane buttons. Feedback from the user is carried out using a black-and-white LCD display (unfortunately, it does not have a backlight) and sound signals (beeps).
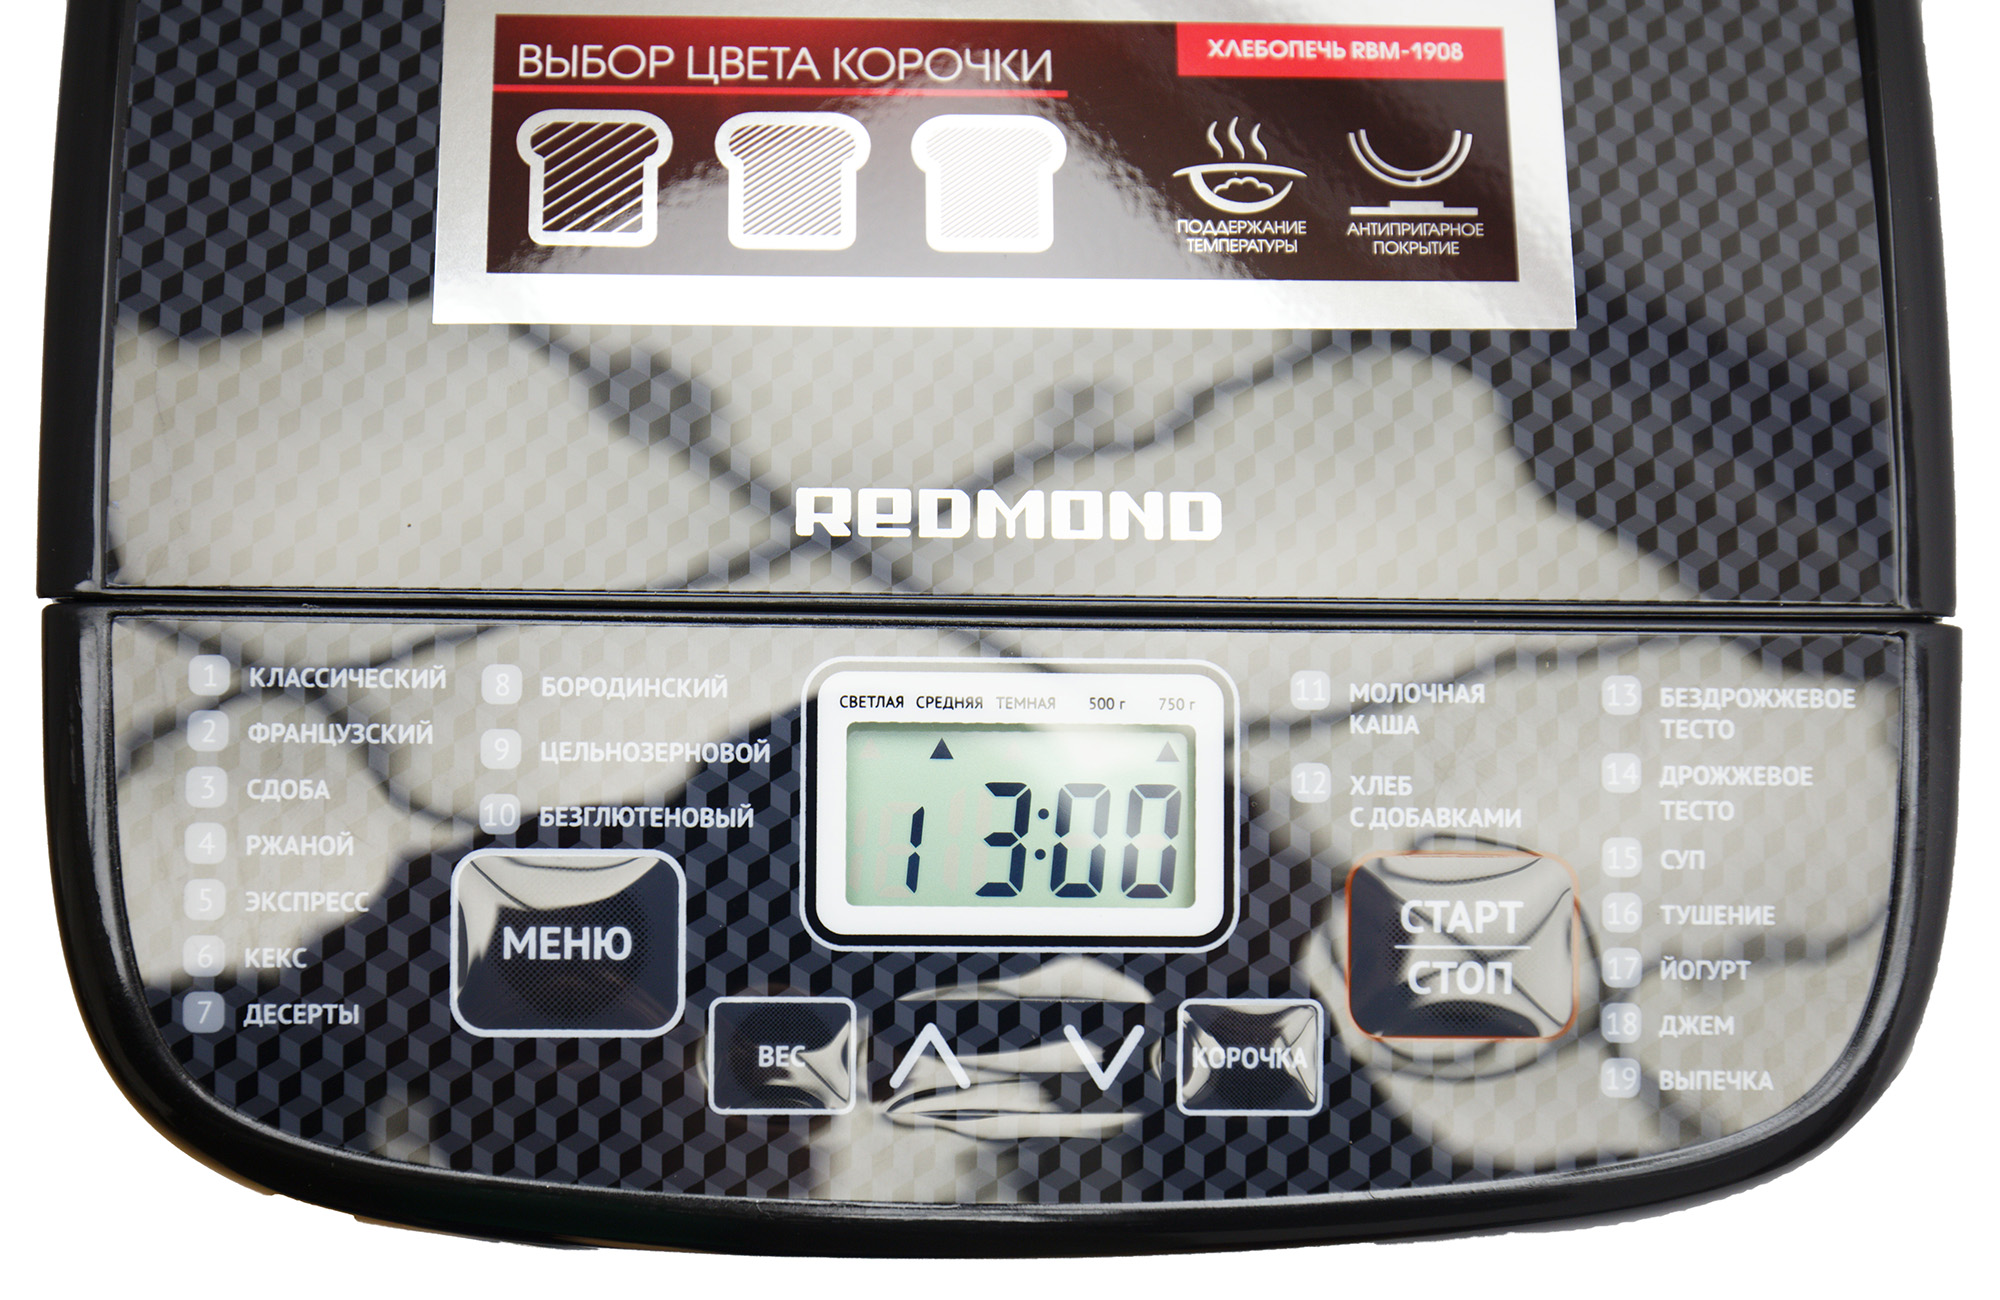
The purpose of the buttons is intuitive:
- Weight — product weight setting (500/750 g);
- Crust — selection of the crust type (light/medium/dark);
- More/less – setting the cooking time or the delayed start timer;
- Menu – program selection;
- Start/Stop – start or stop the program
The display shows the selected settings and, during cooking, displays a countdown timer.
Pressing the buttons is accompanied by a loud sound signal (squeak). In a similar way (with one or more beeps), the bread machine notifies you of other events that require the user’s attention (the end of cooking or, for example, that it is time to add the missing ingredients).
In general, the sequence of actions is as follows:
- select the desired program using the “Menu” button;
- choice of weight depending on the number of ingredients;
- choice of the desired type of crust;
- setting the cooking time (if the selected program allows you to change this parameter);
- setting a delayed start time (again, if this is required and this possibility is allowed by the selected program);
- program launch.
After that, it remains only to observe the operation of the device. In some cases, 15-20 minutes after the start of the program, the bread maker will notify you to add additional ingredients. At the end of the program, the device switches to the “Heating” mode, or simply exits (depending on the type of program).
The delayed start time can be set up to 15 hours (which includes the cooking time) in 10 minute increments. Thus, the user practically does not have to deal with counting time. A set time (for example, 10 hours) will mean that the dish will be ready in exactly 10 hours, regardless of how long it takes to cook.
The bread maker has a non-volatile memory. In the event of a temporary power outage (up to 10 minutes), all the specified settings will be saved, and if power is applied, the program will automatically continue.
We list the built-in programs and their purpose, according to the manufacturer’s data:
- Program “Classic bread”. Used for baking classic white bread. The program includes kneading, raising dough and baking bread.
- Program “French bread”. It is used for baking French bread – very light, with a crispy crust. Provides long kneading and more time to rise the dough. In this program, it is recommended to bake dough products that do not contain butter (margarine) and milk.
- Program “Goodies”. Program for making sweet pastries with additional ingredients (fruits, nuts, chocolate chips, candied fruits, raisins, etc.), the time of addition of which is indicated by a sound signal. The program includes kneading, dough rising and baking.
- Program “Rye bread”. Recommended for baking bread from rye flour. Includes kneading, proofing dough and baking bread. You can choose the weight of the product and the color of the crust, there is no manual adjustment of the time.
- Express program. It is used for the accelerated baking of white bread. It implies the need to add an additional third of a teaspoon of yeast to the dough for white bread, based on the weight of the pastry of 750 g. The program includes kneading, short-term dough rise and baking.
- Program “Keks”. Recommended for baking muffins with various fillings. The program includes quick kneading, proofing and baking. The appliance will beep when it’s time to add additional ingredients.
- Dessert program. For the preparation of chocolate and milk desserts.
- Program “Borodino bread”. Recommended for the preparation of Borodino bread, includes kneading, proofing dough and baking bread.
- Whole Grain Bread Program. Since the flour used for this bread is heavier, the program preheats the ingredients for 5 minutes before kneading the dough and leaves the dough to rise for a longer time. The program includes kneading, raising dough and baking bread.
- Gluten Free Bread Program. For baking bread from gluten-free flour. The program includes heating ingredients, kneading, raising dough and baking bread.
- Program “Milk porridge”. Recommended for cooking cereals with milk and water.
- Program “Bread with additives”. Recommended for making bread with various additives, including kneading, proving dough and baking bread. There is no manual time adjustment.
- Yeast-free dough program. Program for kneading yeast-free dough used in the manufacture of noodles, dumplings, etc., without further baking.
- Yeast dough program. Program for making yeast dough without further baking. Includes dough kneading and proofing.
- Soup program. Recommended for making soups and broths. Includes cooking without stirring. Time adjustment available.
- Quenching program. Suitable for stewing meat and vegetables. Includes cooking without stirring, allows you to adjust the cooking time.
- Yogurt program. For preparing various types of yogurt. Cooking time can be adjusted from 5 to 12 hours.
- Jam Program. It is used for making jams, toppings for baking, waffles and ice cream, ketchups, all kinds of seasonings, as well as for preparing a number of products for home canning.
- Baking program. The program includes only the baking process (without kneading and raising). Recommended for baking biscuits and preparing second courses.
For each program, the manufacturer has given the possibility of enabling / adjusting additional parameters: for example, for them such parameters as the allowable operating time or, for example, the possibility of enabling a delayed start will differ. You can learn more about this from a special table given in the instructions.
Exploitation
Before using the bread maker for the first time, no special steps are required. The appliance and bowl can be wiped with a damp cloth. After that, the device must be installed on a flat horizontal surface, not forgetting about sufficient ventilation.
During the operation of the bread machine, we did not encounter any serious shortcomings or surprises: the device worked stably and confidently and turned out to be one hundred percent in line with our expectations.
We were not too pleased, perhaps, with a lid not equipped with a spring. In the open position, it is held solely by its own weight, and therefore, with careless movement, it can slam shut with a loud sound.
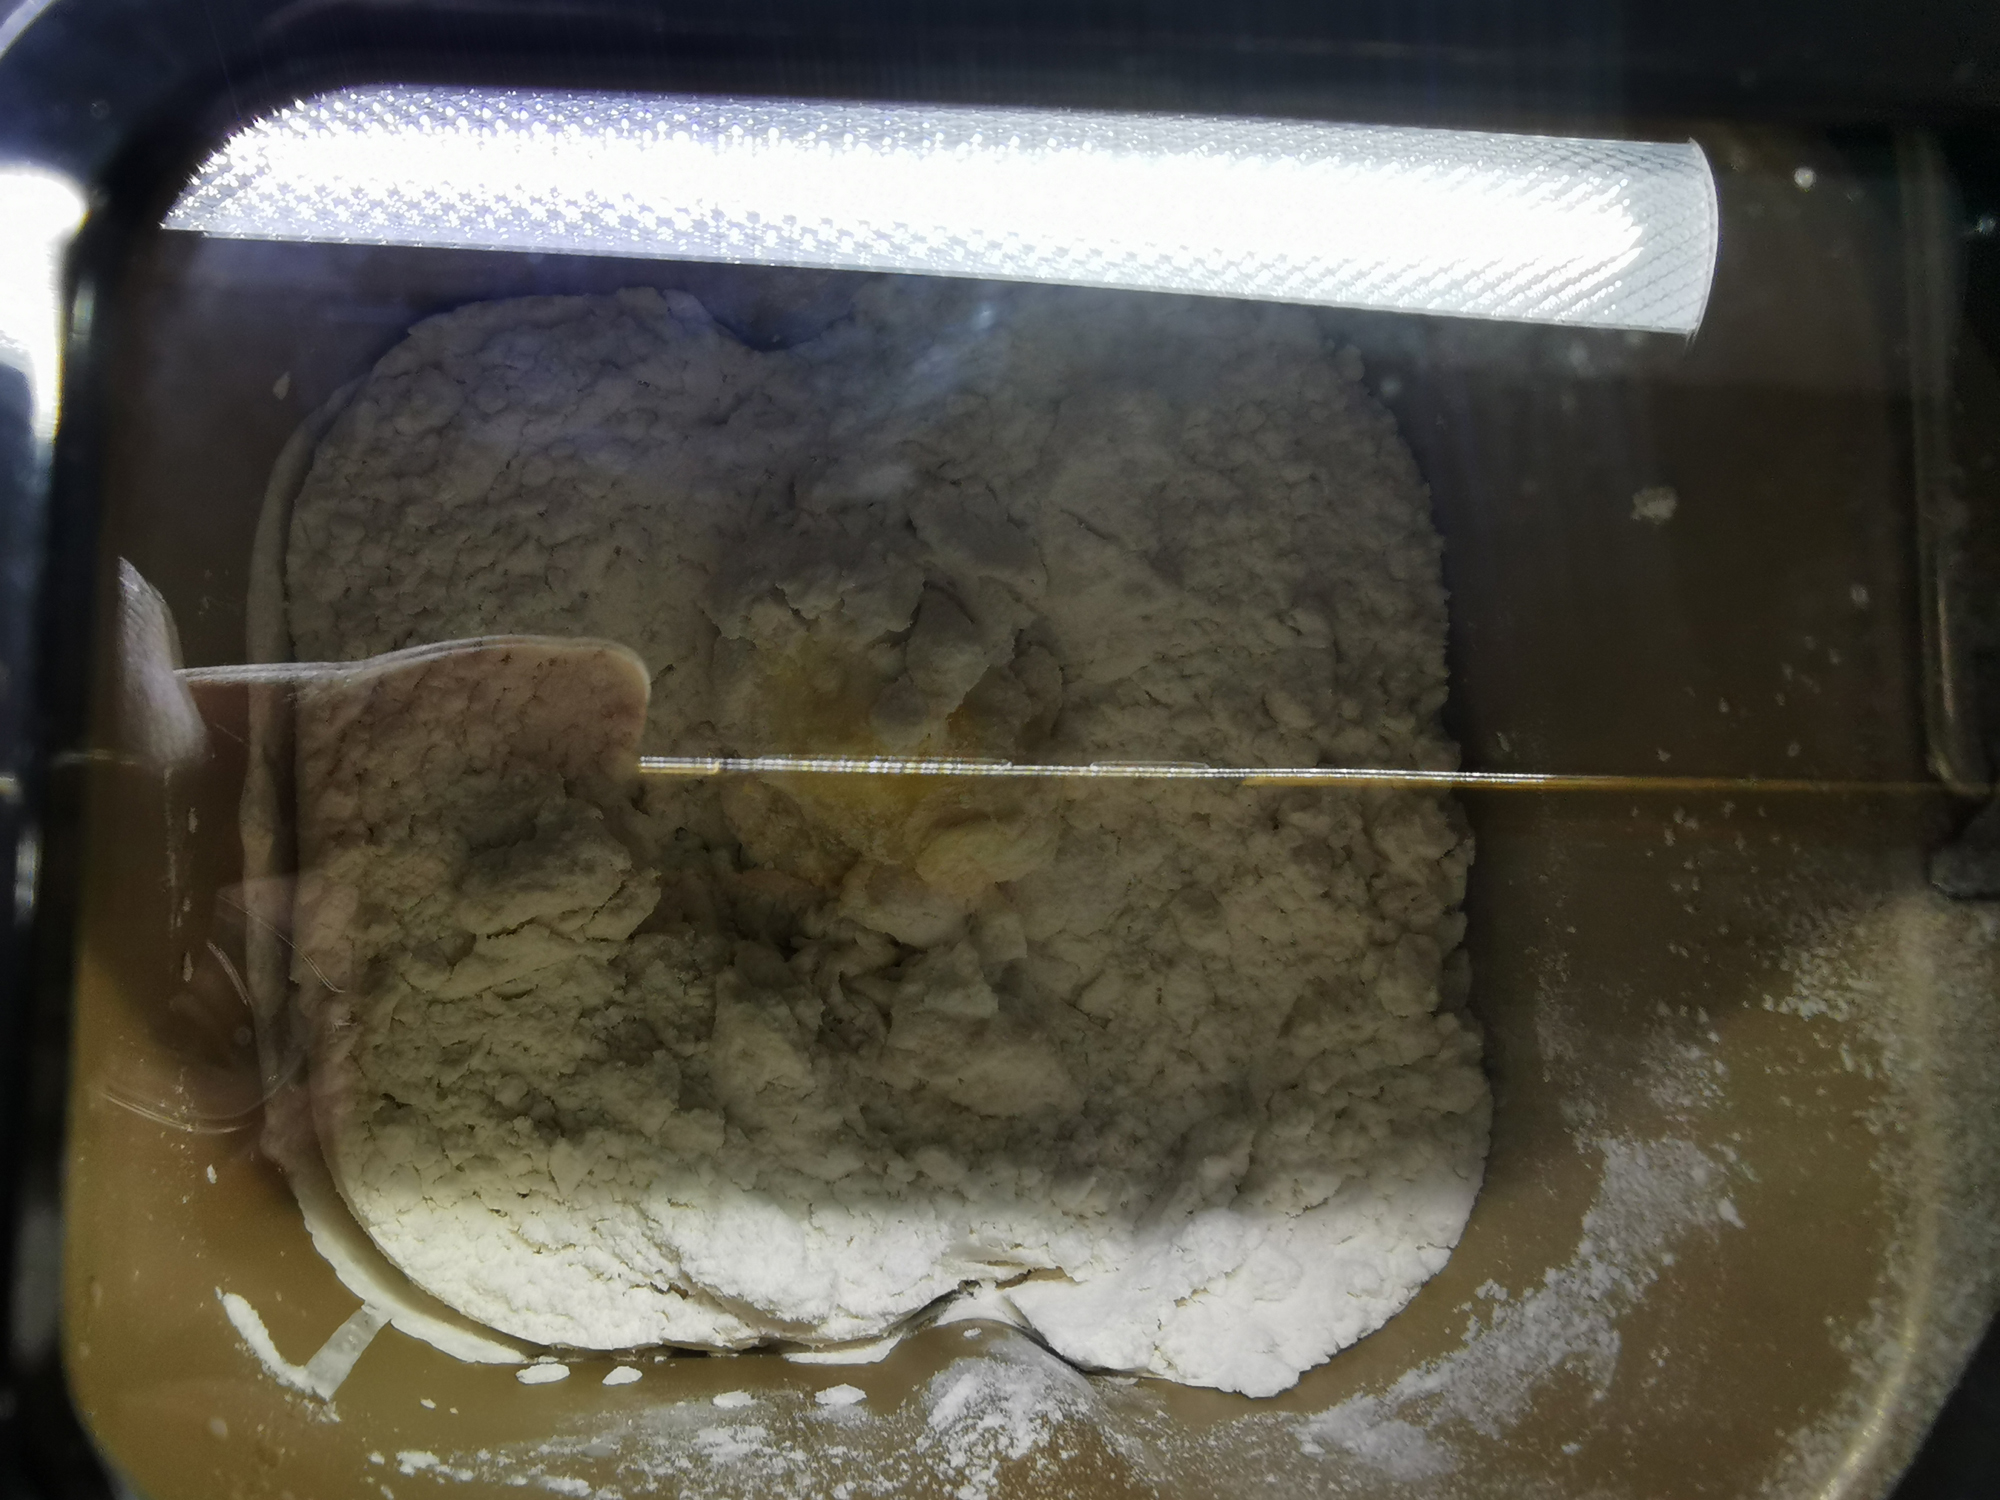
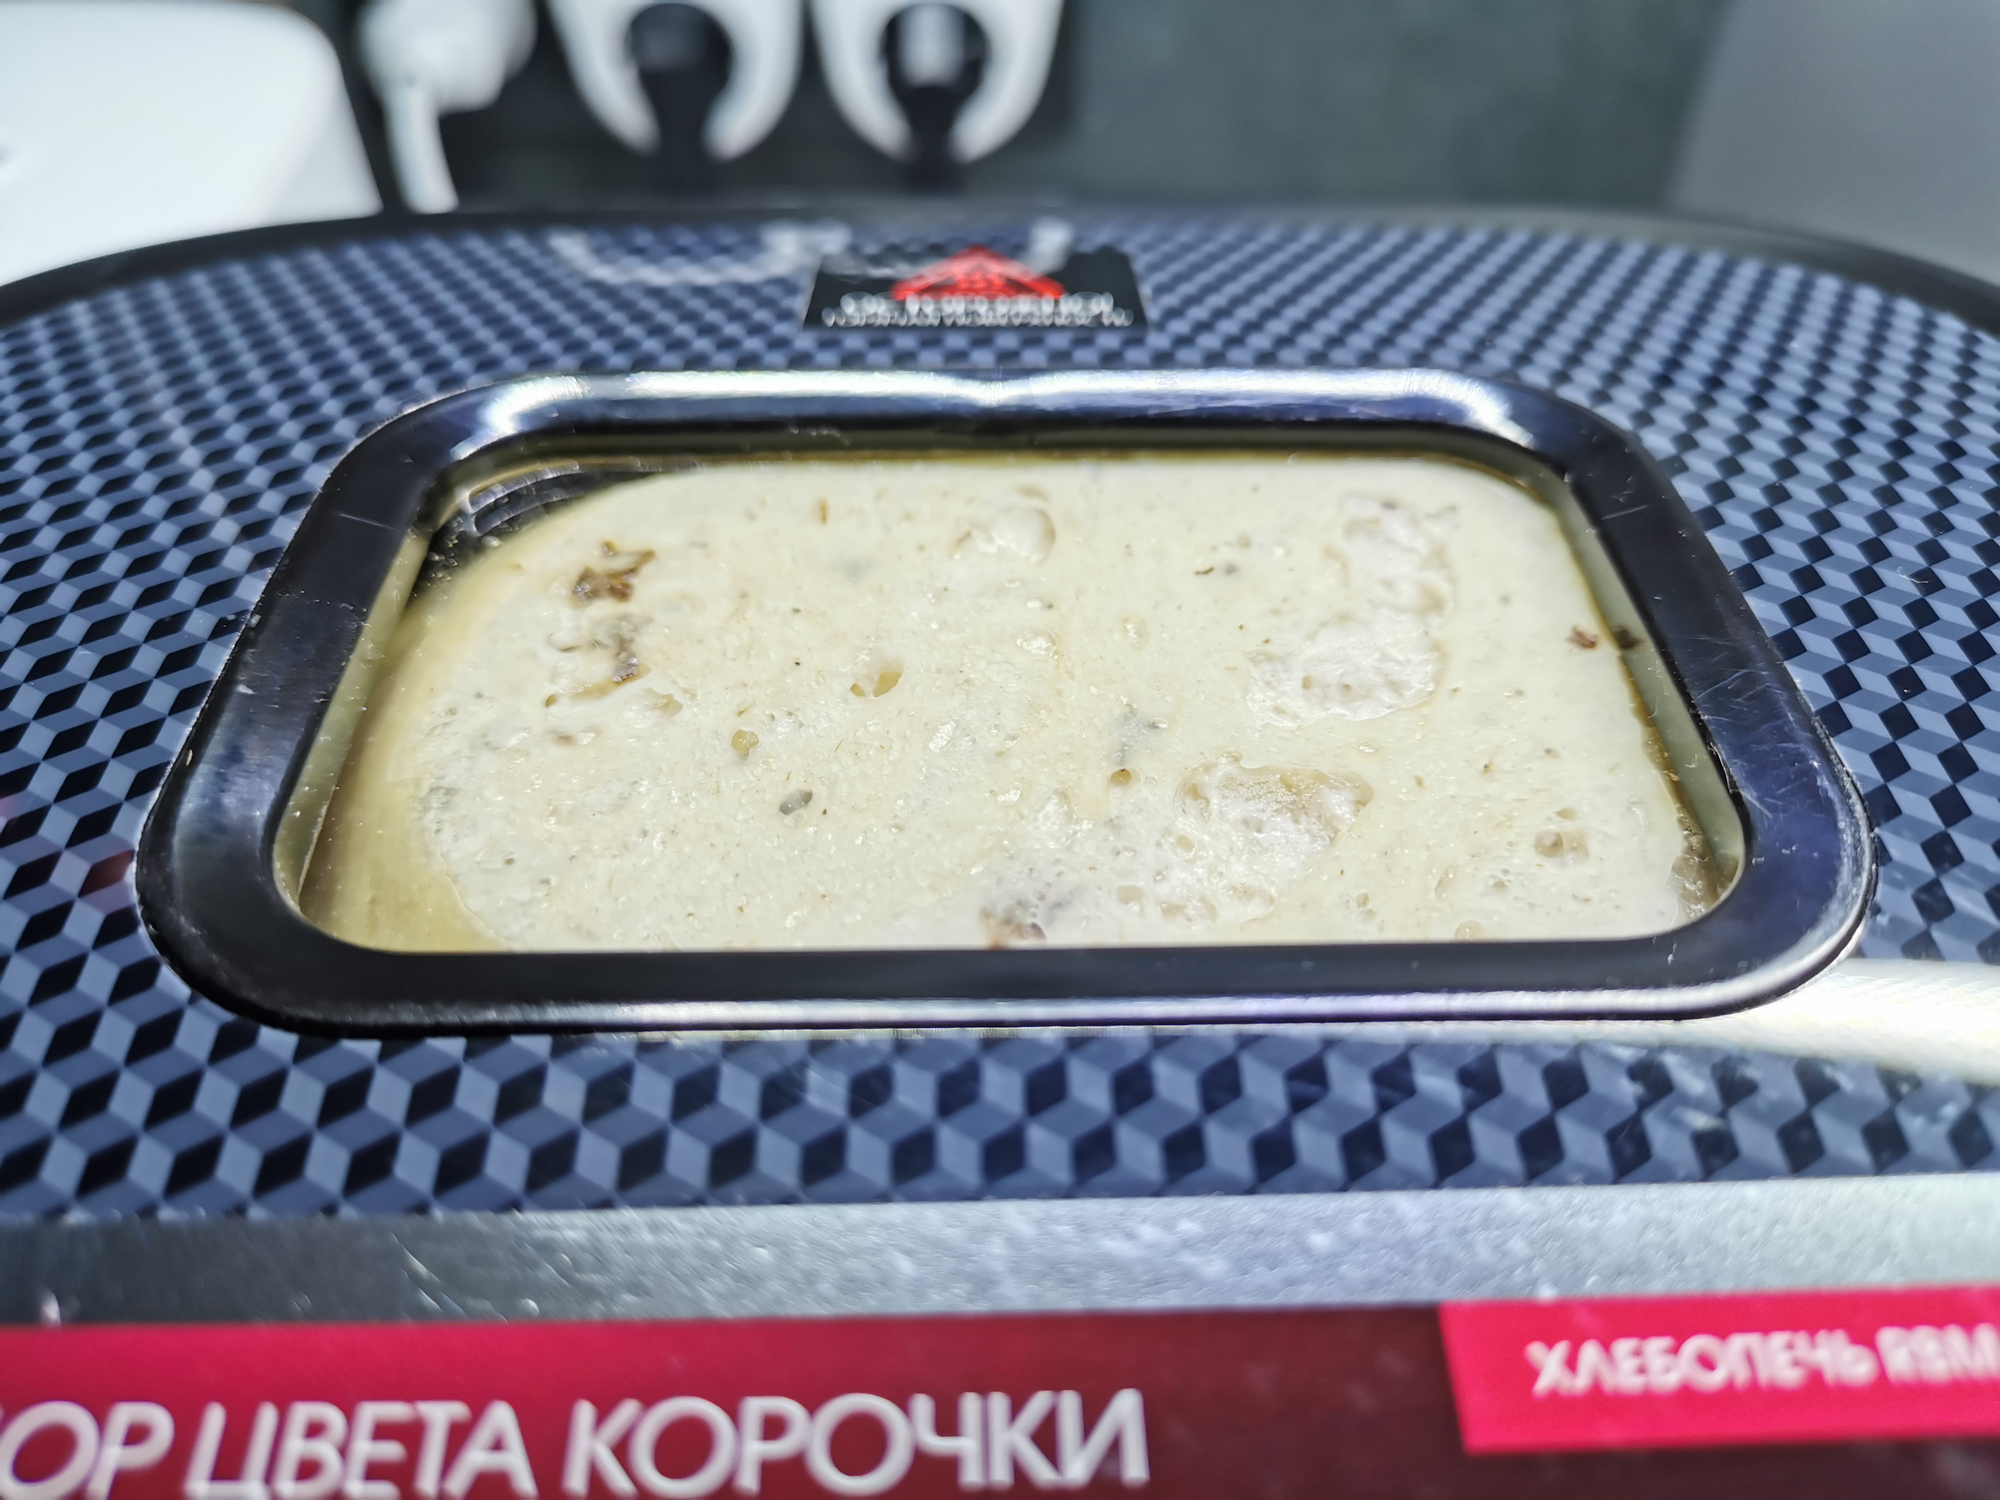
Finally, the viewing window, made of two layers of plastic, fogs up during the preparation of some dishes, which makes it difficult to observe what is happening inside the device (for example, during dough proofing). It will not work to wipe the window: you will have to wait until the baking process begins, and the drops of water do not evaporate.
Care
Cleaning and caring for the device does not involve any complicated steps. It is recommended to wash the baking bowl with non-abrasive detergents and a soft sponge. The housing should be wiped with a damp cloth. The bowl and blades cannot be washed in the dishwasher, but this is not a problem, especially if you fill the bowl with water and detergent immediately after cooking is completed – everything will be washed off easily and simply. The inner surface of the body can be wiped with a damp cloth without the use of abrasive detergents (this may be necessary if flour accidentally spills past the bowl into the body of the bread machine). In general, we did not have any problems with cleaning the bread machine.
Our measurements
During the operation of the bread machine, we measured the energy consumption using a wattmeter. The results were as follows: in the operating mode of the heating element, the bread machine in our tests consumed up to 479 watts. In the kneading mode, the value of this indicator was fixed in the range up to 30 watts. In the intensive kneading mode, the power consumption was up to 110 W (depending on the density of the dough). For a cycle of baking bread according to the Classic Bread program, the device consumes about 0.25 kWh, for 12 hours on the Yoghurt program – 0.175 kWh, for 20 minutes of cooking porridge – 0.1 kWh.
We would characterize the noise level during dough kneading as relatively low (it is not louder than the noise of a conventional kitchen hood at “low” power). The sound signals emitted by the device turned out to be quite loud (they can be heard from another room through a closed door), but not so much as to cause discomfort.
practice tests
During testing, we tried several recipes that we found on the manufacturer’s website. Here’s what we got.
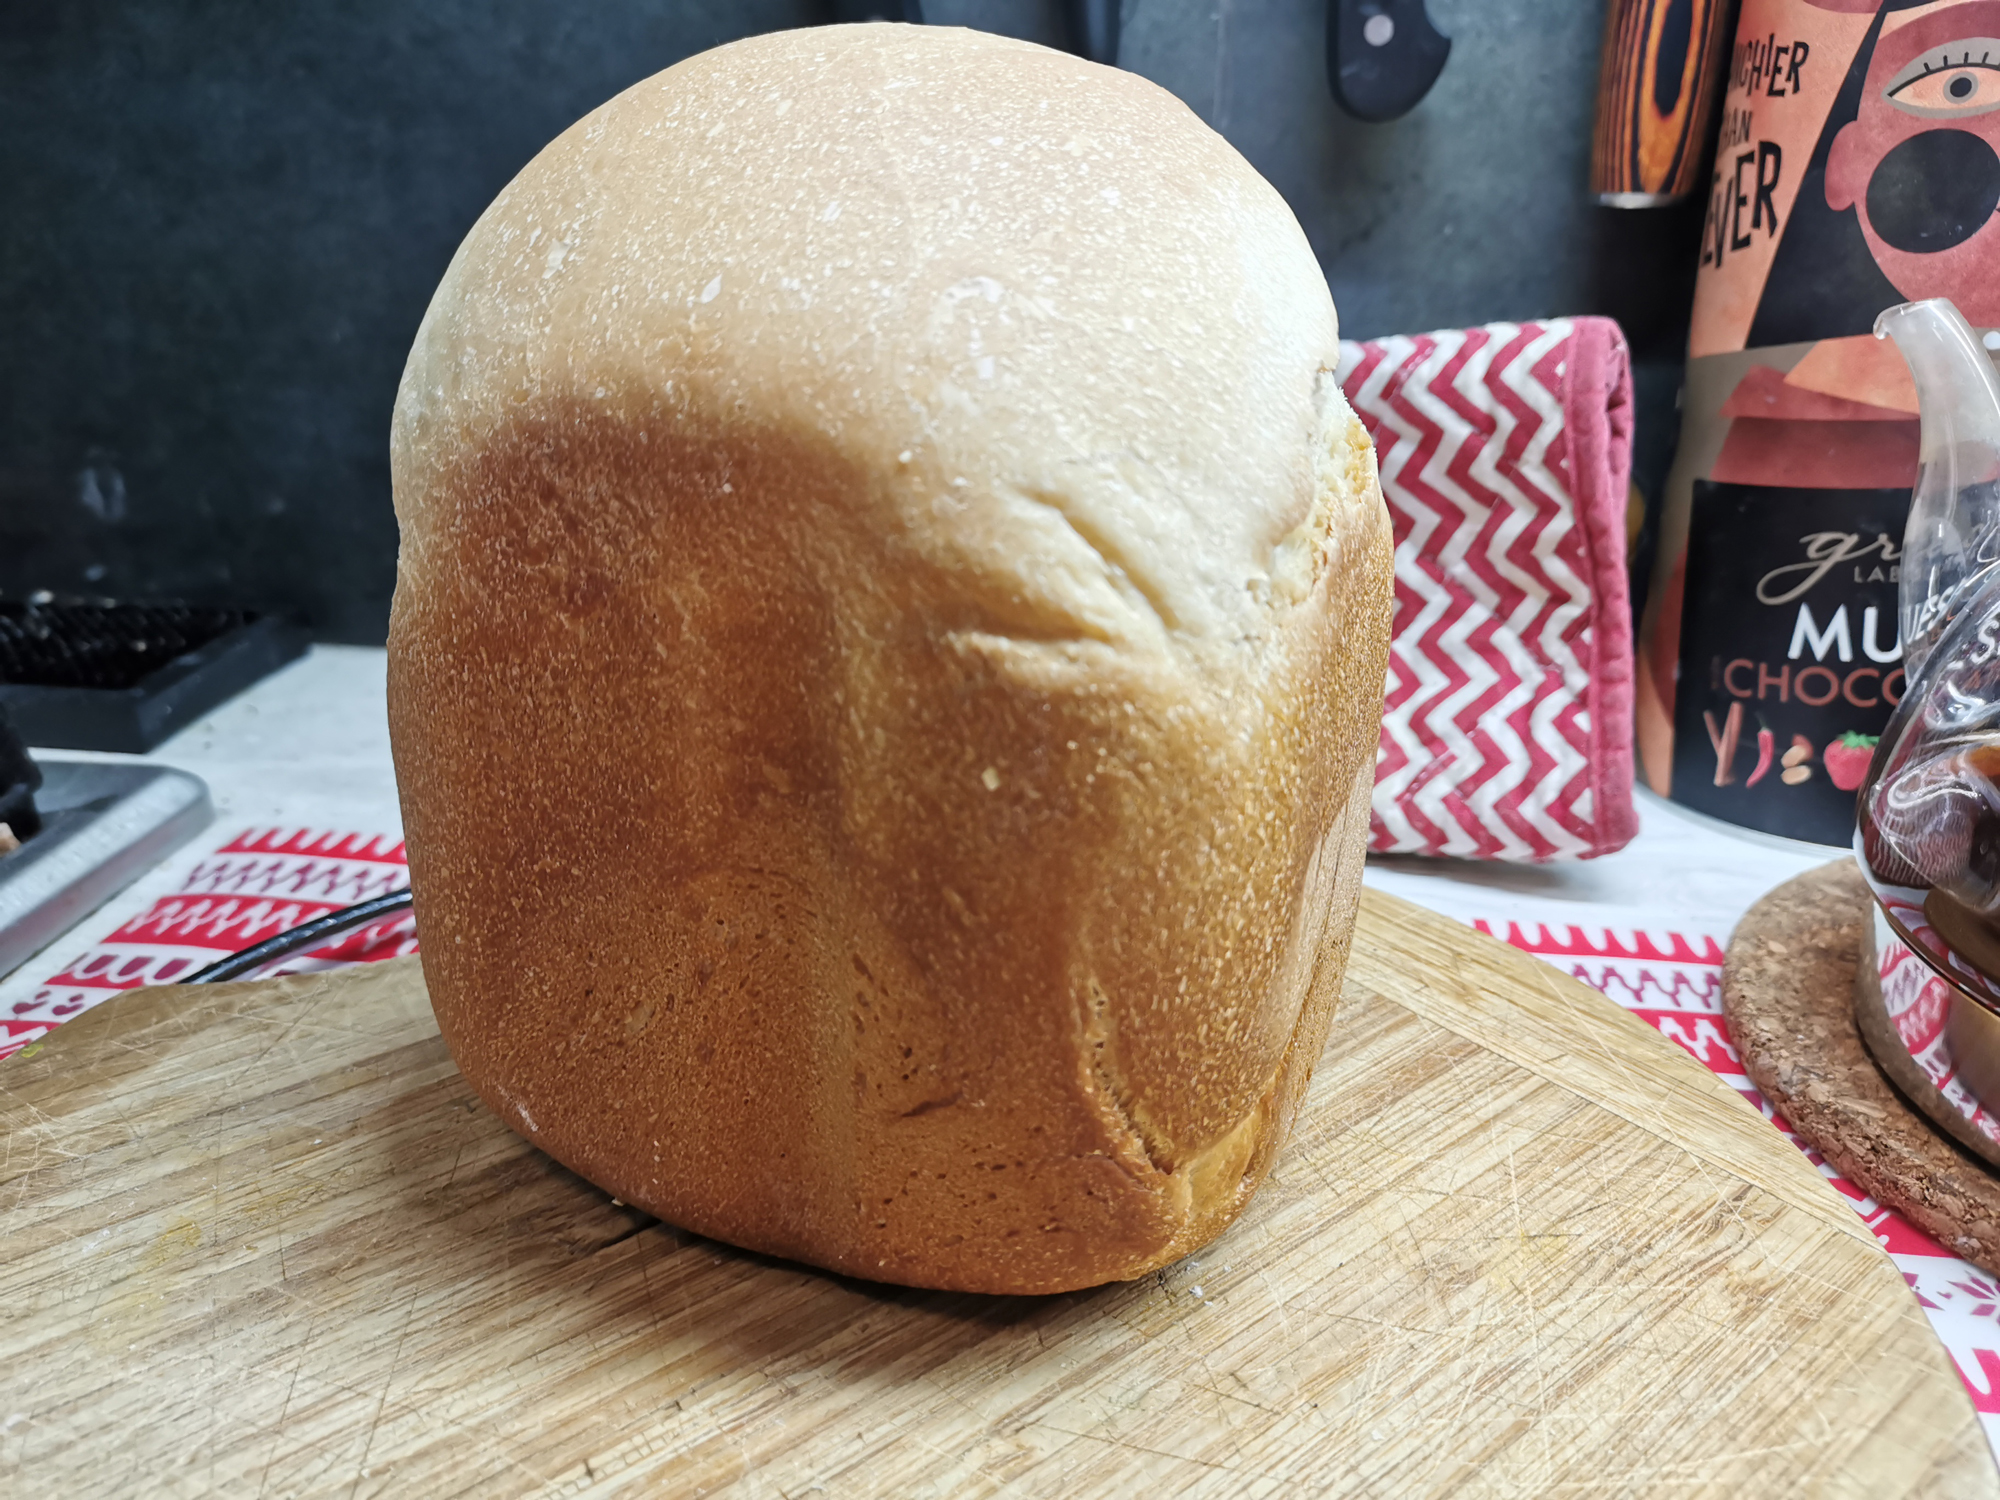
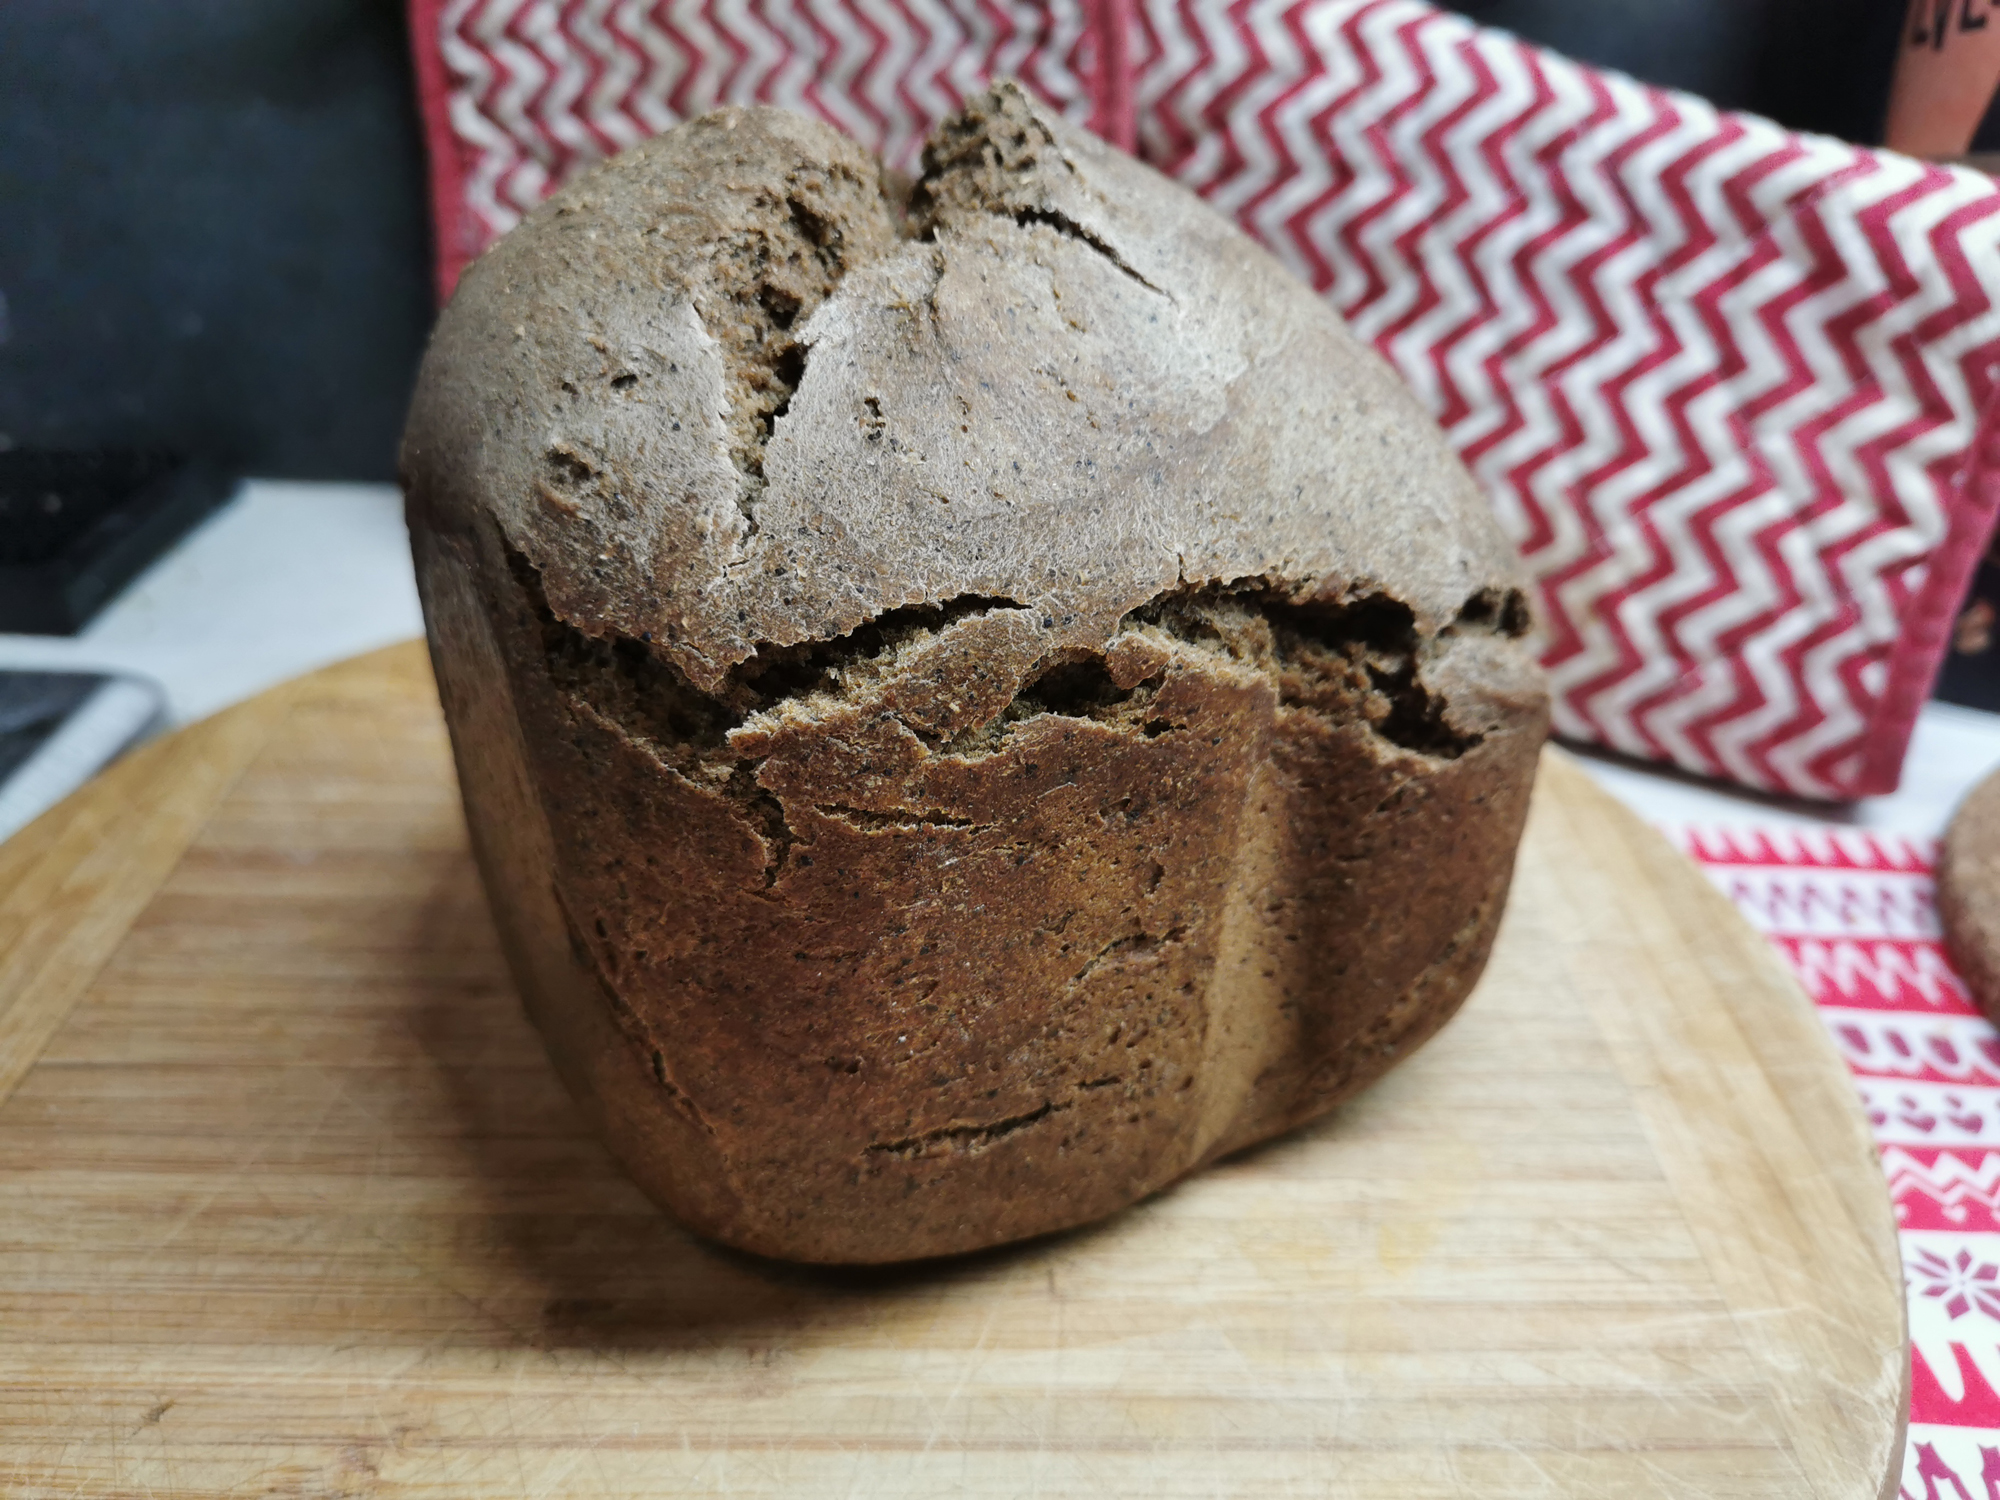
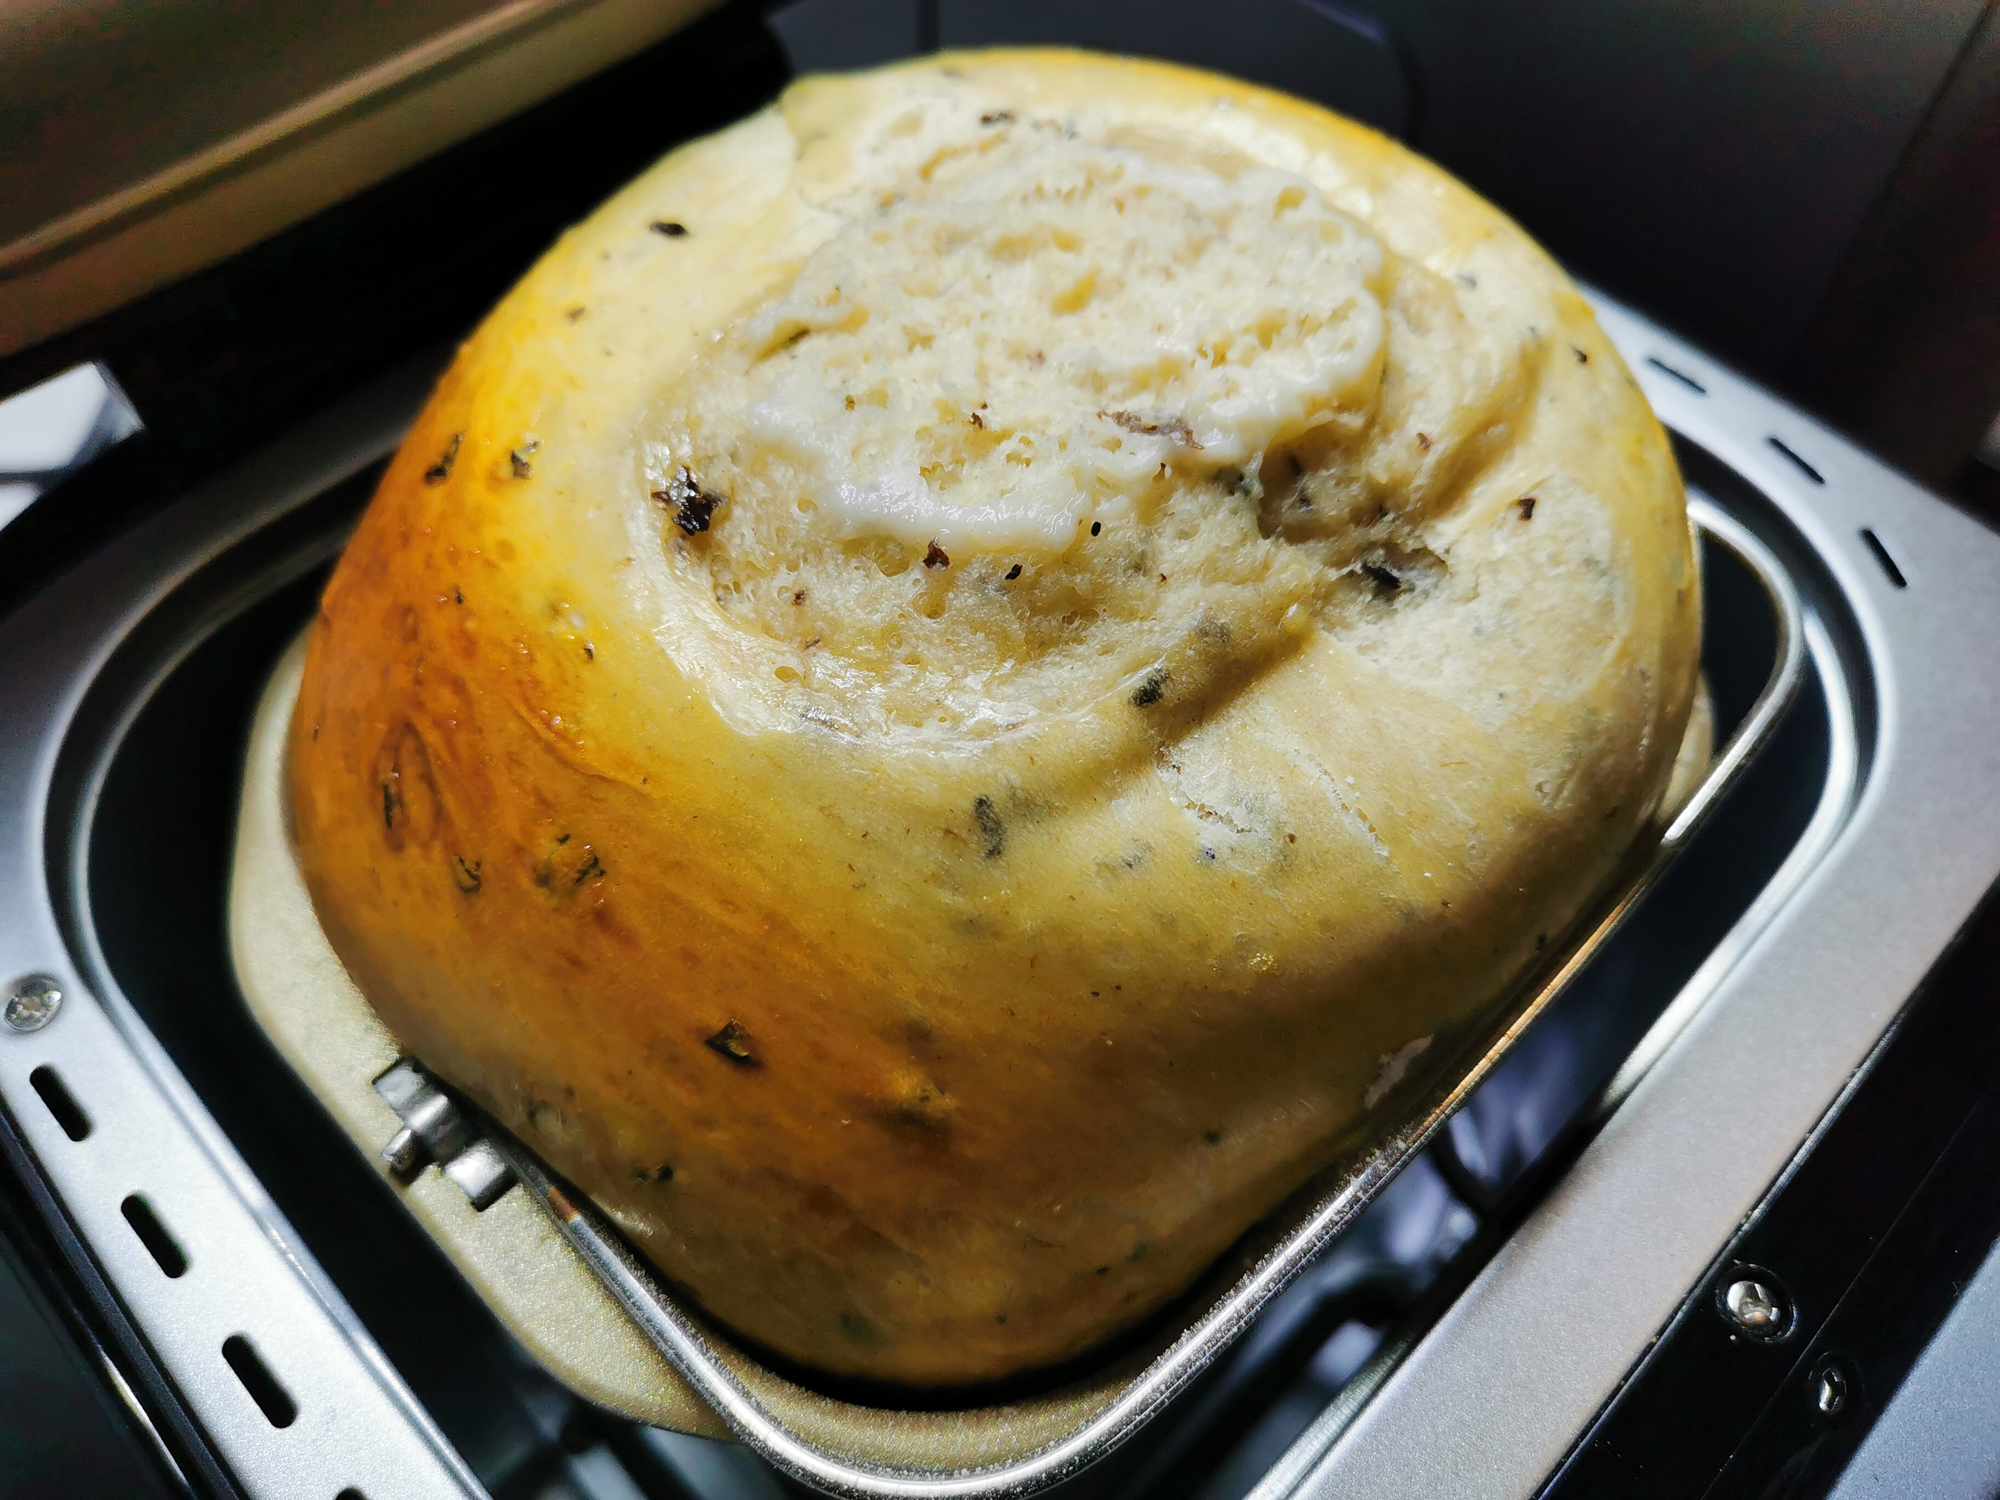
Program “Classic bread”, recipe “Airy white bread”
Ingredients:
- Dry yeast – 1 tsp
- Wheat flour – 480 g
- Chicken egg – 1 pc.
- Vegetable oil – 2 tbsp. l.
- Water – 120 ml
- Sugar – 1.5 tsp
- Salt – 1 tsp
- Milk 2.5% – 120 ml
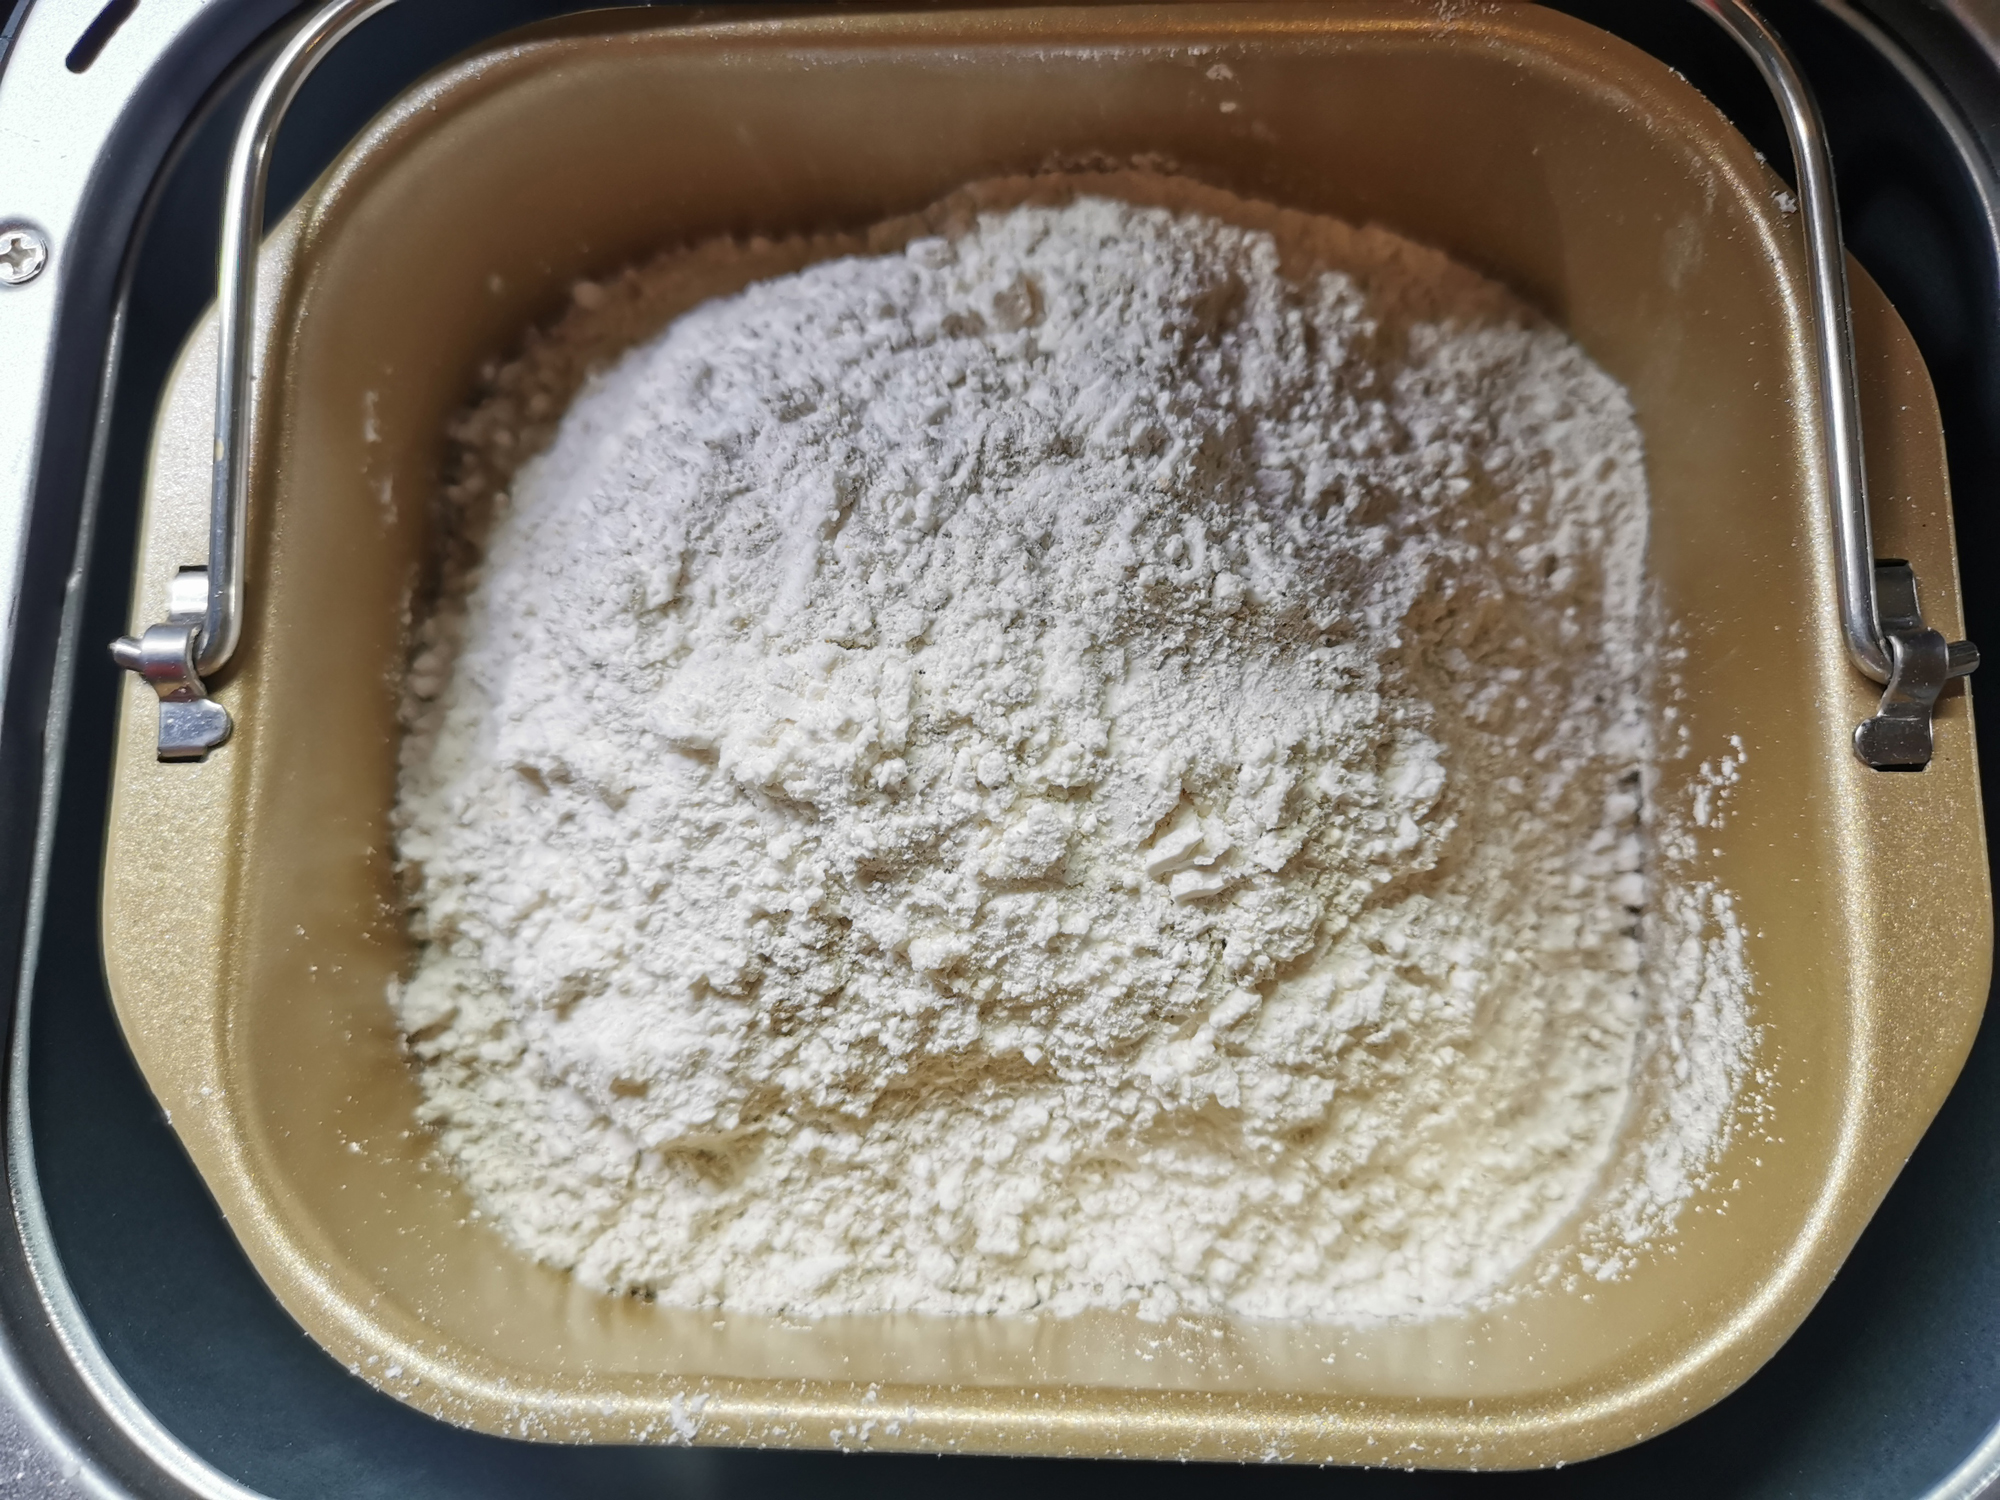
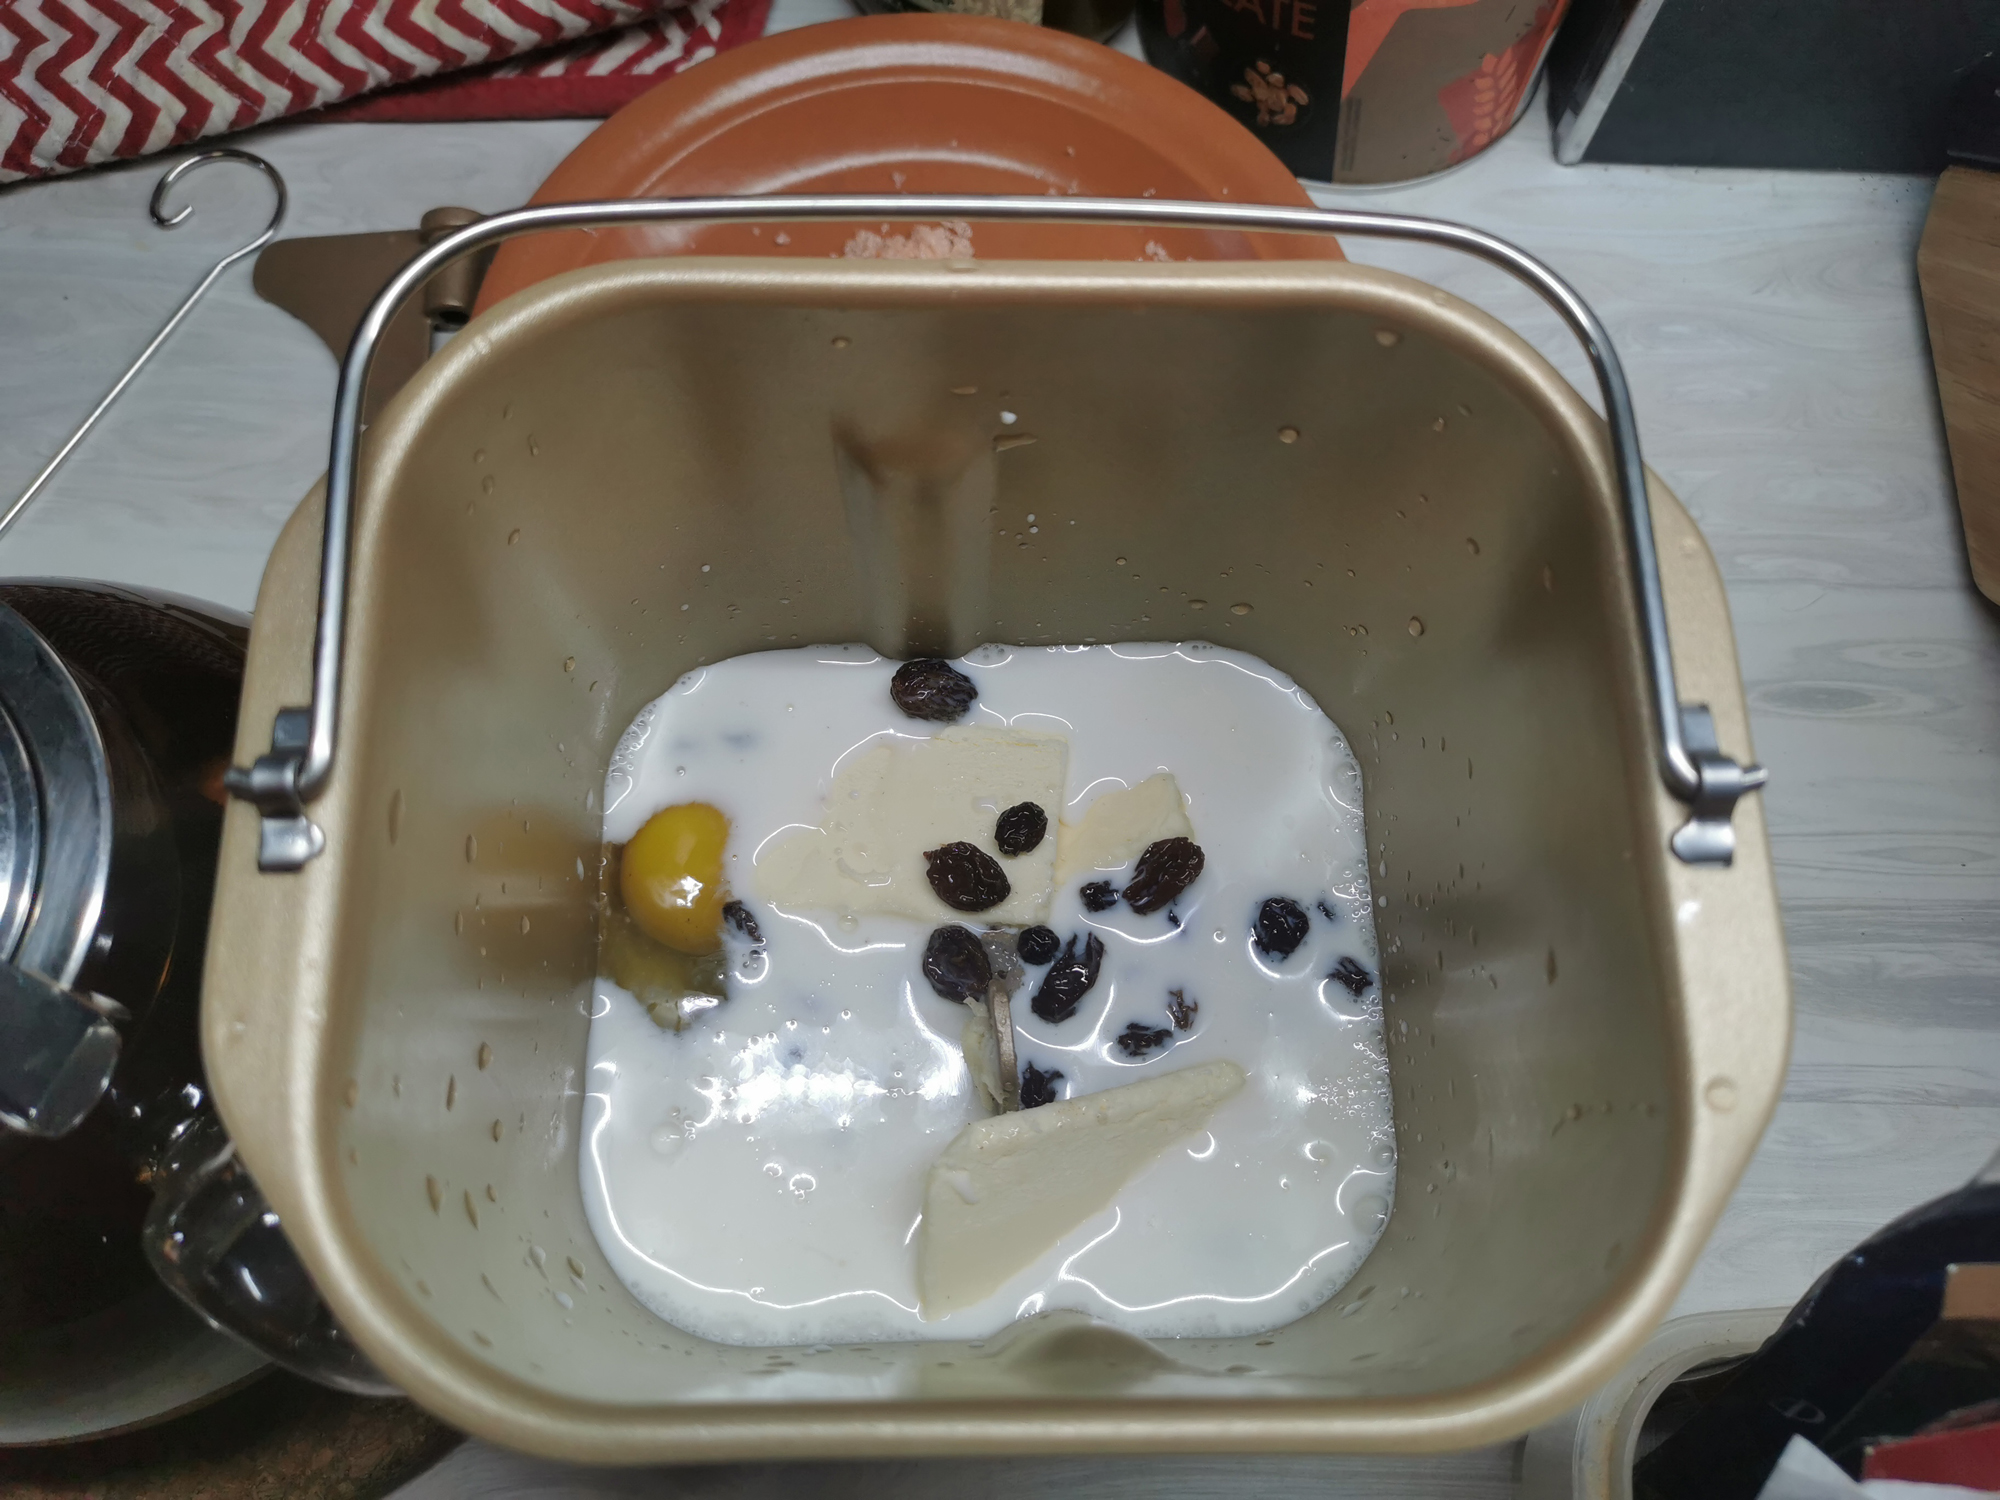
To prepare white bread, according to the recipe, we placed the ingredients in the bread machine in the following order: water, milk, eggs, salt, sugar, vegetable oil, wheat flour, yeast.
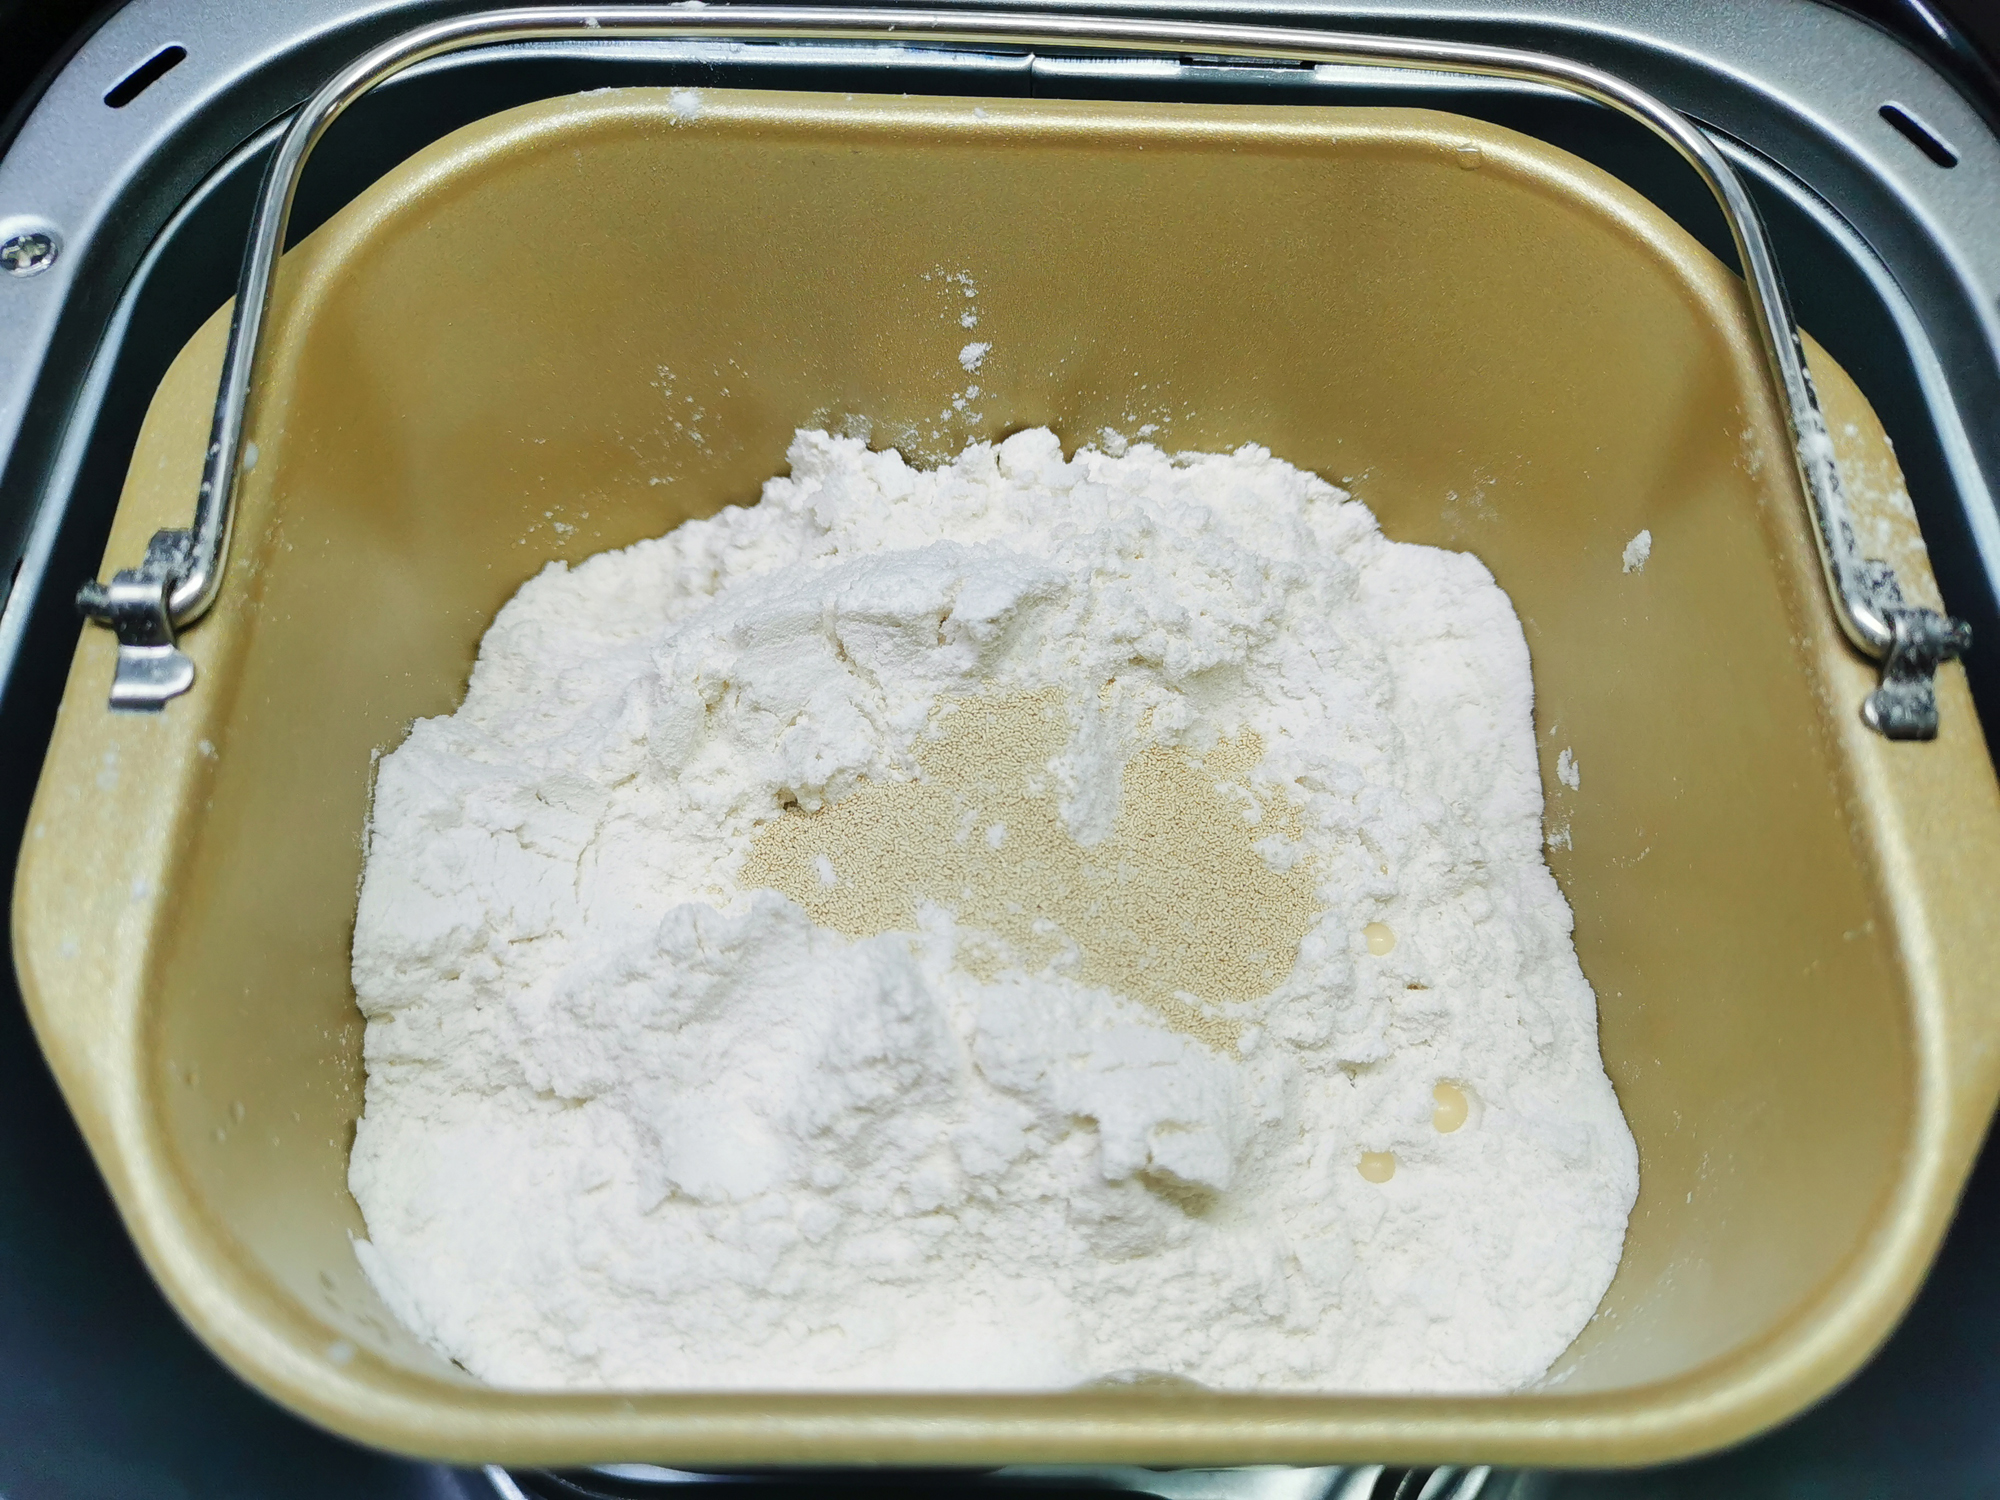
The bread was baked on the “Classic Bread” program, the crust color was set to “Medium”.
At the end of the program, we received a fully prepared soft and really airy bread.
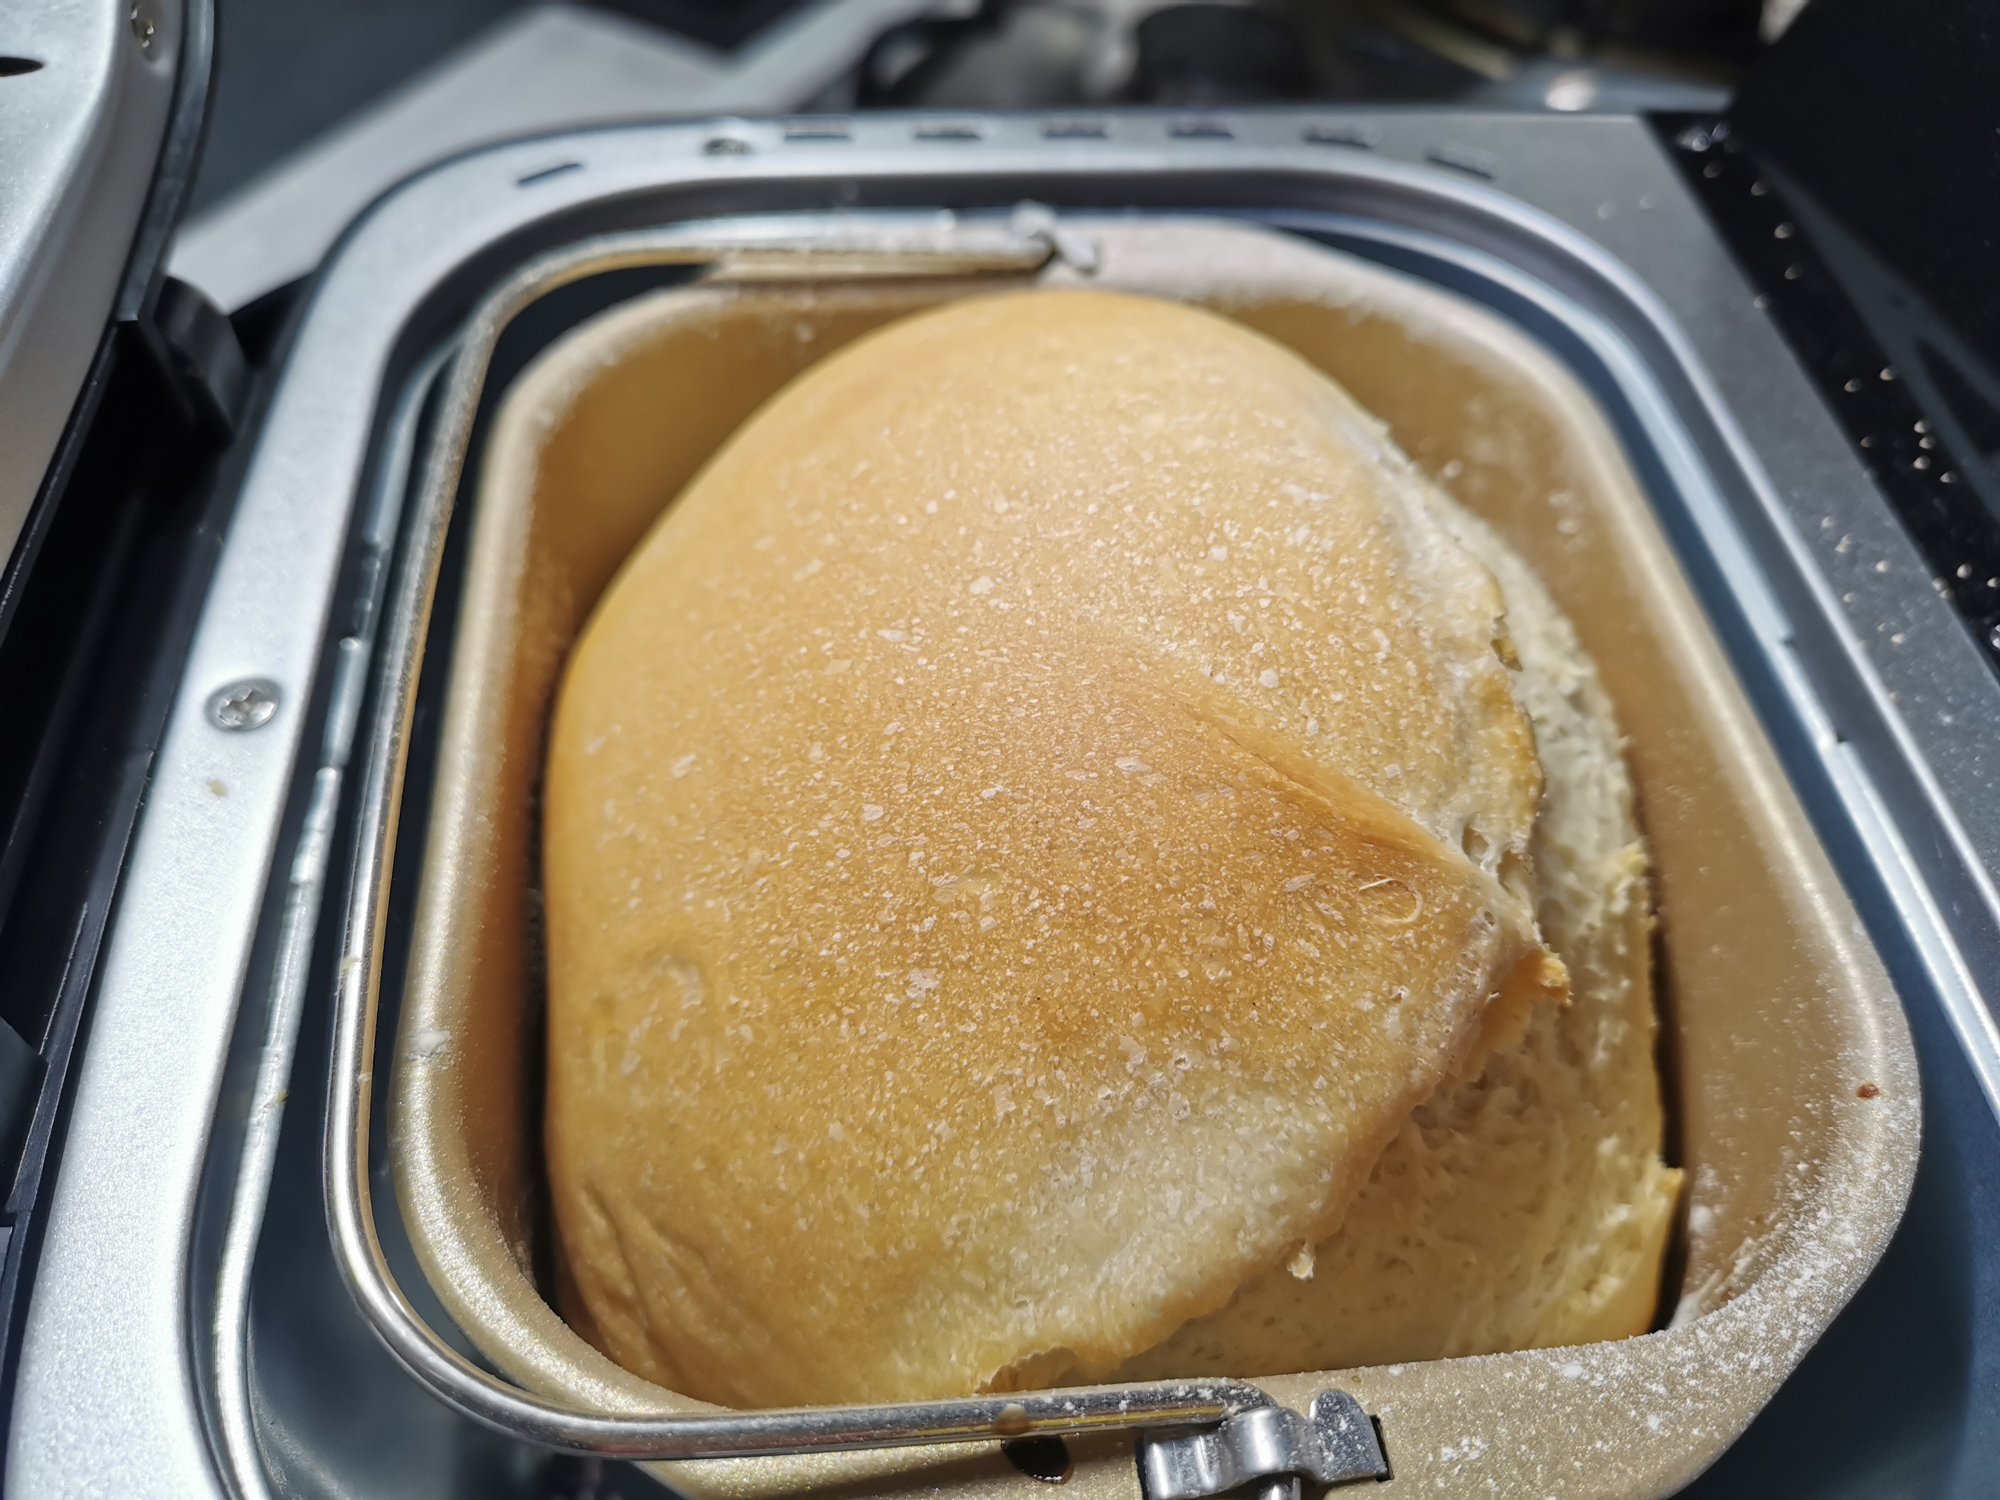
The only gripe is that our loaf slightly “blew off the roof”.
This happens, for example, when the dough turned out to be a little watery.
Since this did not affect the taste, and the problem turned out to be purely aesthetic, we give our bread an “excellent” rating.
Here is how our bread looked in the cut.
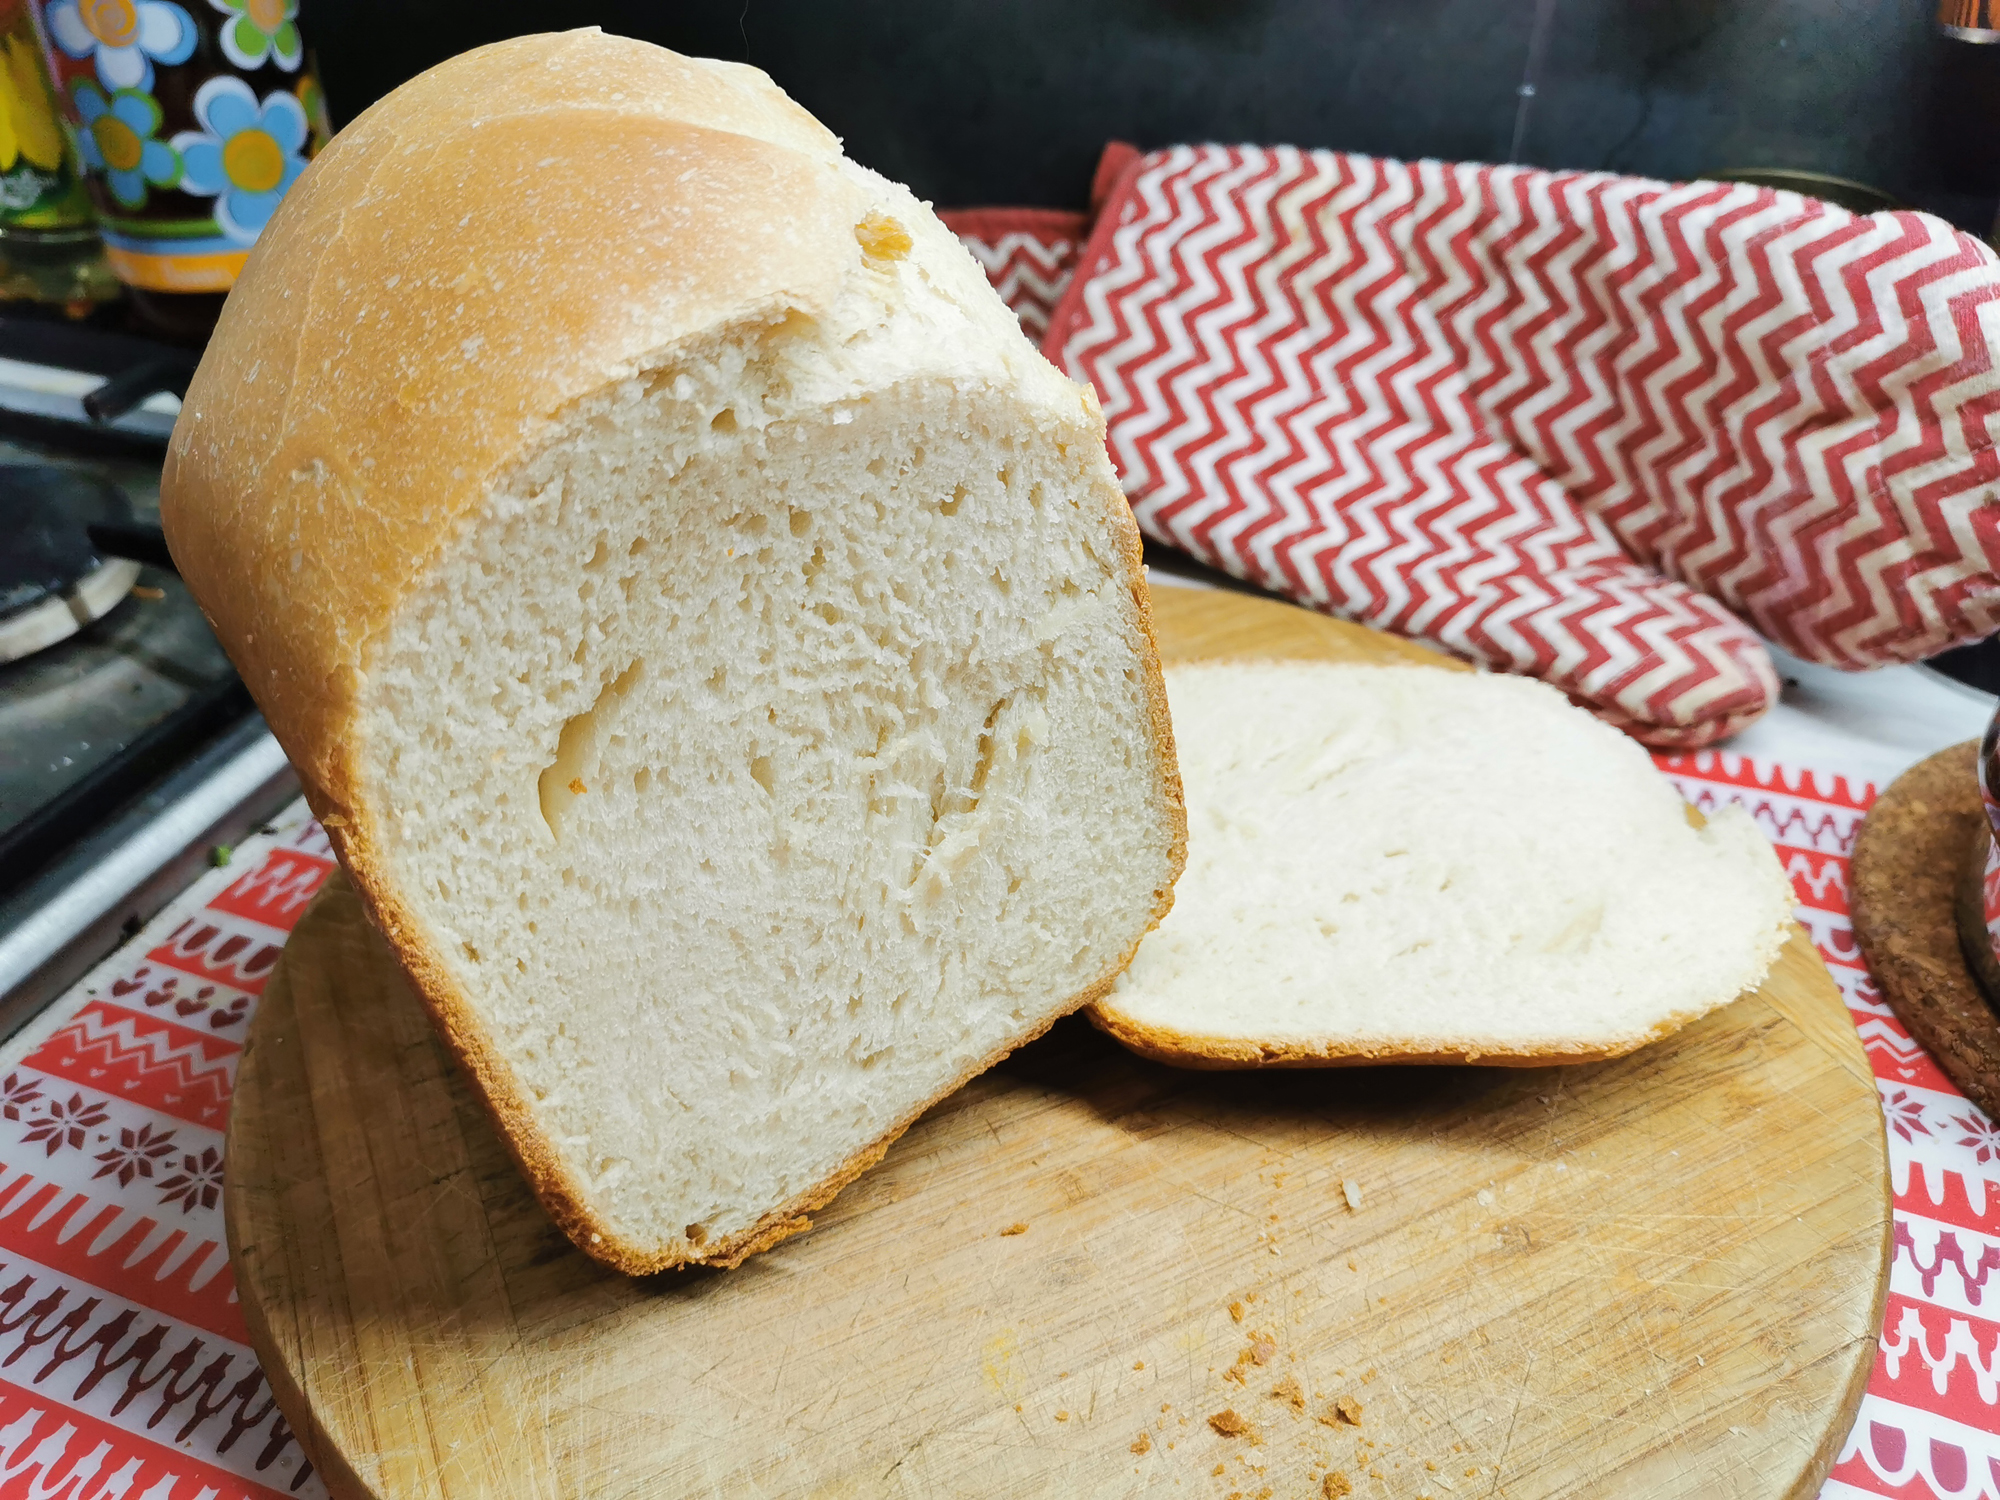
Result: excellent.
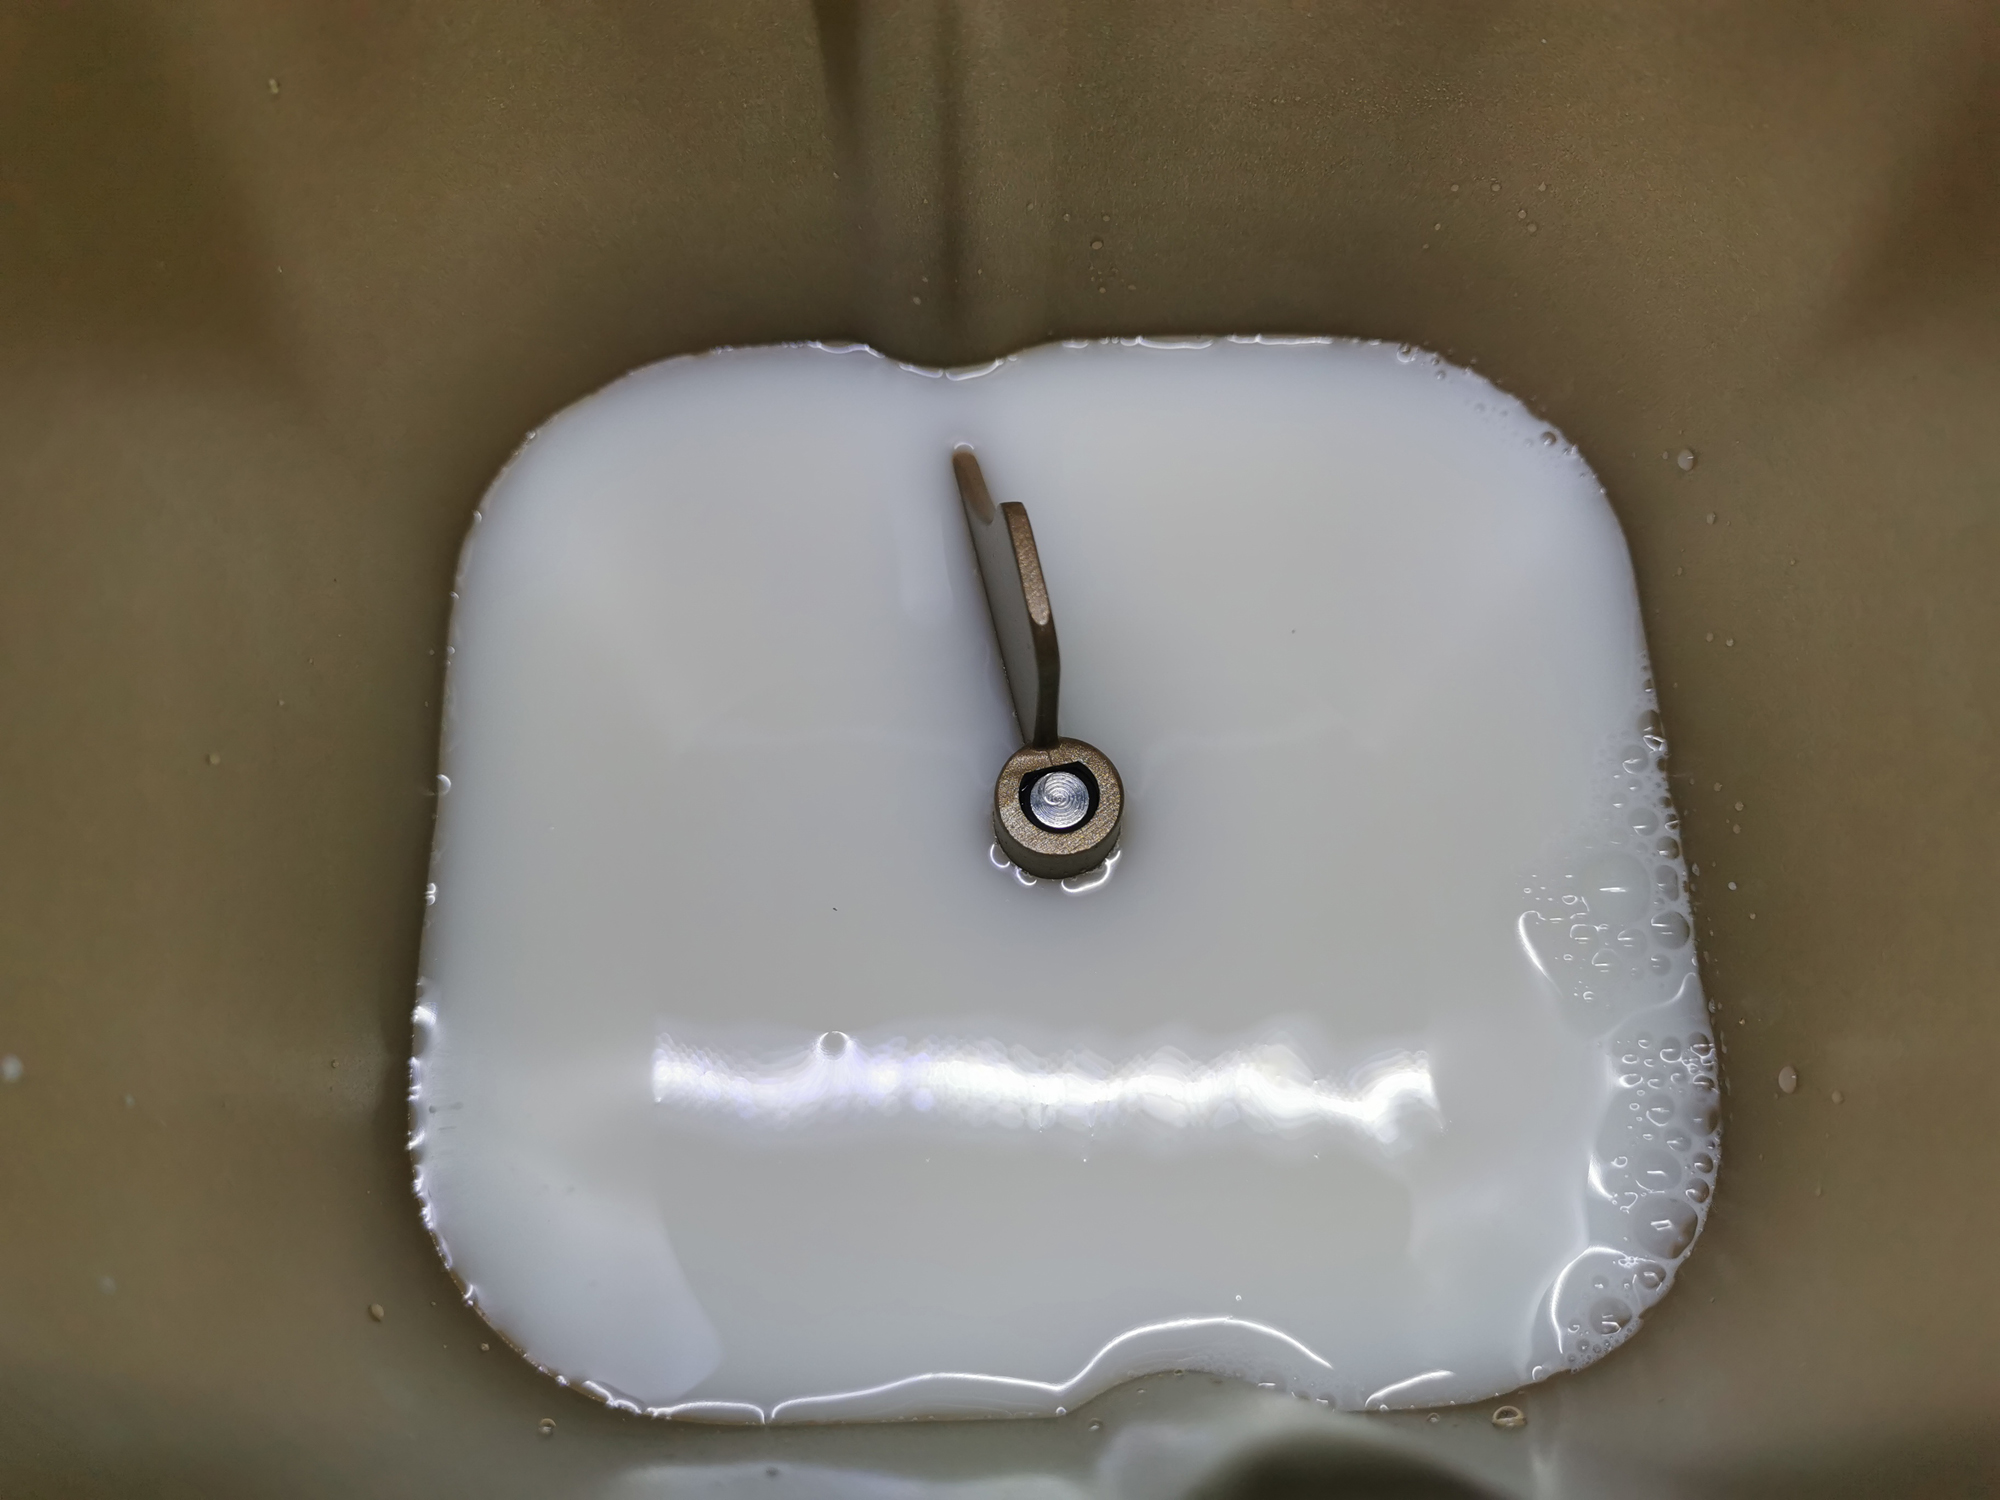
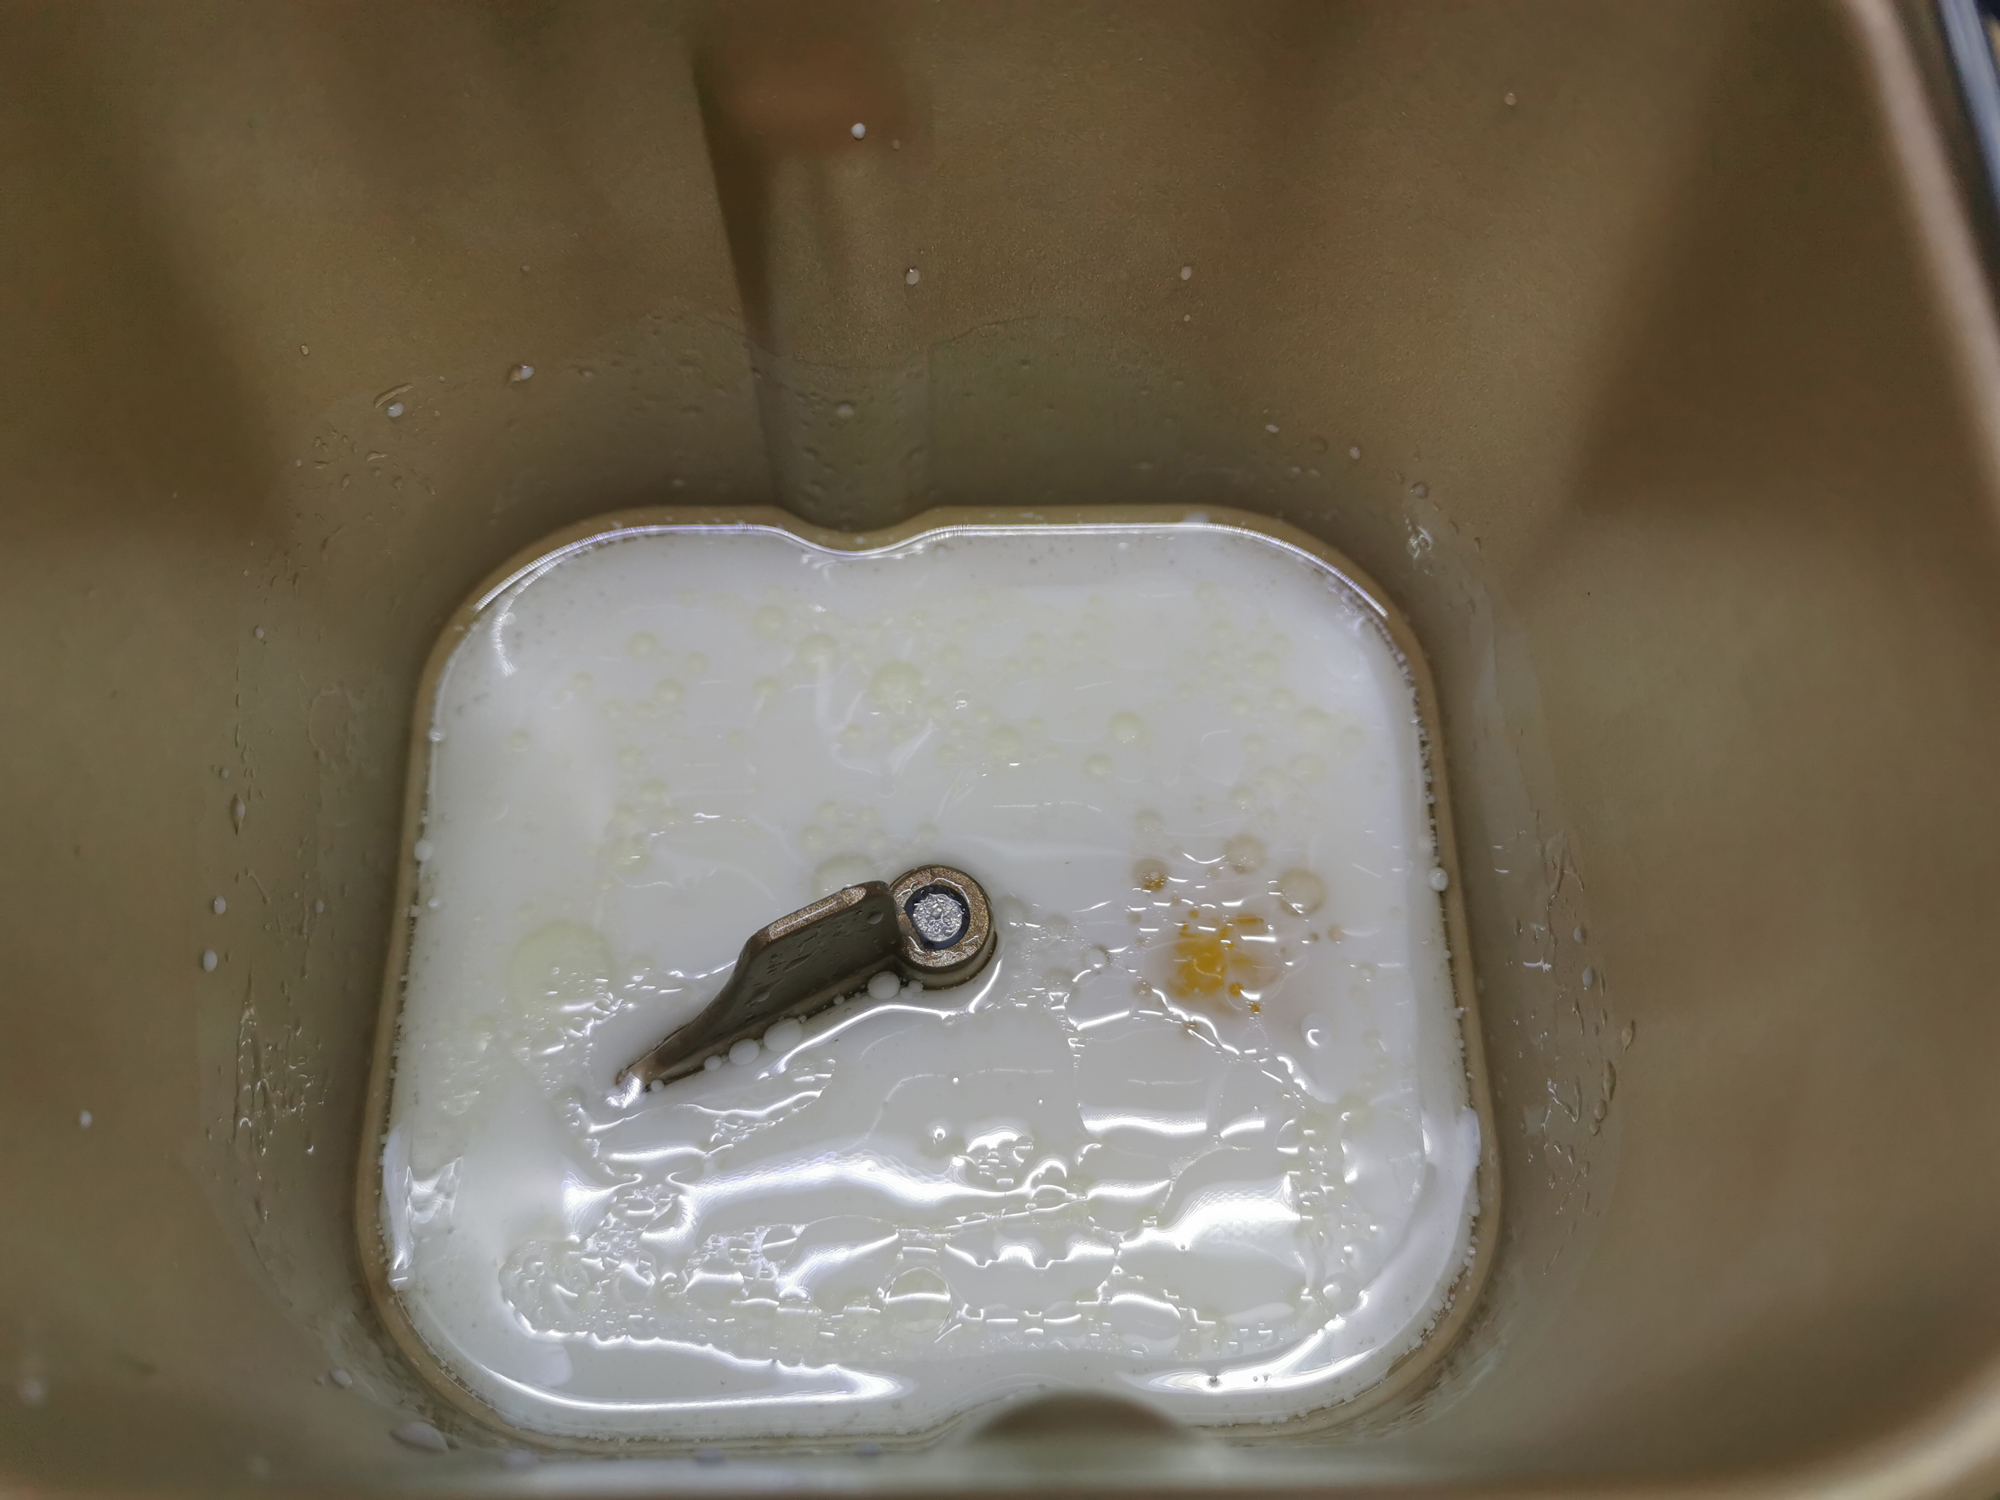
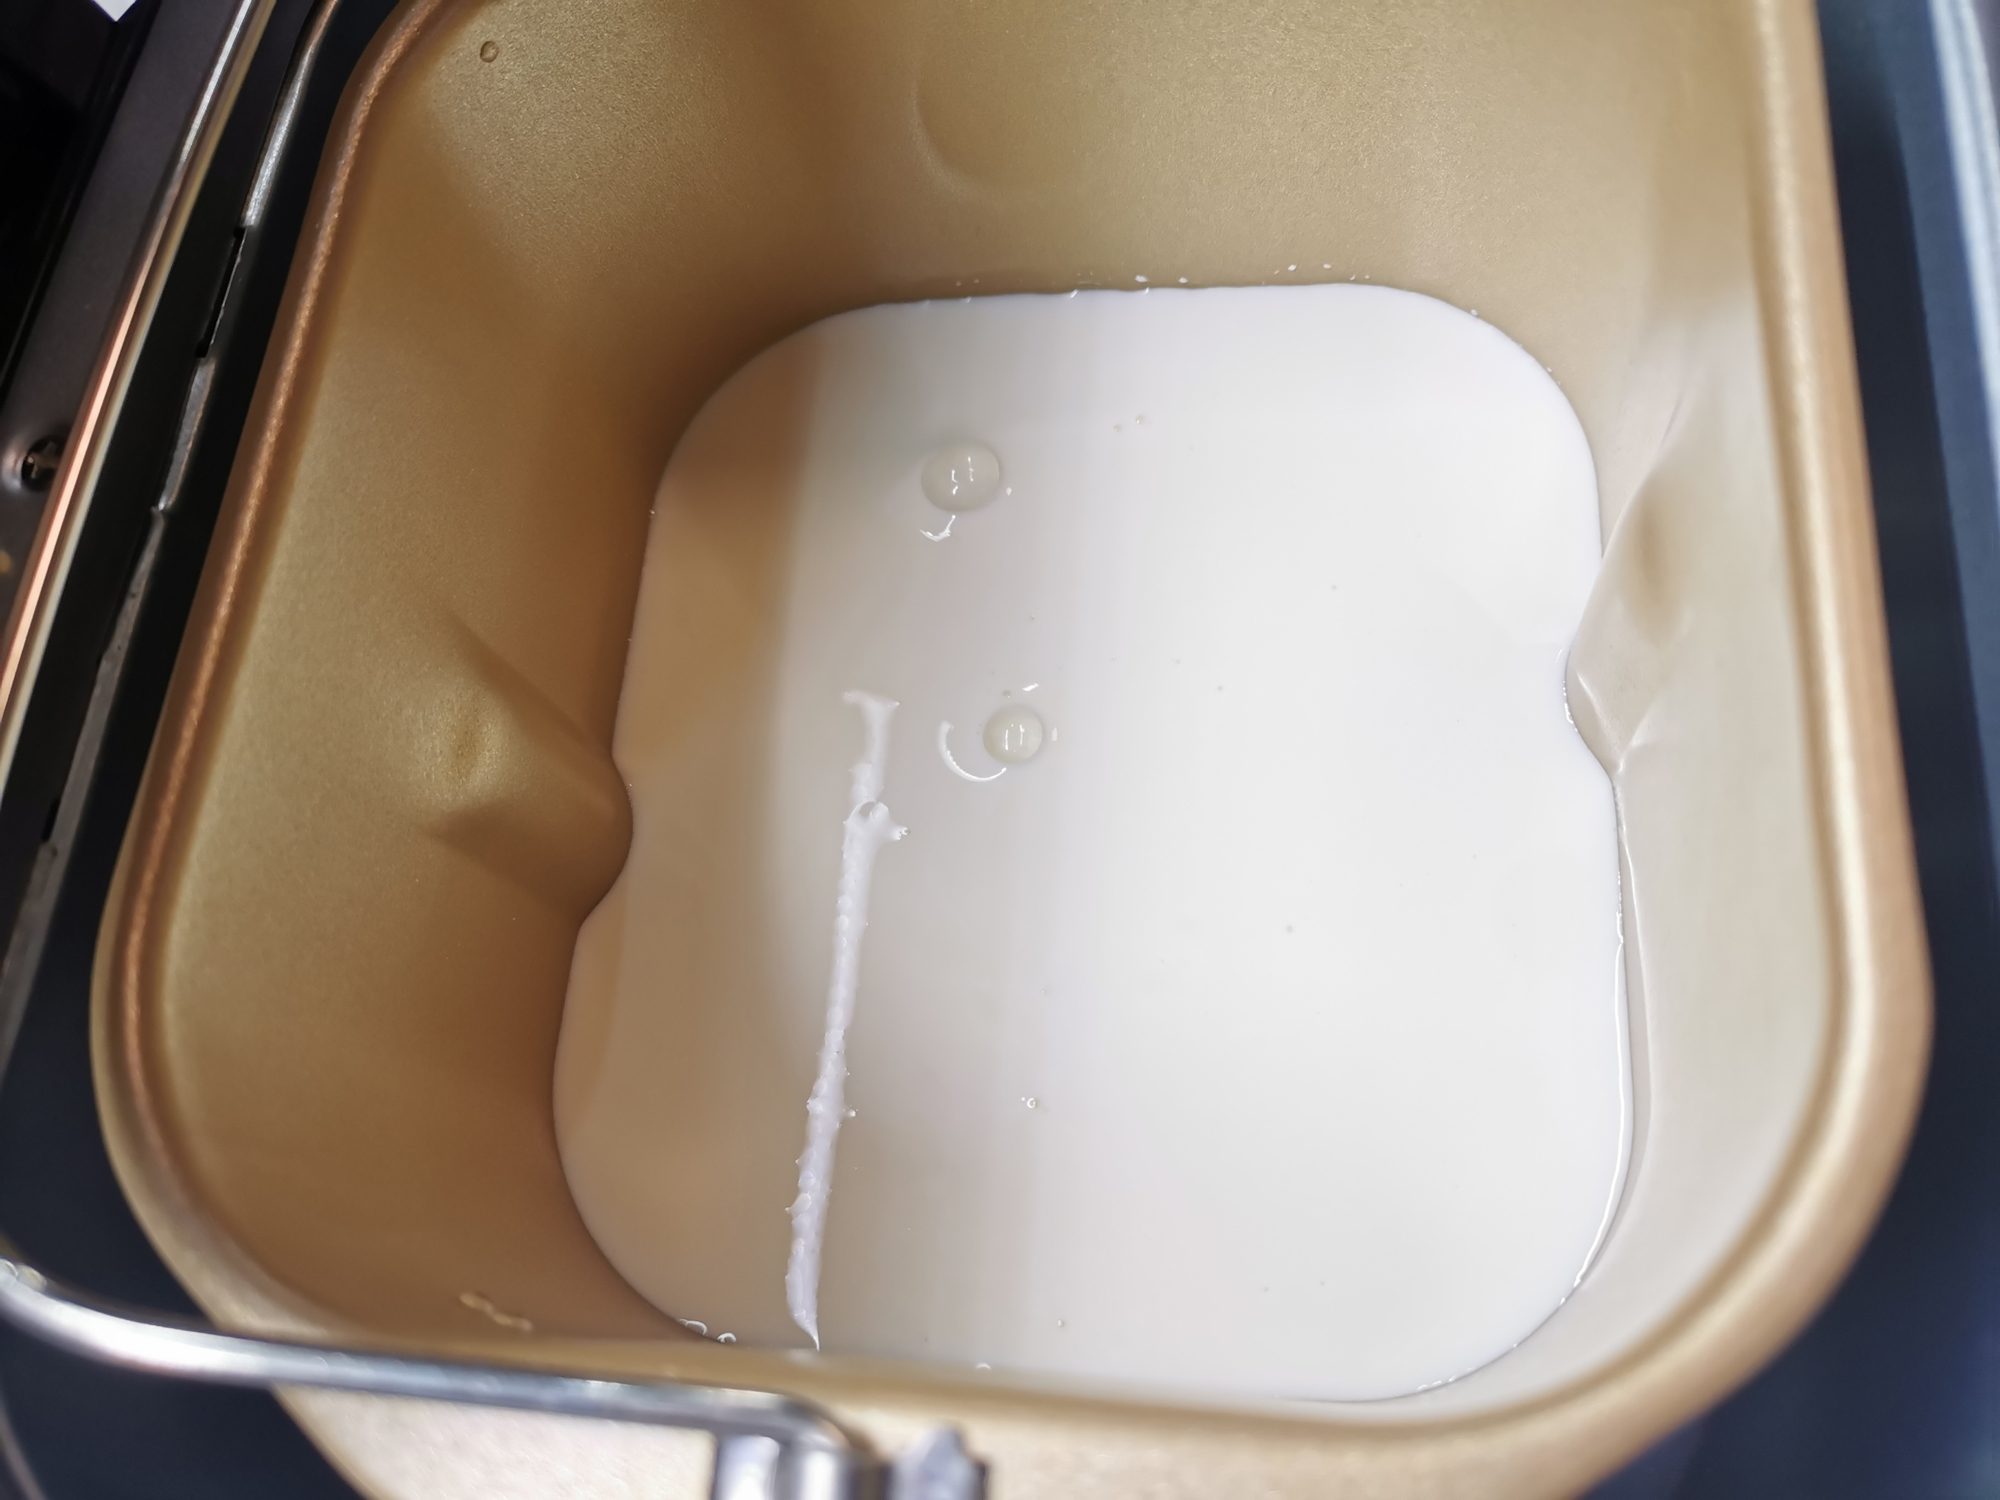
Yogurt program.
For yogurt, we took 300 ml of sour milk with a fat content of 2.5%, 350 ml of milk with a fat content of 3.2% and 350 ml of 10% cream.
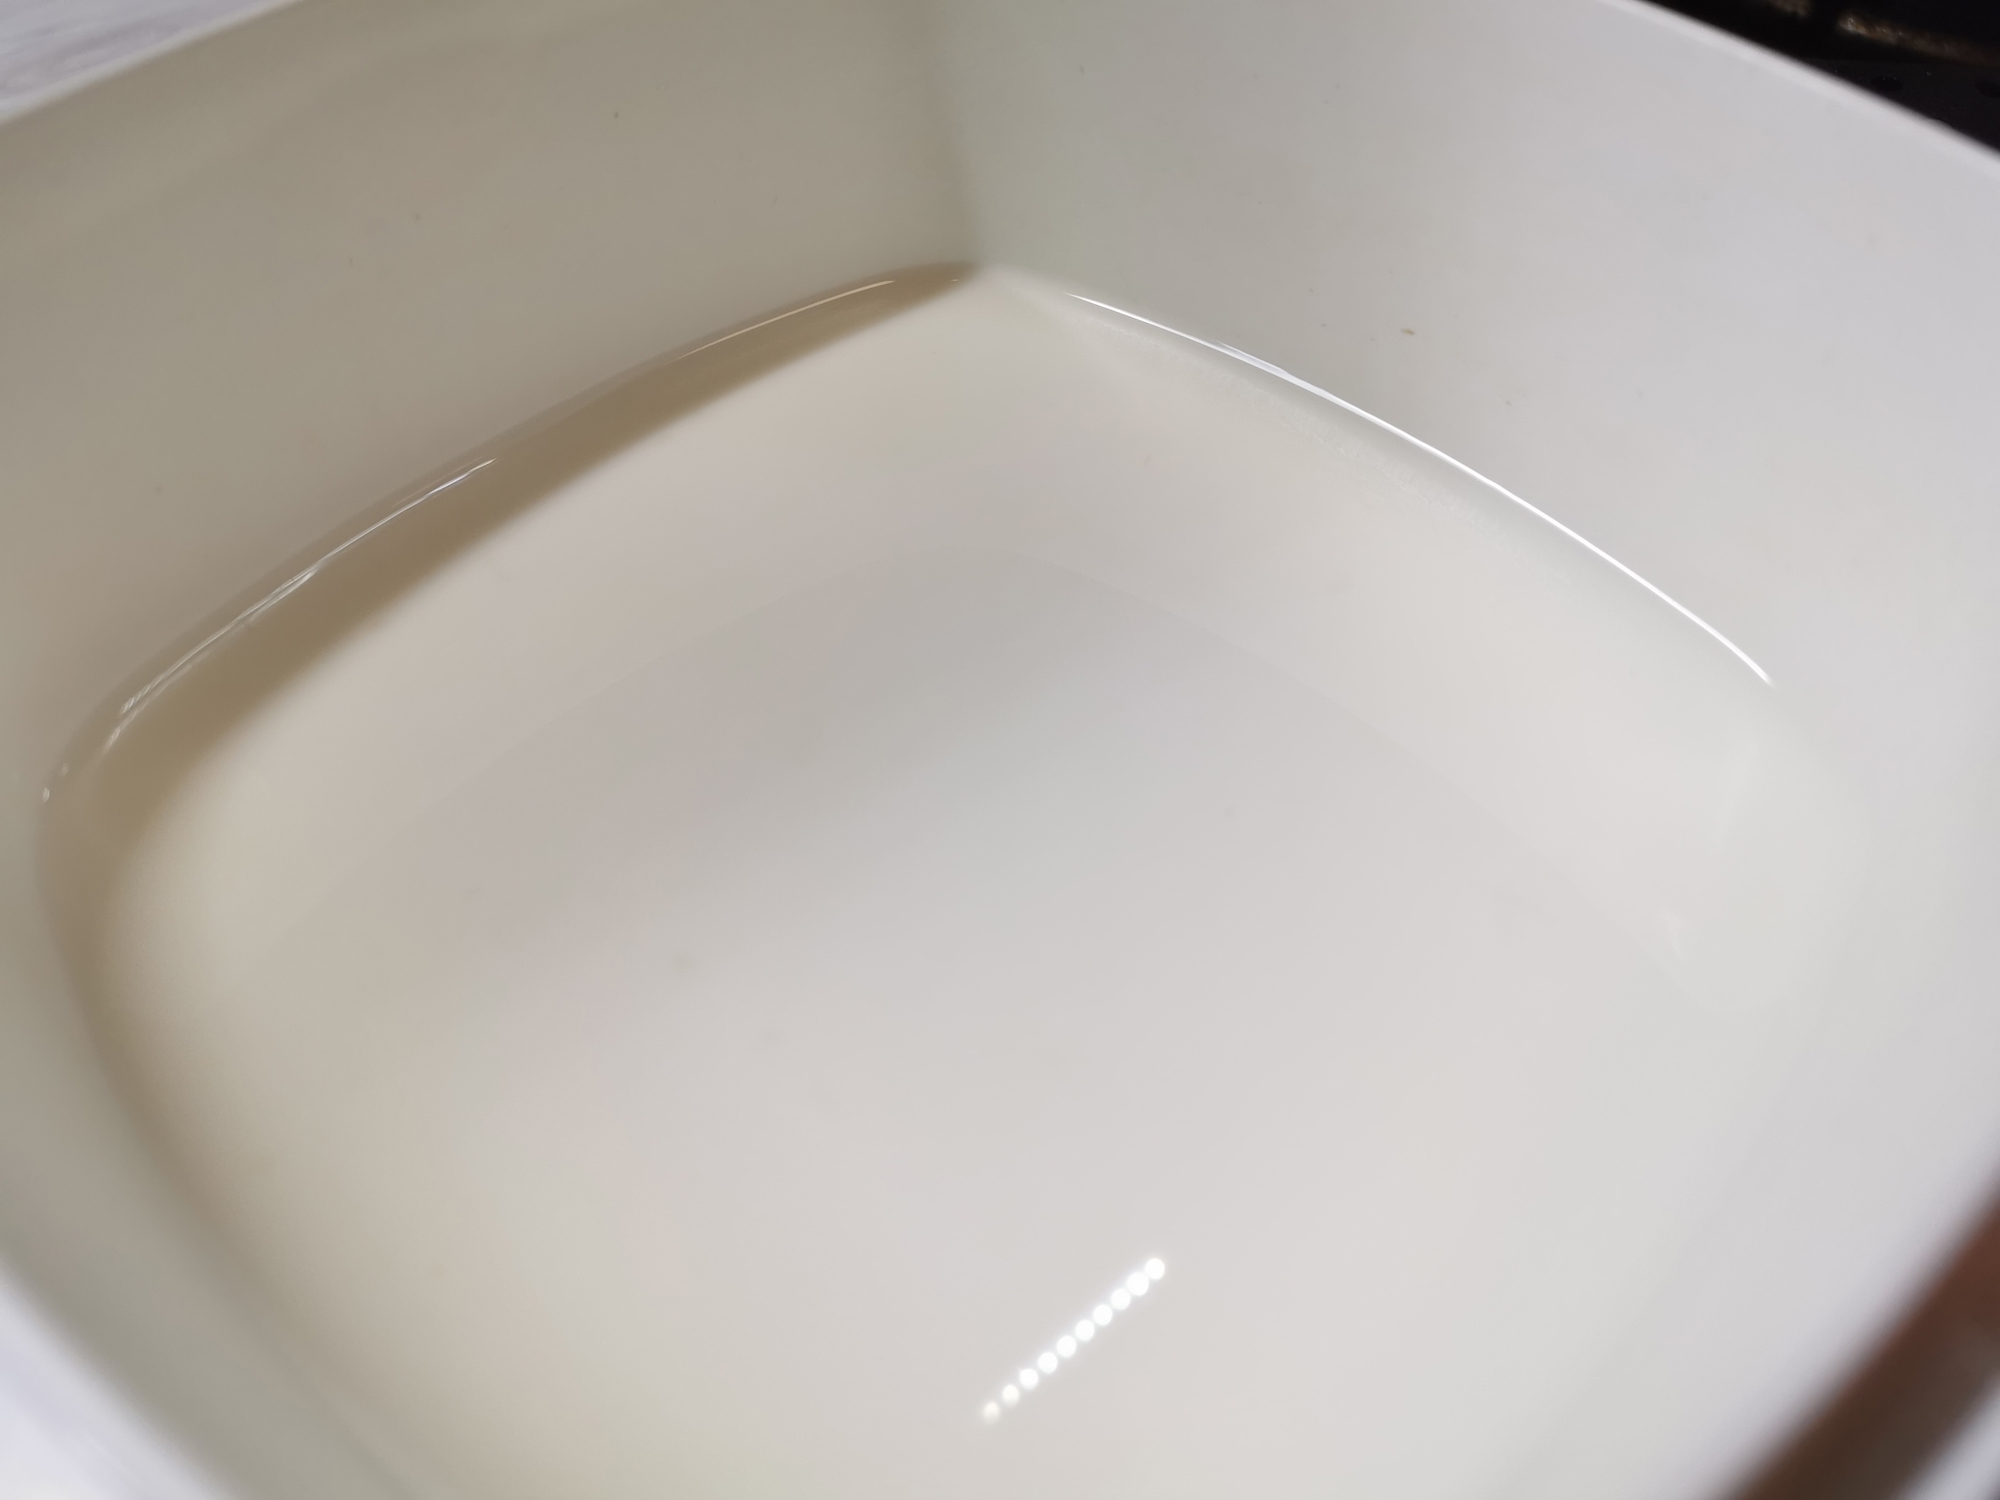
We combined all the ingredients, mixed thoroughly and started the bread machine on the Yoghurt program for 12 hours.
After a predetermined time, a rather thick yoghurt was obtained.
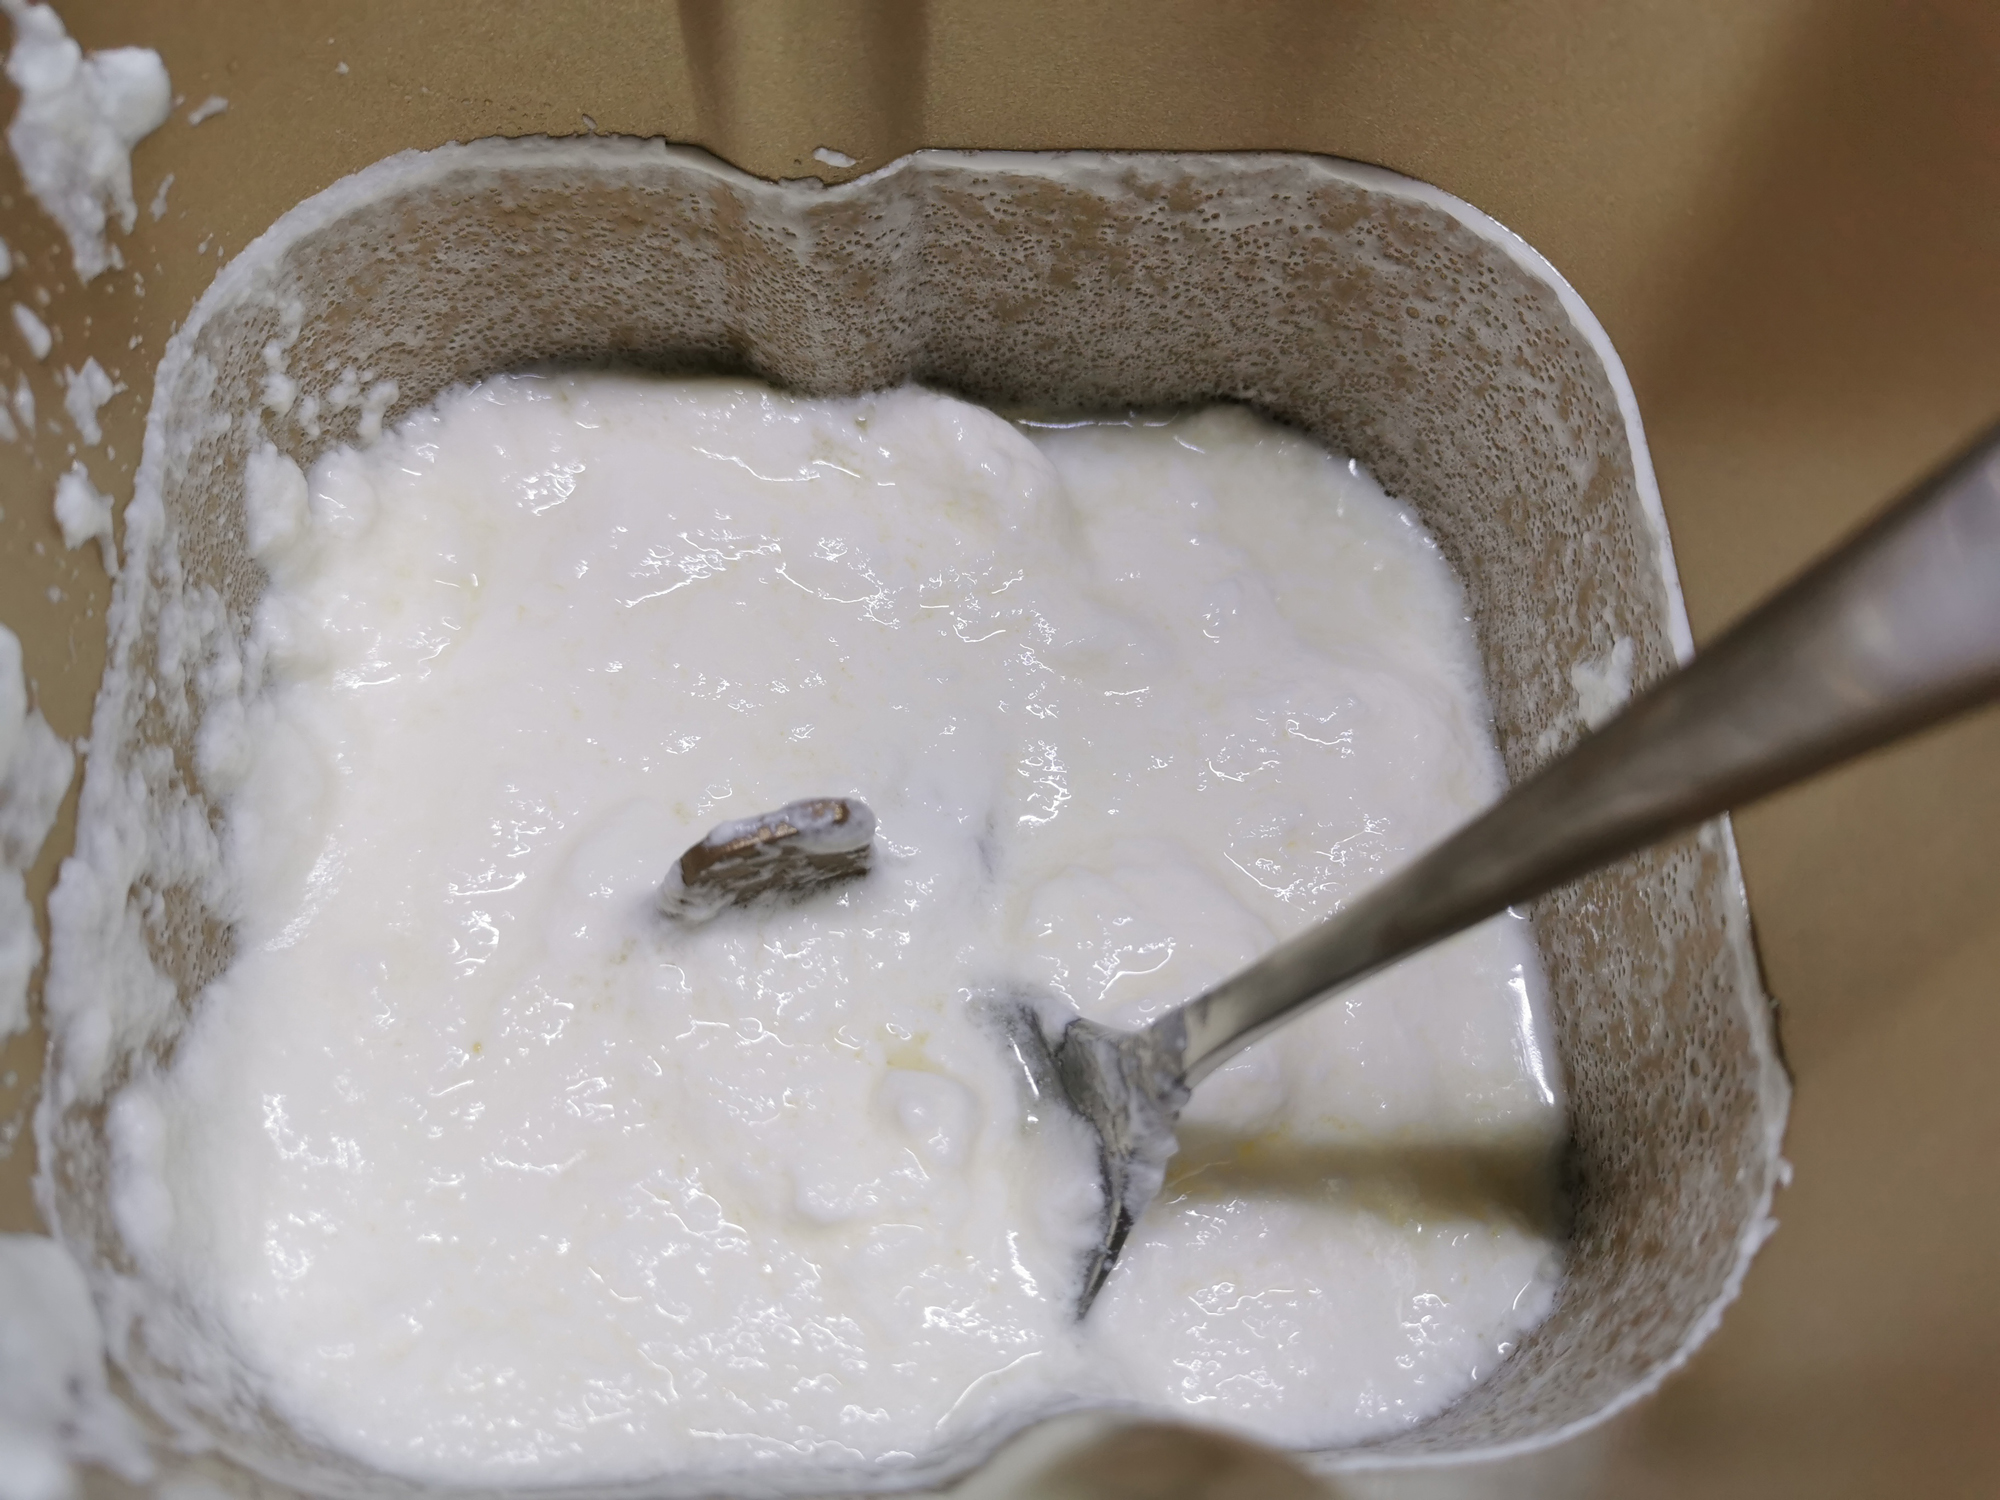
…which was further thickened when left for 3 hours in the refrigerator.
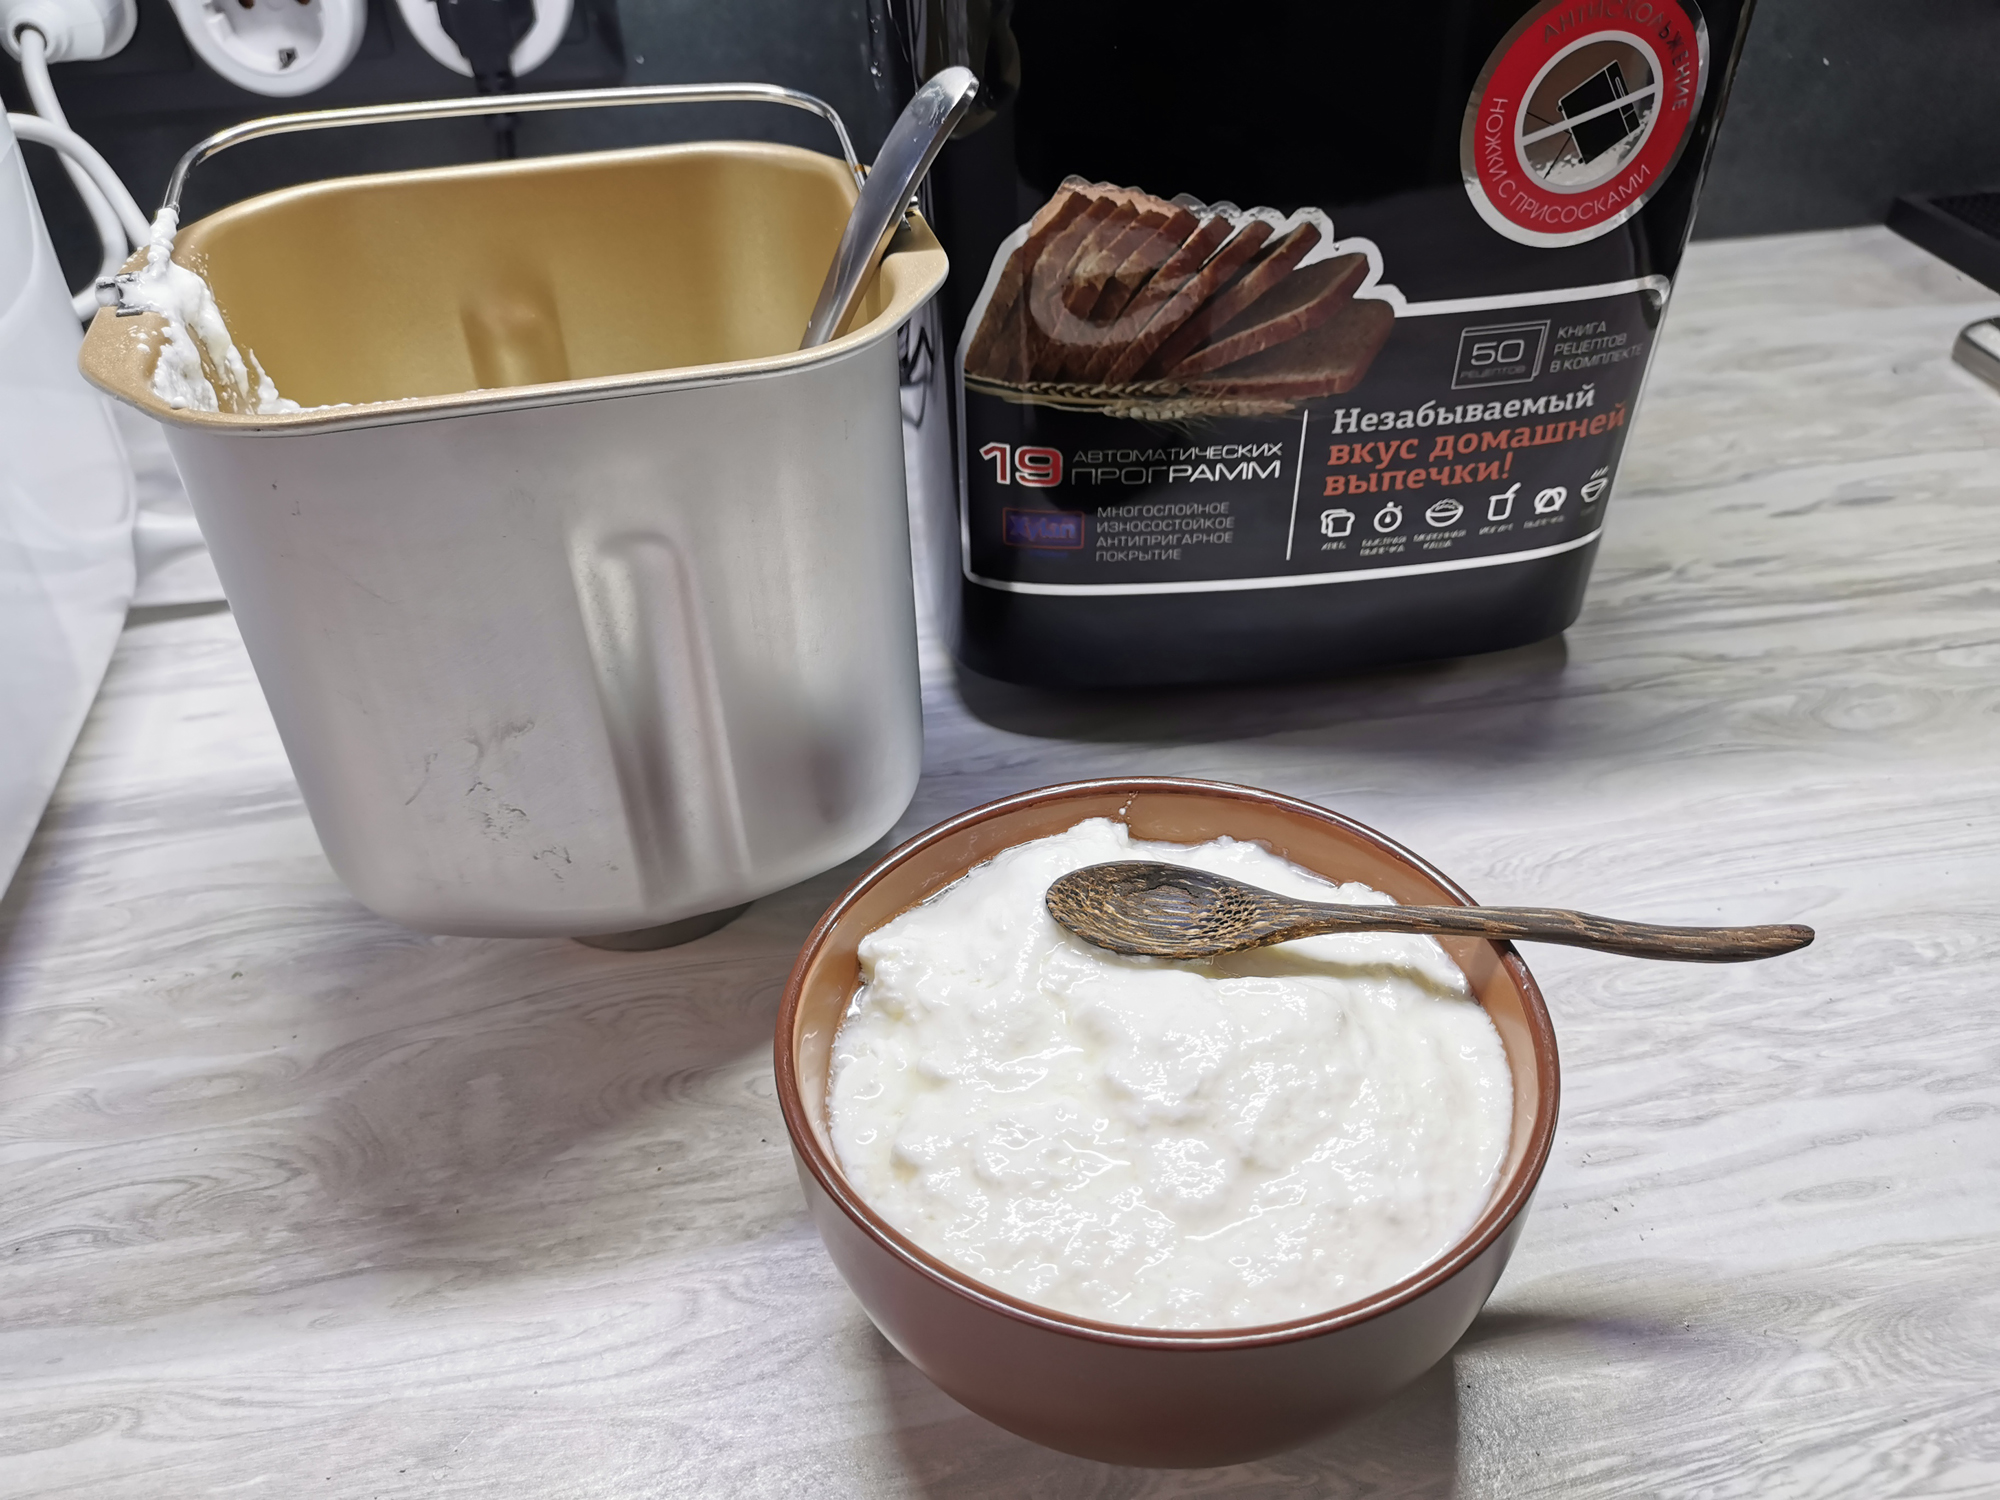
We were completely satisfied with the taste and appearance of the finished yogurt.
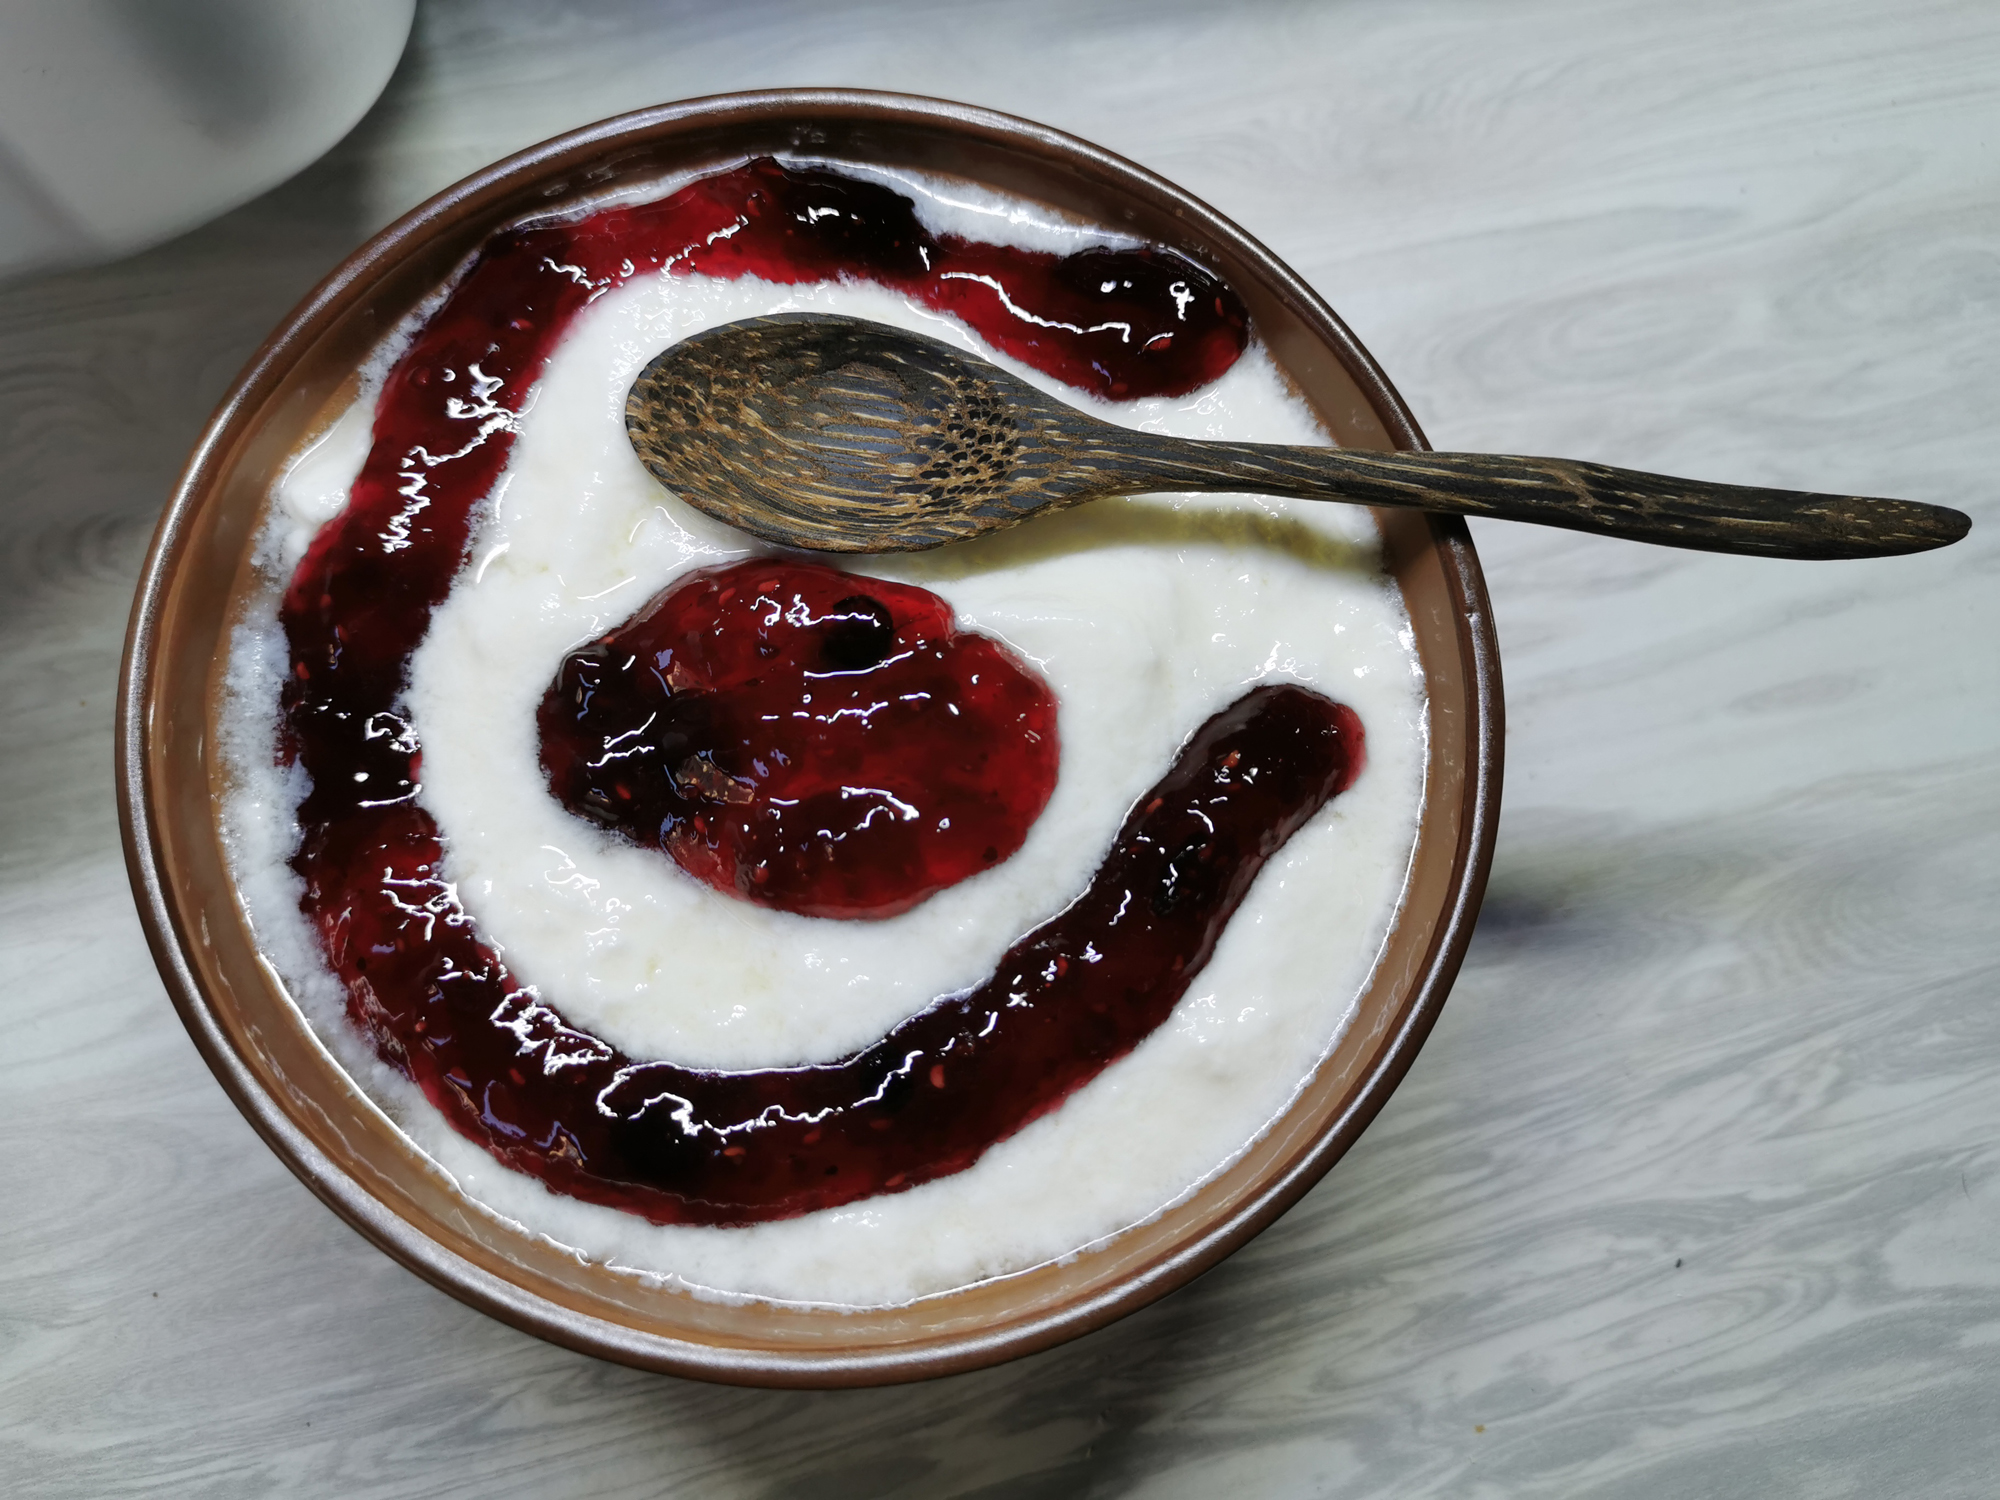
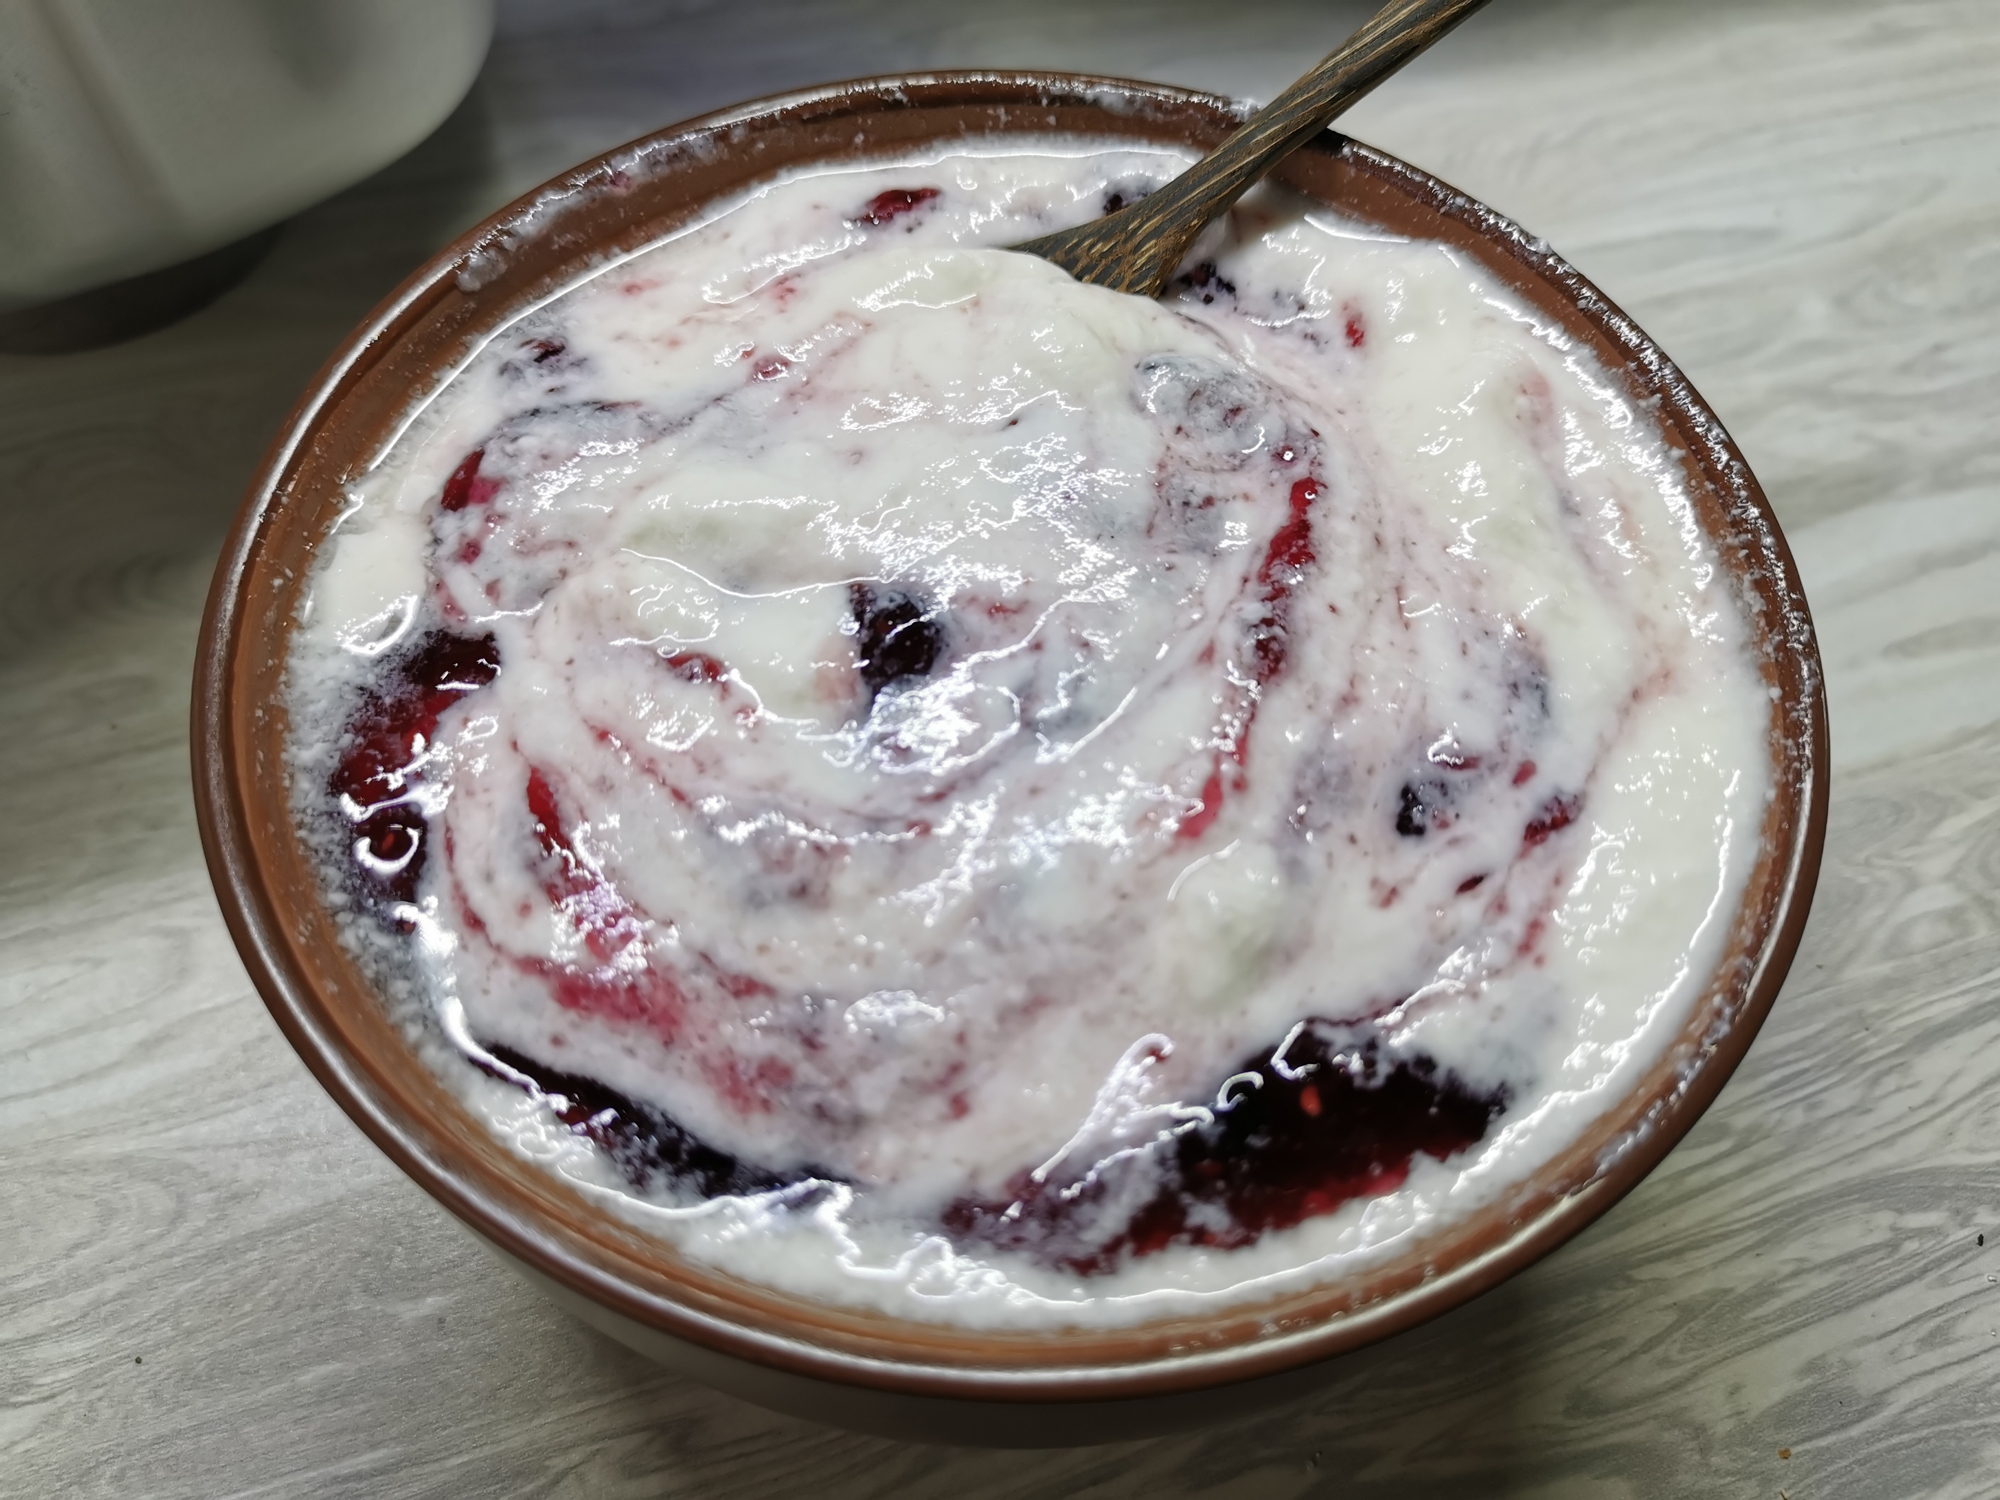
Result: excellent.
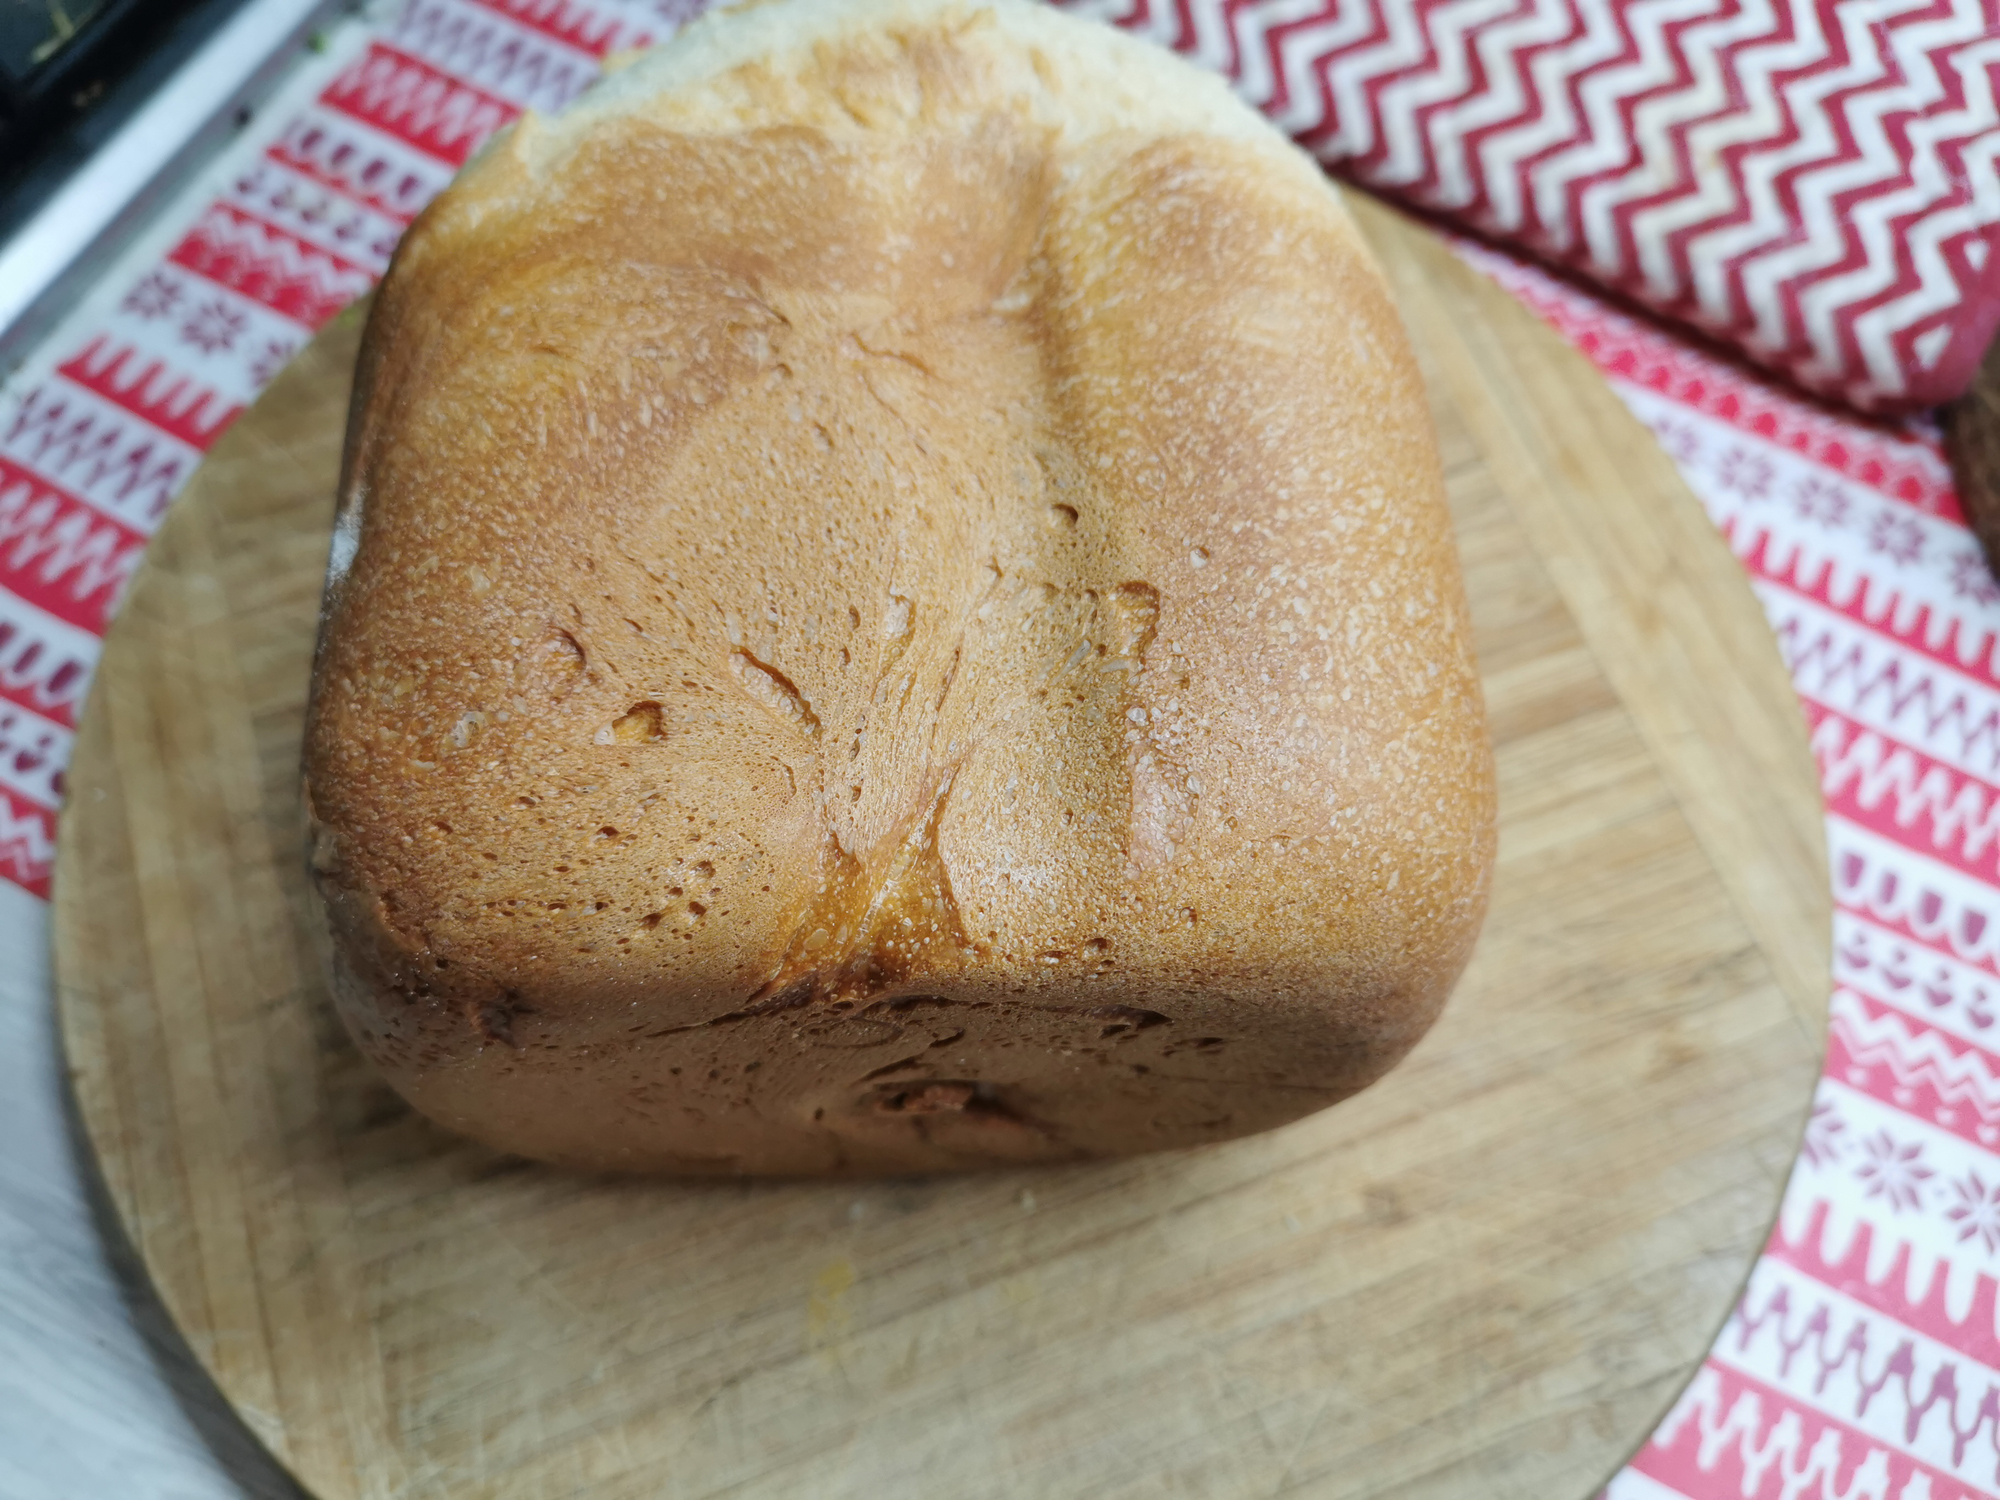
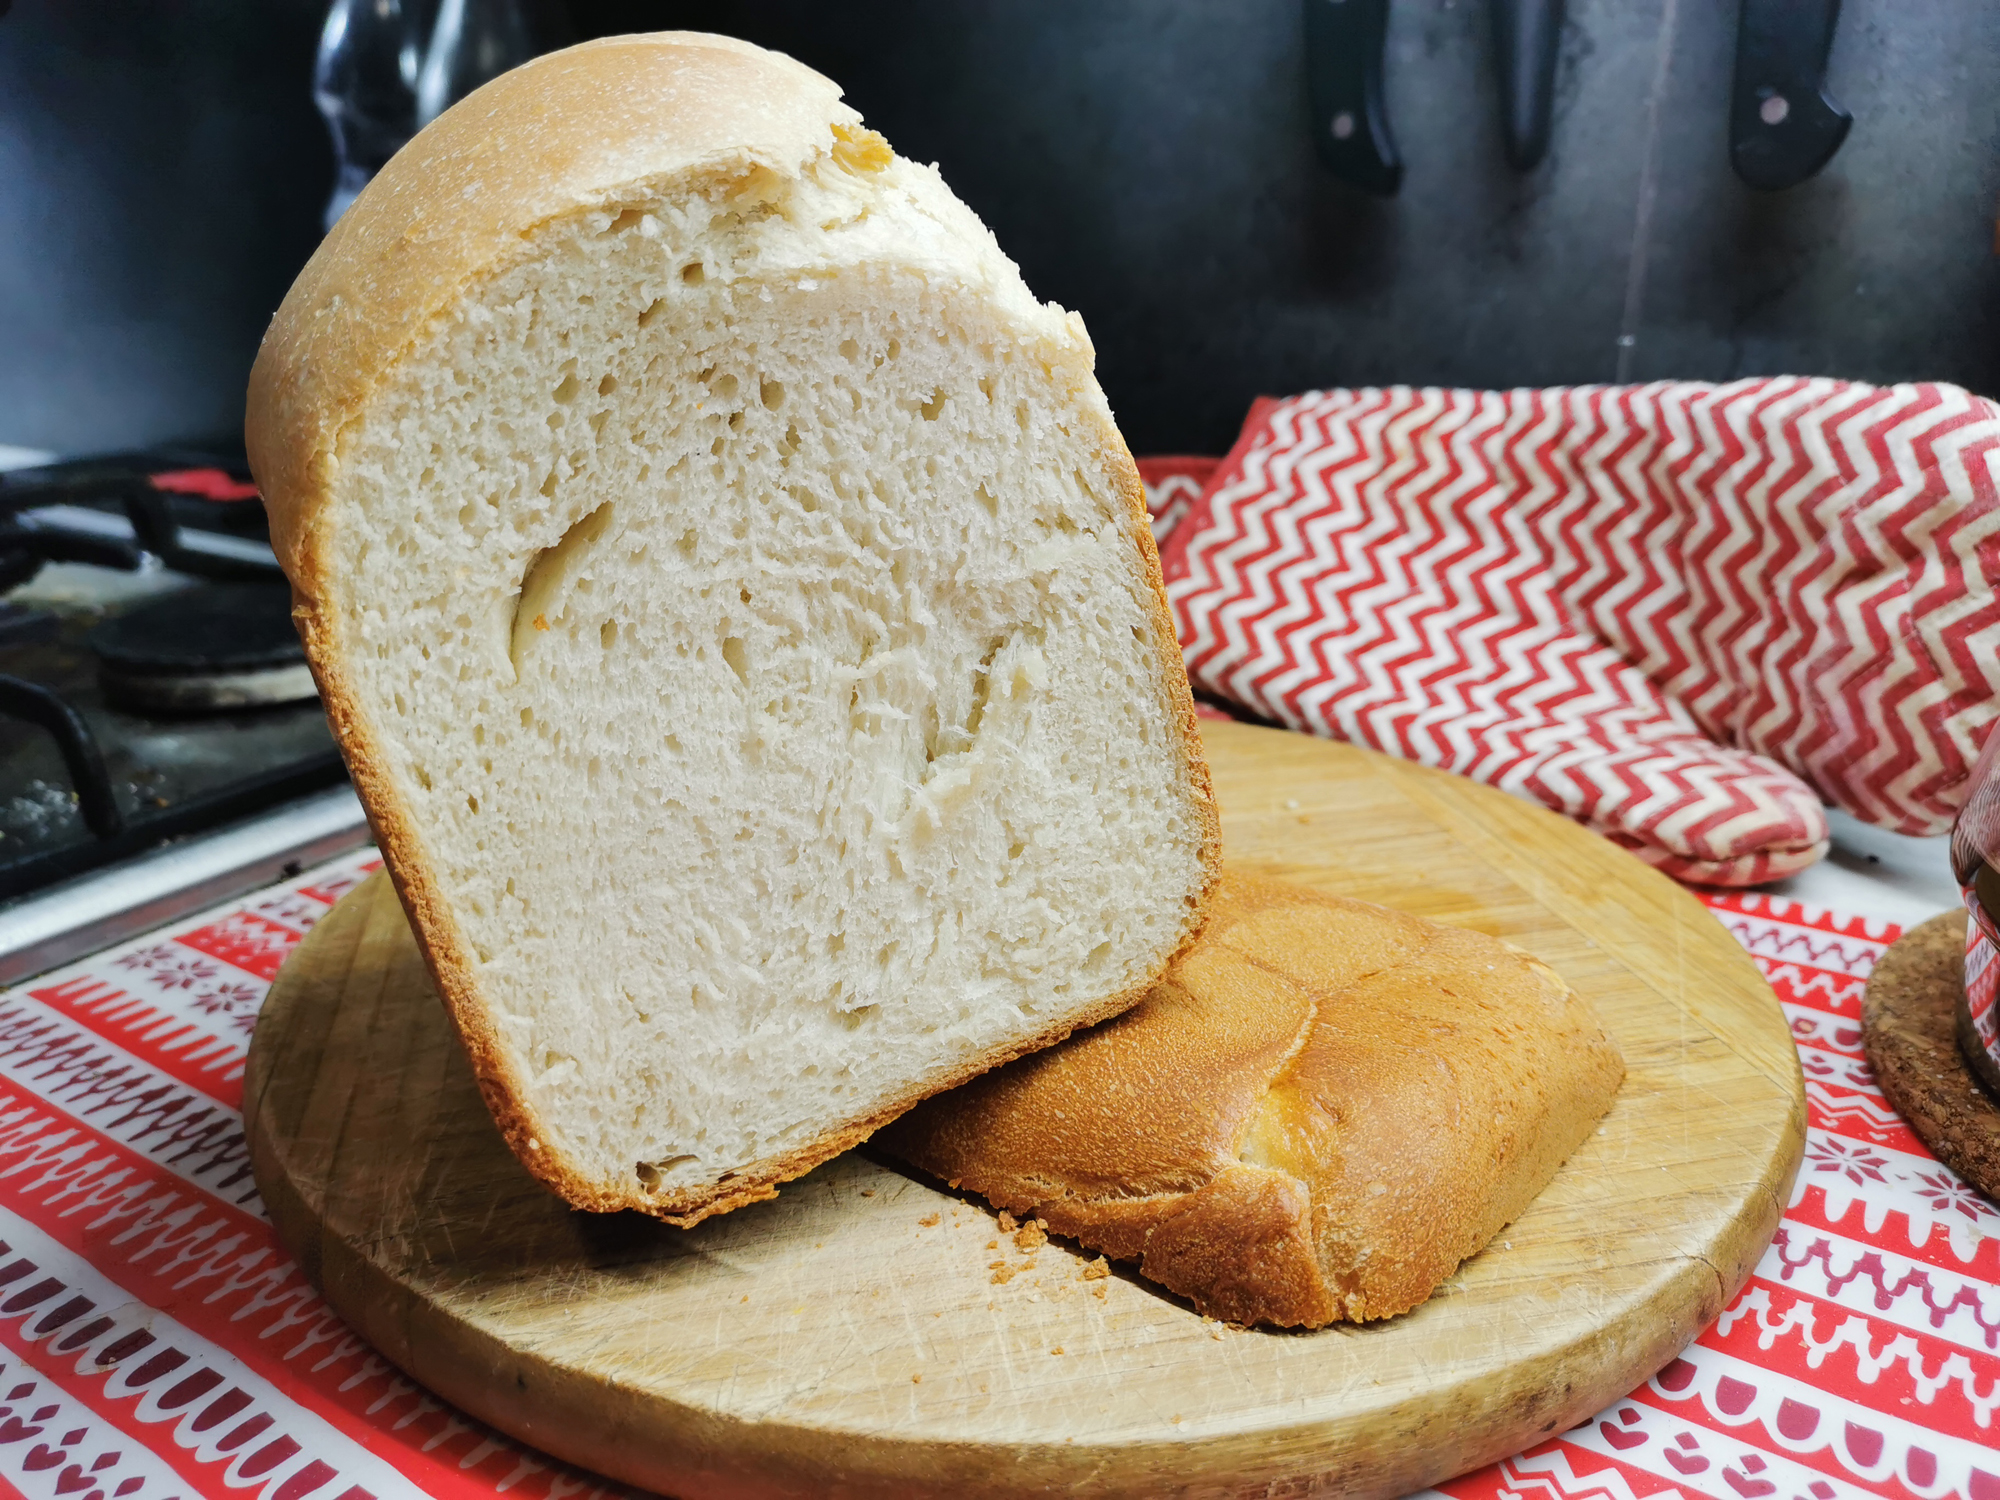
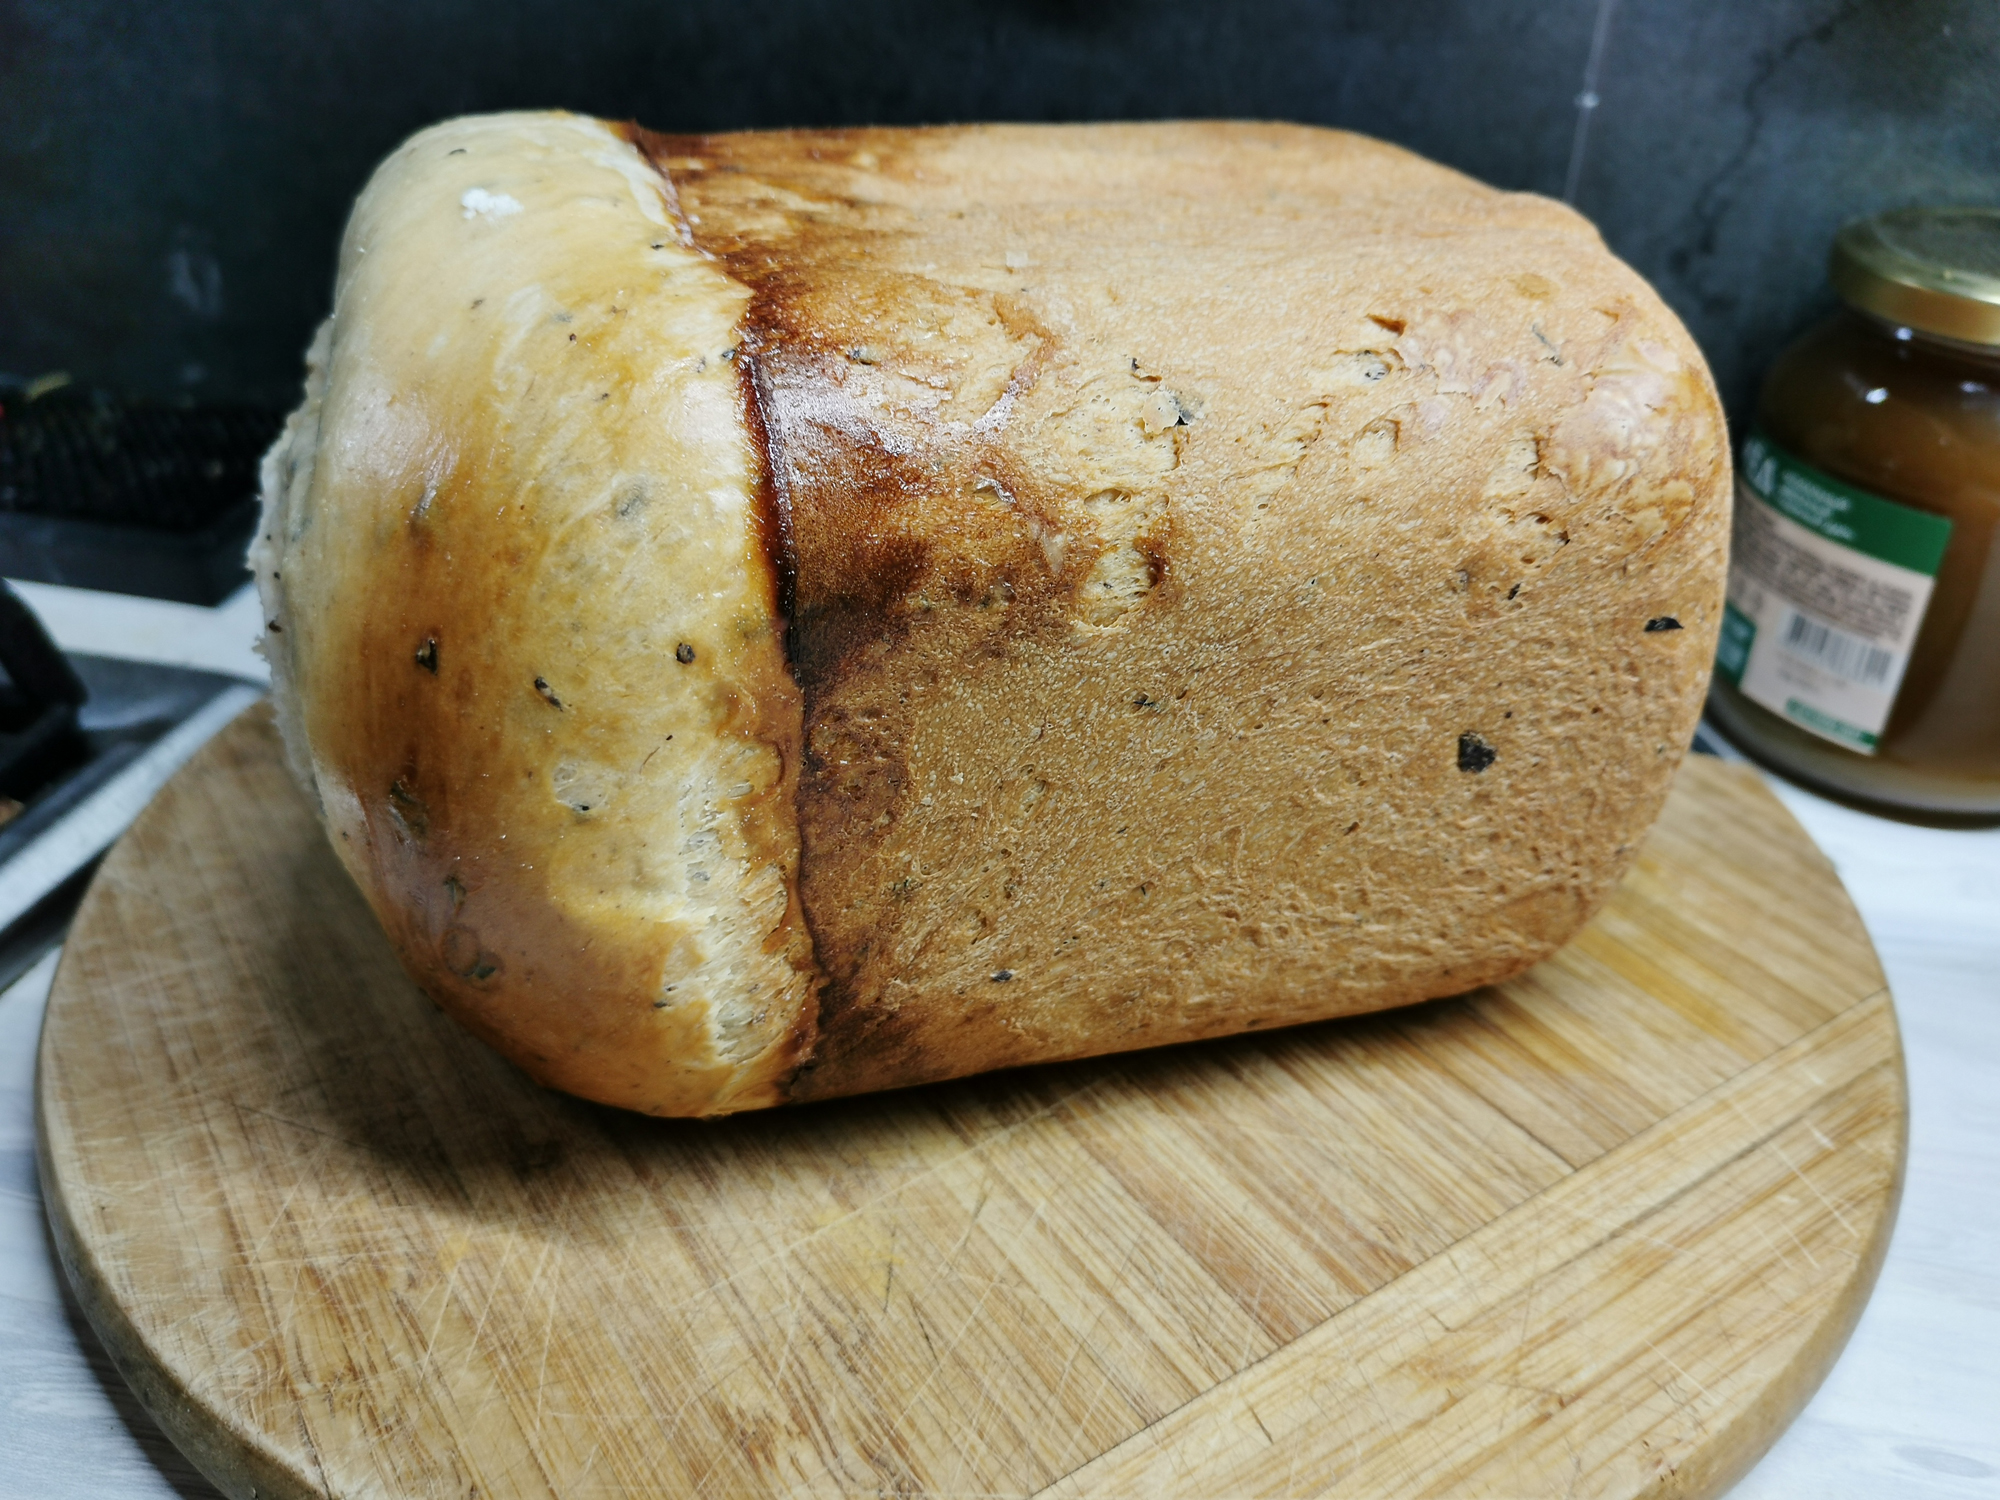
Program “Rye bread”, recipe “Rye bread with cumin”
We needed a lot of ingredients for rye bread. Here is the full list of what we had to stock up:
- Ground nutmeg – 1 g
- Sugar – 12 g
- Whole grain flour – 20 g
- Premium wheat flour – 350 g
- Honey – 12 g
- Vegetable oil – 12 ml
- Salt – 6 g
- Water – 330 ml
- Rye malt – 28 g
- Rye flour – 230 g
- Cumin seeds – 1 g
- Ground coriander – 2 g
- Yeast – 4.5 g
Before starting cooking, the ingredients had to be put into the bread machine in the following order: water, sugar, salt, honey, yeast, malt, ground coriander, whole cumin, nutmeg, vegetable oil, wheat flour, rye flour, whole grain flour.

Bread is being prepared on the “Rye Bread” program, the weight should be set at 750 g, the crust color should be “Medium”.
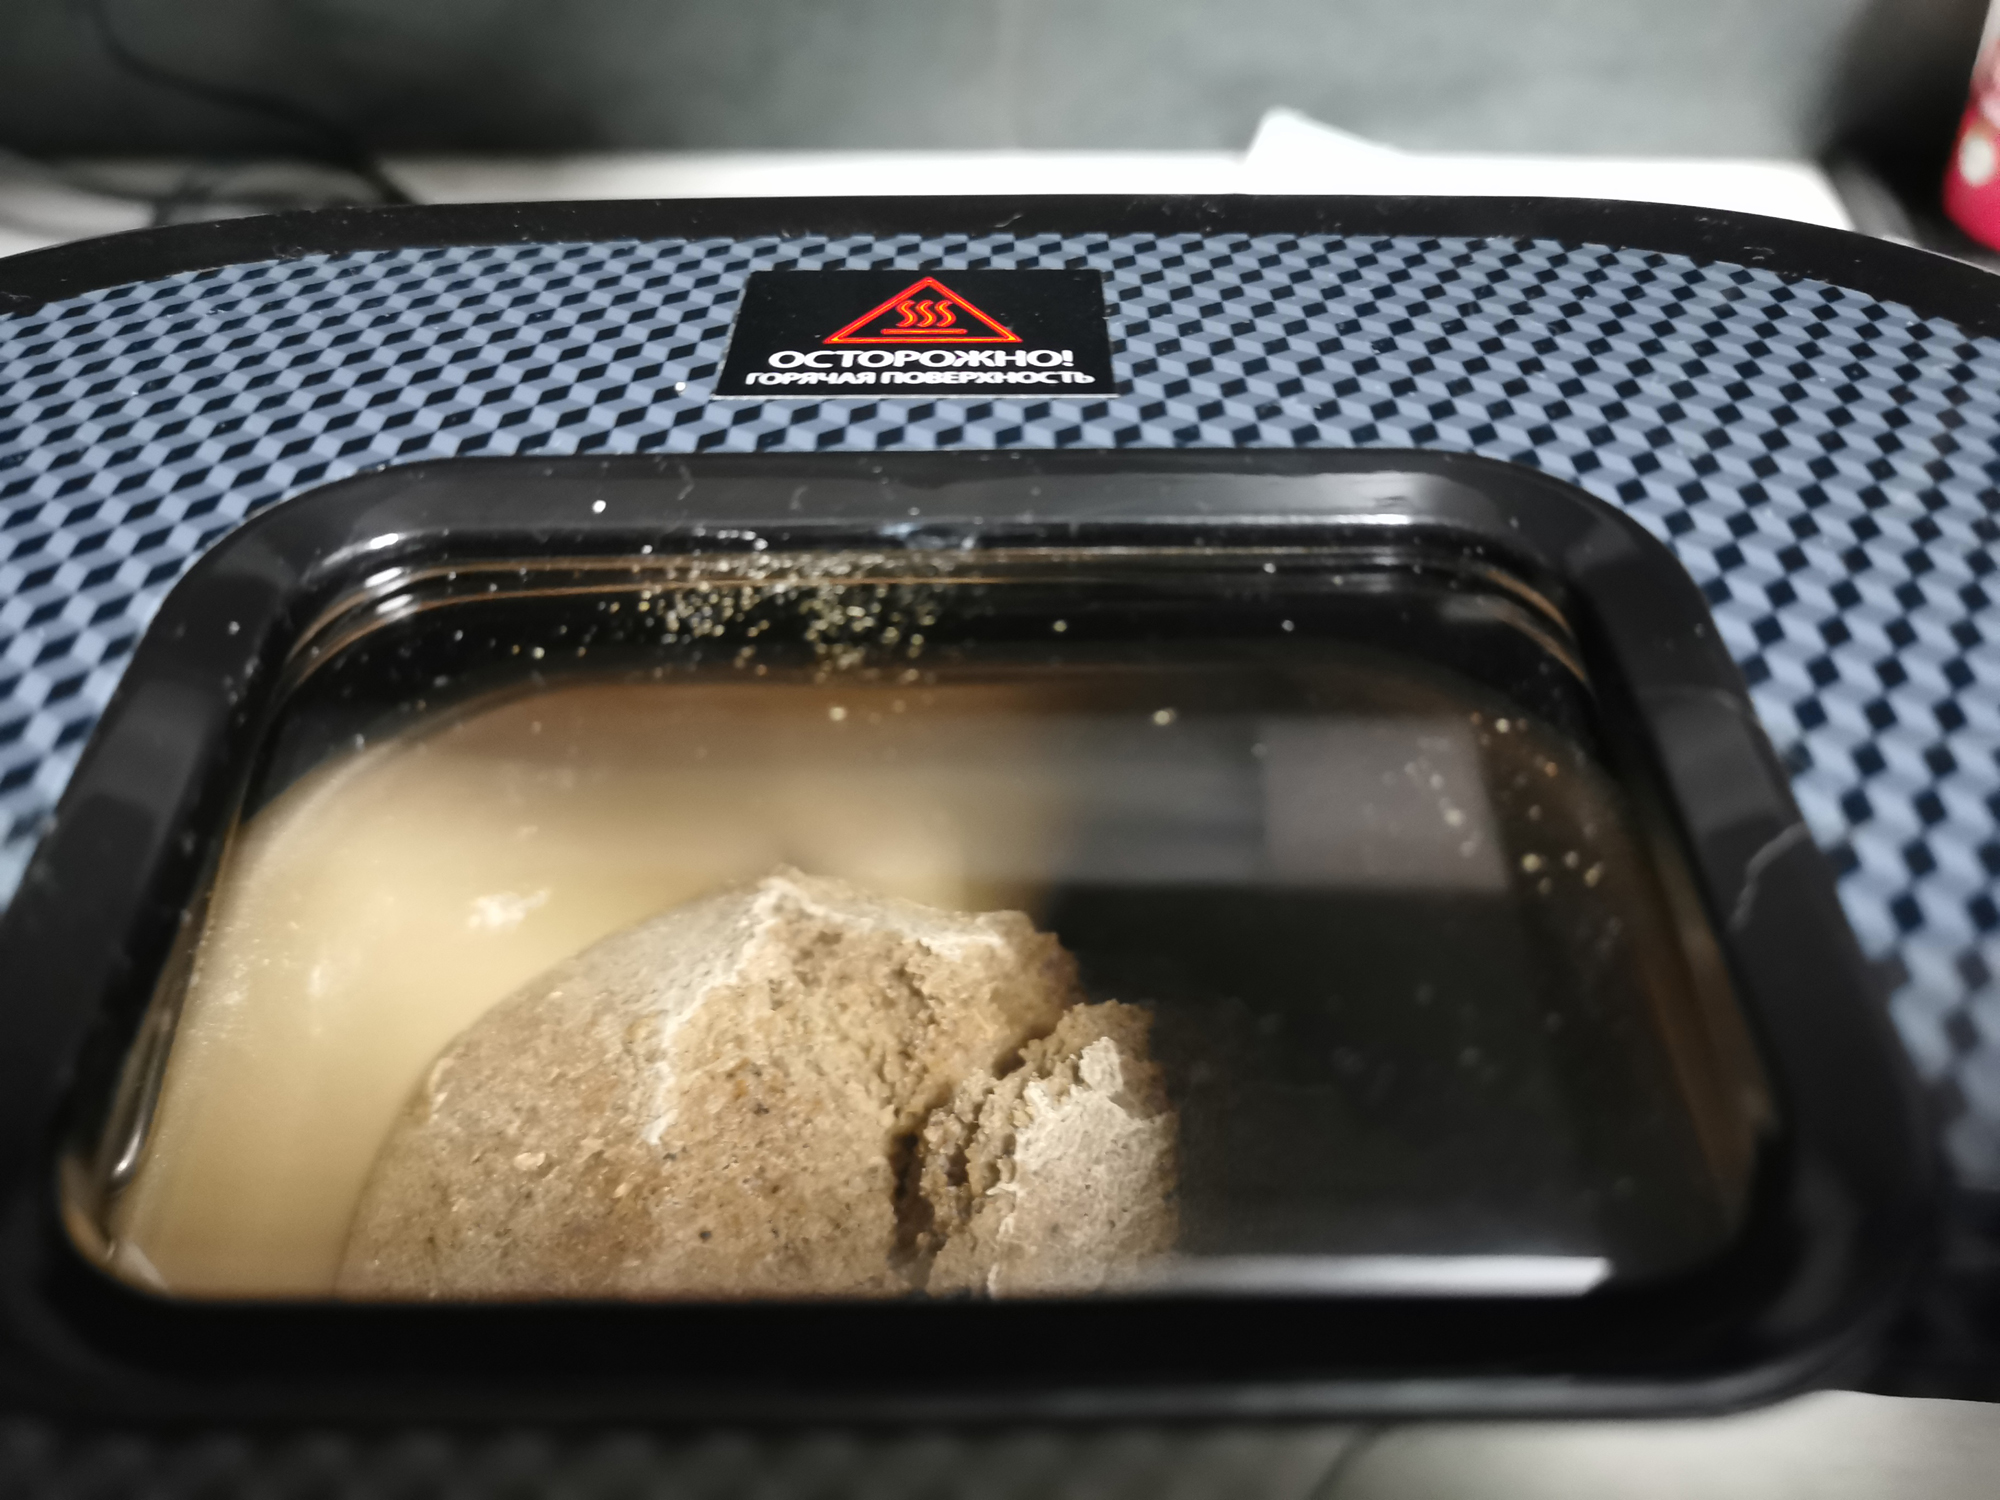
At the end of the program, we received a generally ready, but somewhat damp-looking bread with a characteristic rye taste and caraway flavor.
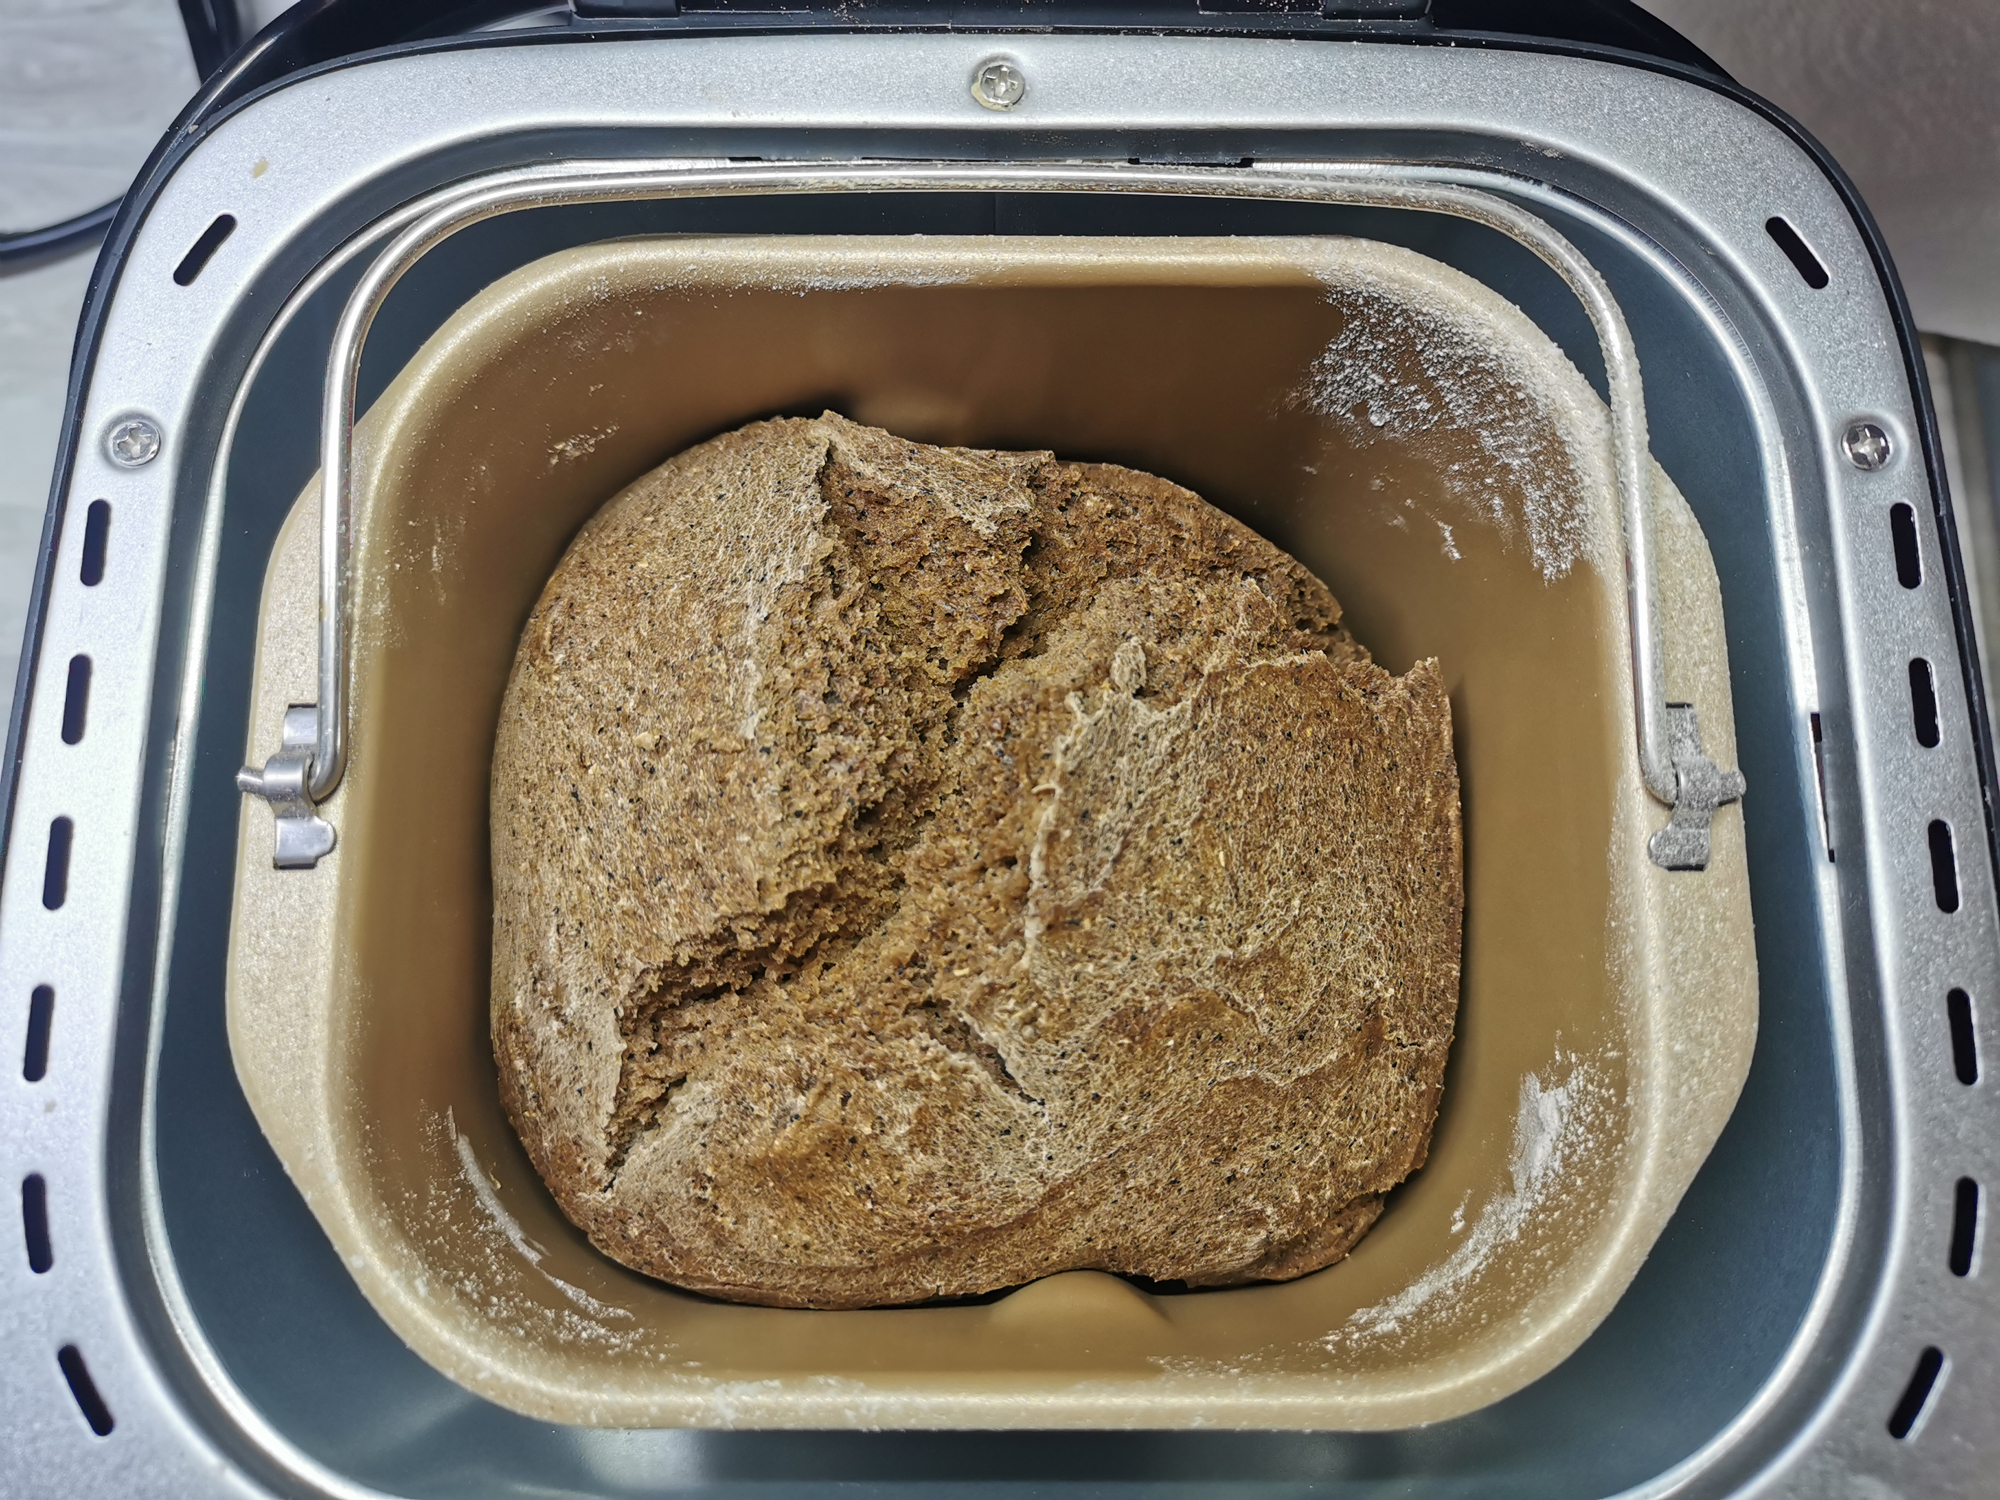
It is worth noting that the taste of the finished product turned out to be much better than its appearance – all the bread was eaten in a couple of days.
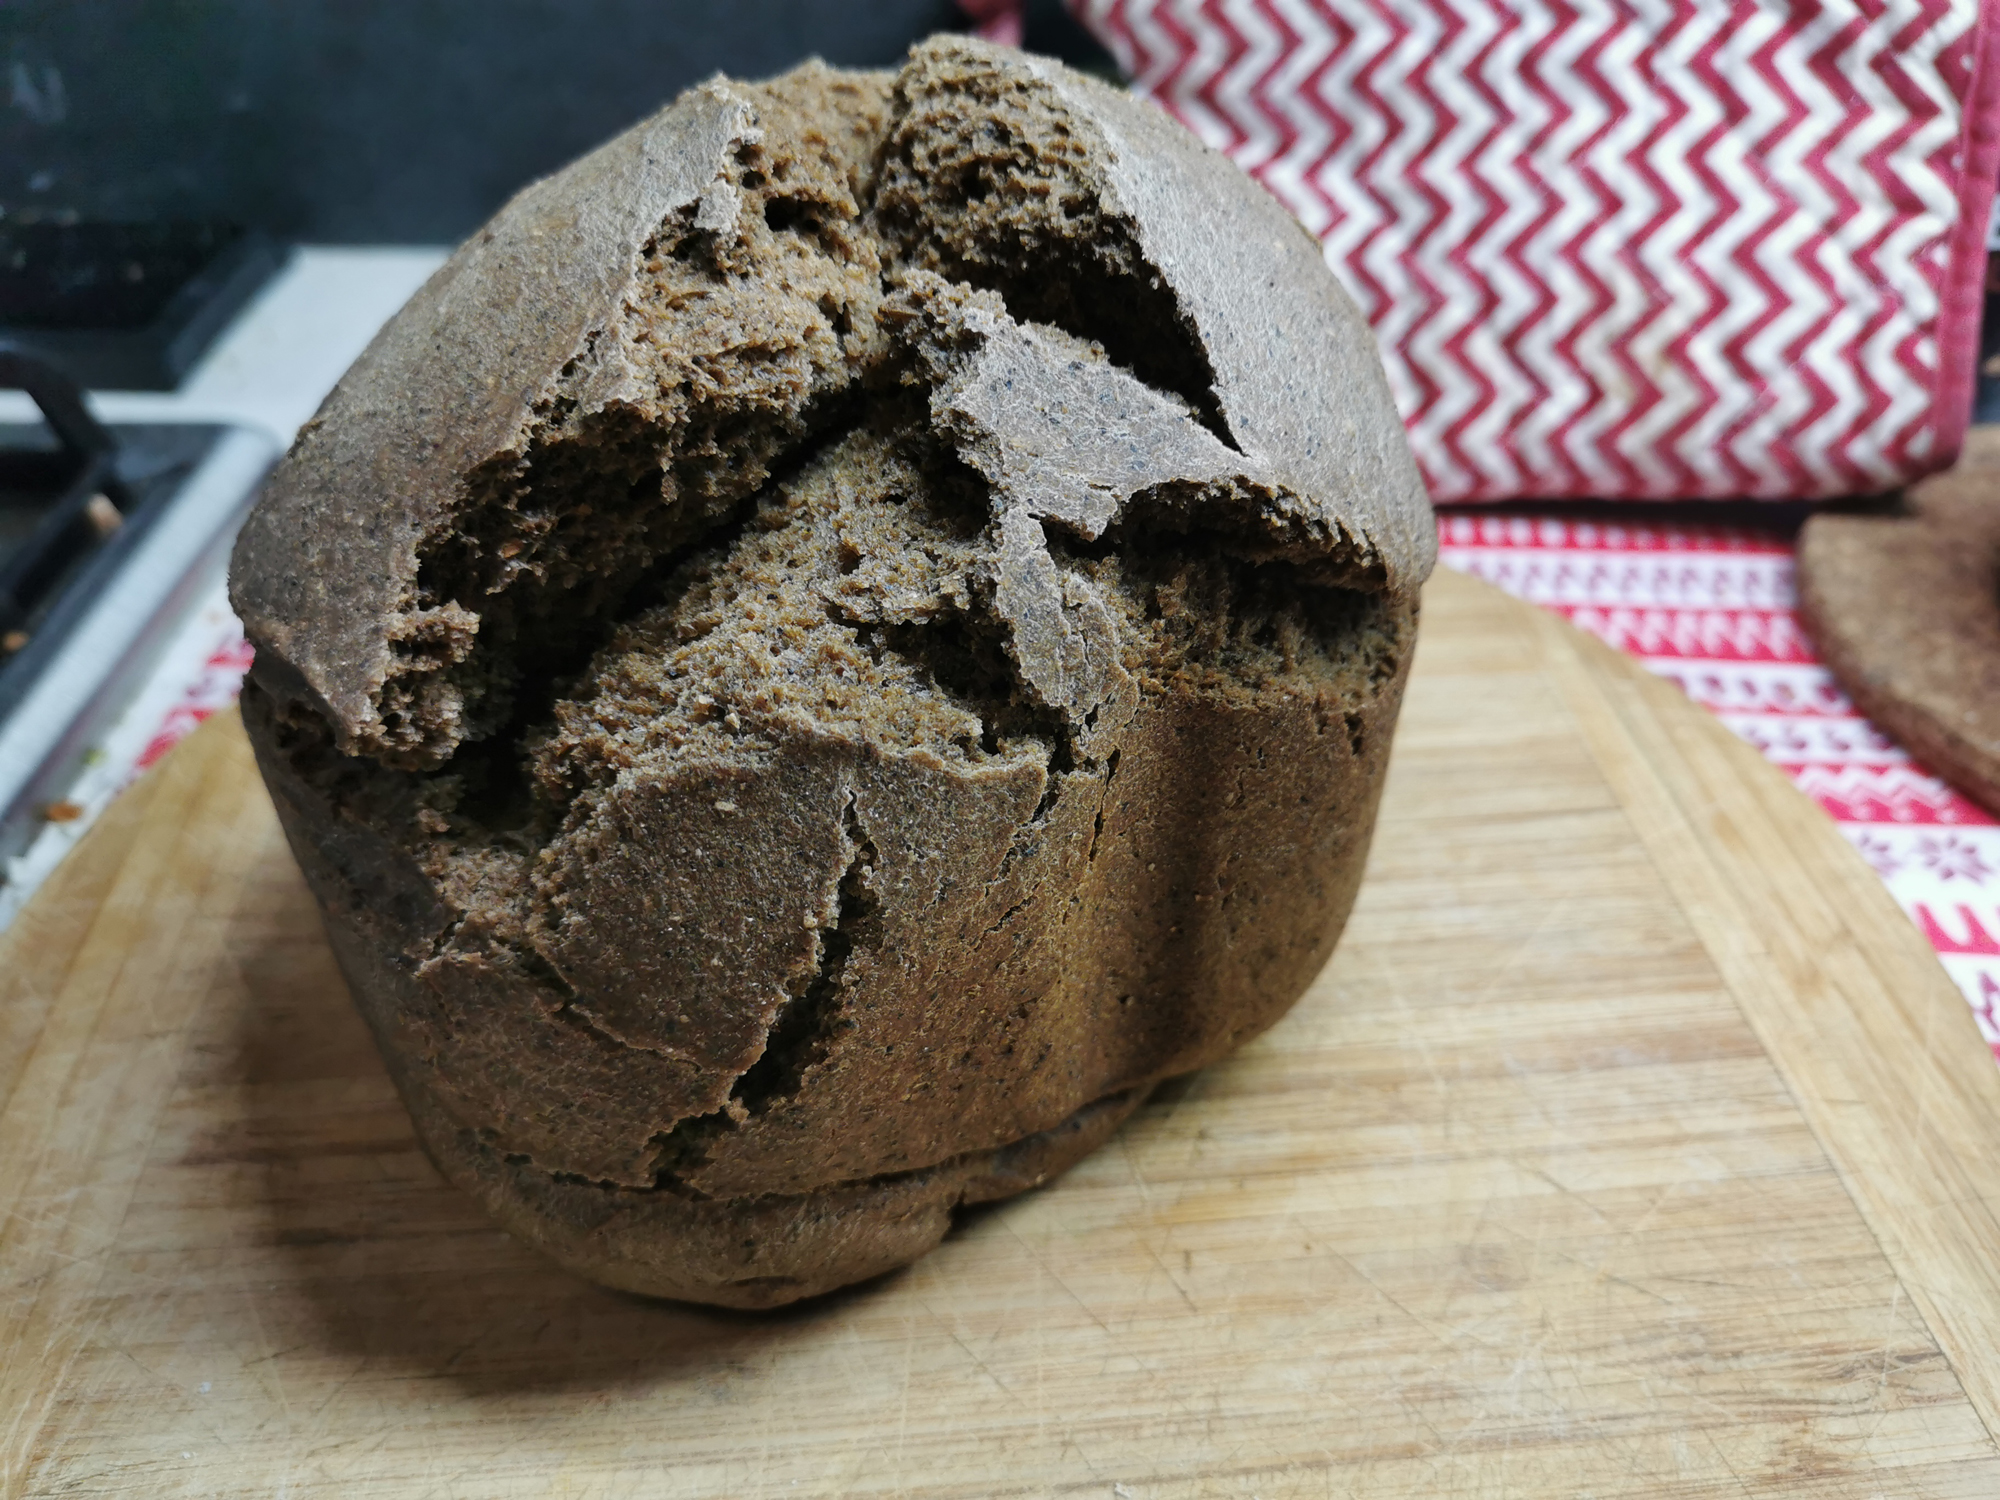
Therefore, despite some errors, we recognize the experiment as successful.
As usual, we will attach a photo of the bread in the context.
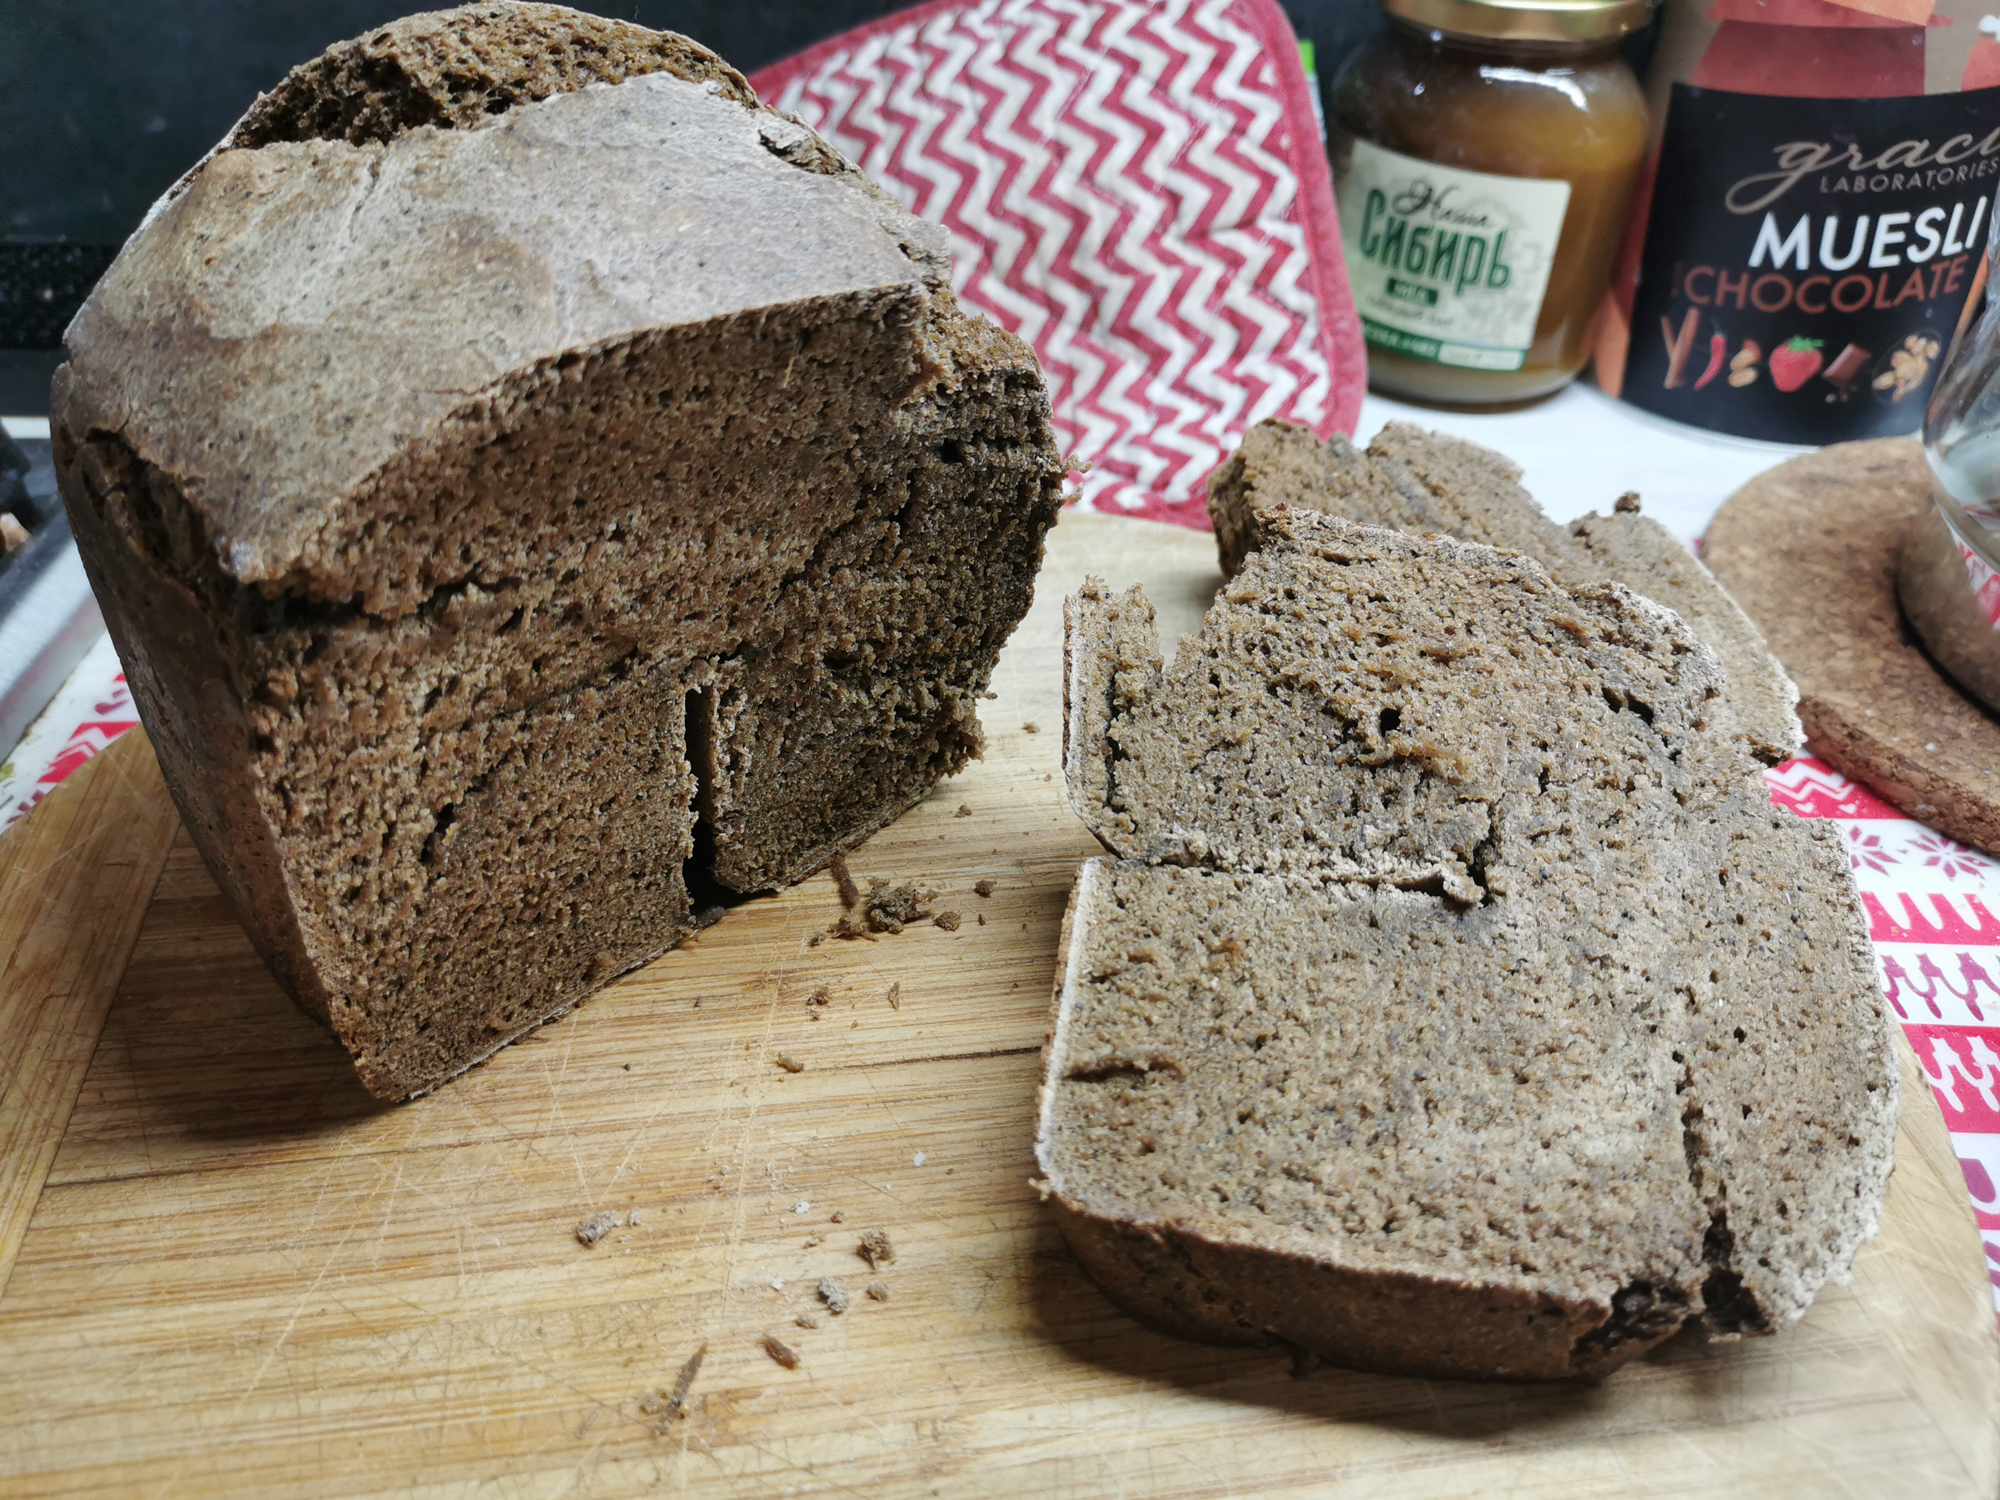
Result: good.
Program “Milk porridge”
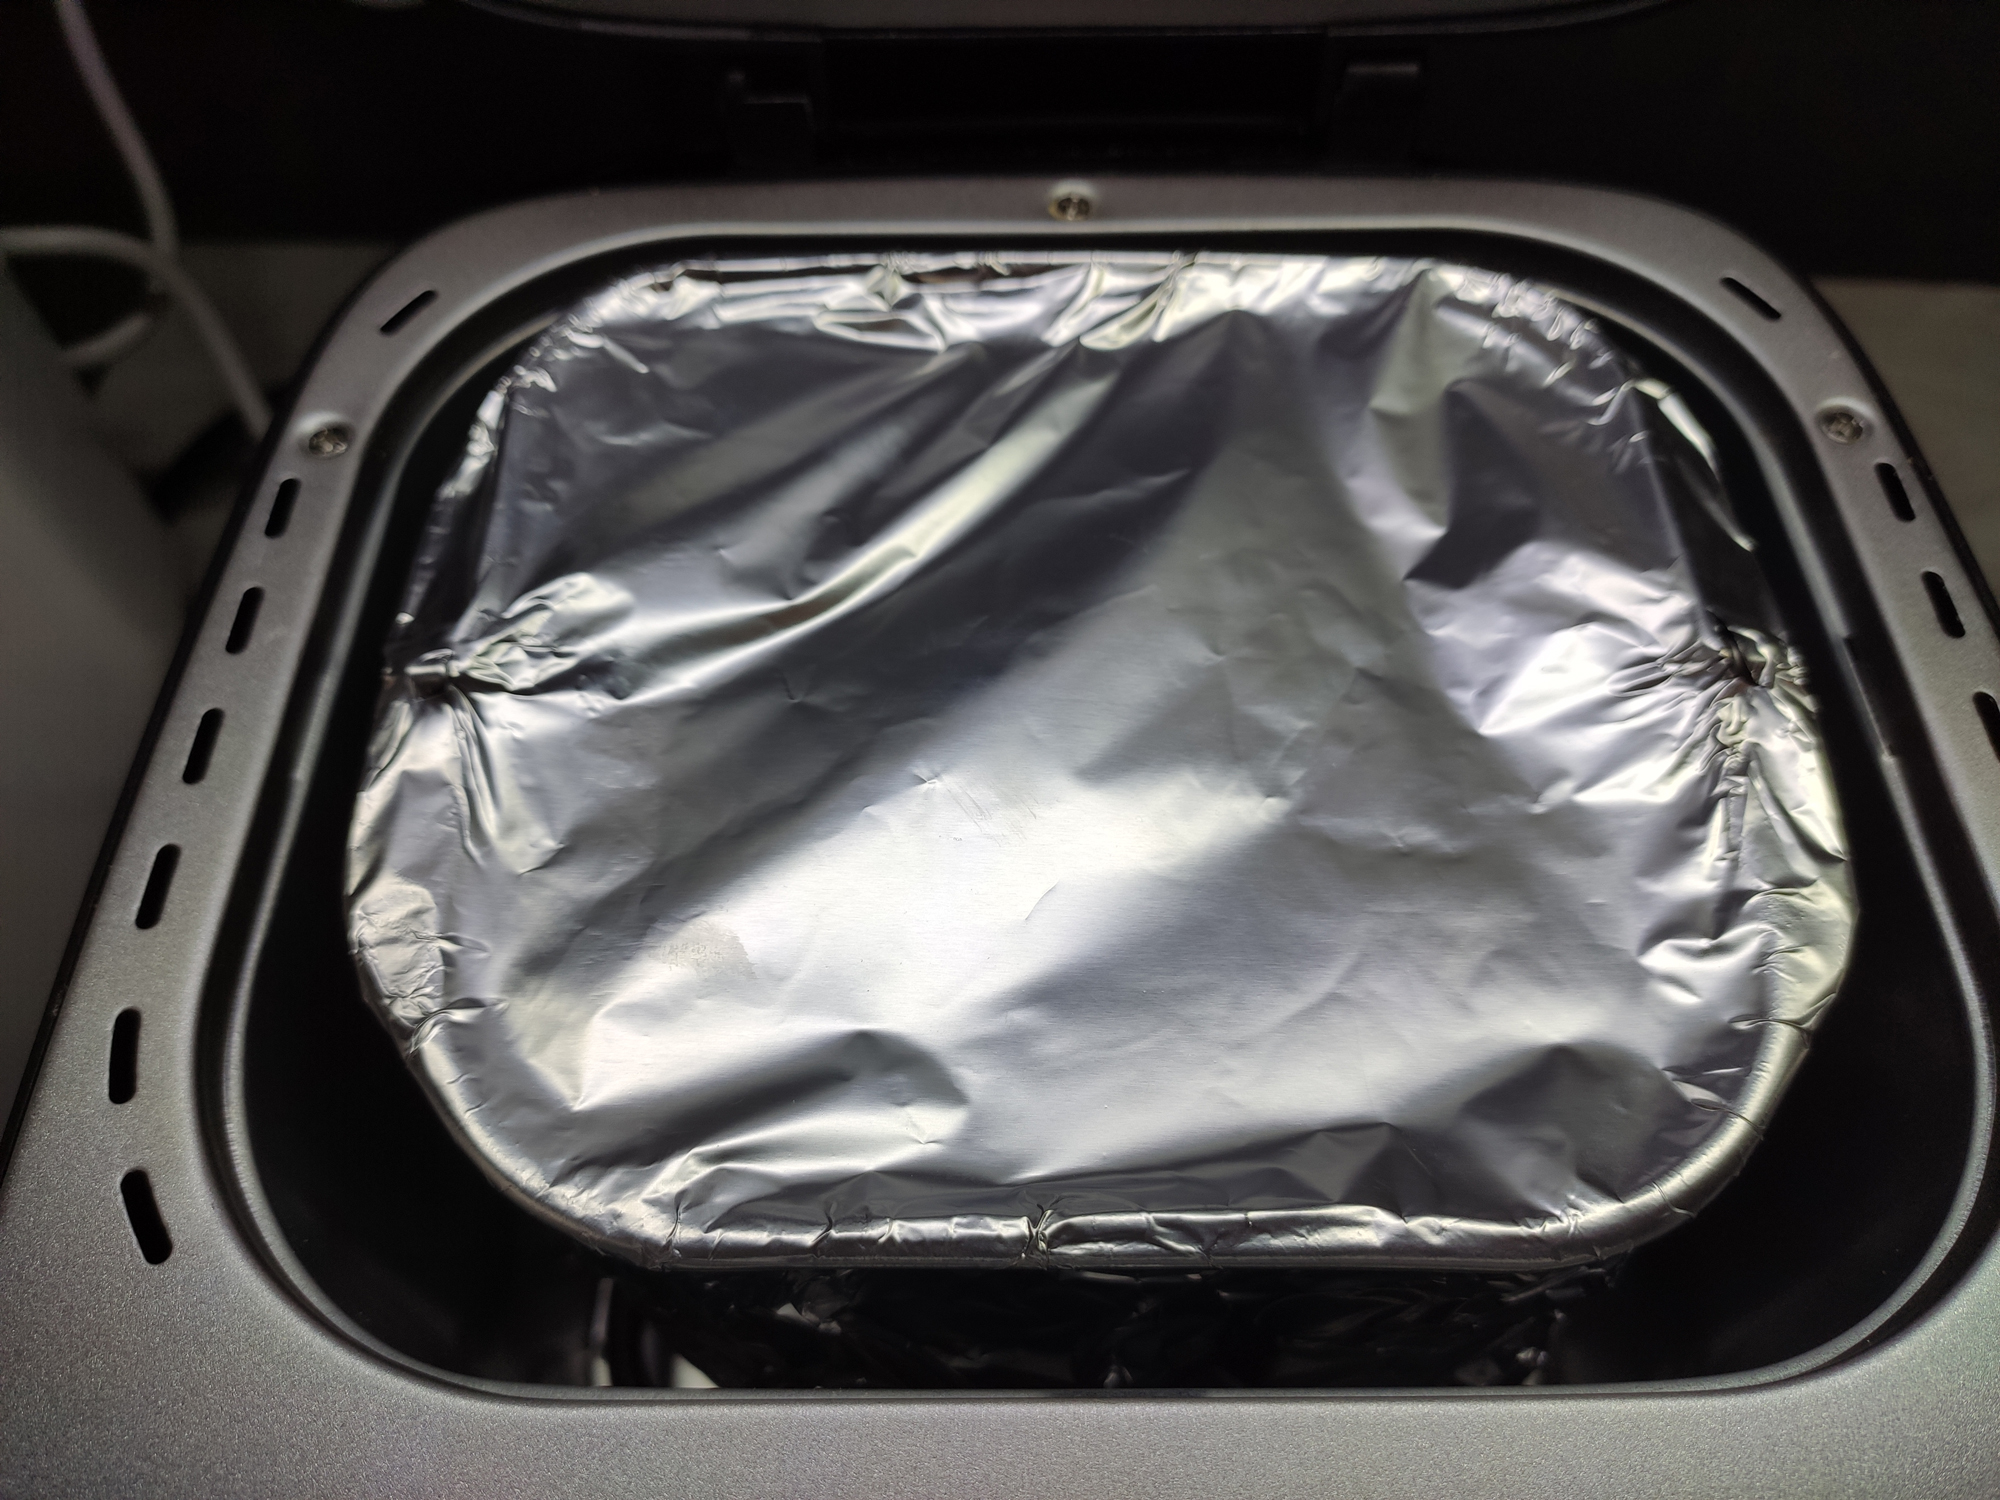
According to the recipe, we took oatmeal (100 g), added milk (800 ml), a little sugar and salt to it, then covered the bowl with foil, fixed the foil around the edges.
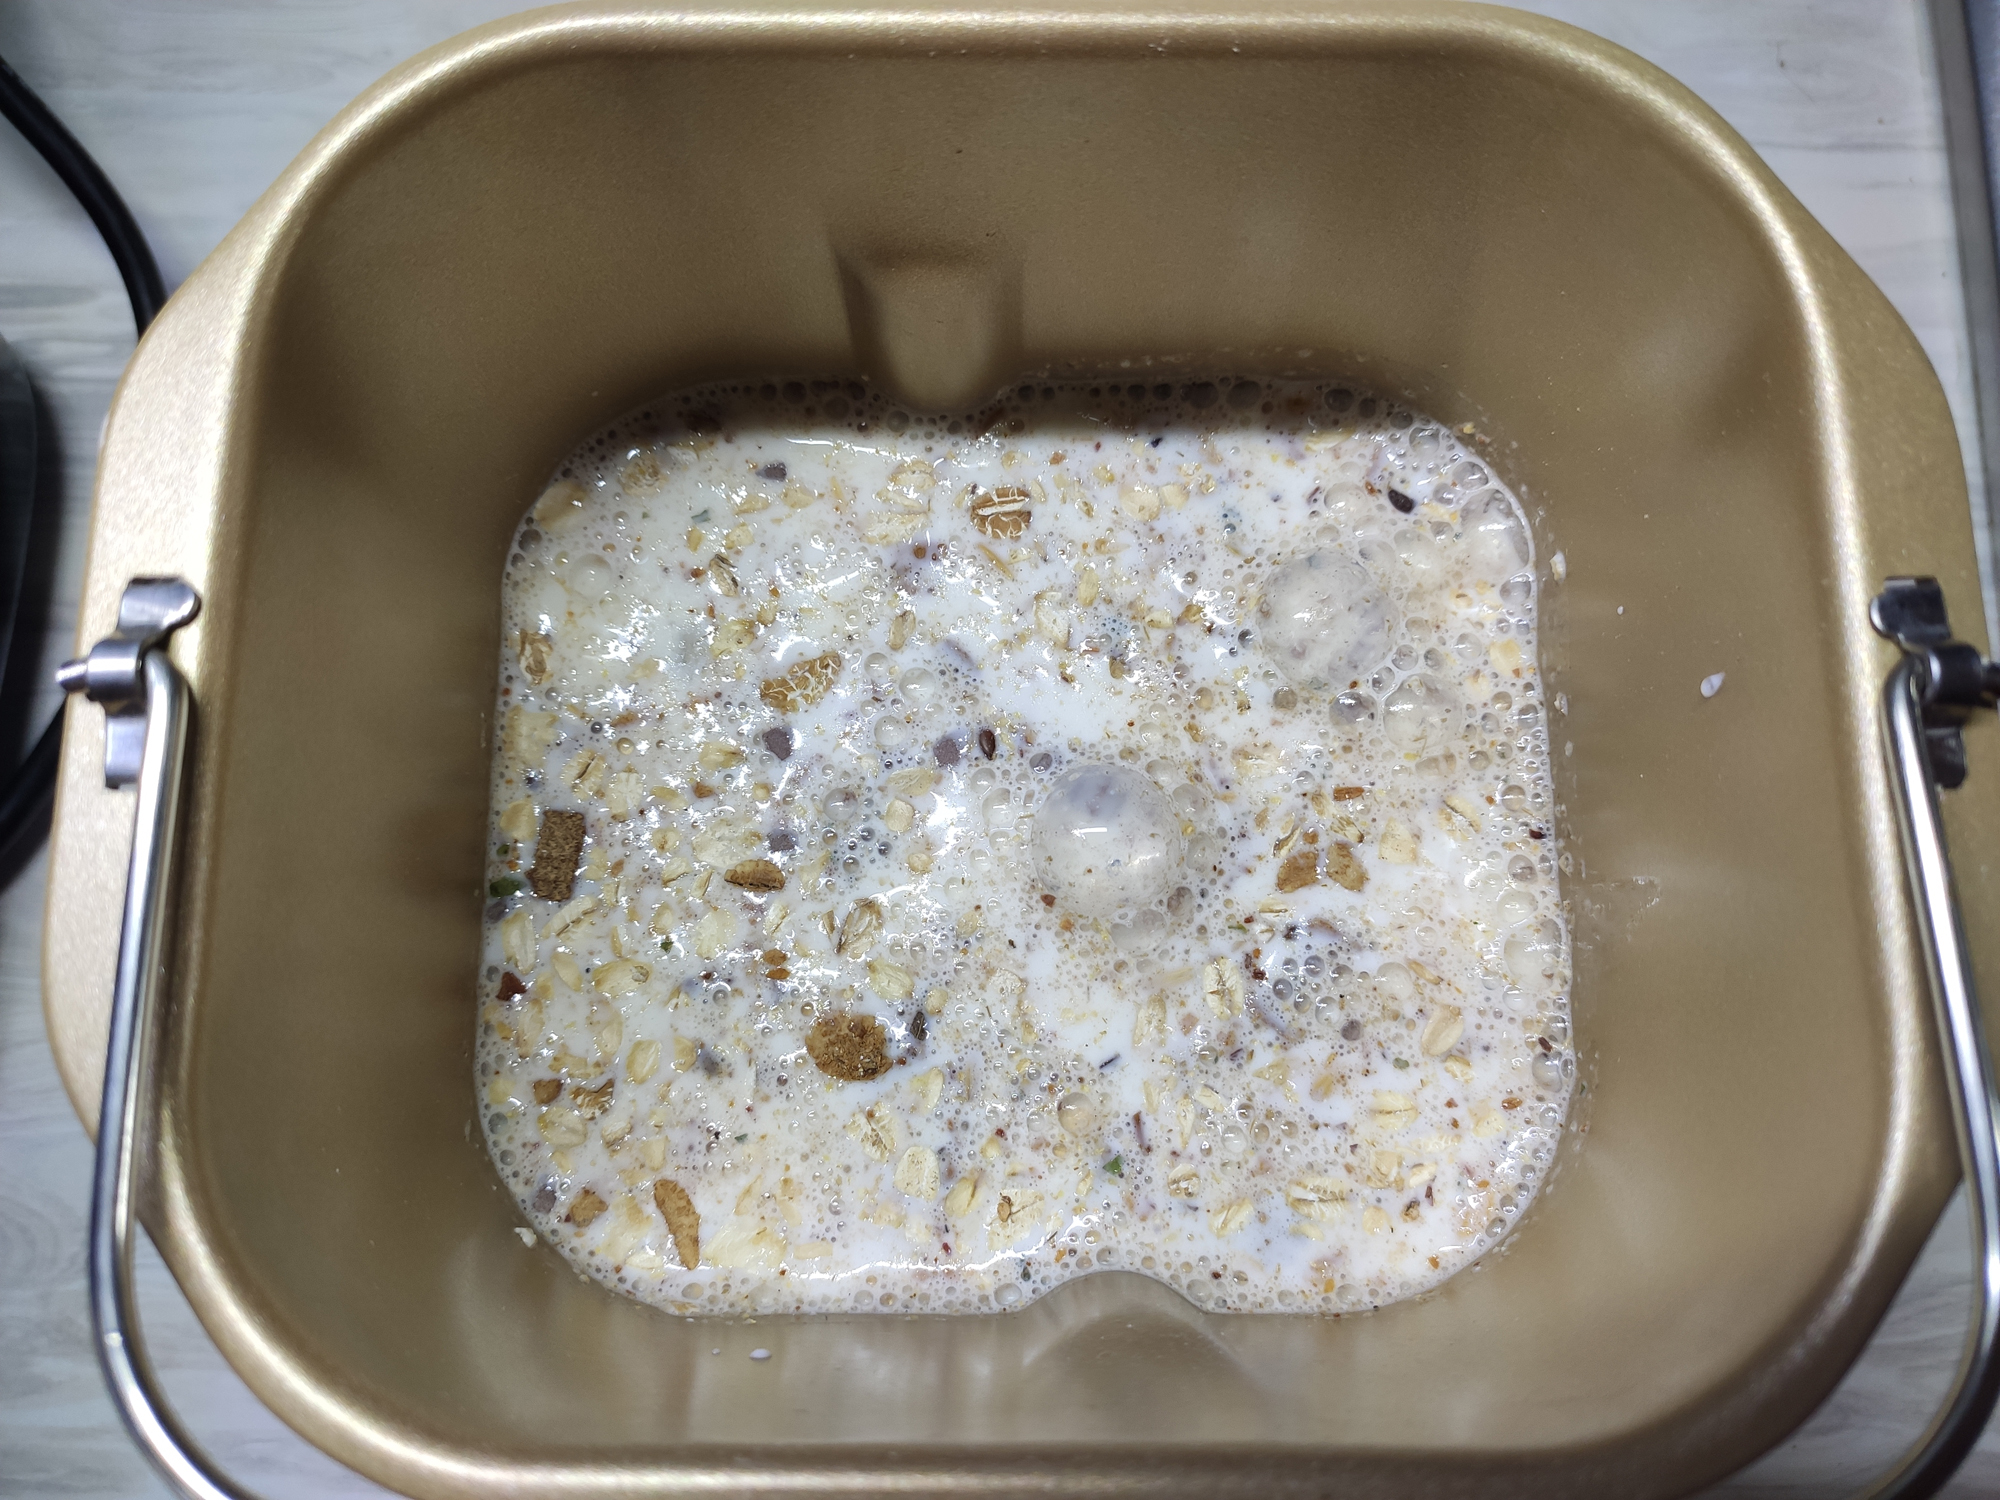
We closed the lid, installed the Milk Porridge program and started the device for 20 minutes.
After the specified time, we found a large amount of milk in the bowl, in which steamed flakes floated. It didn’t look like porridge. However, what can you expect here when the recipe suggests taking 800 ml of milk and only 100 grams of cereal?
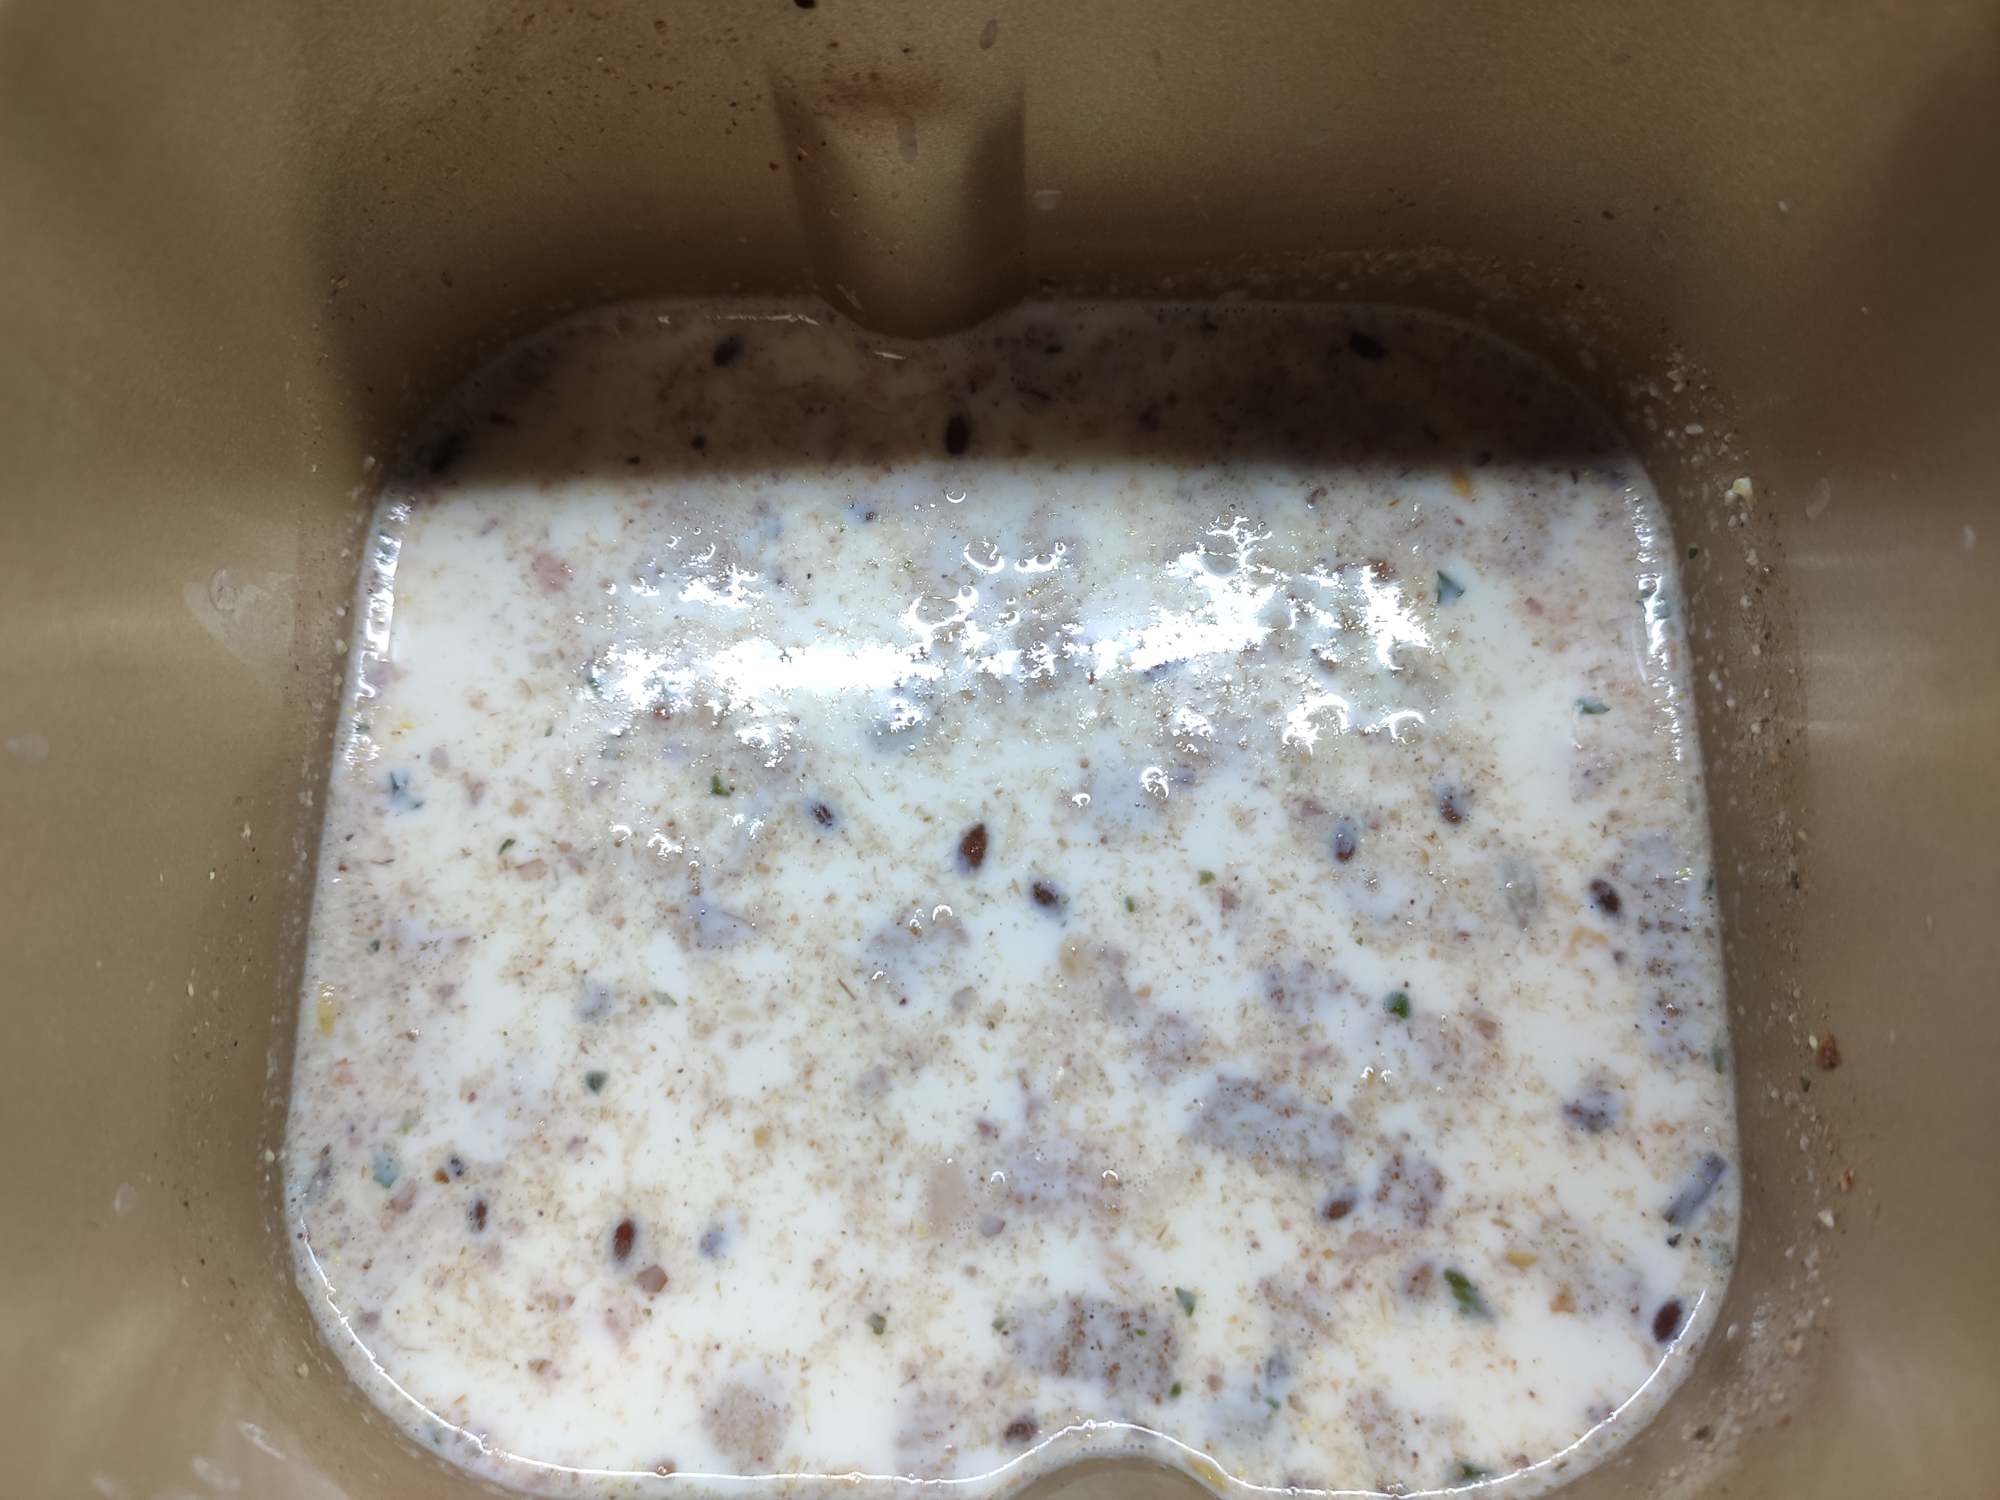
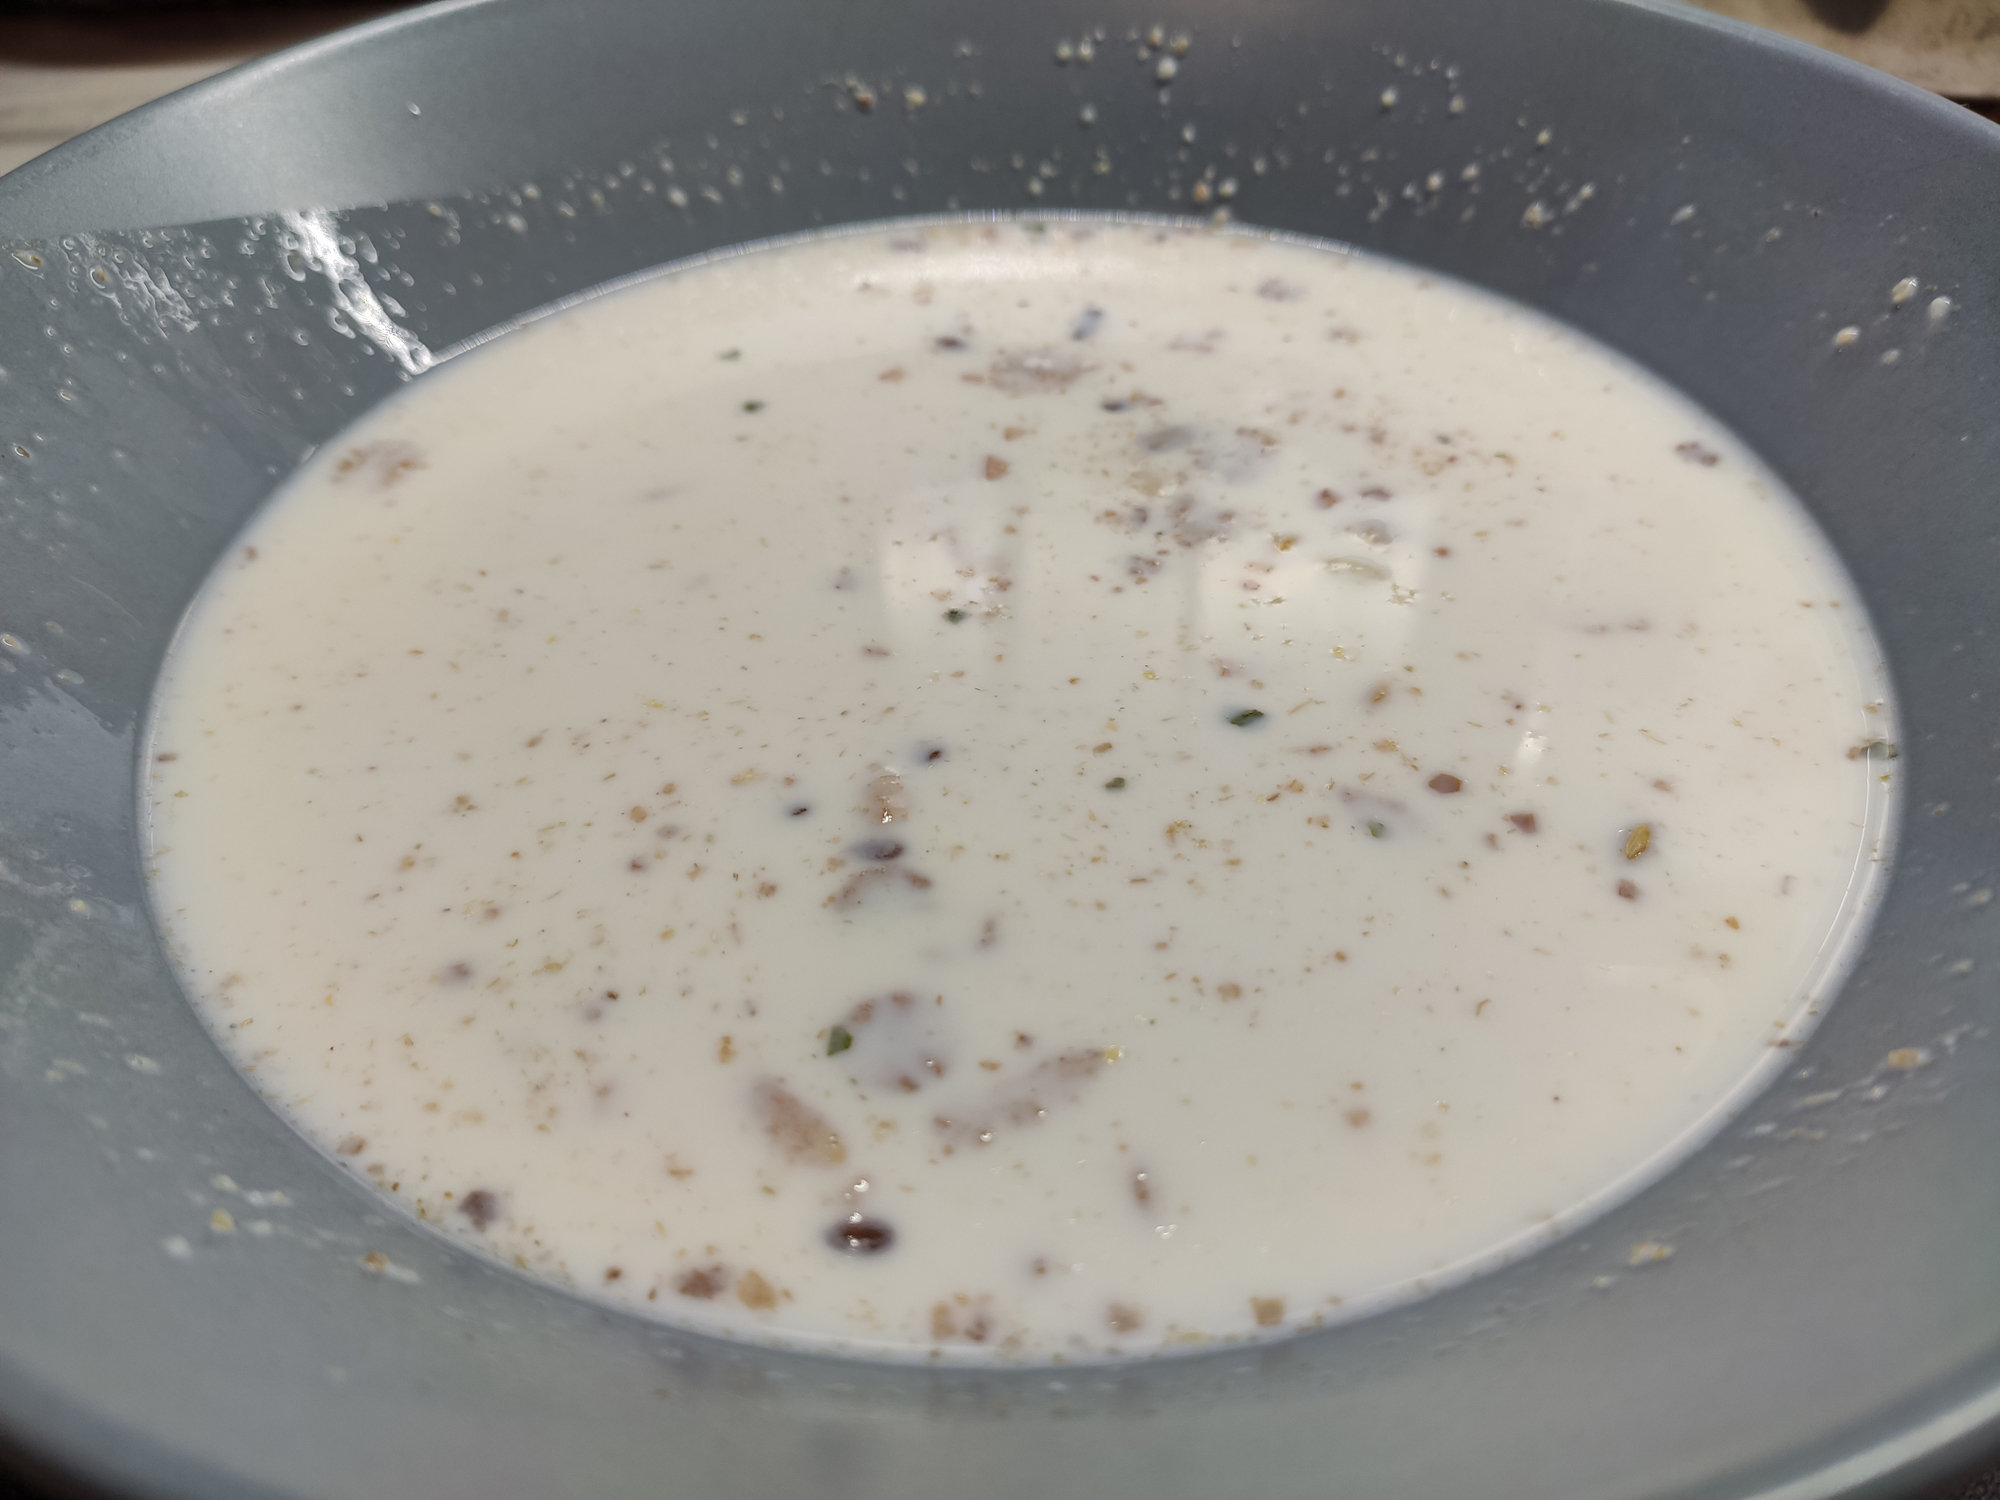
I had to correct the situation manually. We added flakes (by eye, based on our own ideas), and then repeated the experiment. This time the porridge turned out quite good.
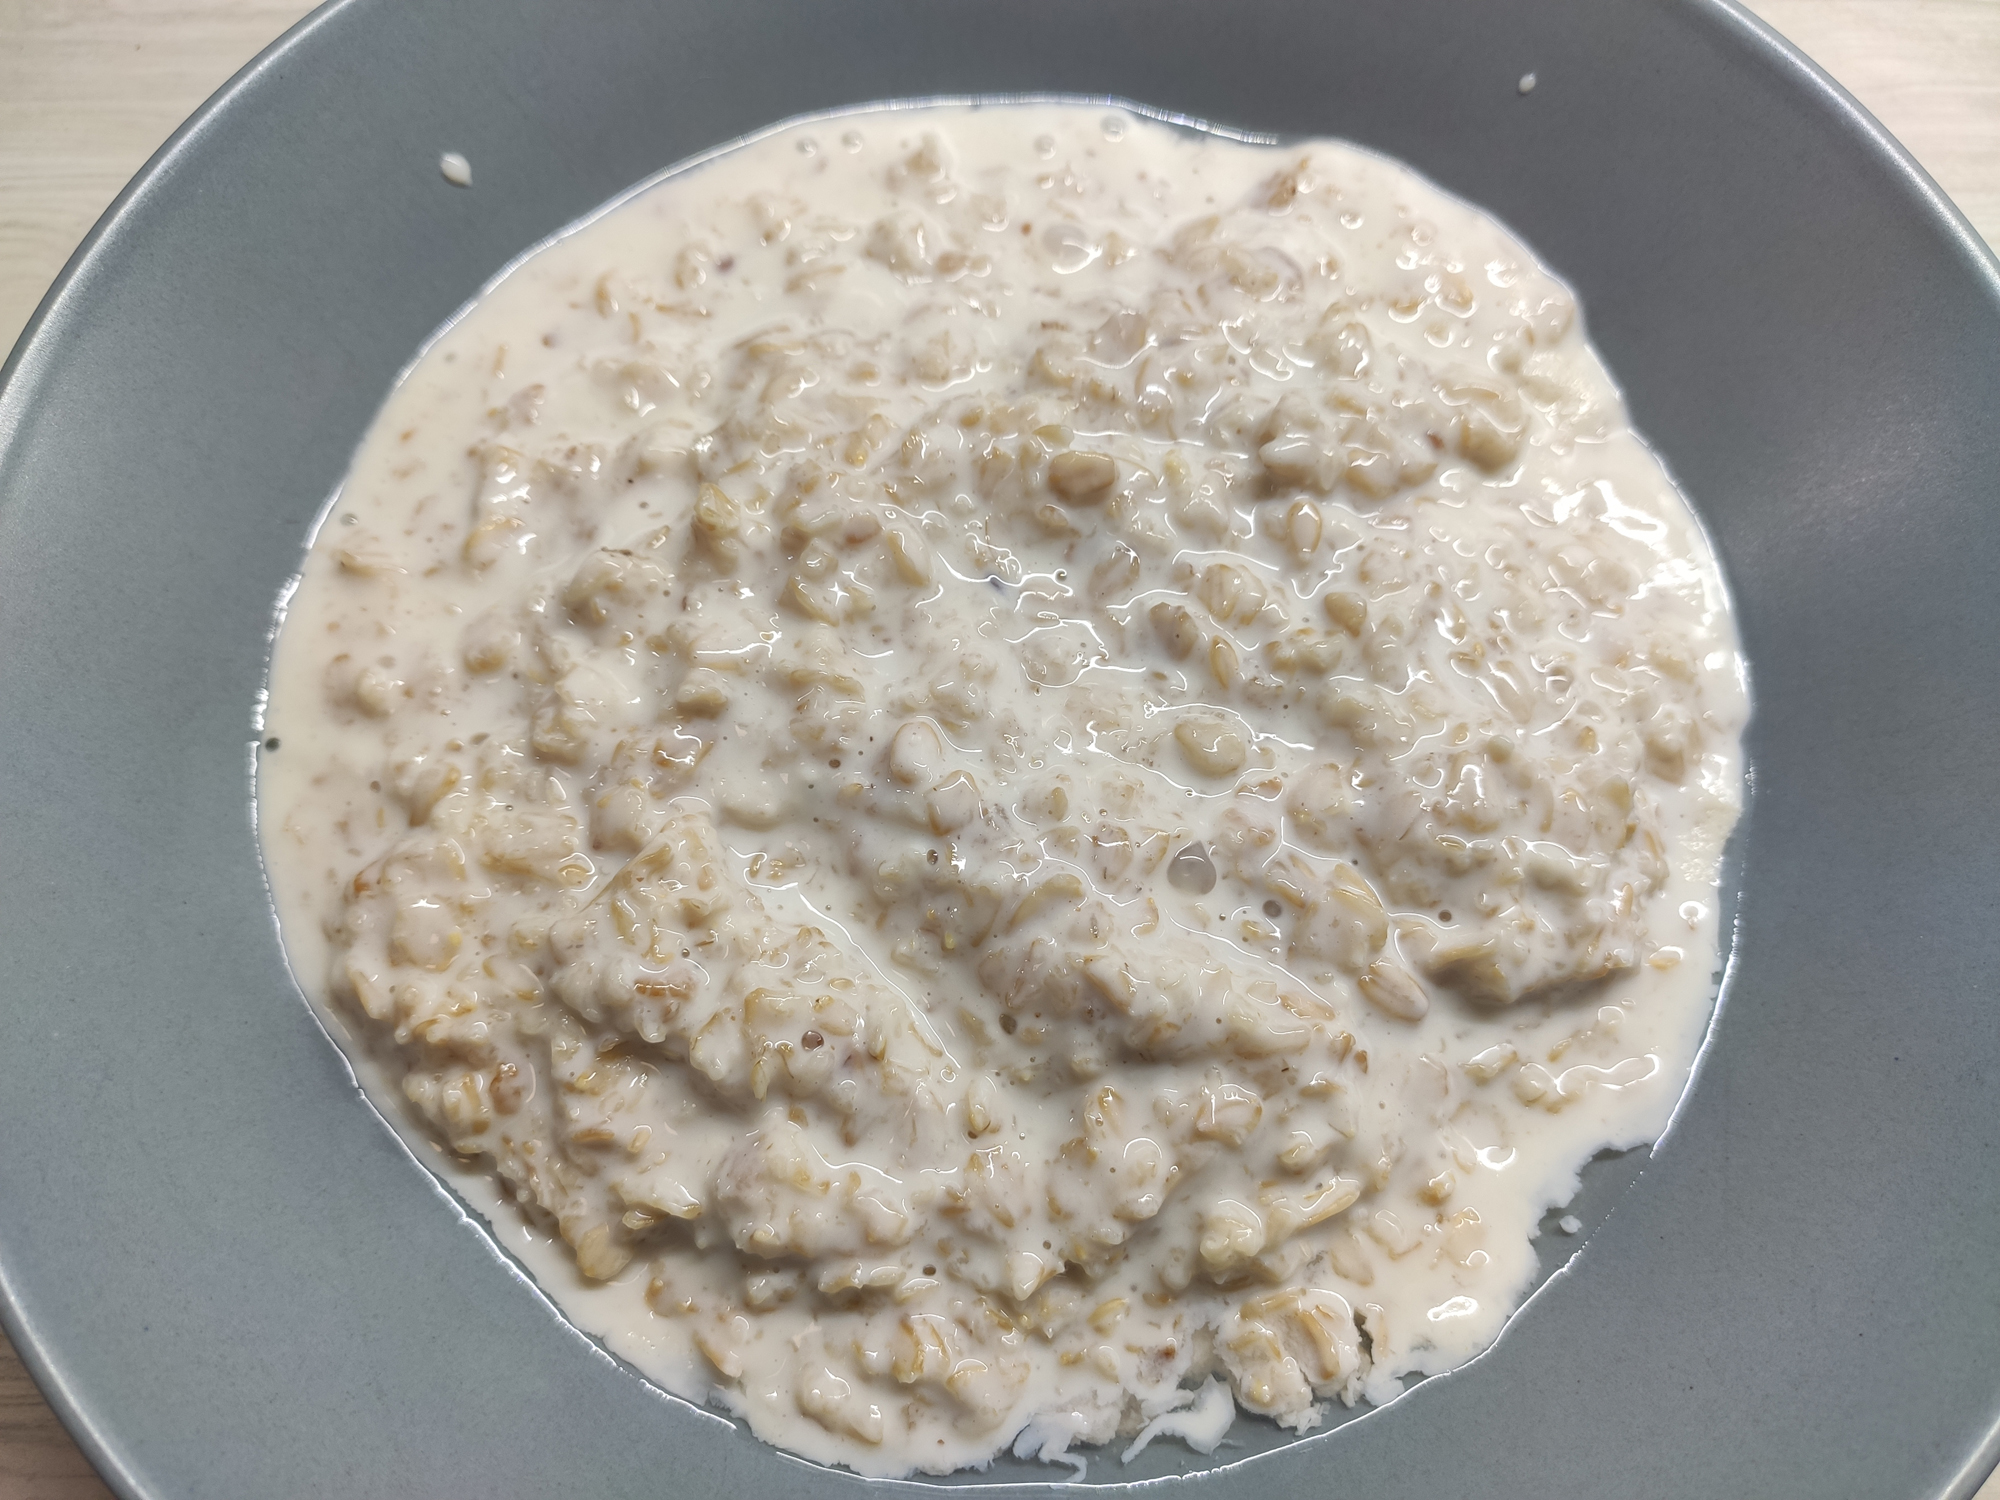
Thus, we conclude that the problem in this case is not in the bread machine, but in a not quite adequate recipe.
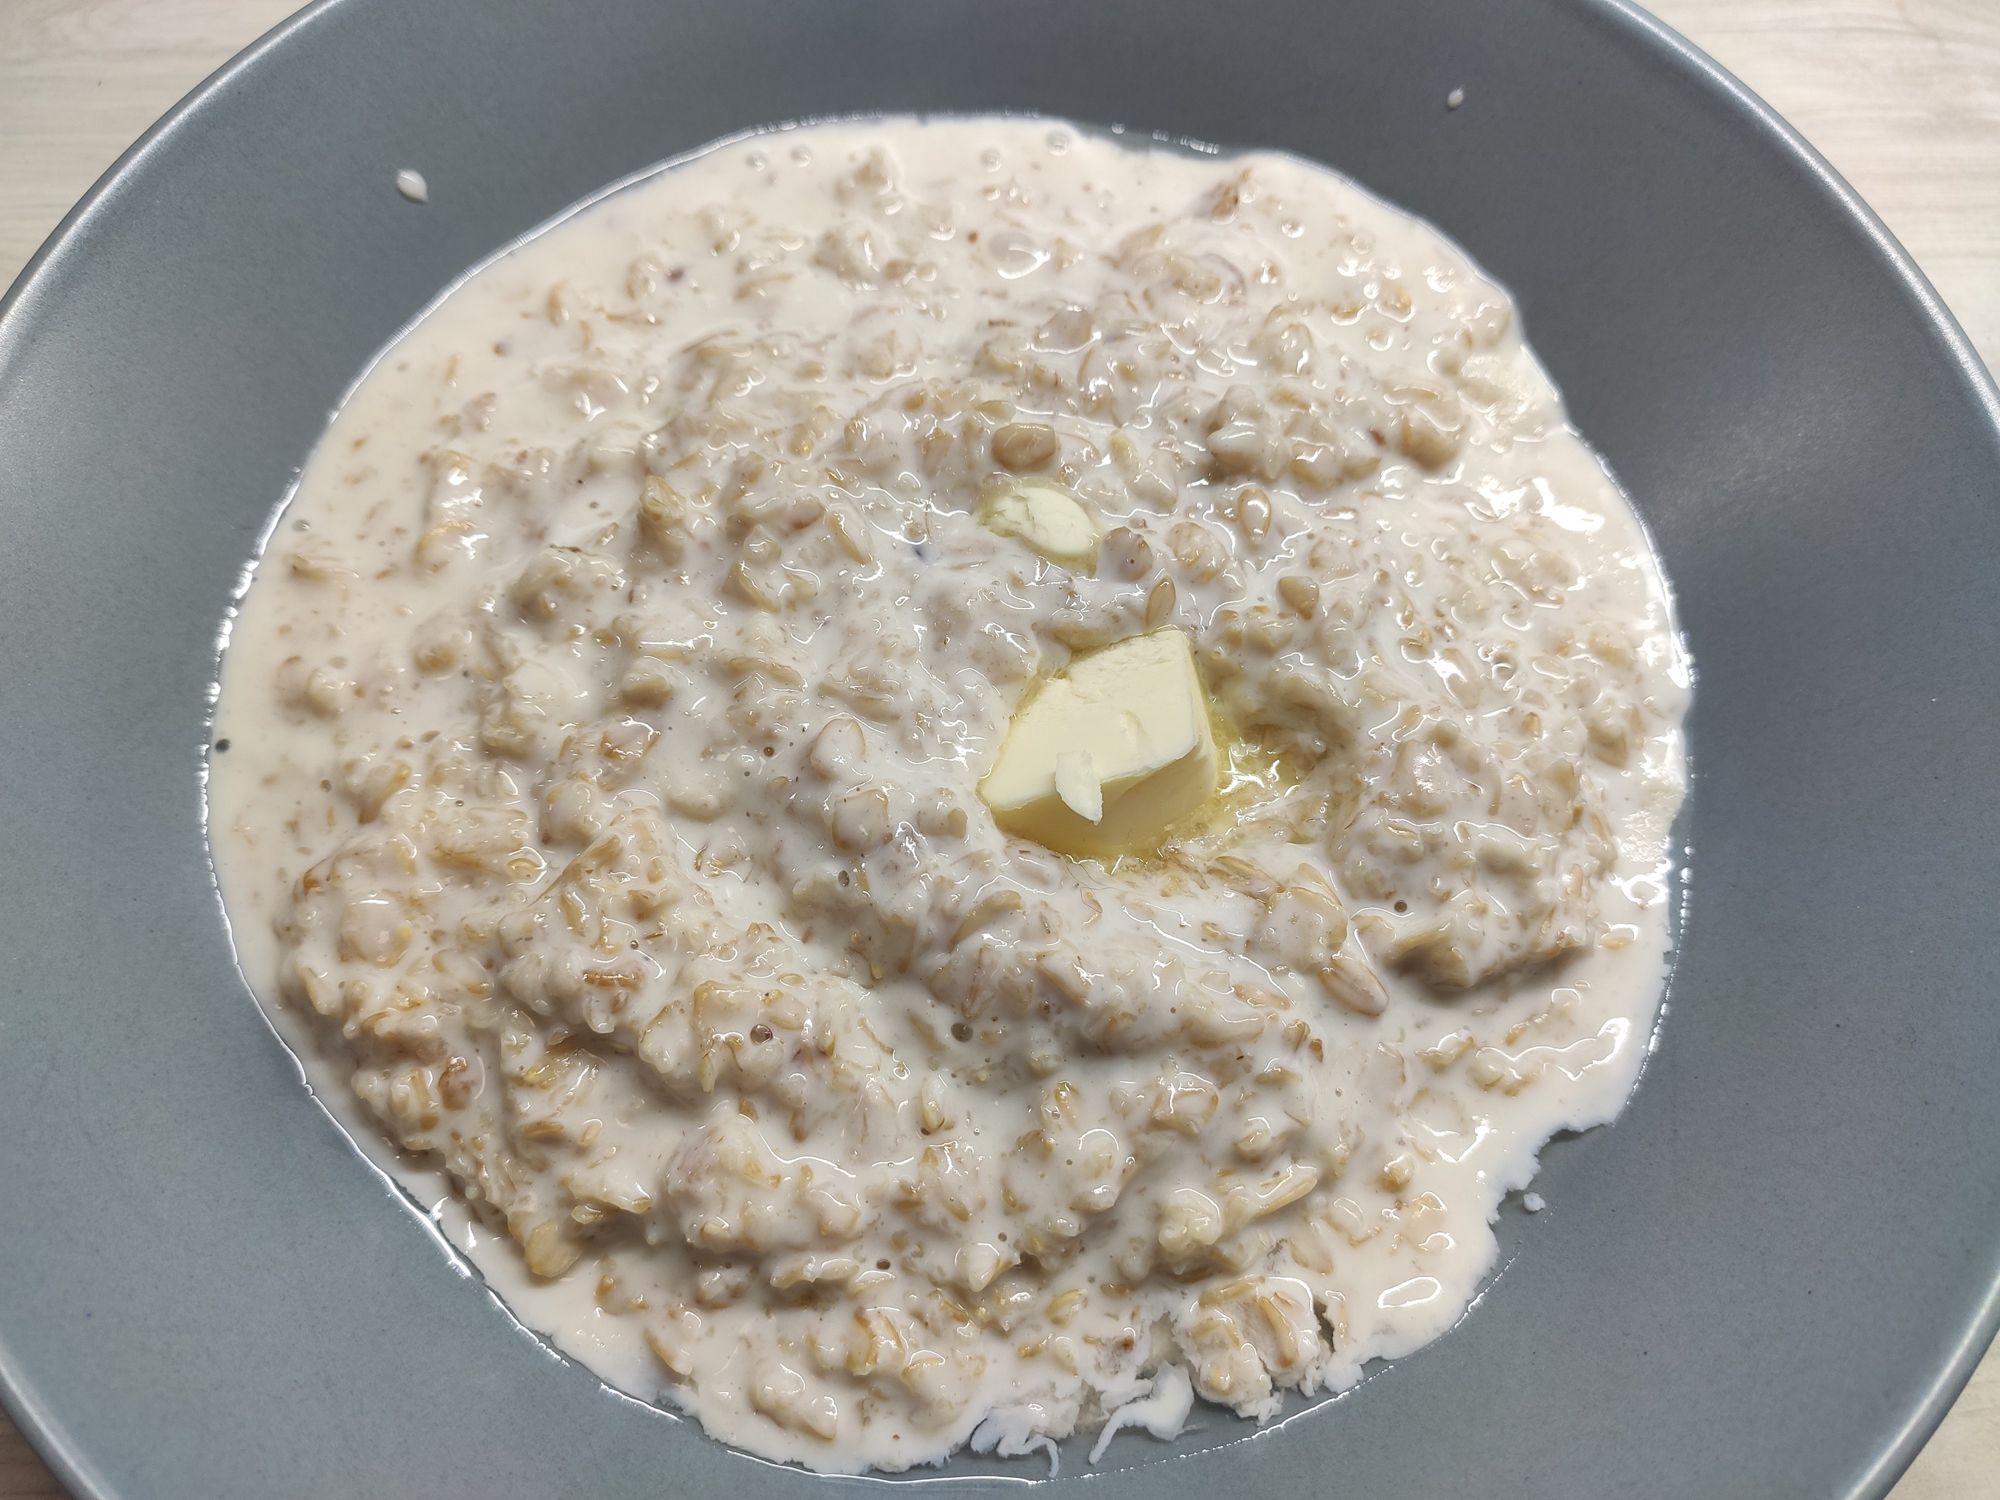
Result: medium.
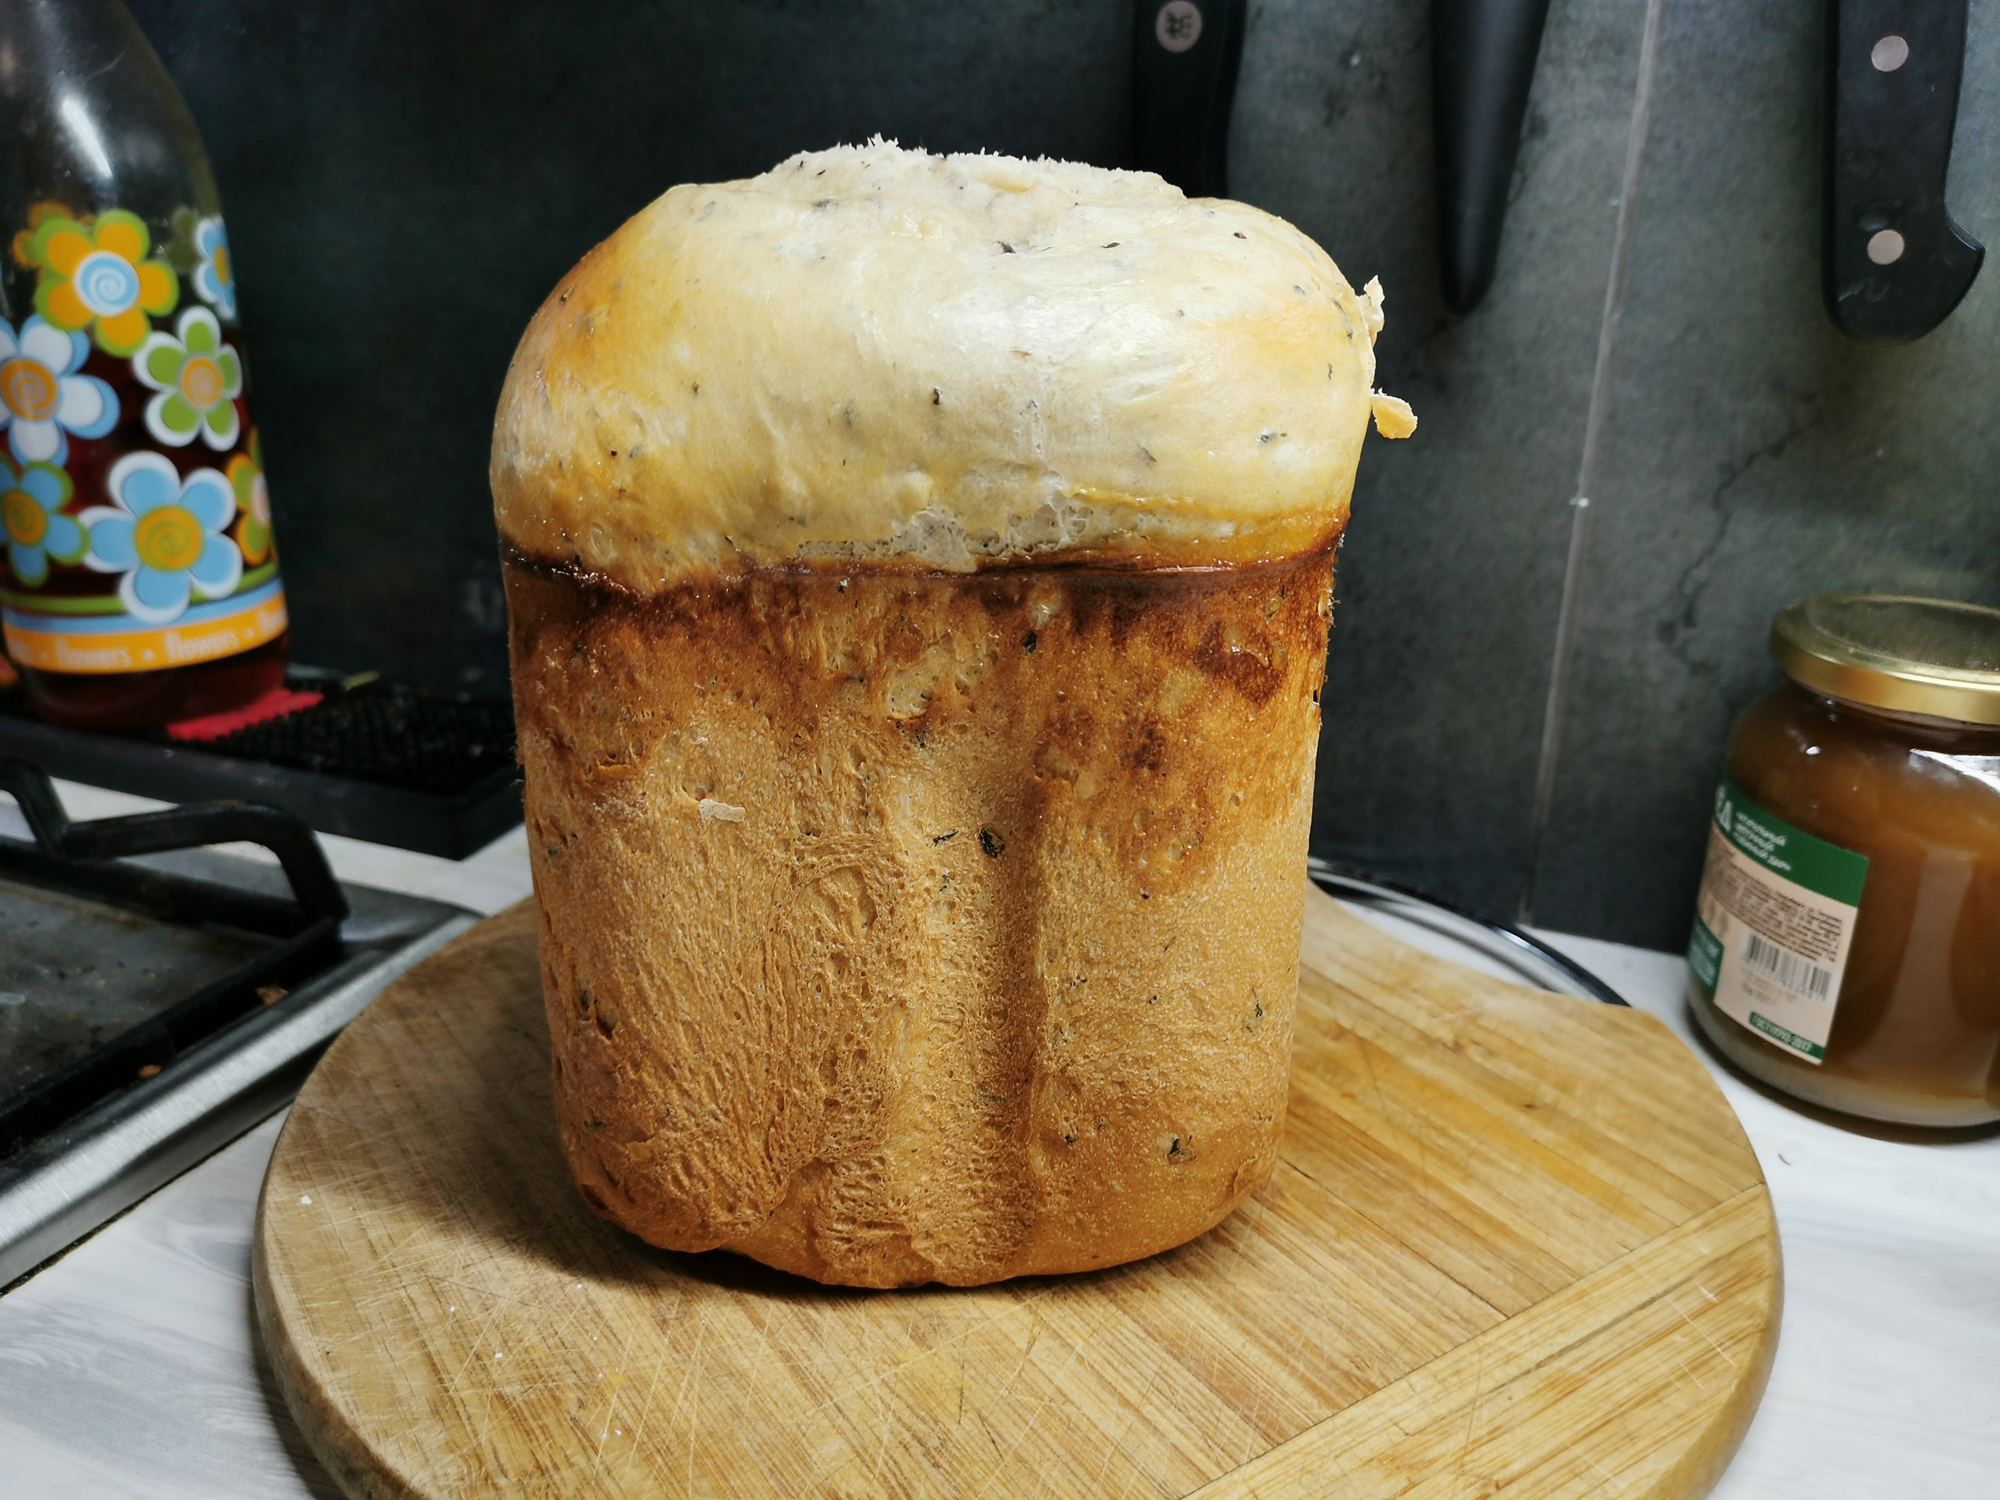
Baking program, recipe “Kulich”
To prepare the Easter cake, we successively placed the following ingredients in the bread machine: 160 ml of milk, 1 egg, st. l. vanilla sugar, 0.5 tsp salt, 3 tbsp. l. sugar, 30 g butter, 40 g raisins, 480 g wheat flour and 1.5 teaspoons of dry yeast. After that, they closed the lid and set the “Muffin” program, weight – 750 g, crust color – “Medium”.

1 hour before the end of the program, we had to beat the egg, open the lid and grease the risen dough with it. At this stage, we noticed that the dough had risen too much: it even stuck to the viewing window.
Well, we corrected the situation as best we could: opened the lid, peeled off the top of the cake from the window and smeared it with an egg.
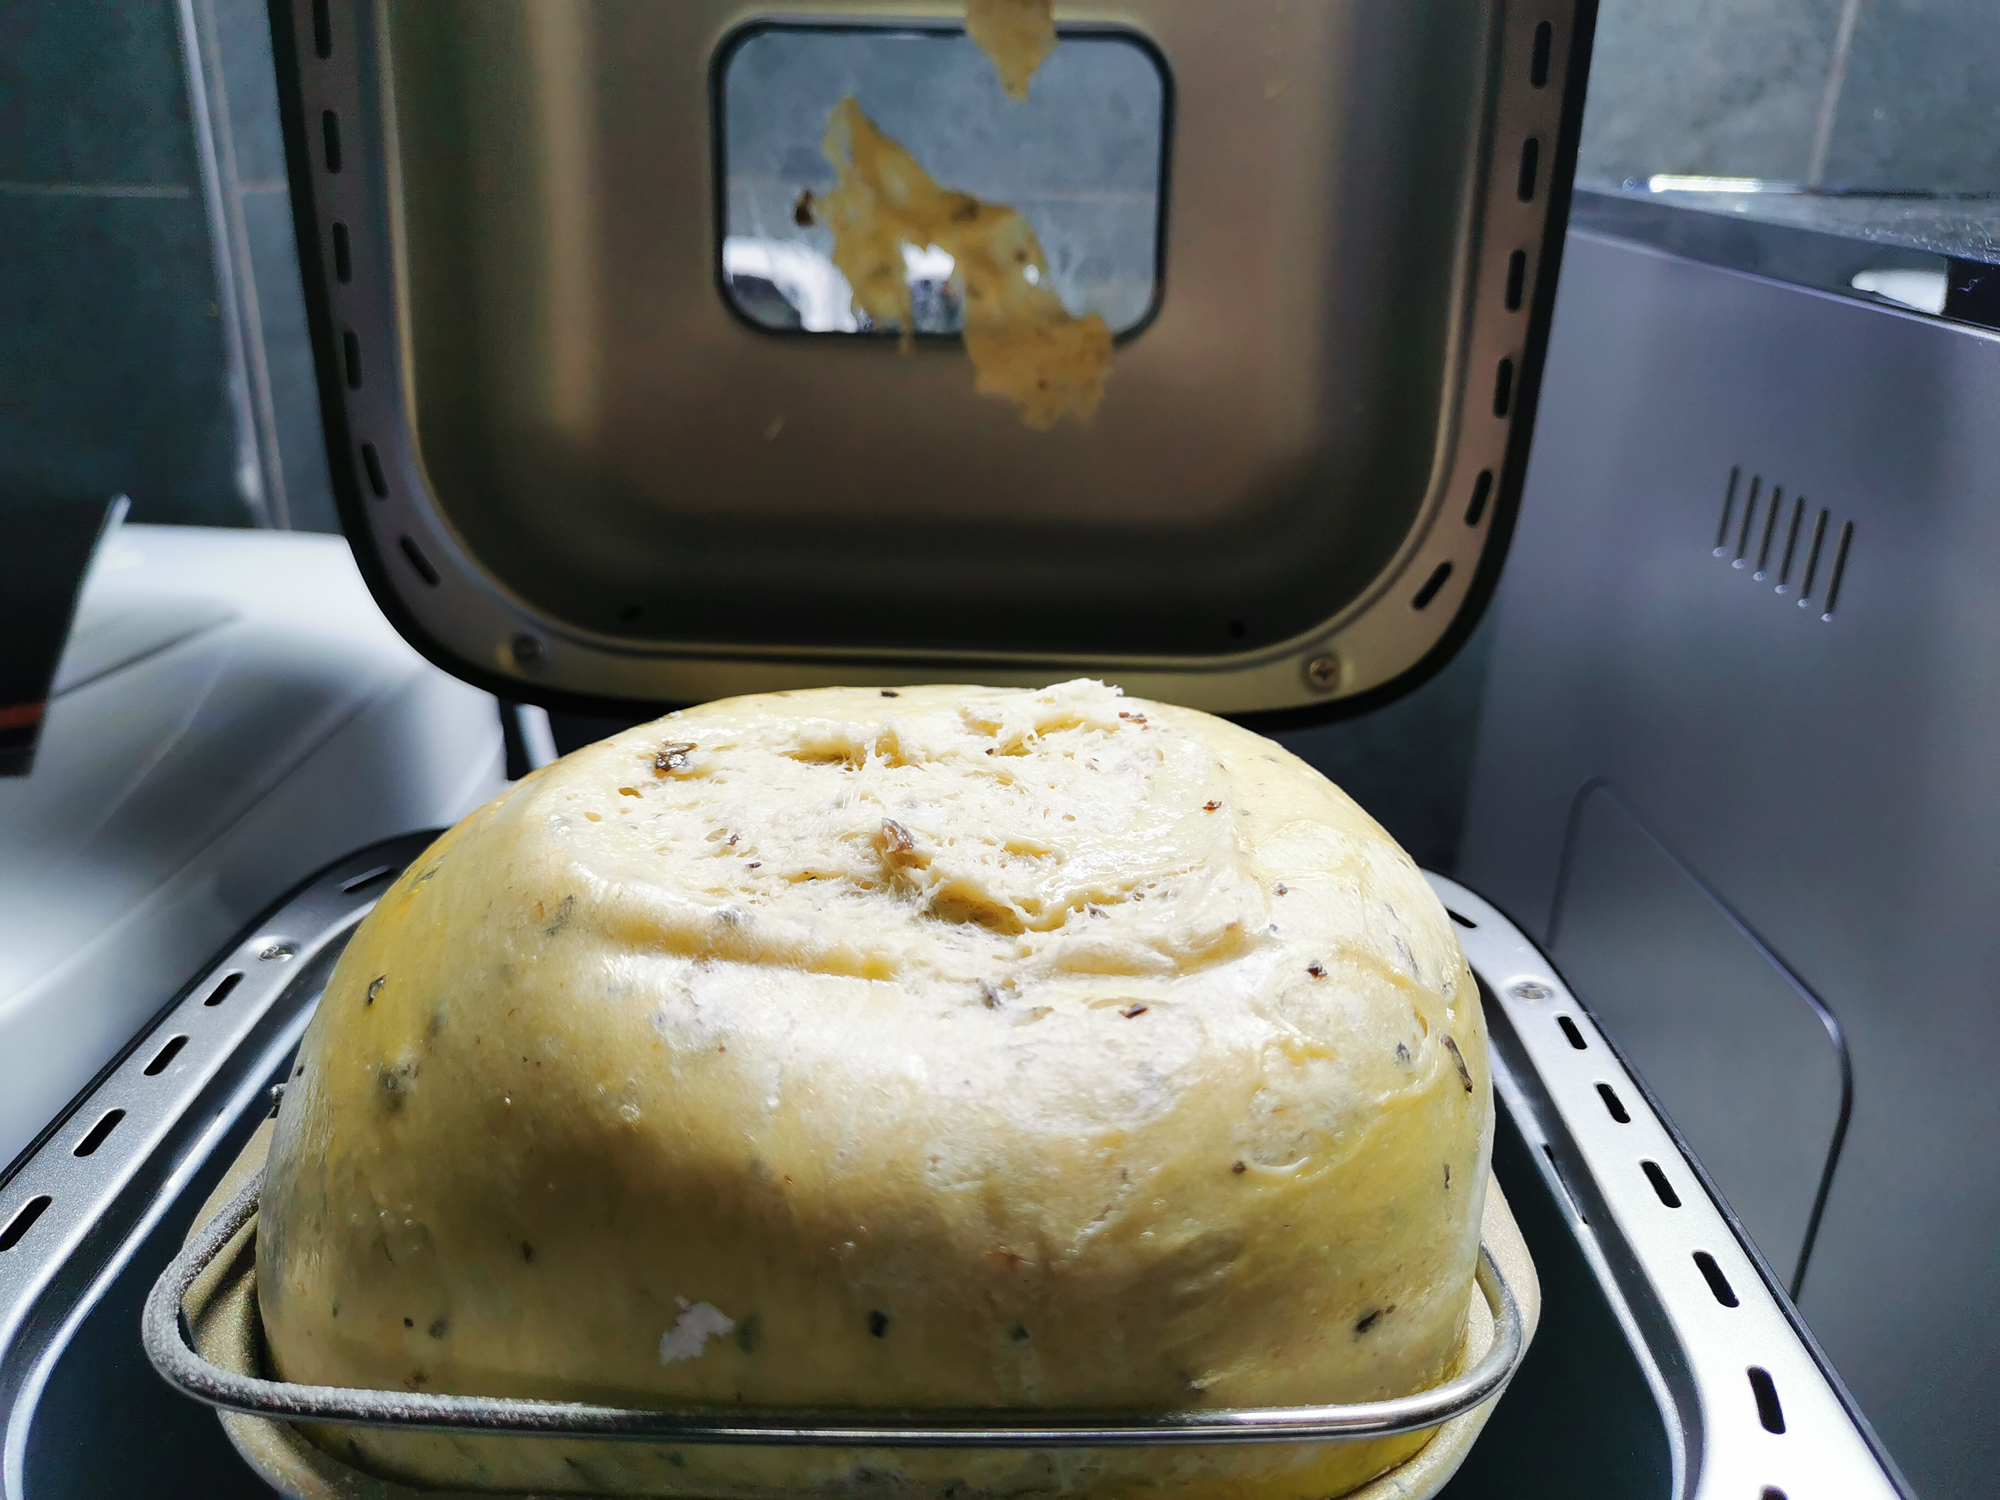
Then close the lid and cook until the end of the program.
We took out the finished cake and let it cool.
Then decorated with icing and sprinkles.
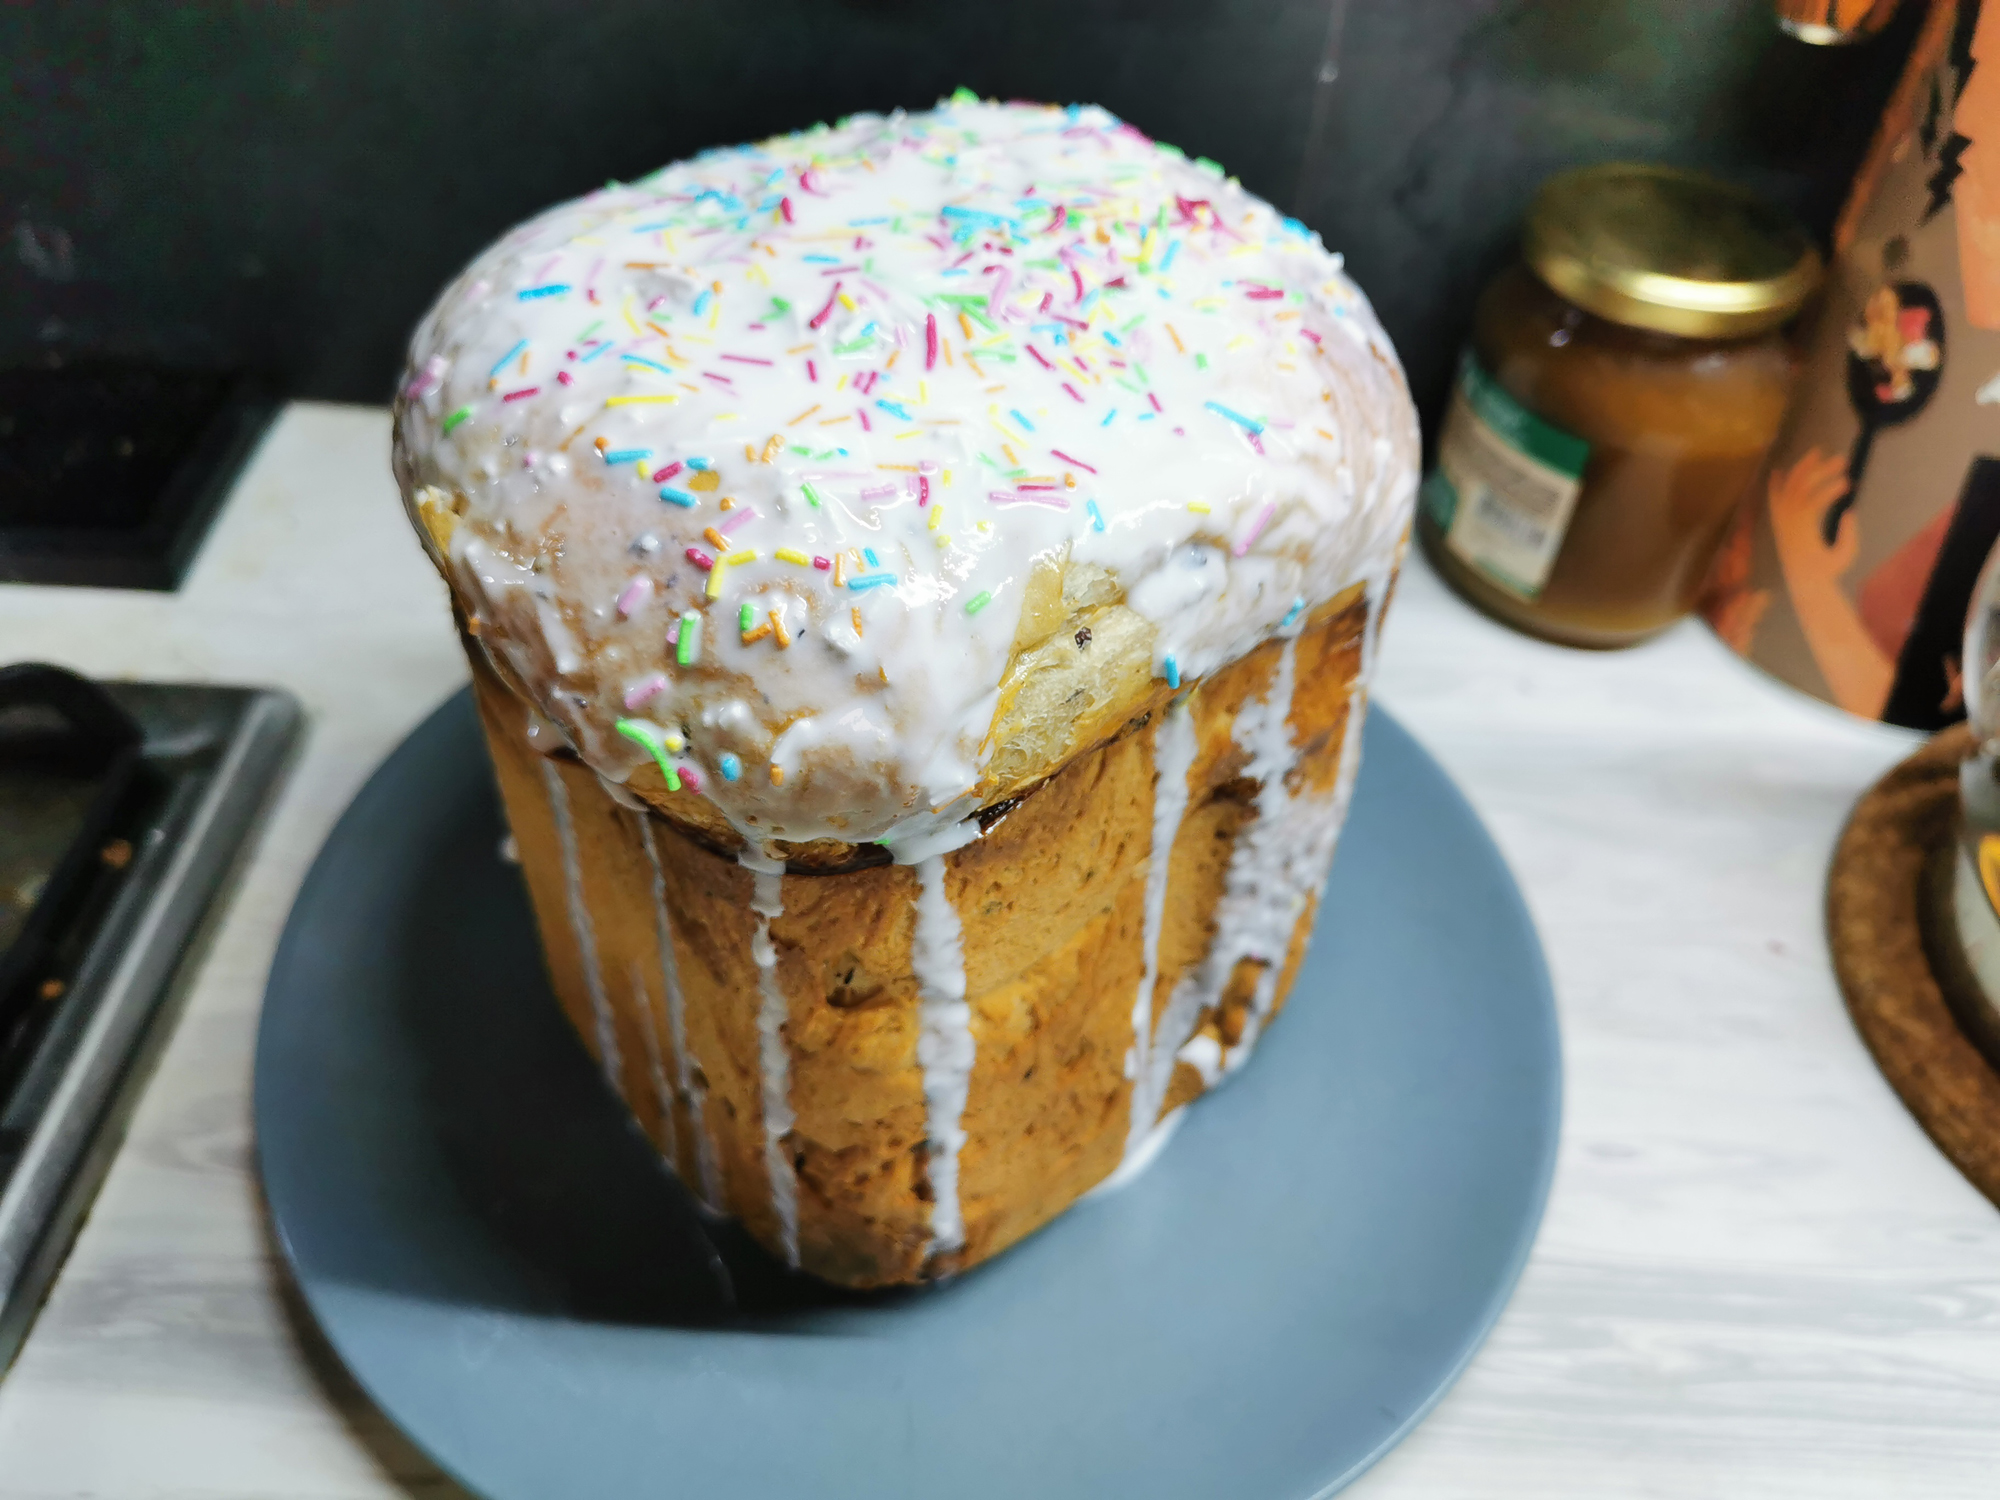
We were more than satisfied with the result.
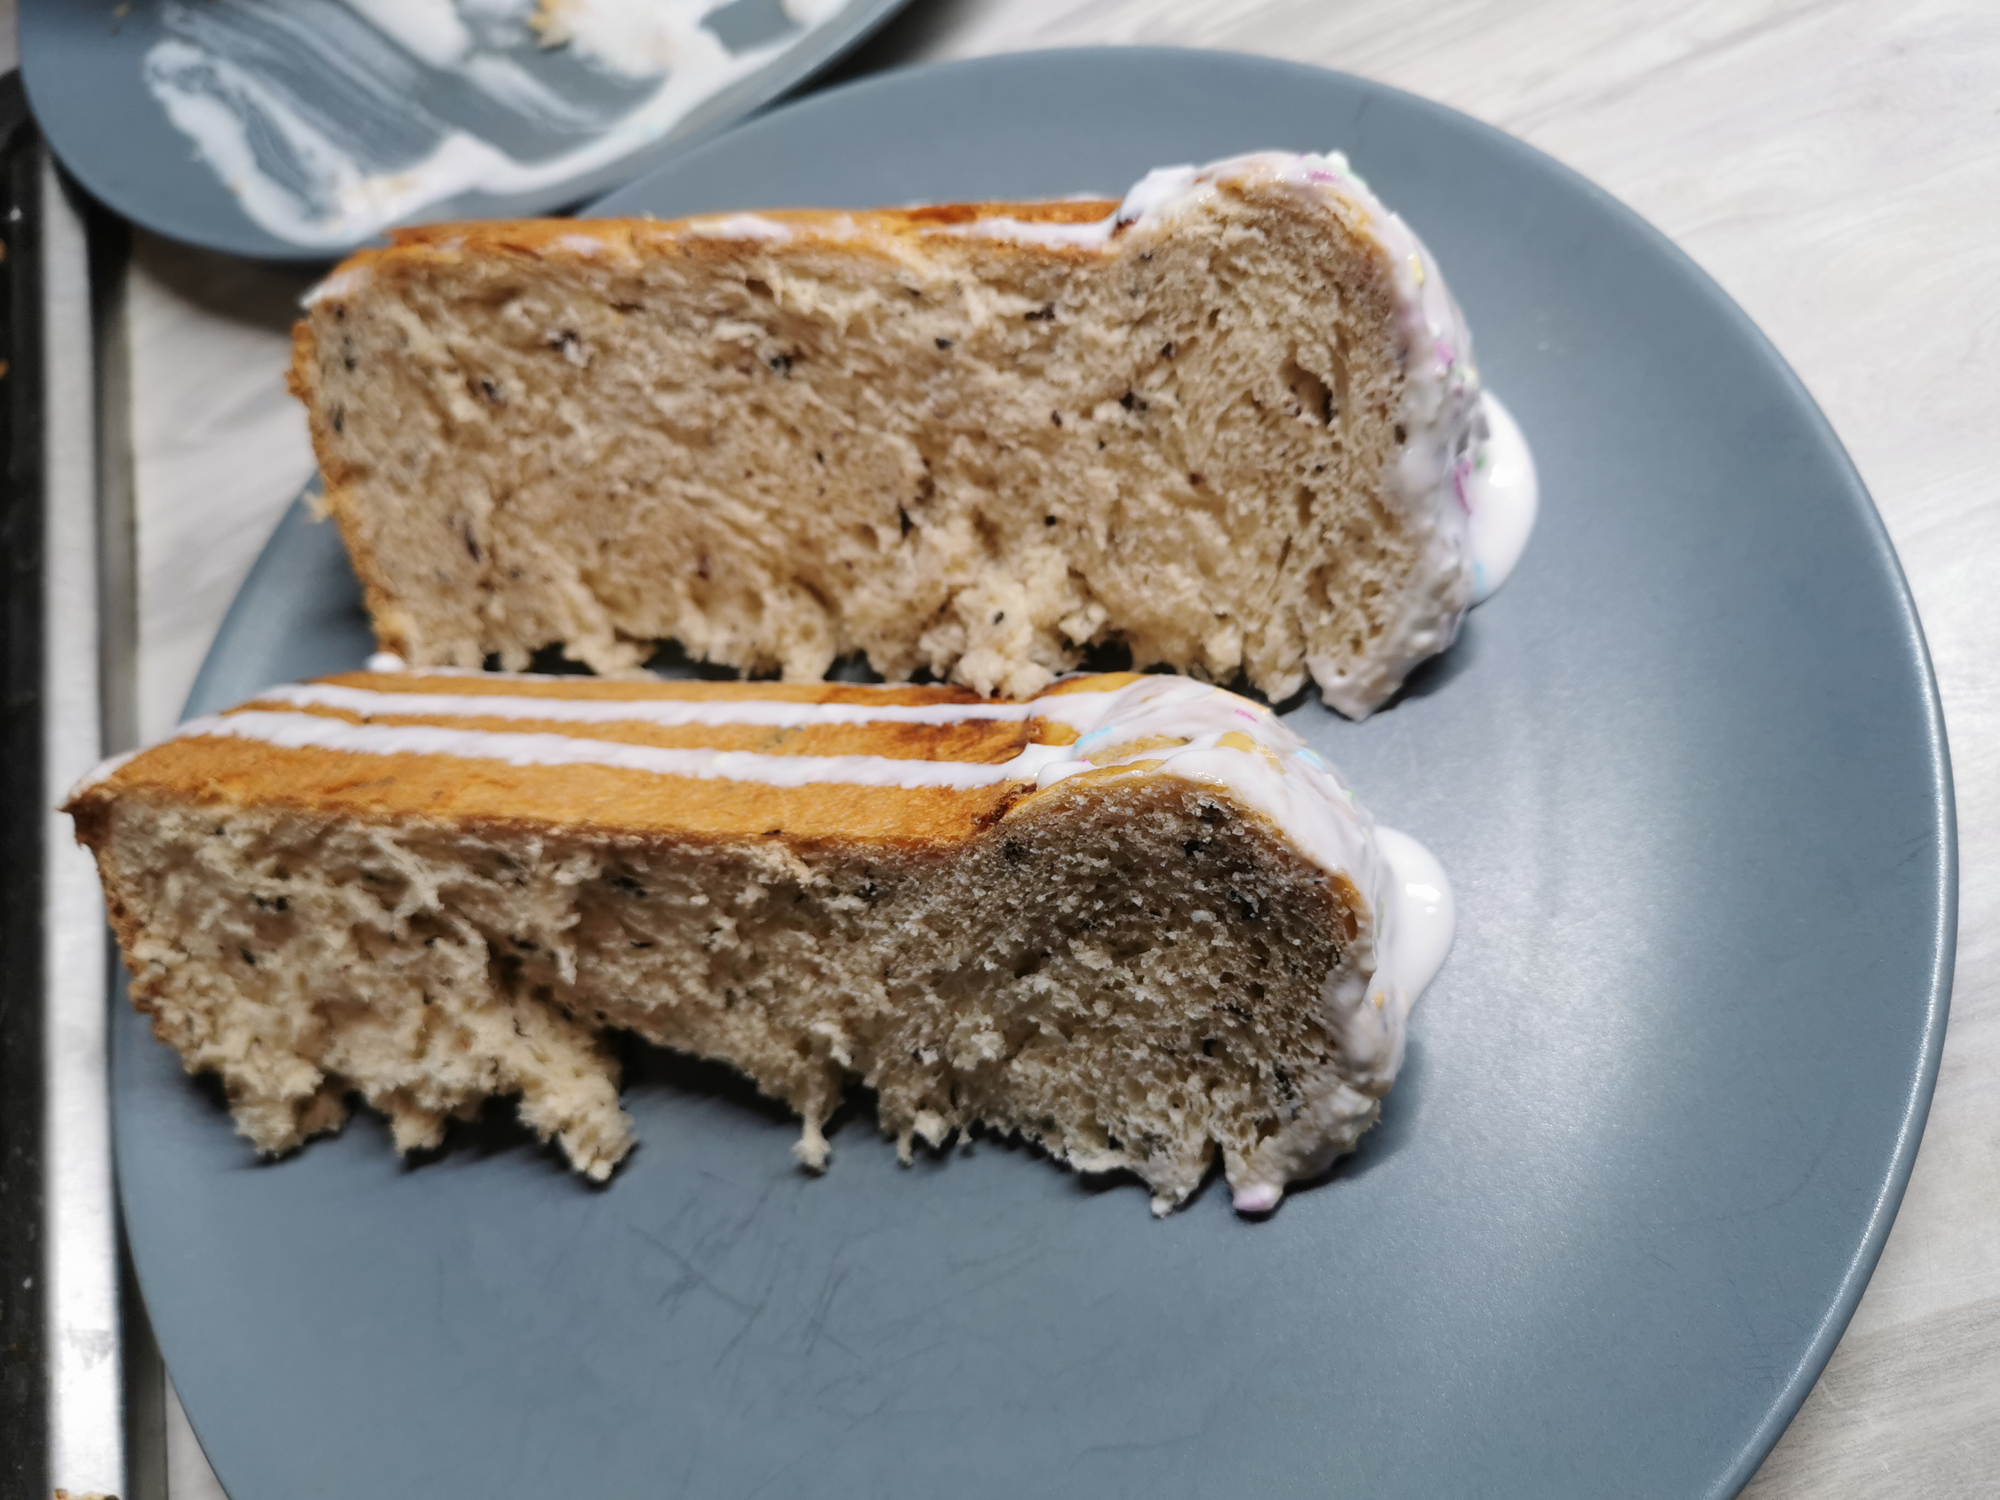
The cake was perfectly baked, turned out to be soft and moderately sweet.
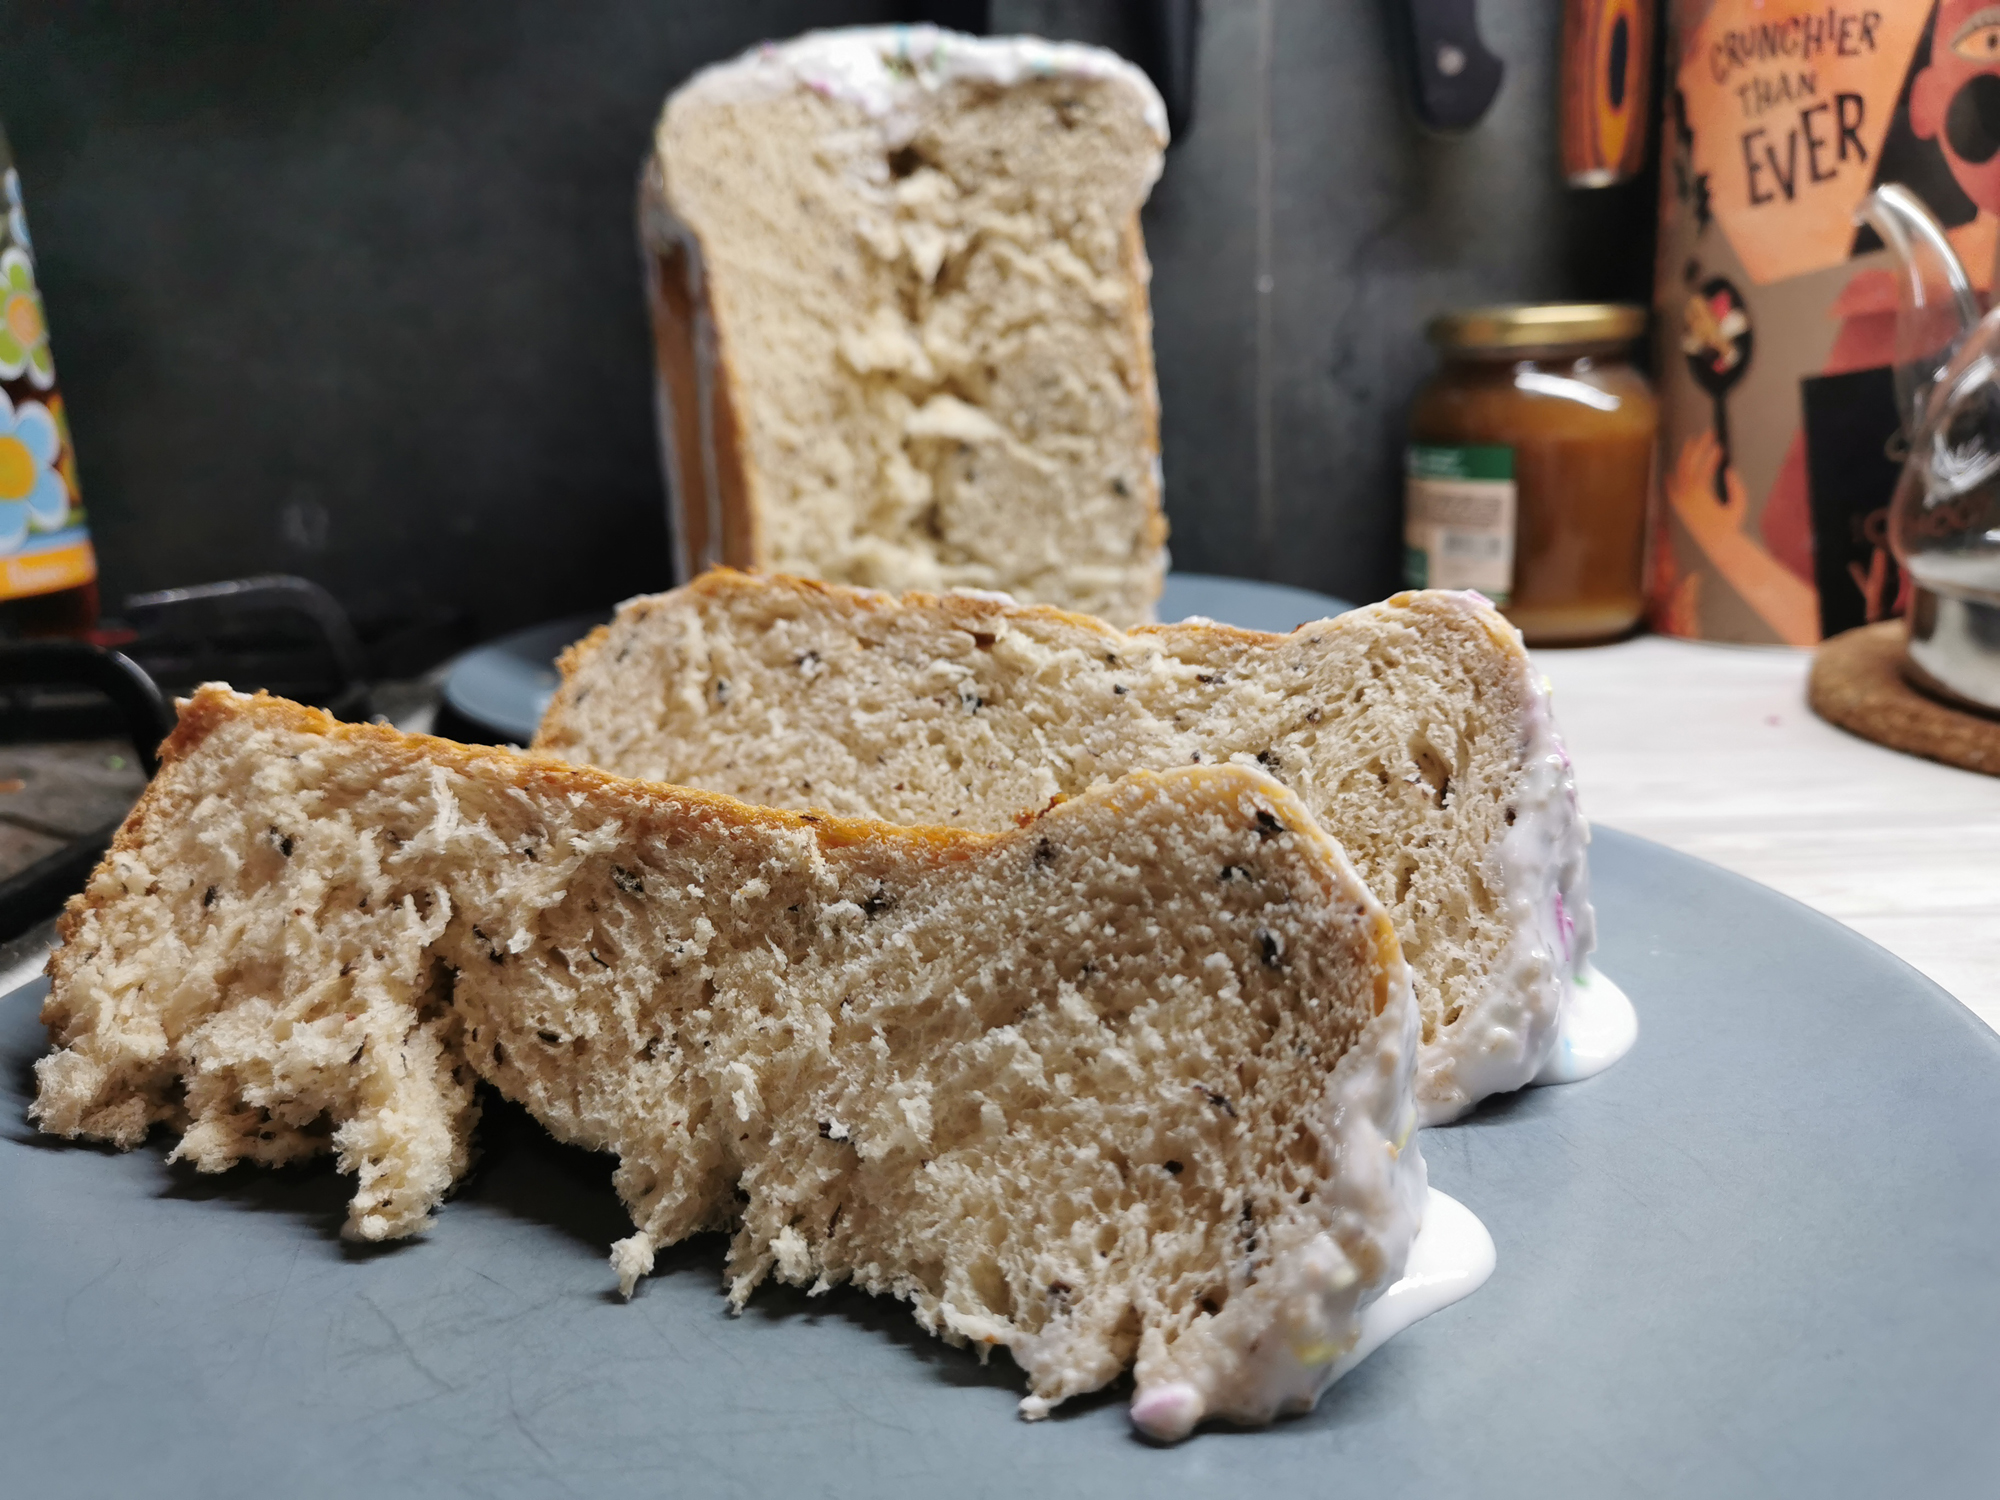
Result: excellent.
Program “Desserts”, recipe “James from apples and pears”
To prepare confiture, we needed 250 g of pear, 250 g of apples, and 400 g of sugar.
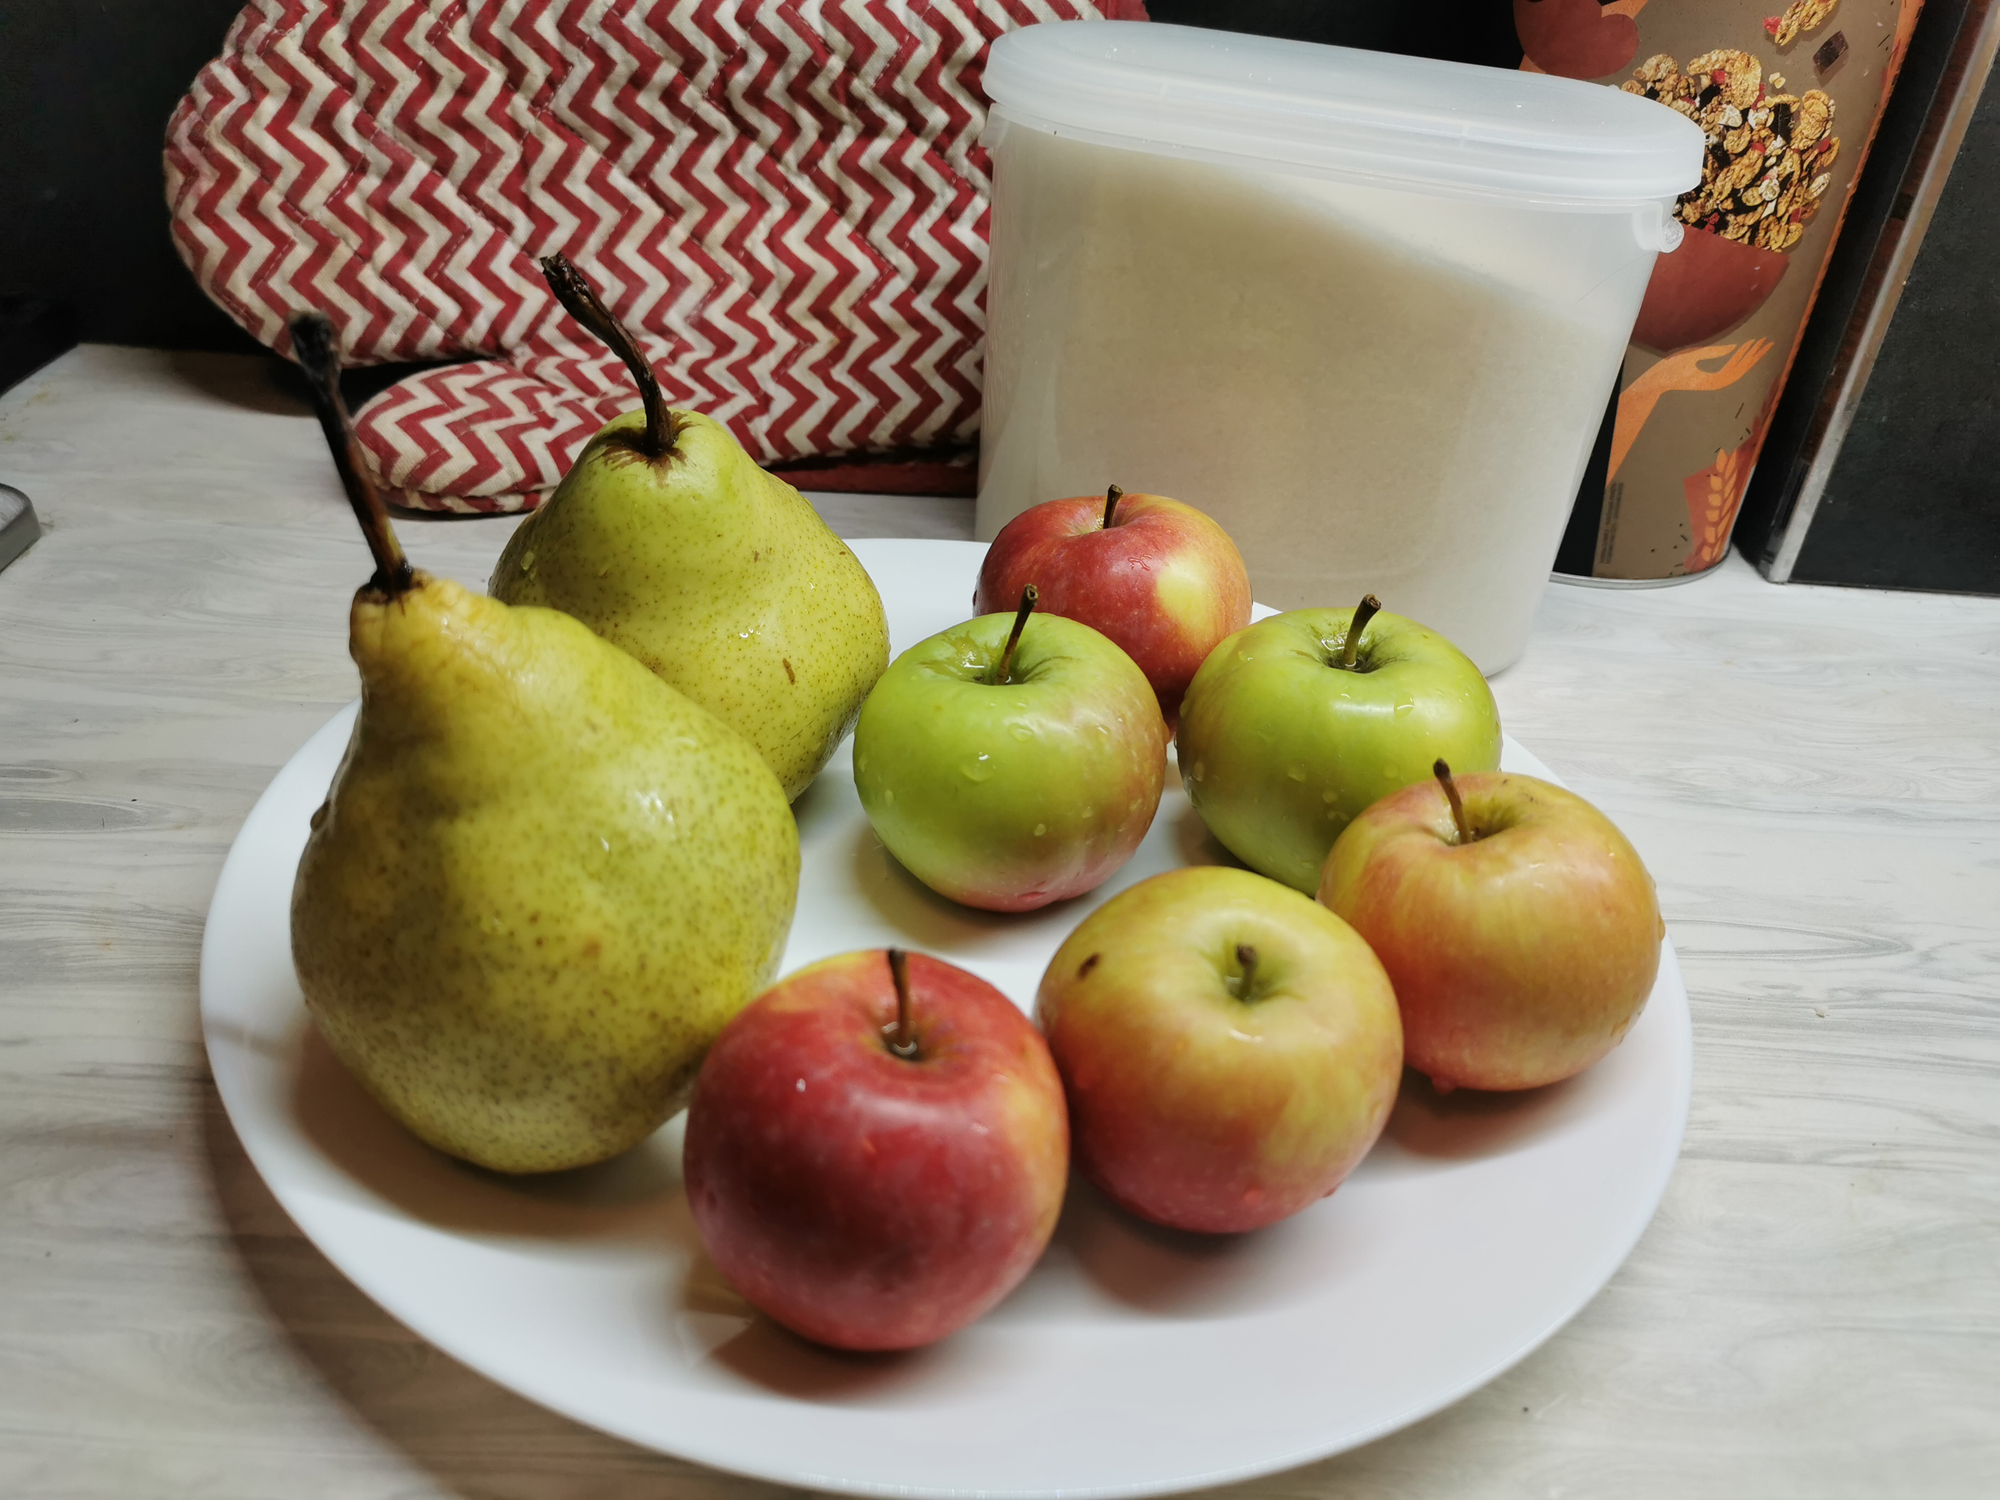
Before cooking, apples and pears must be peeled, core and seeds.
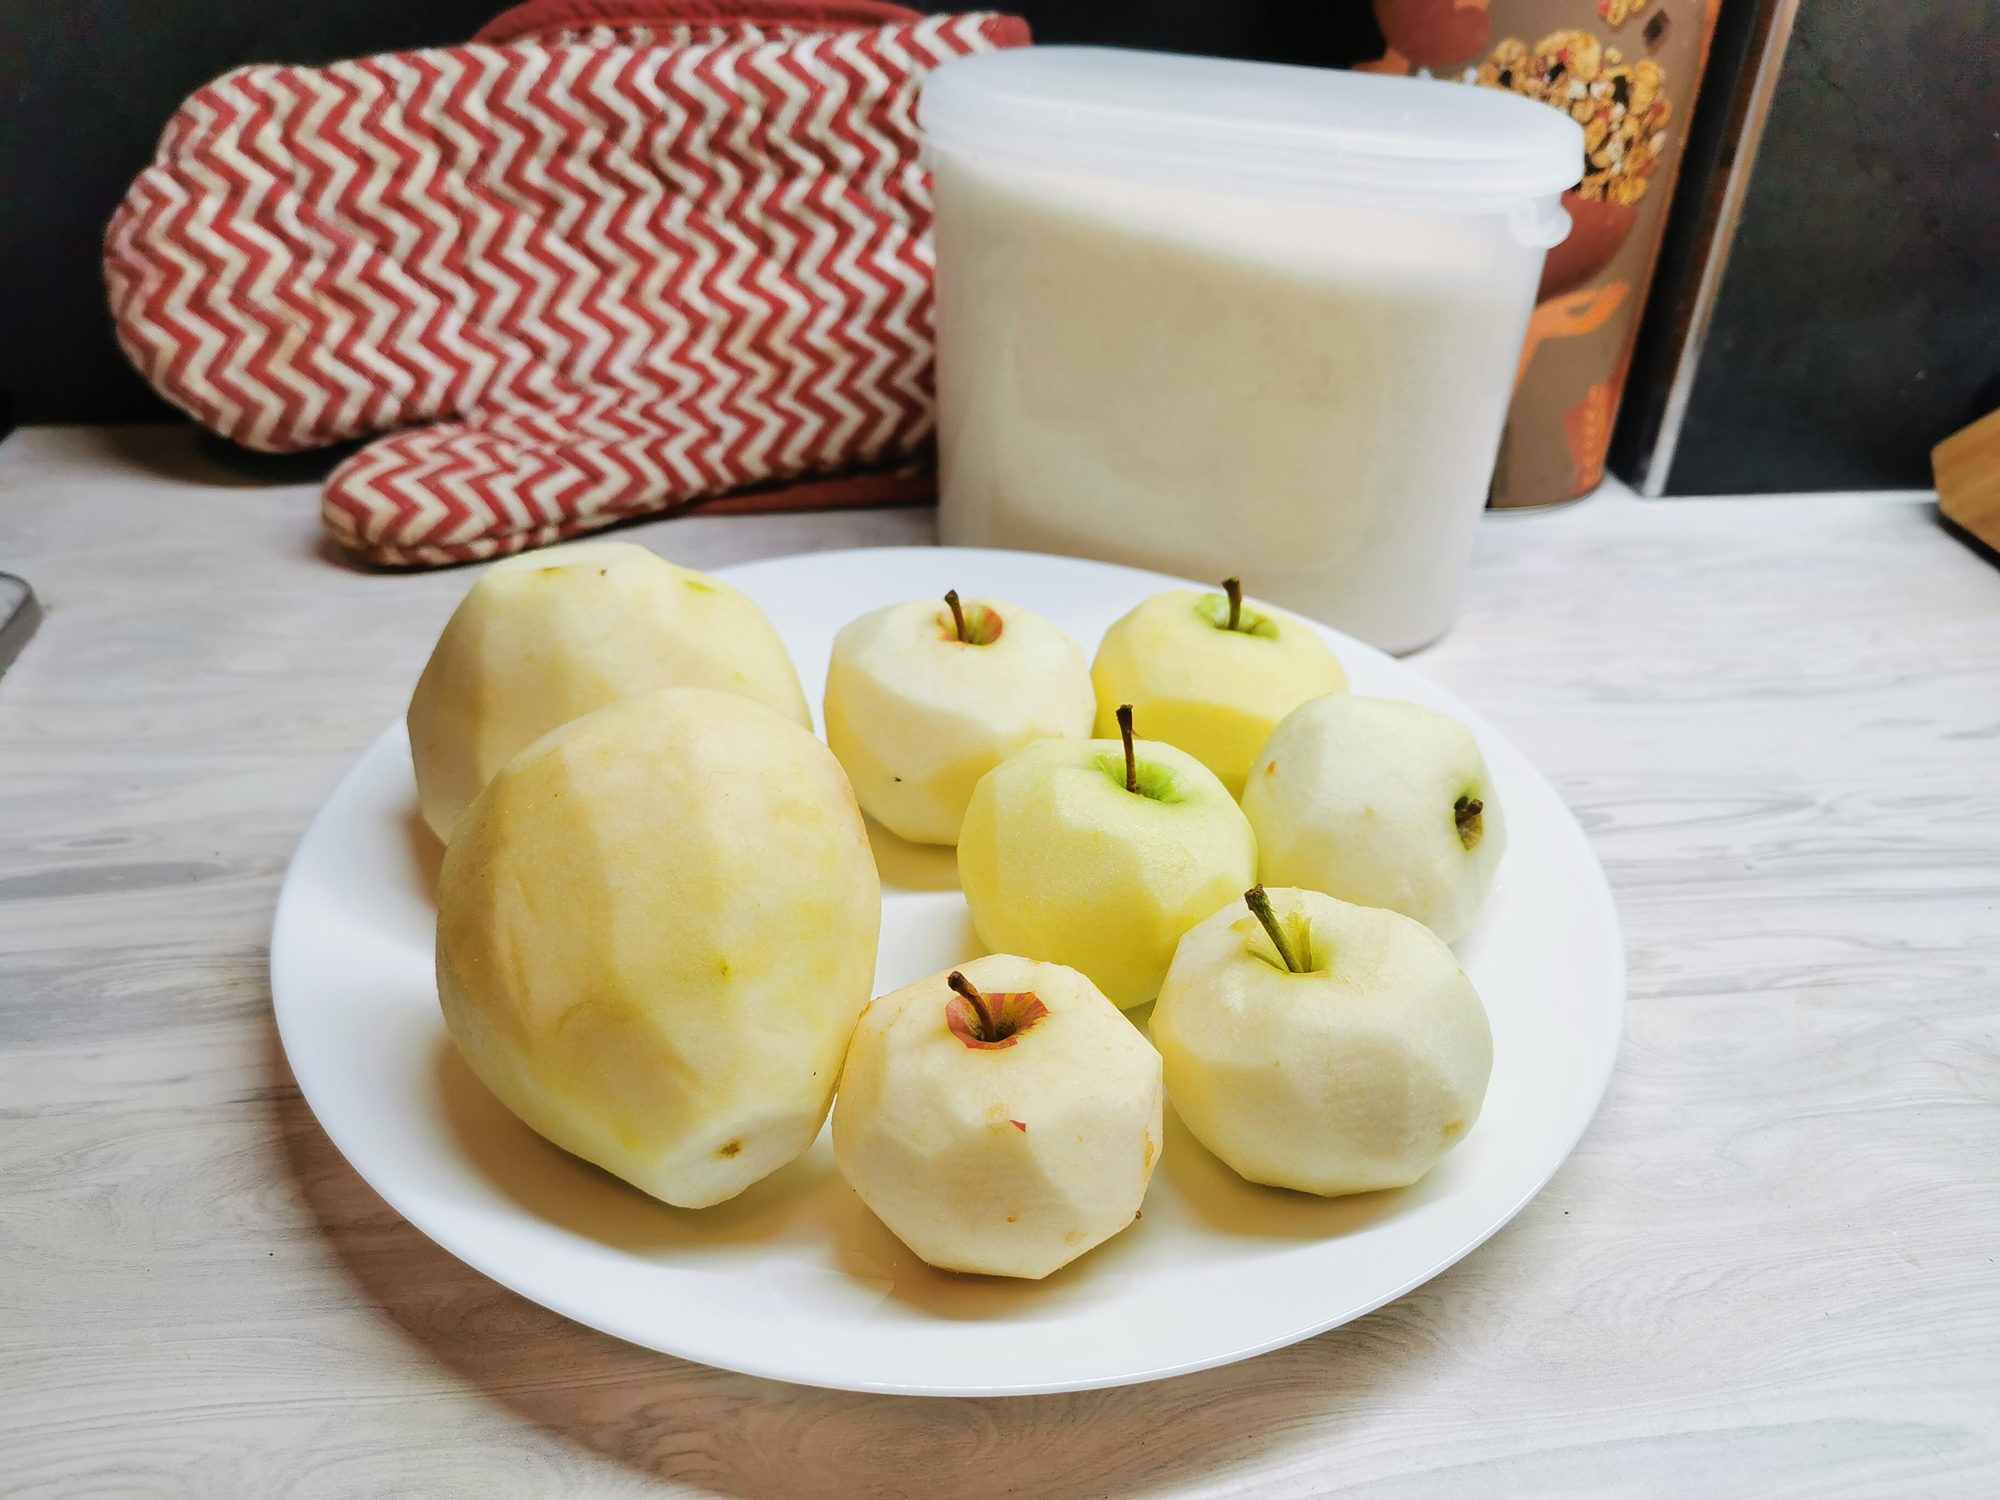
Cut into 0.5 cm cubes.
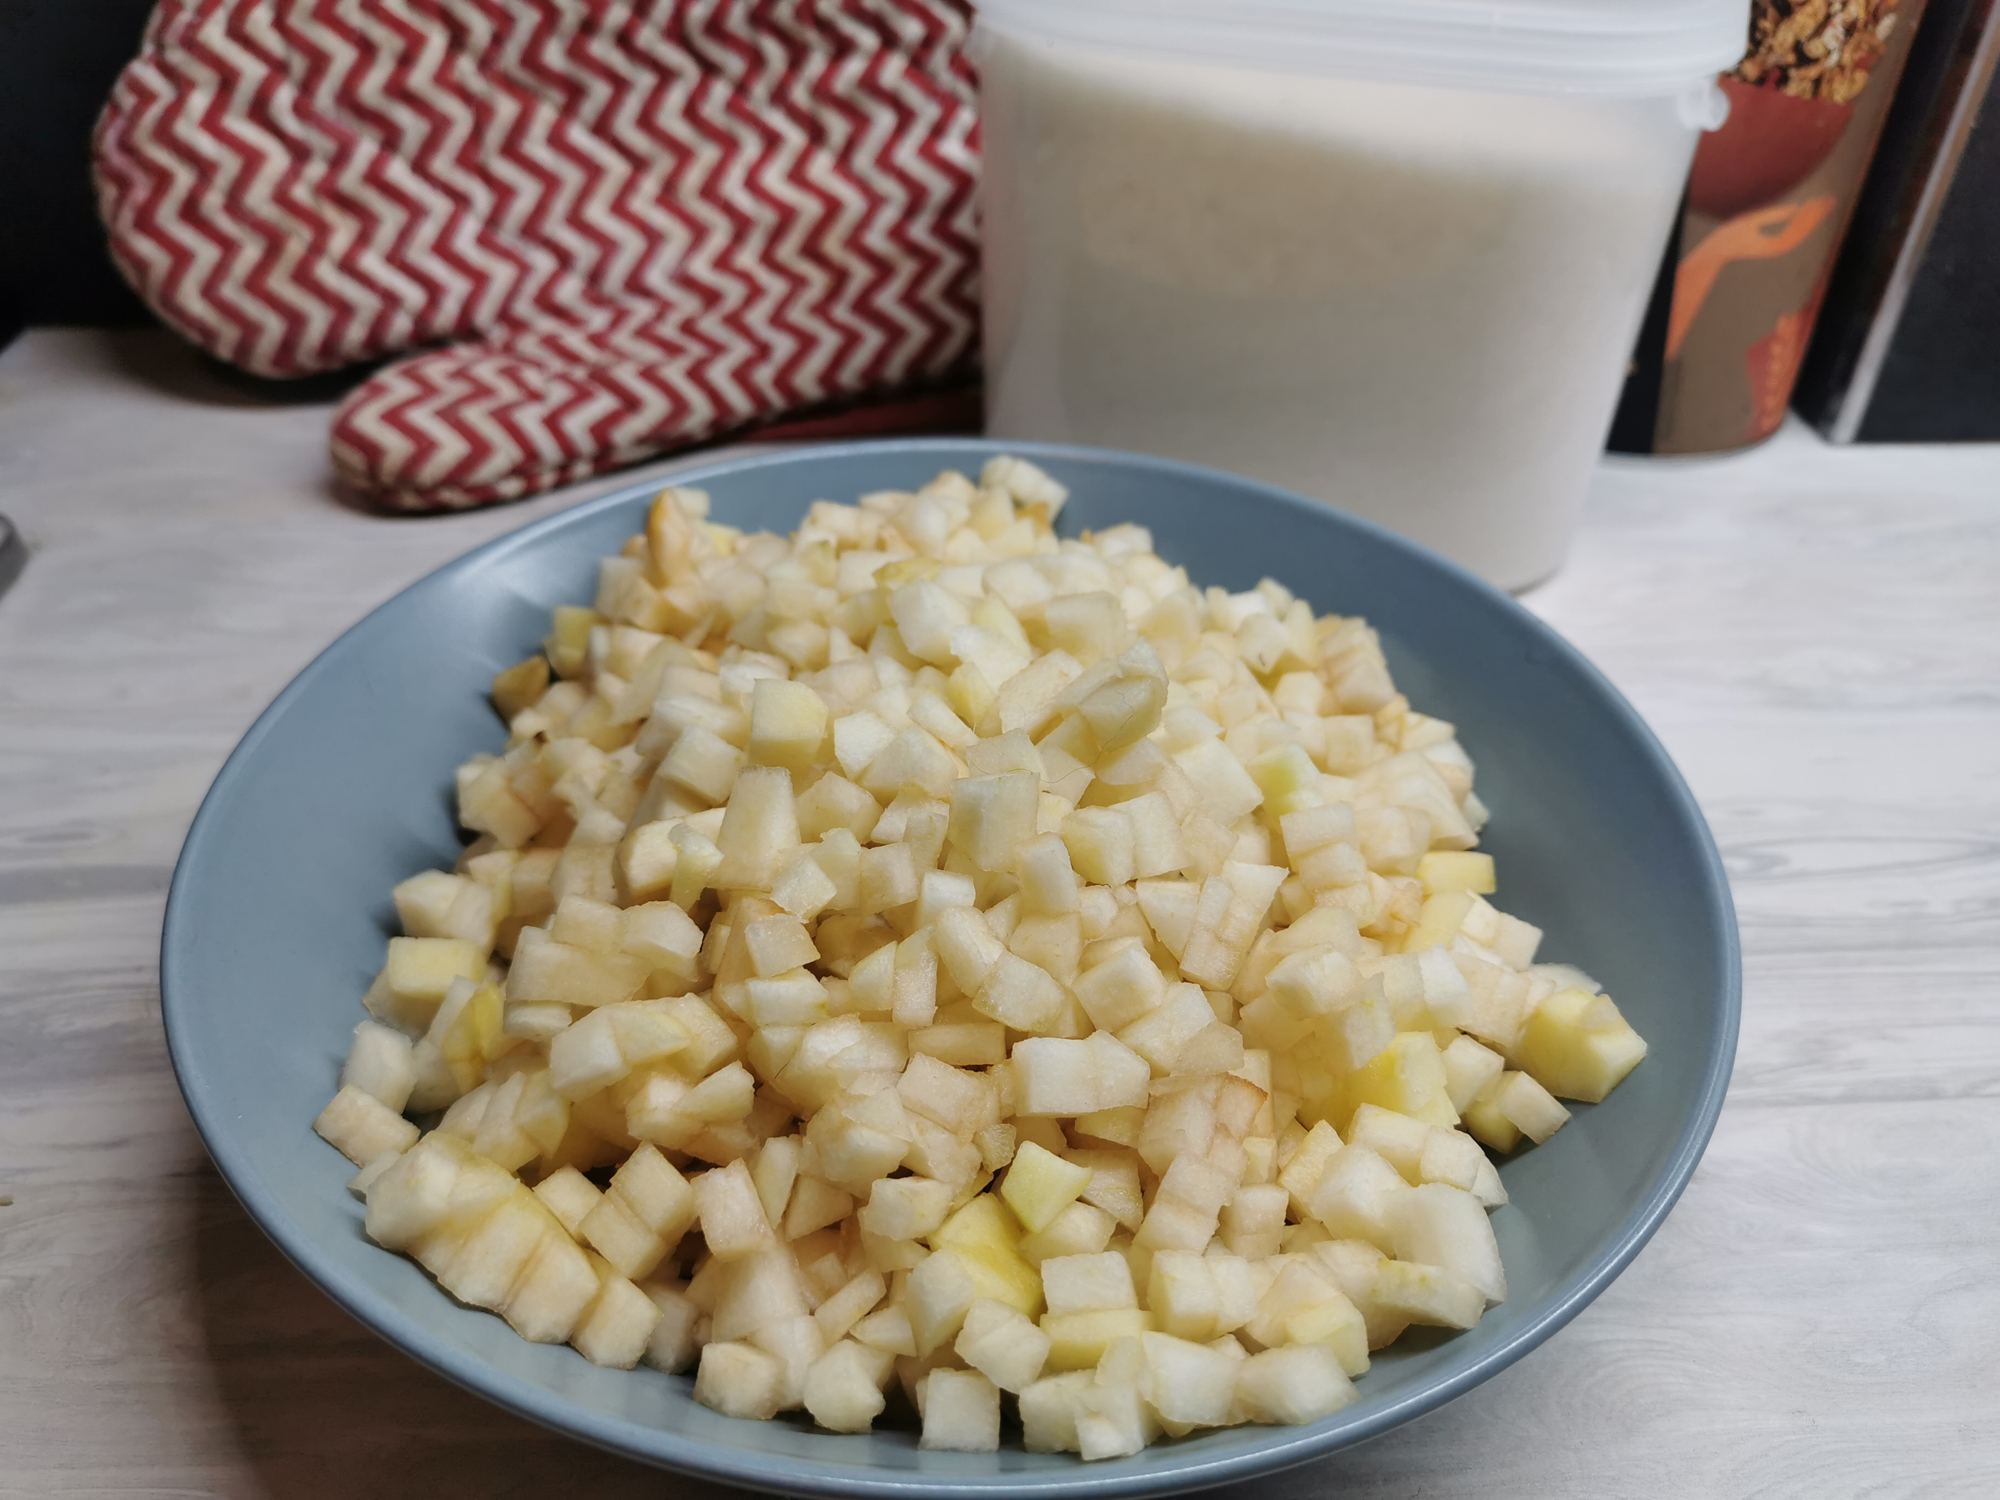
…sprinkle with sugar and leave for 8 hours.
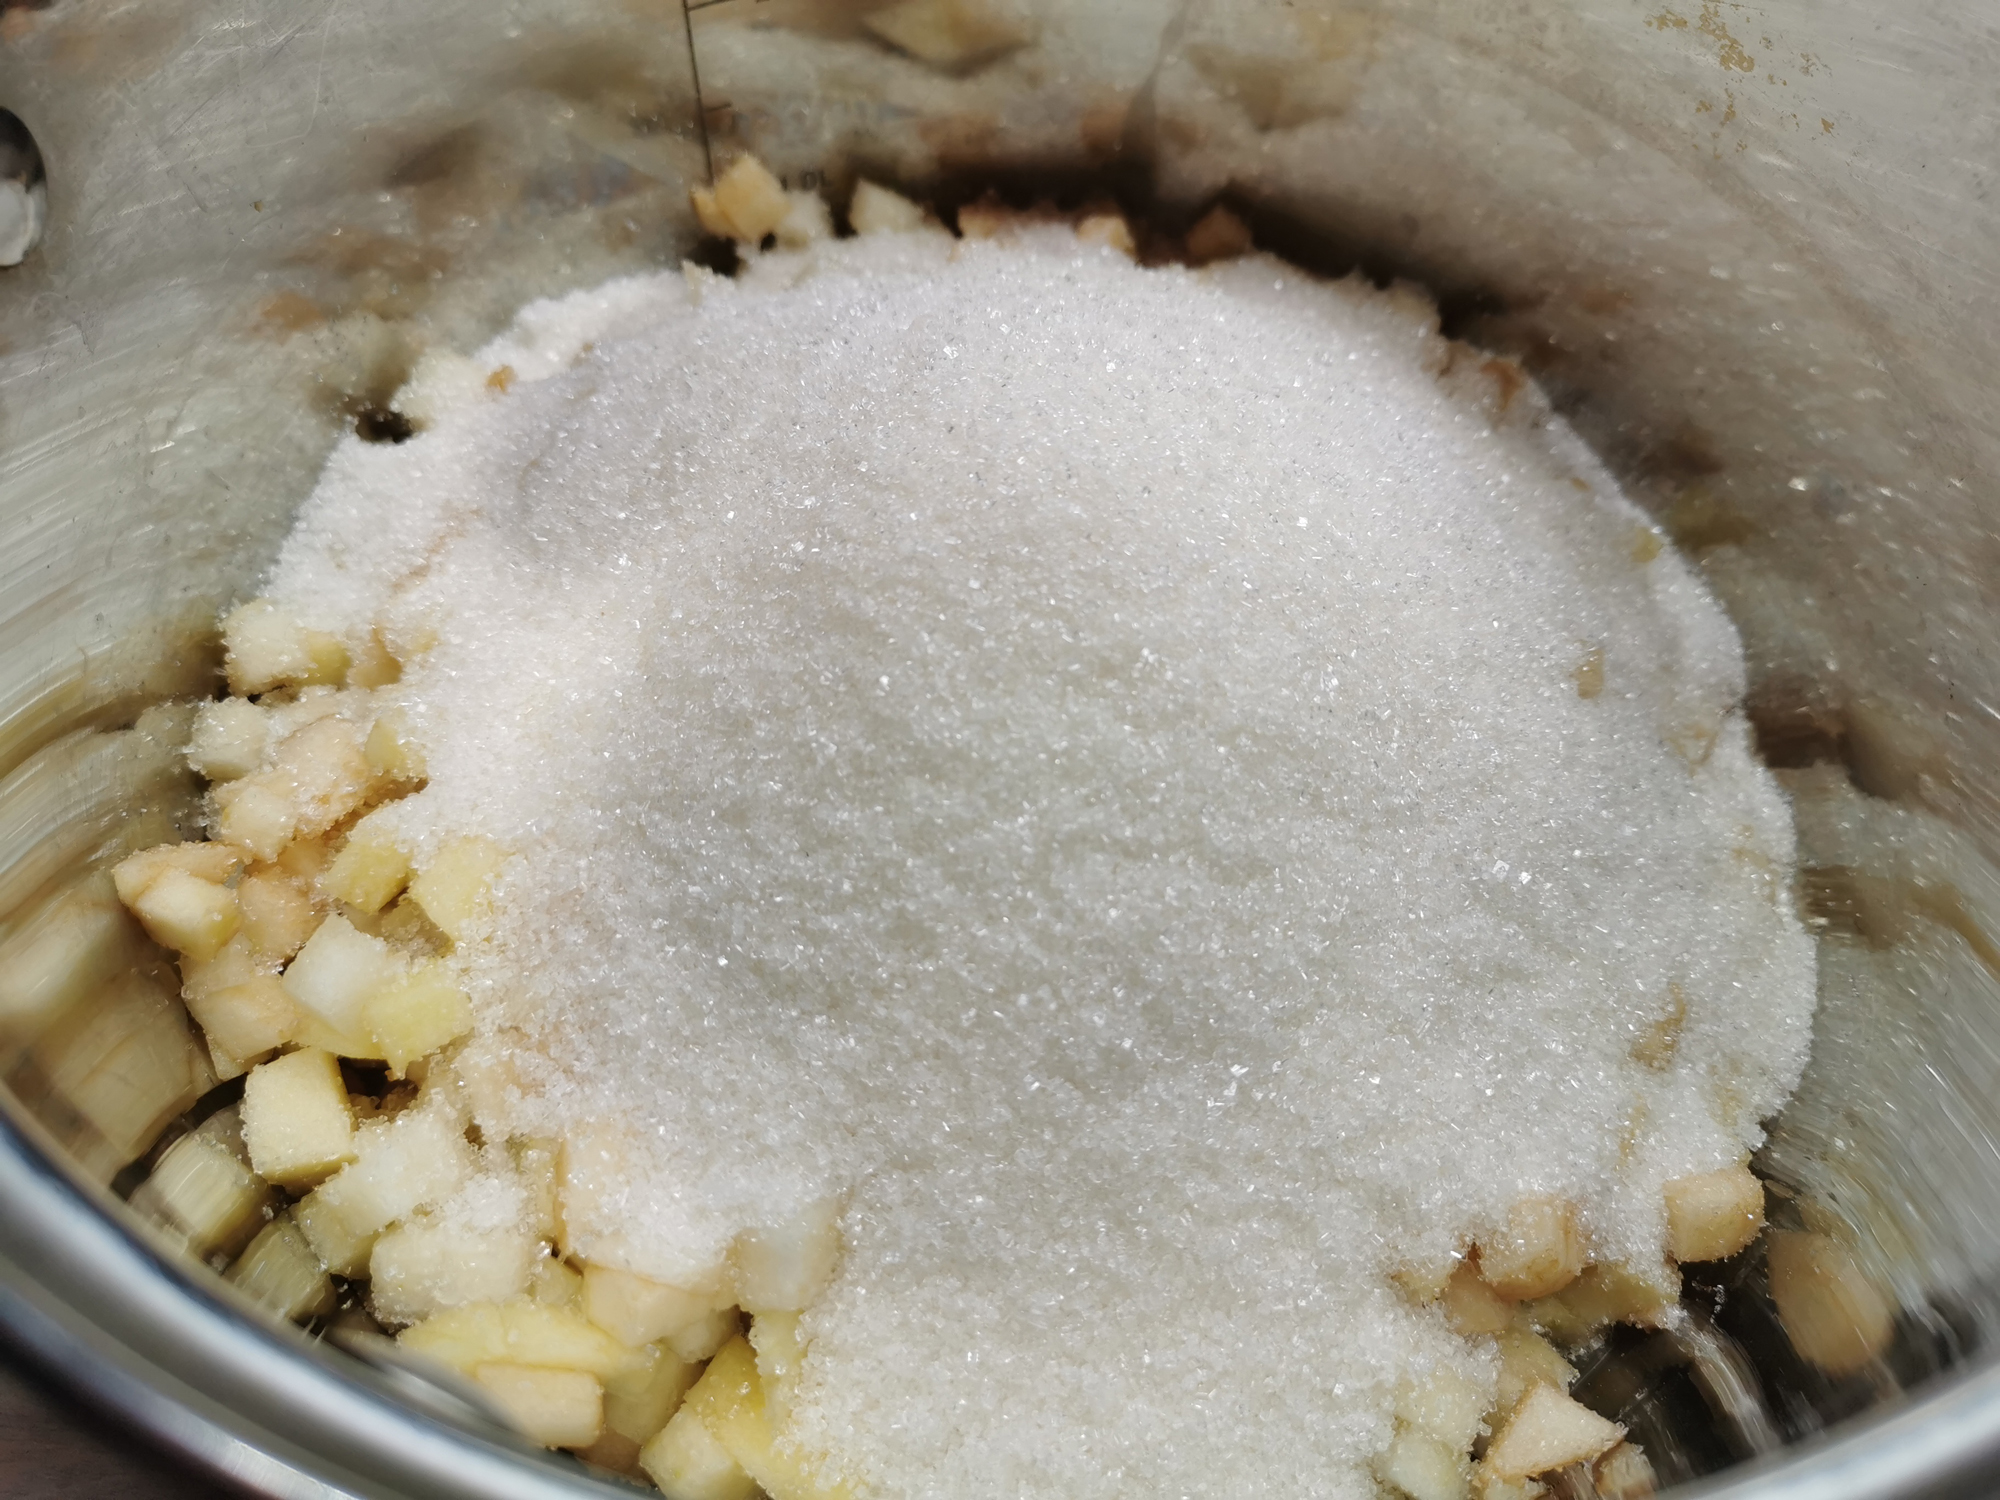
Then put the fruit in the bowl of the bread machine.
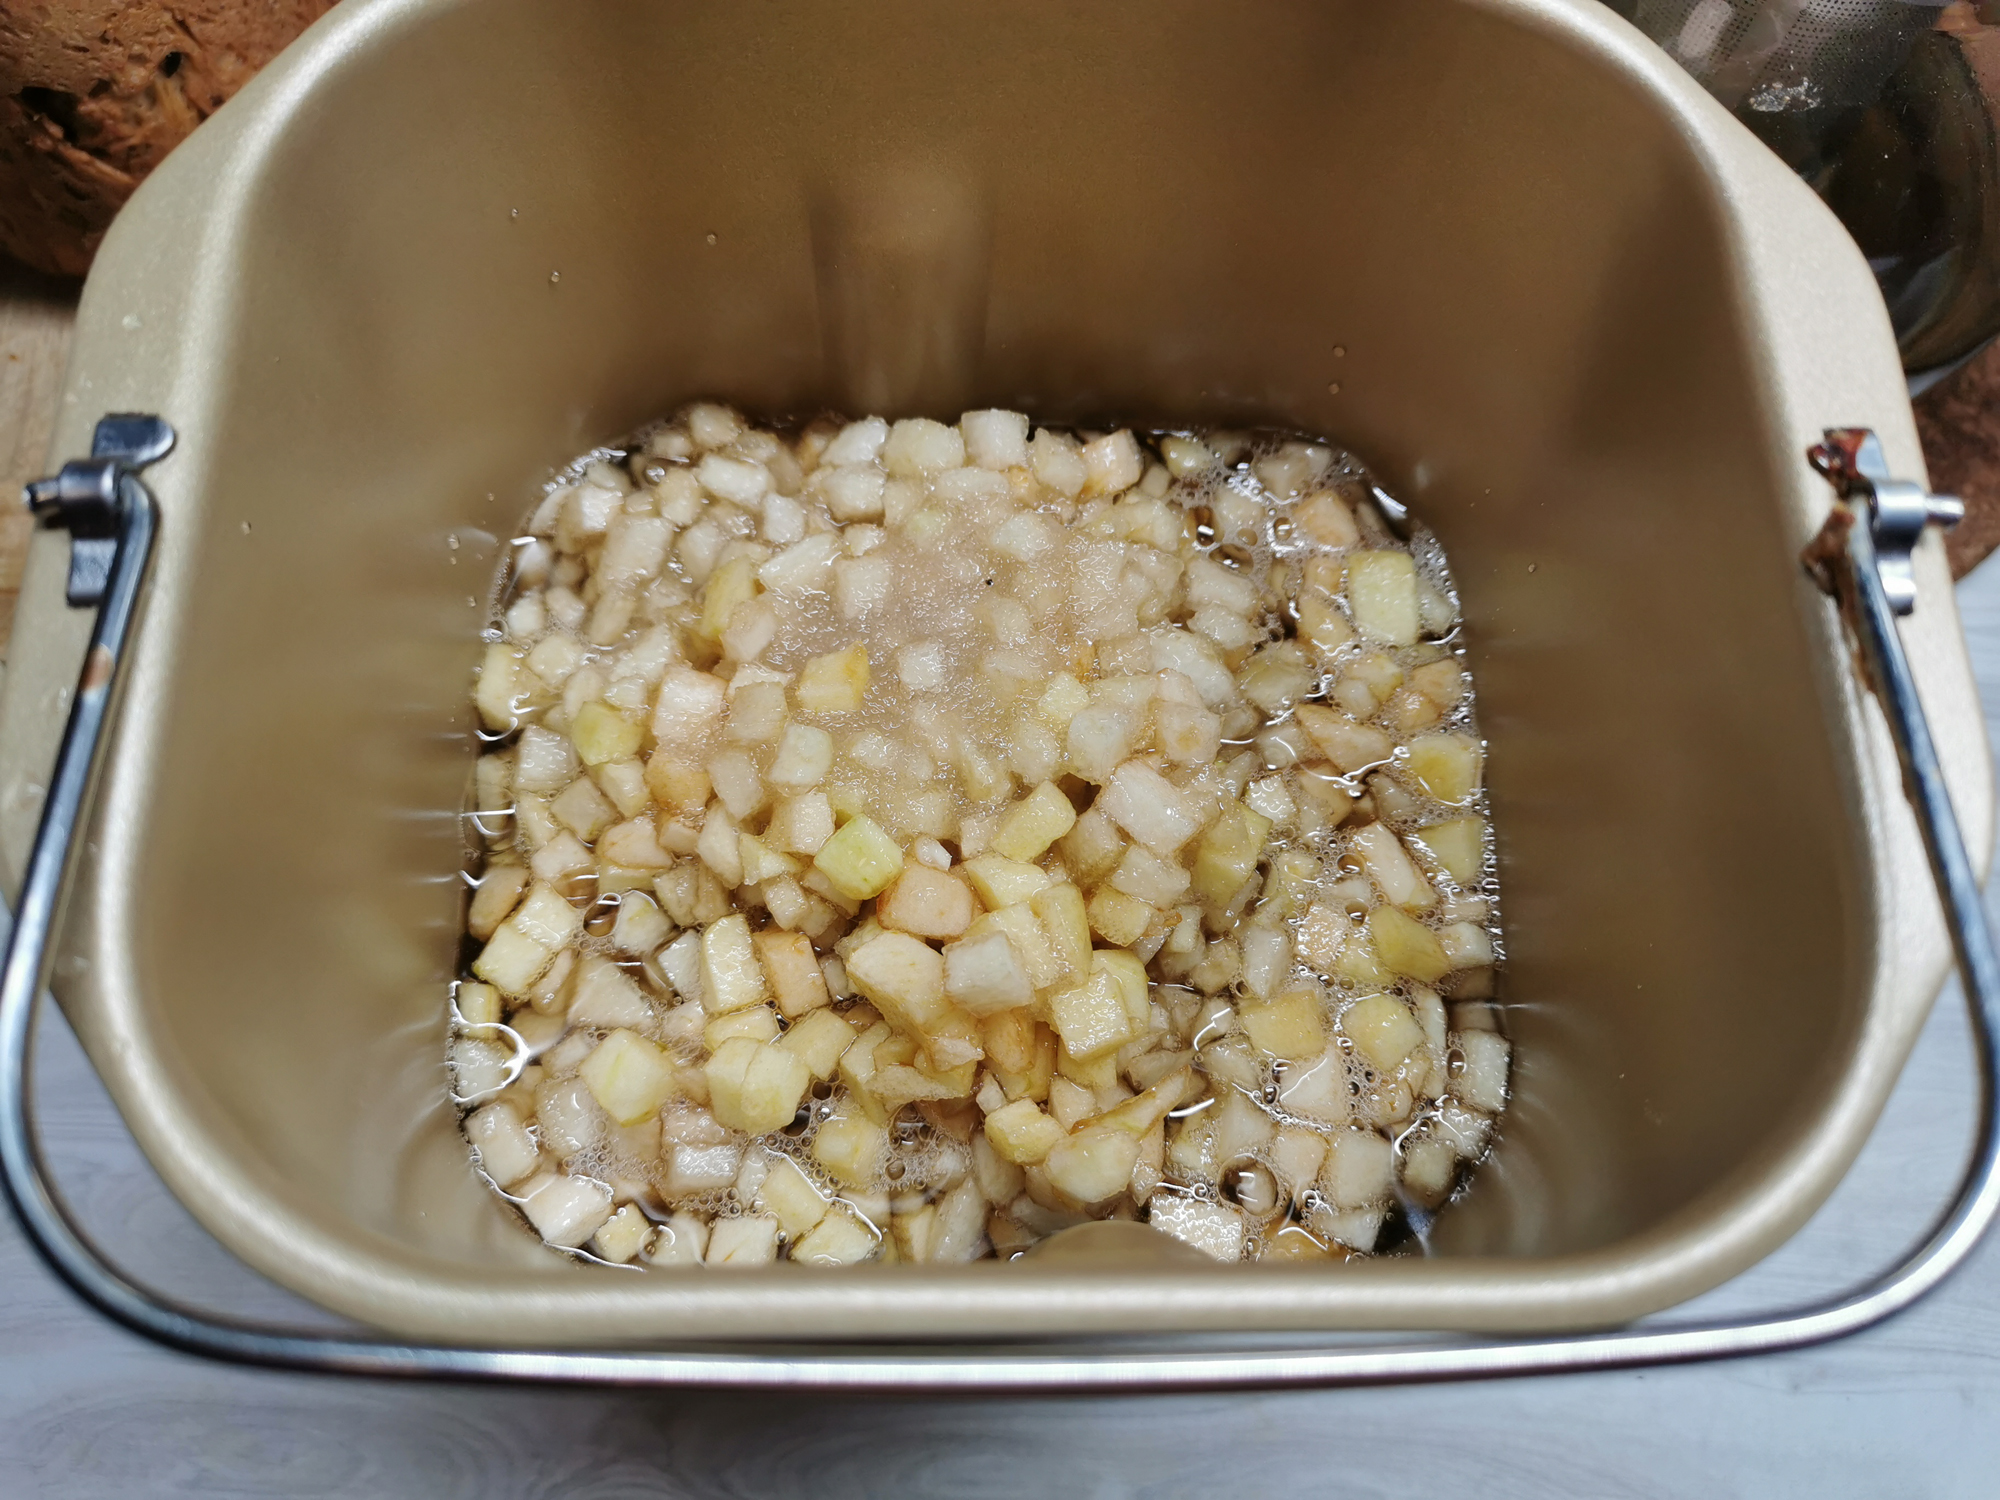
Cover the bowl with foil, fasten the foil around the edges of the bowl. Close the lid. Set the program “Desserts”, cooking time 1 hour.
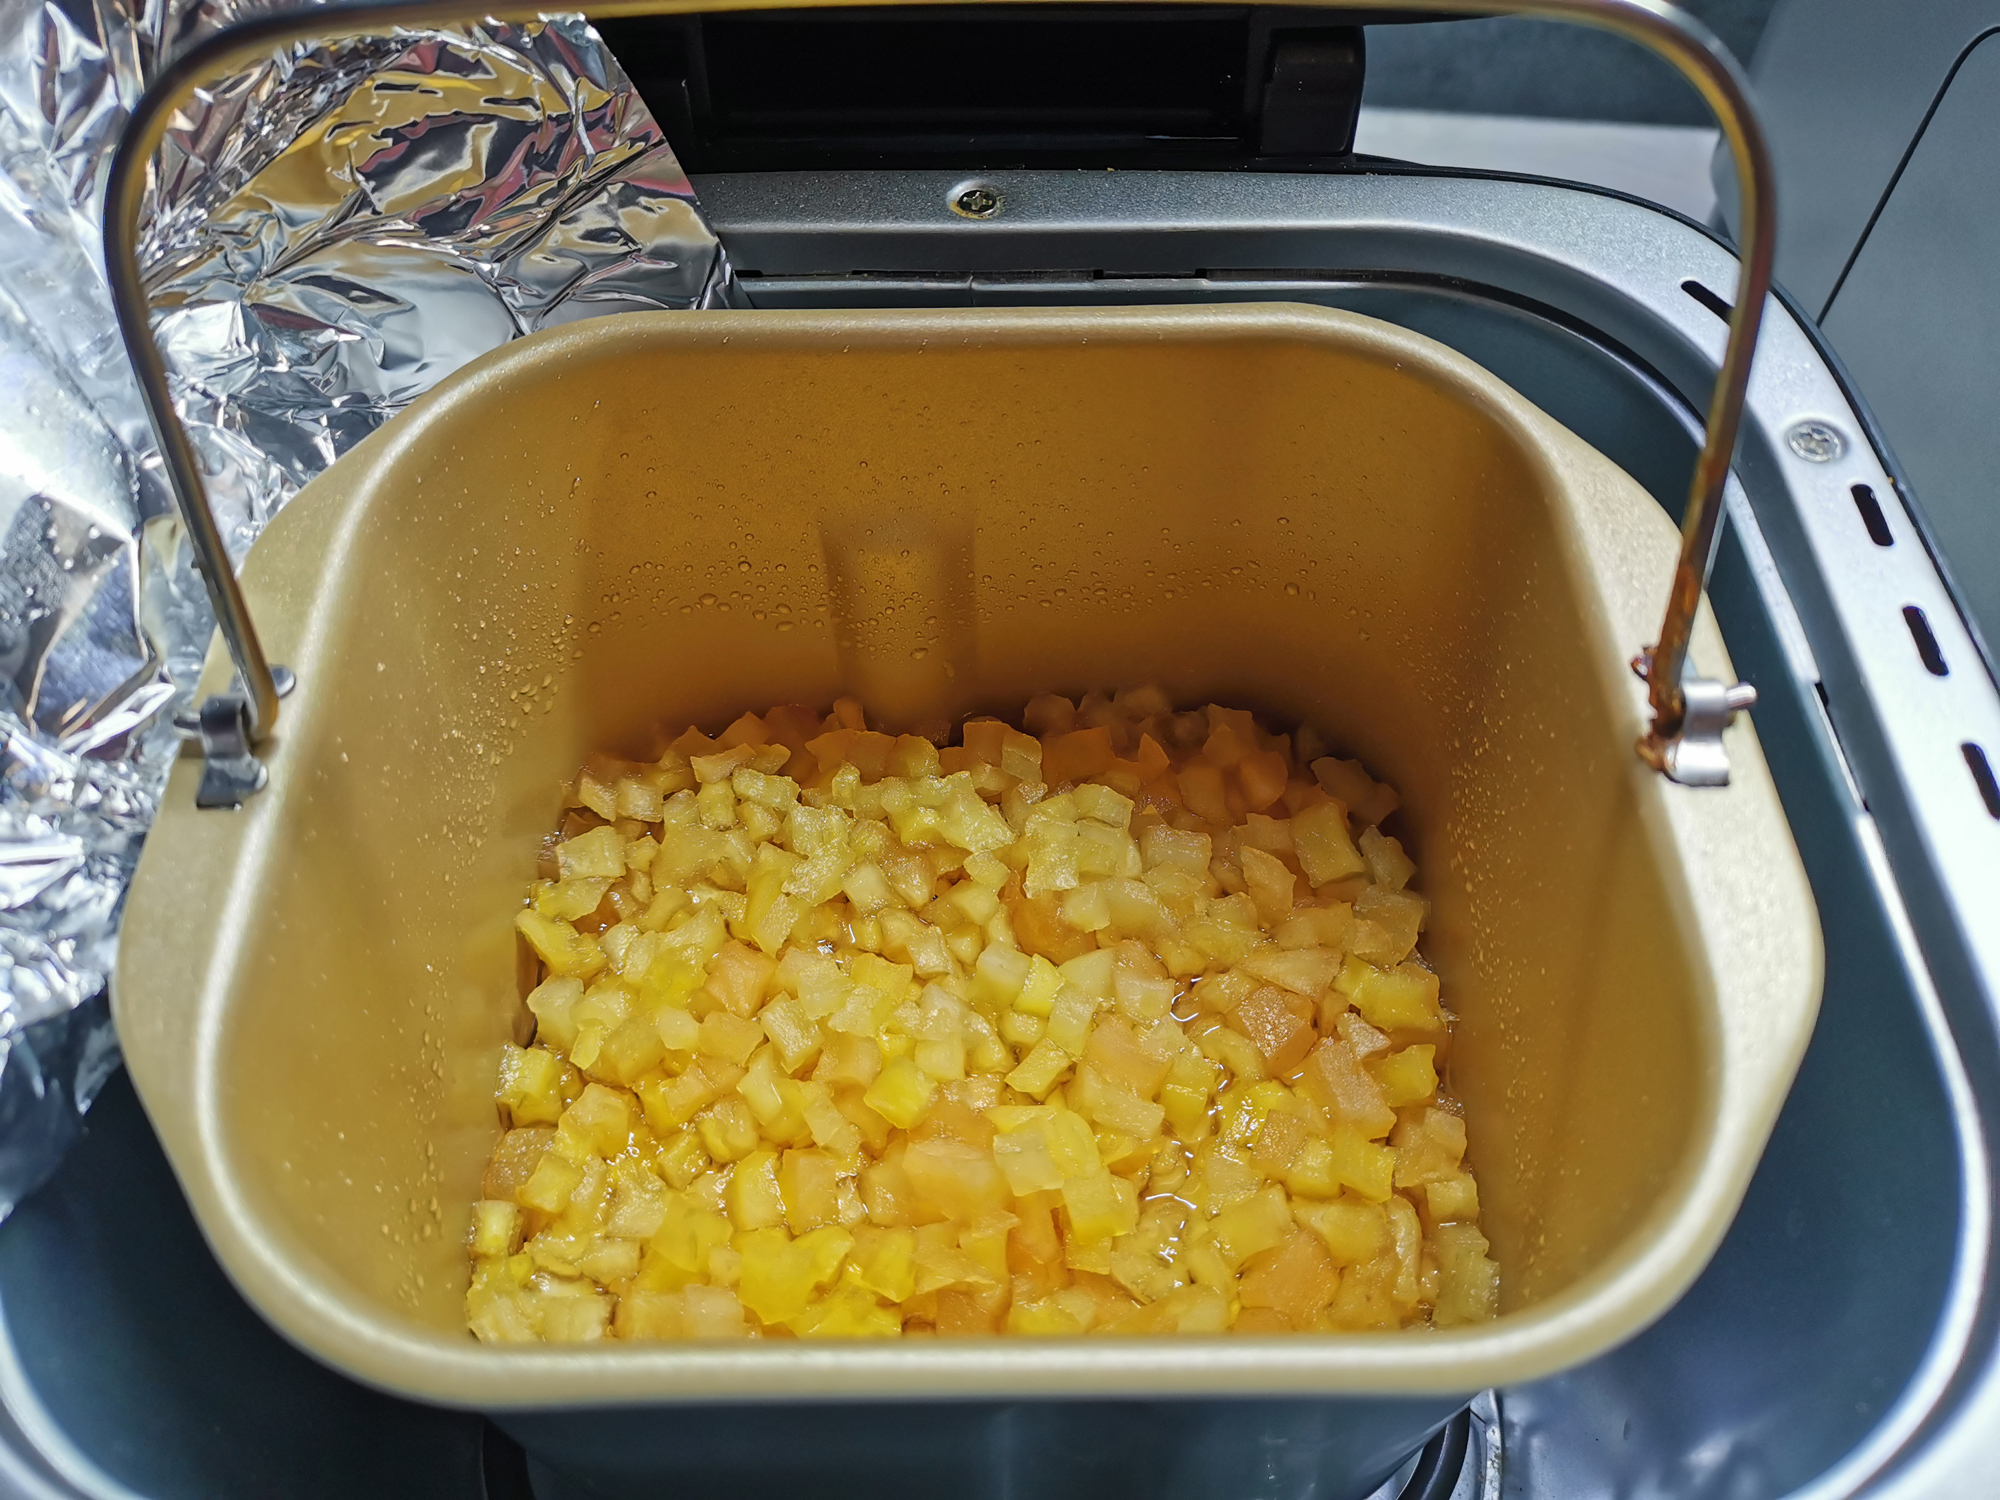
The result again satisfied us.

The finished confiture turned out to be moderately thick, rich in taste and fragrant.
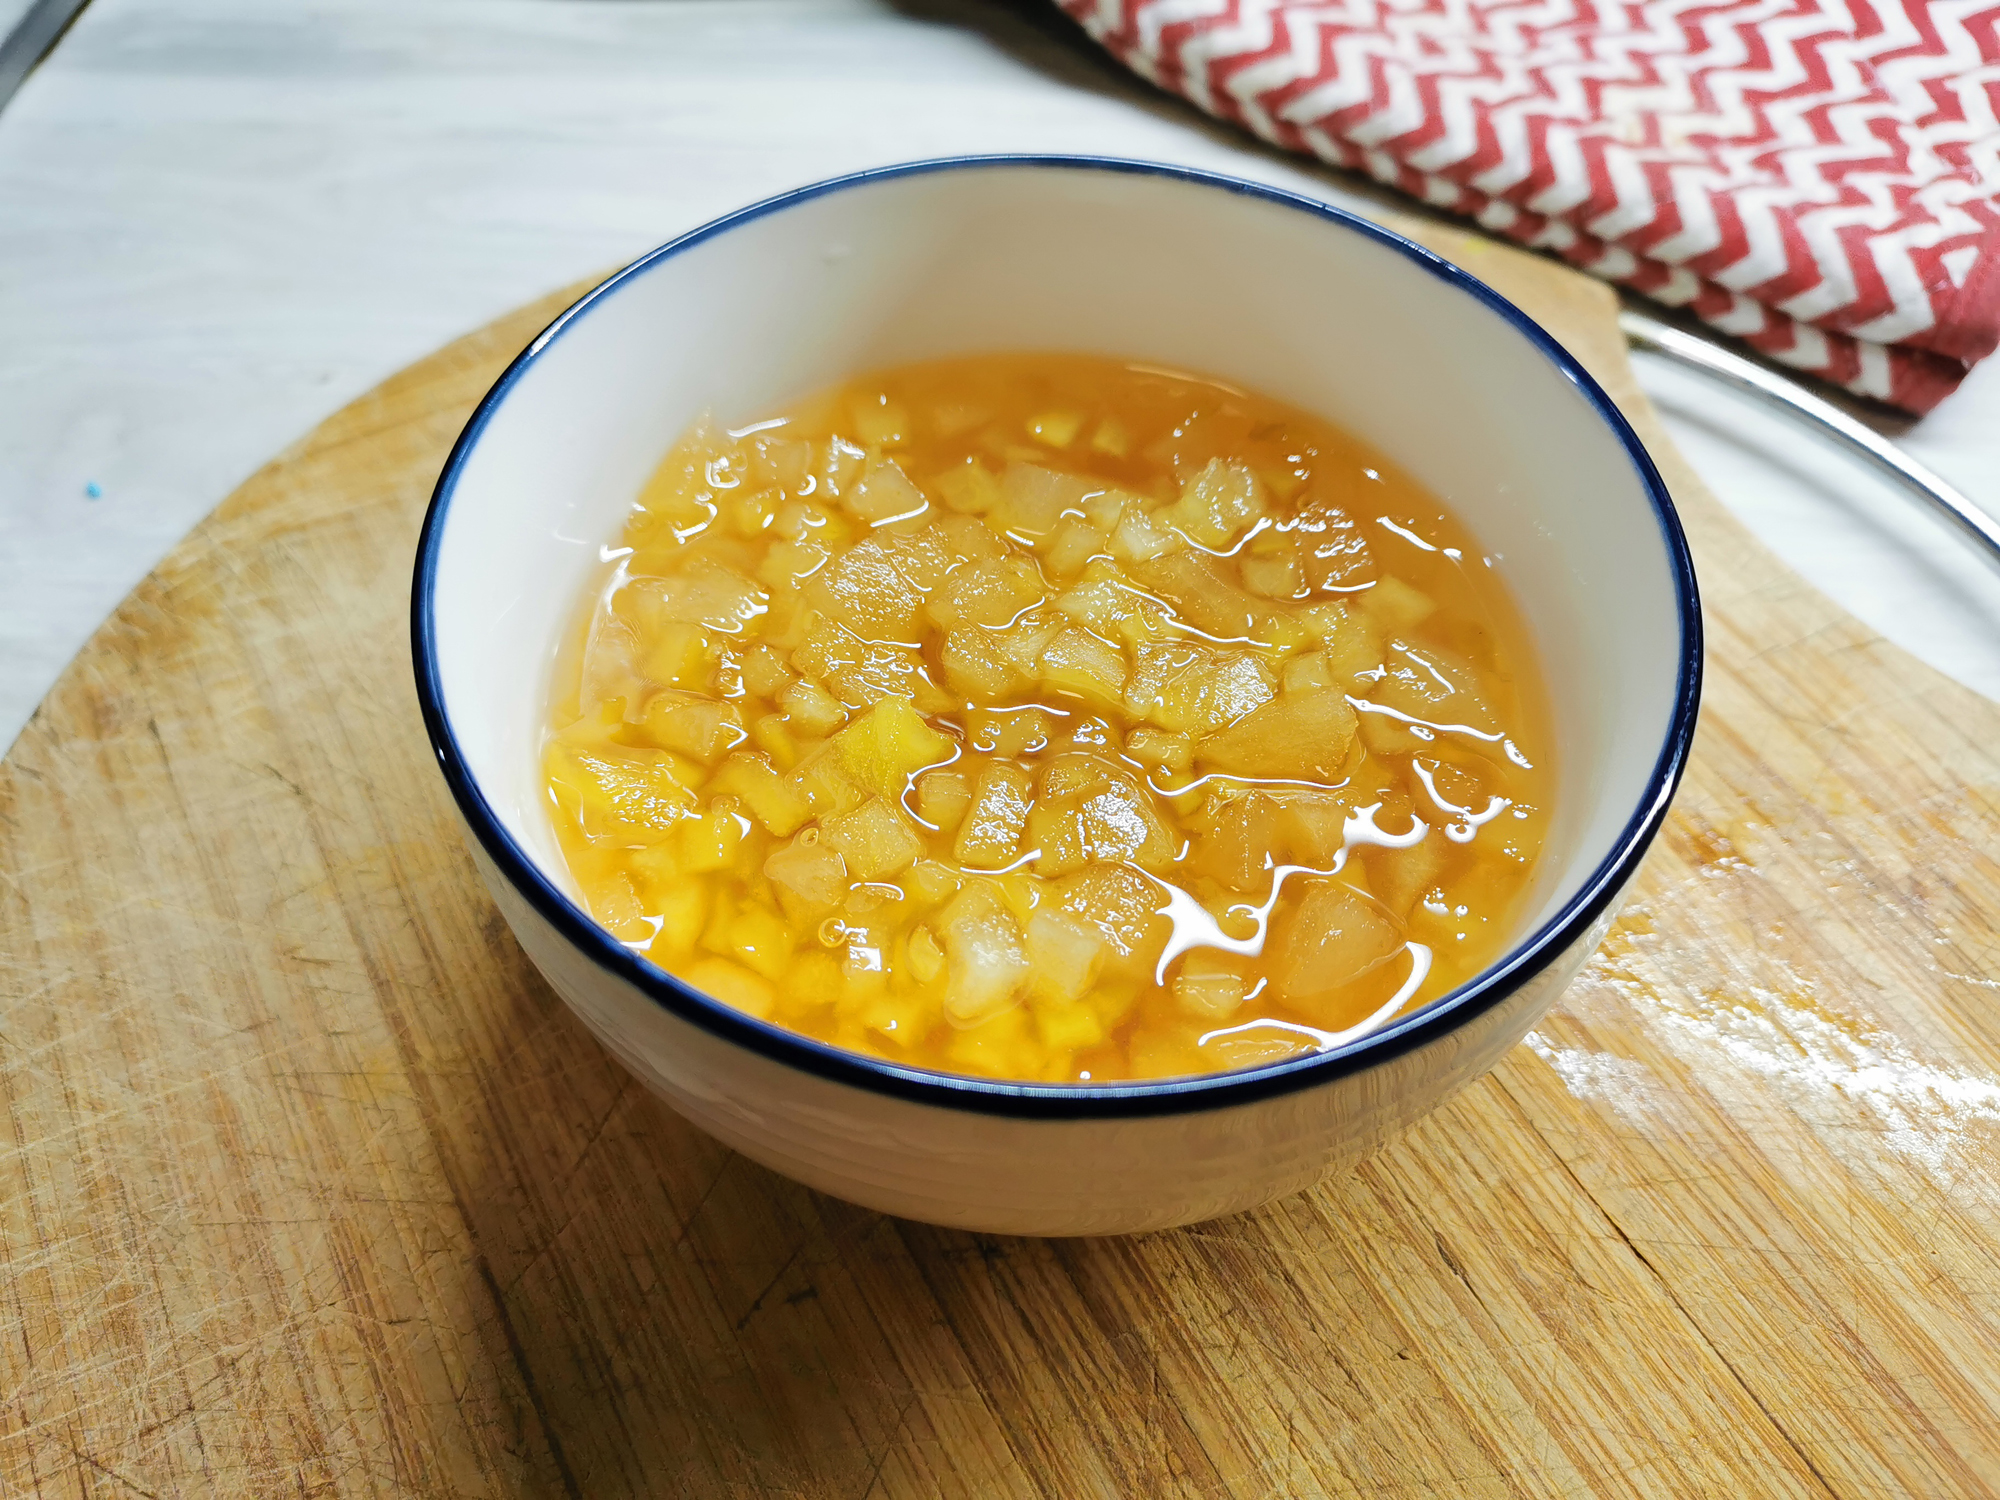
Result: excellent.
findings
The Redmond RBM-1908 bread machine proved to be an adequate and fully consistent device with the expectations placed on it: it did a good job, and in some cases even perfectly coped with all forms of baking, and also adequately “worked out” other recipes not related to flour products. We managed to cook porridge, yogurt, and confiture from apples and pears.
Thus, the device coped with the assigned tasks as a whole. At the same time, this bread machine belongs to the middle, and not to the highest category: it has a simple black and white display without backlight, a simple design and a modest appearance.
The only major problem we encountered (during the preparation of porridge) turned out to be an error in the recipe, and not a malfunction of the oven.
Pros :
- rich set of programs
- ease of operation
- Possibility to cook many different dishes
Cons :
- small black and white display without backlight
- manufacturer’s recipes require care